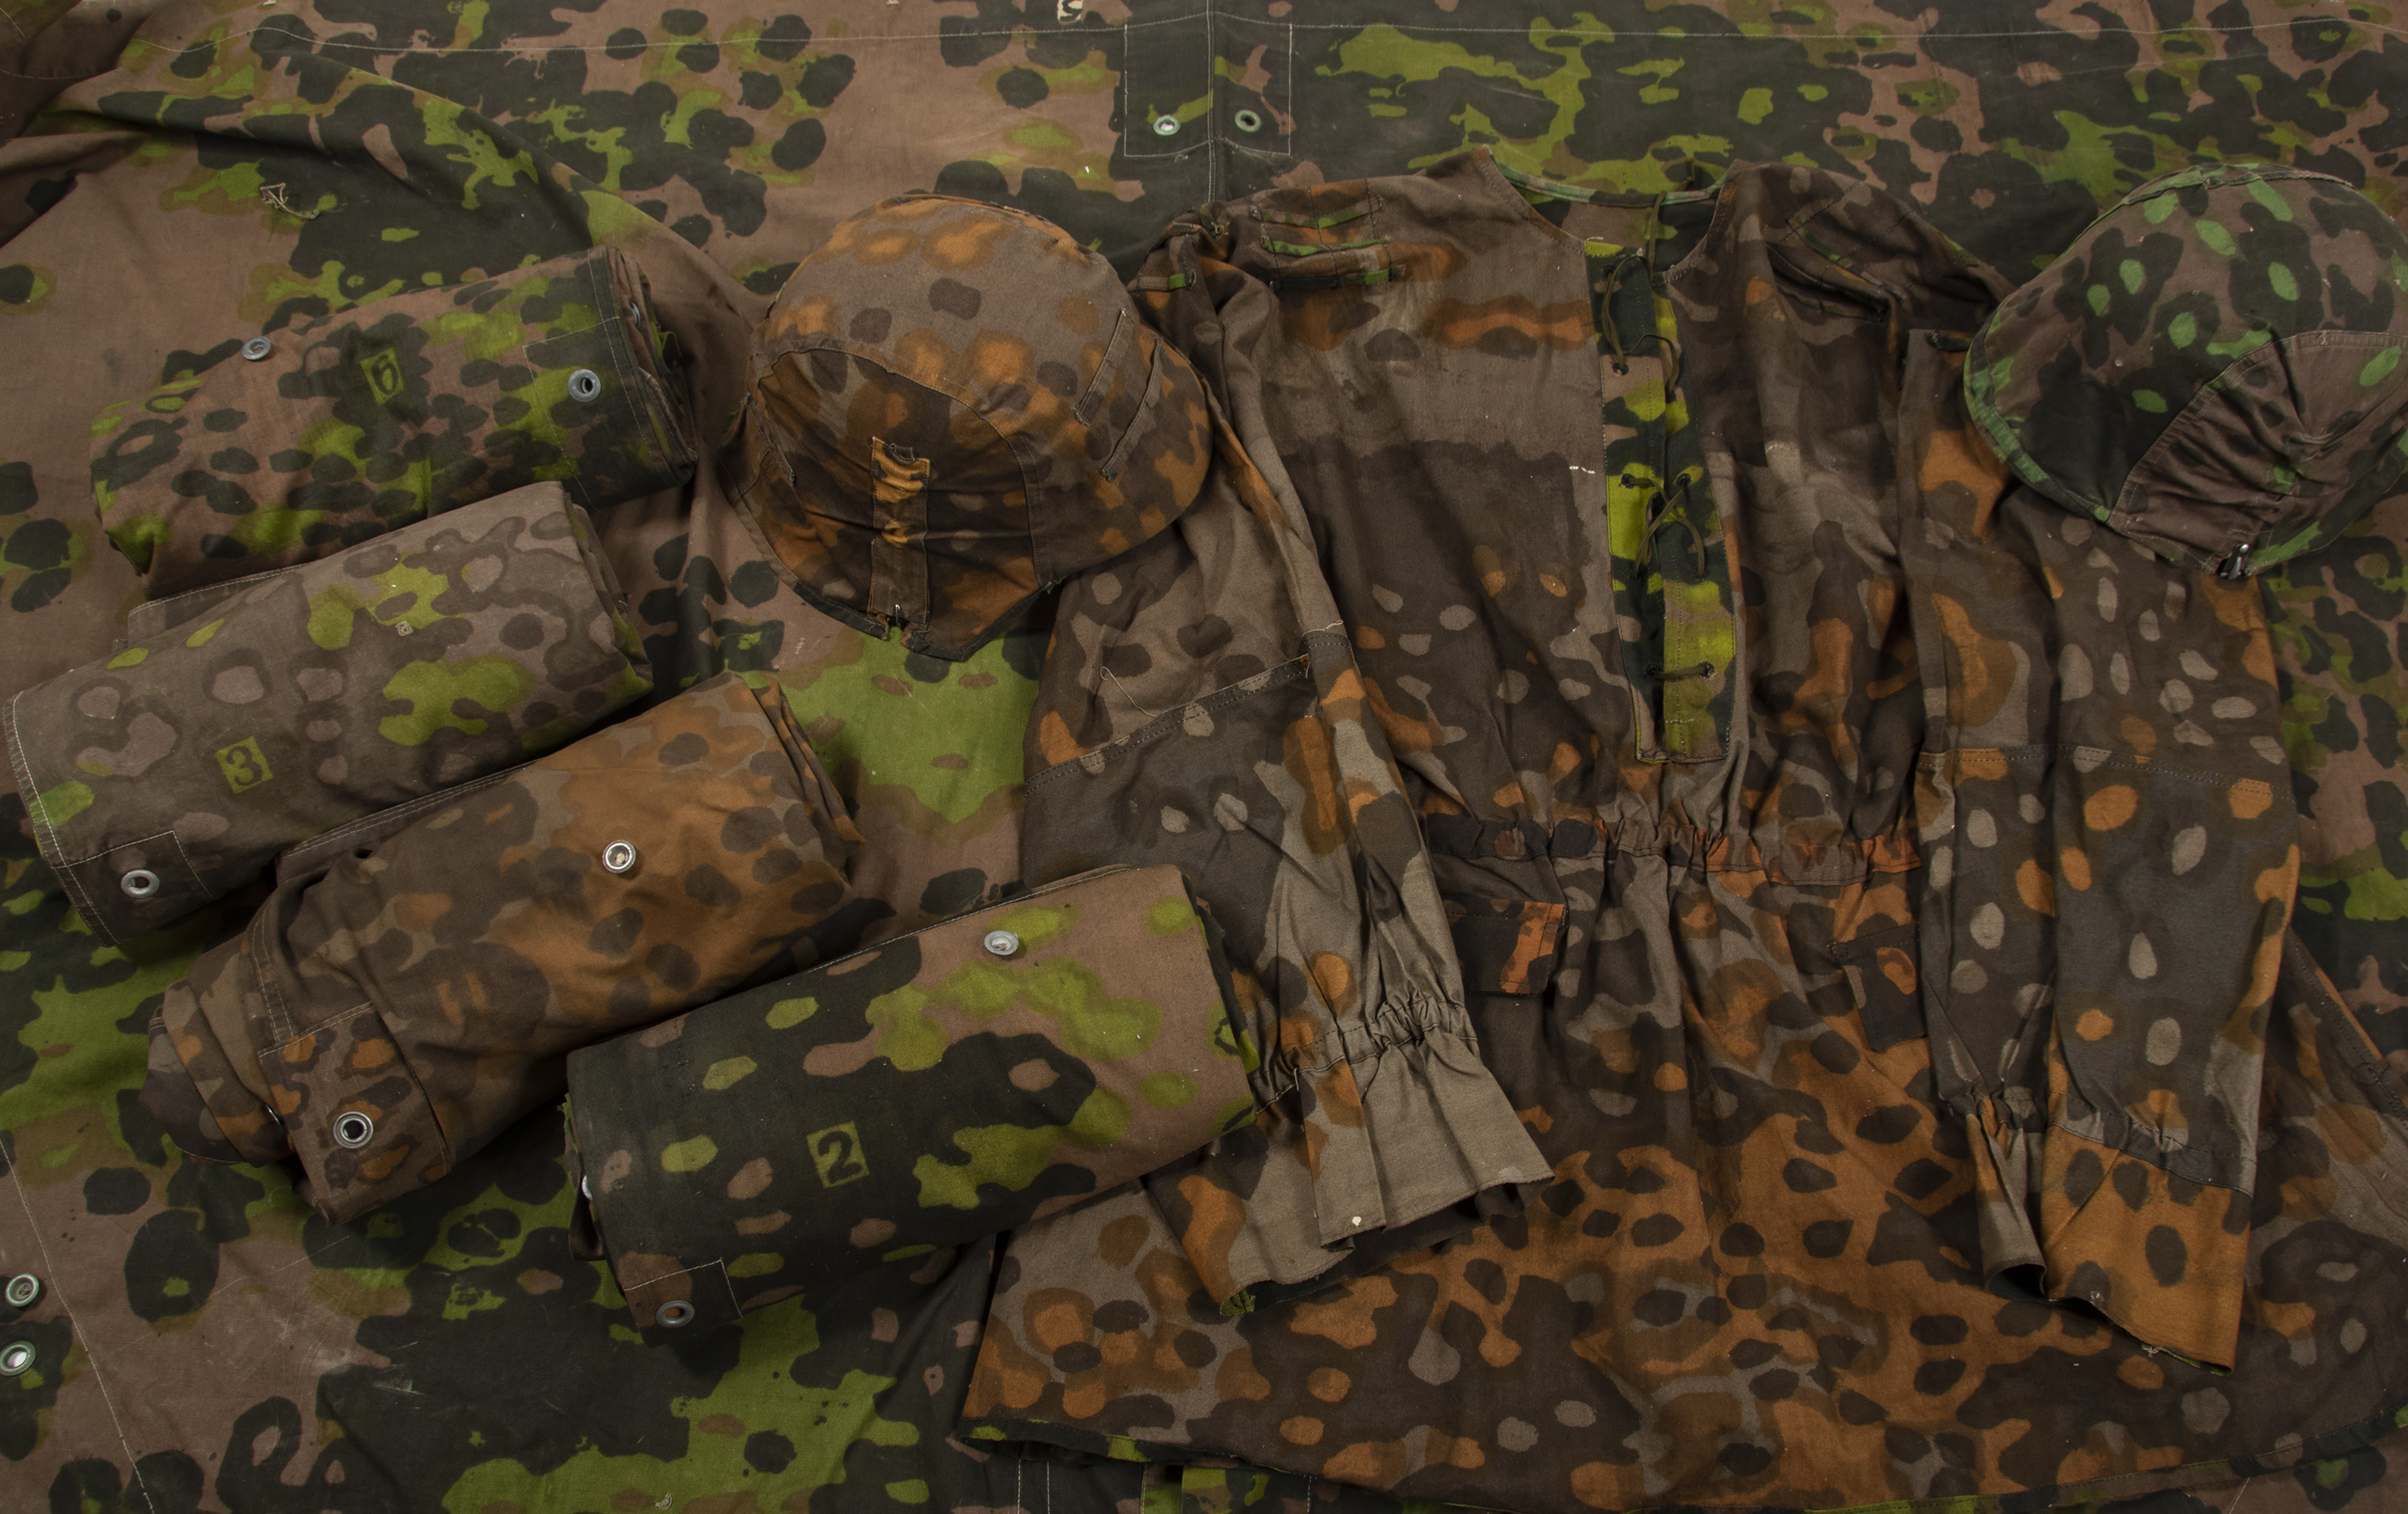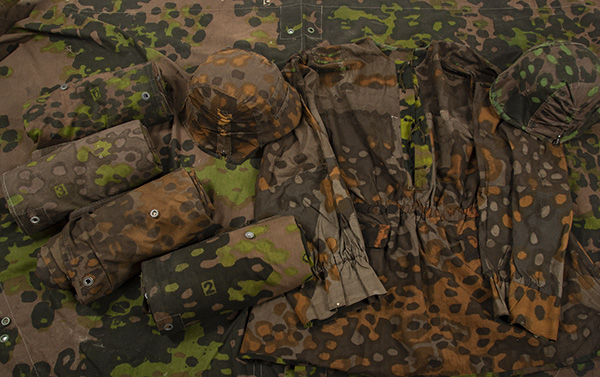
“Plane Tree” CamouflageAll items pictured on this page are original, WWII production except the tree and the SPW (it’s partially original).
During WWII, the German military developed, produced and utilized well over a dozen unique camouflage designs for their troops. The majority of these designs were created and worn by the SS formations. Today, authentic wartime examples are some of the most popular and expensive pieces in the military (and camouflage) collecting world.
The “Plane Tree” patterns are among the most famous, yet the reason for their design and specific purpose are often poorly understood. Their large size also makes them quite difficult to accurately reproduce. This article will seek to clear up some of the myths and mysteries regarding these patterns.
 The Name:
 To date, despite quite a bit of archival, wartime SS correspondence regarding their patterns being available, the actual names or designations of the various camouflages have not been found. All names currently used to distinguish the various patterns are late 20th century collector inventions.
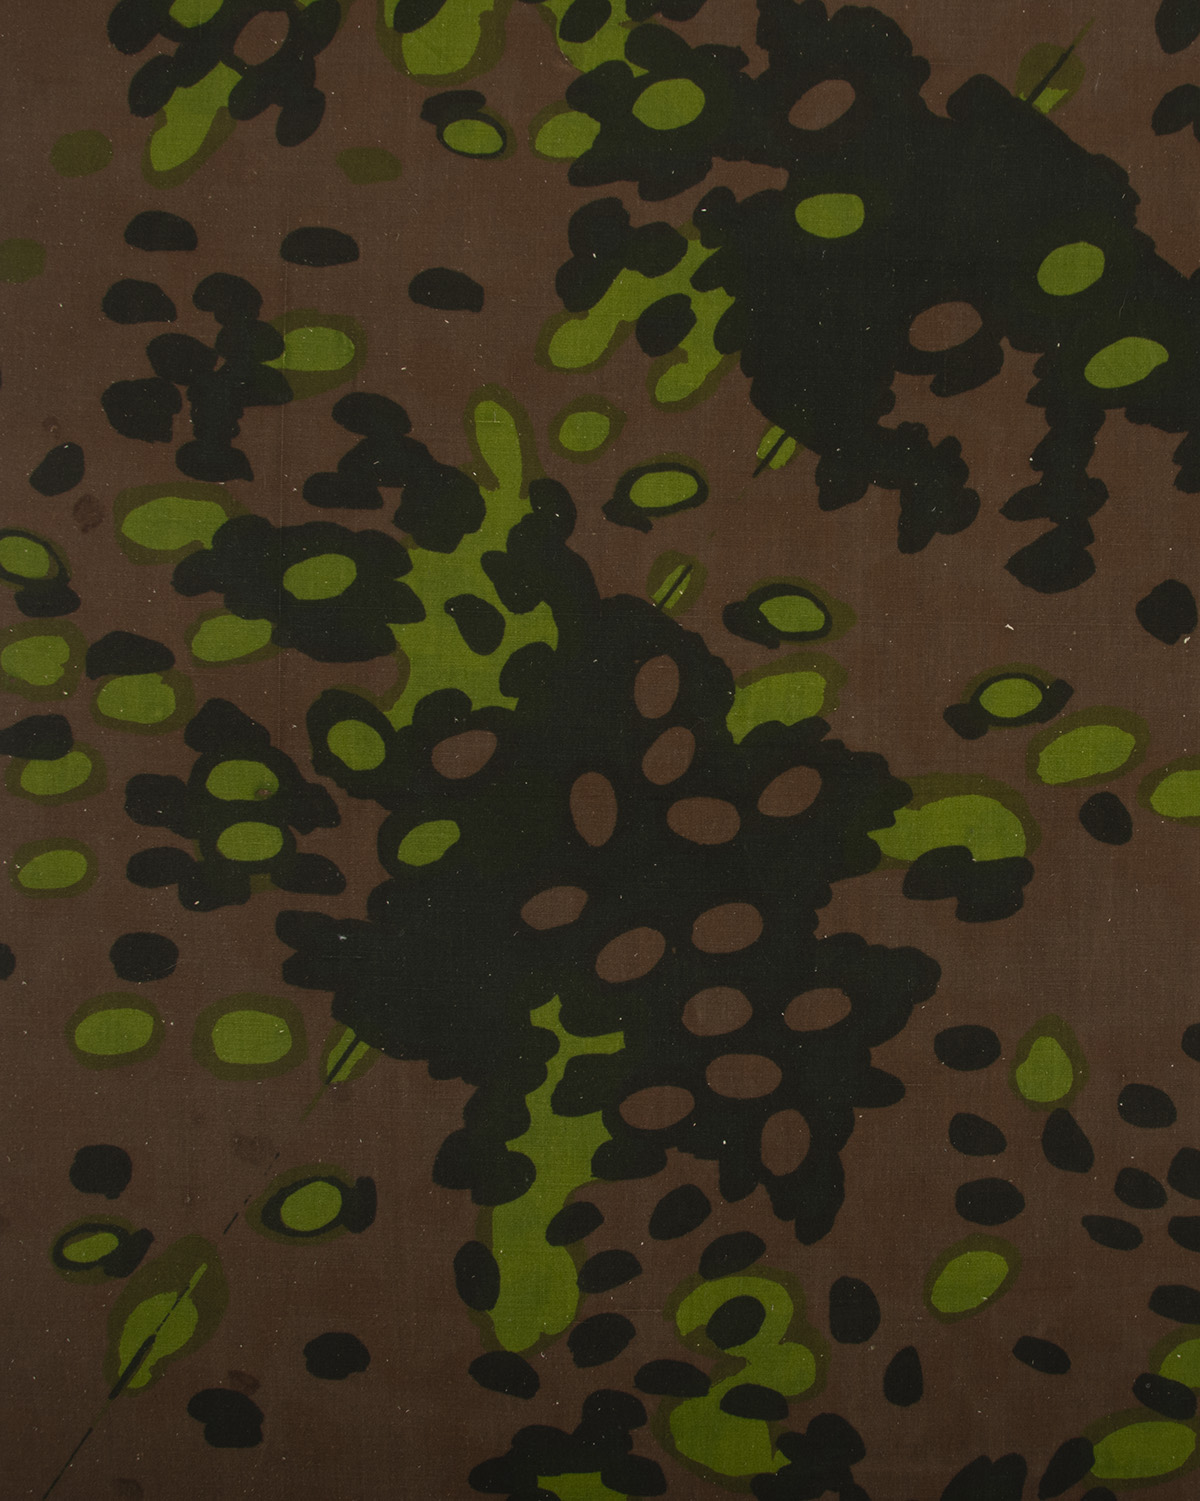
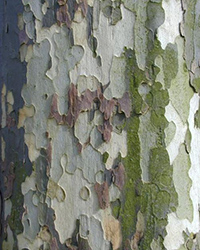
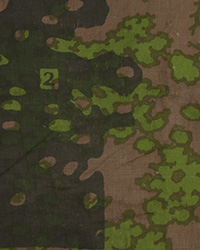
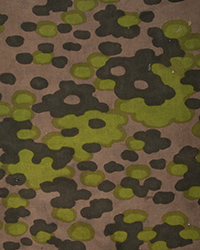
In the case of Planetree, the name refers to the significant similarity to the camouflage pattern and the bark of Planetrees, known by that name in Europe and “sycamore” in the USA.
Development: Shortly after the SS-VT units were established, one of the battalion adjutants conceived the idea to create camouflage jackets and helmet covers for the new troops. His idea was accepted and in 1935, a man named Linnekogel was hired to oversee the project. The design team quickly rejected the geometric patterns then in use by the Army as ineffective and decided to create their own. However, before much work was done, Linnekogel died, and Professor J.G. Otto Schick was hired to fill his position. Schick, in turn, hired Adolf Schmid, an artist who had previously worked for the German Army as his assistant. Together they would create some of the most famous and effective camouflage designs in history.
Schick’s team spent considerable time in the field, studying and testing colors and shapes to determine the best combinations to break up outlines and conceal troops. Manufacturing firms were consulted to explore all available printing methods, and great effort was expended developing the fabric. The goal was to recreate the appearance of natural foliage as closely as possible, on a tough and hard wearing fabric.
During their research, the team determined that the most effective design would have a natural, irregular flowing form, without repetitions. These goals, random flow and avoiding repetitions, would come to dominate nearly every one of their designs in the coming years. The Planetree patterns would actually be the penultimate designs, with those following them seeking to maintain the effect while being more efficient to produce.
Size: Nearly all camouflage patterns are designed for rotary printing, and their size is thus restricted by the circumference of the available rollers- typically 18″-24″. US WWII “Frogskin” camouflage is only 14 inches. The numbered Plantree patterns are entirely different animals- they have “repeats” of 85 inches, or just over 7 feet. This mades them very difficult to produce- both in 1940 and today.
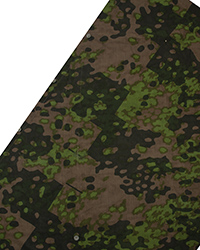
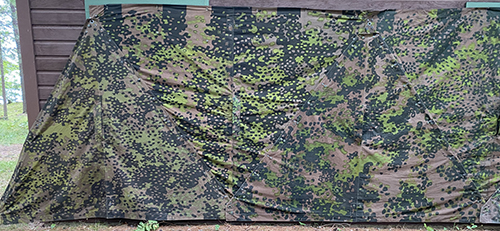 |
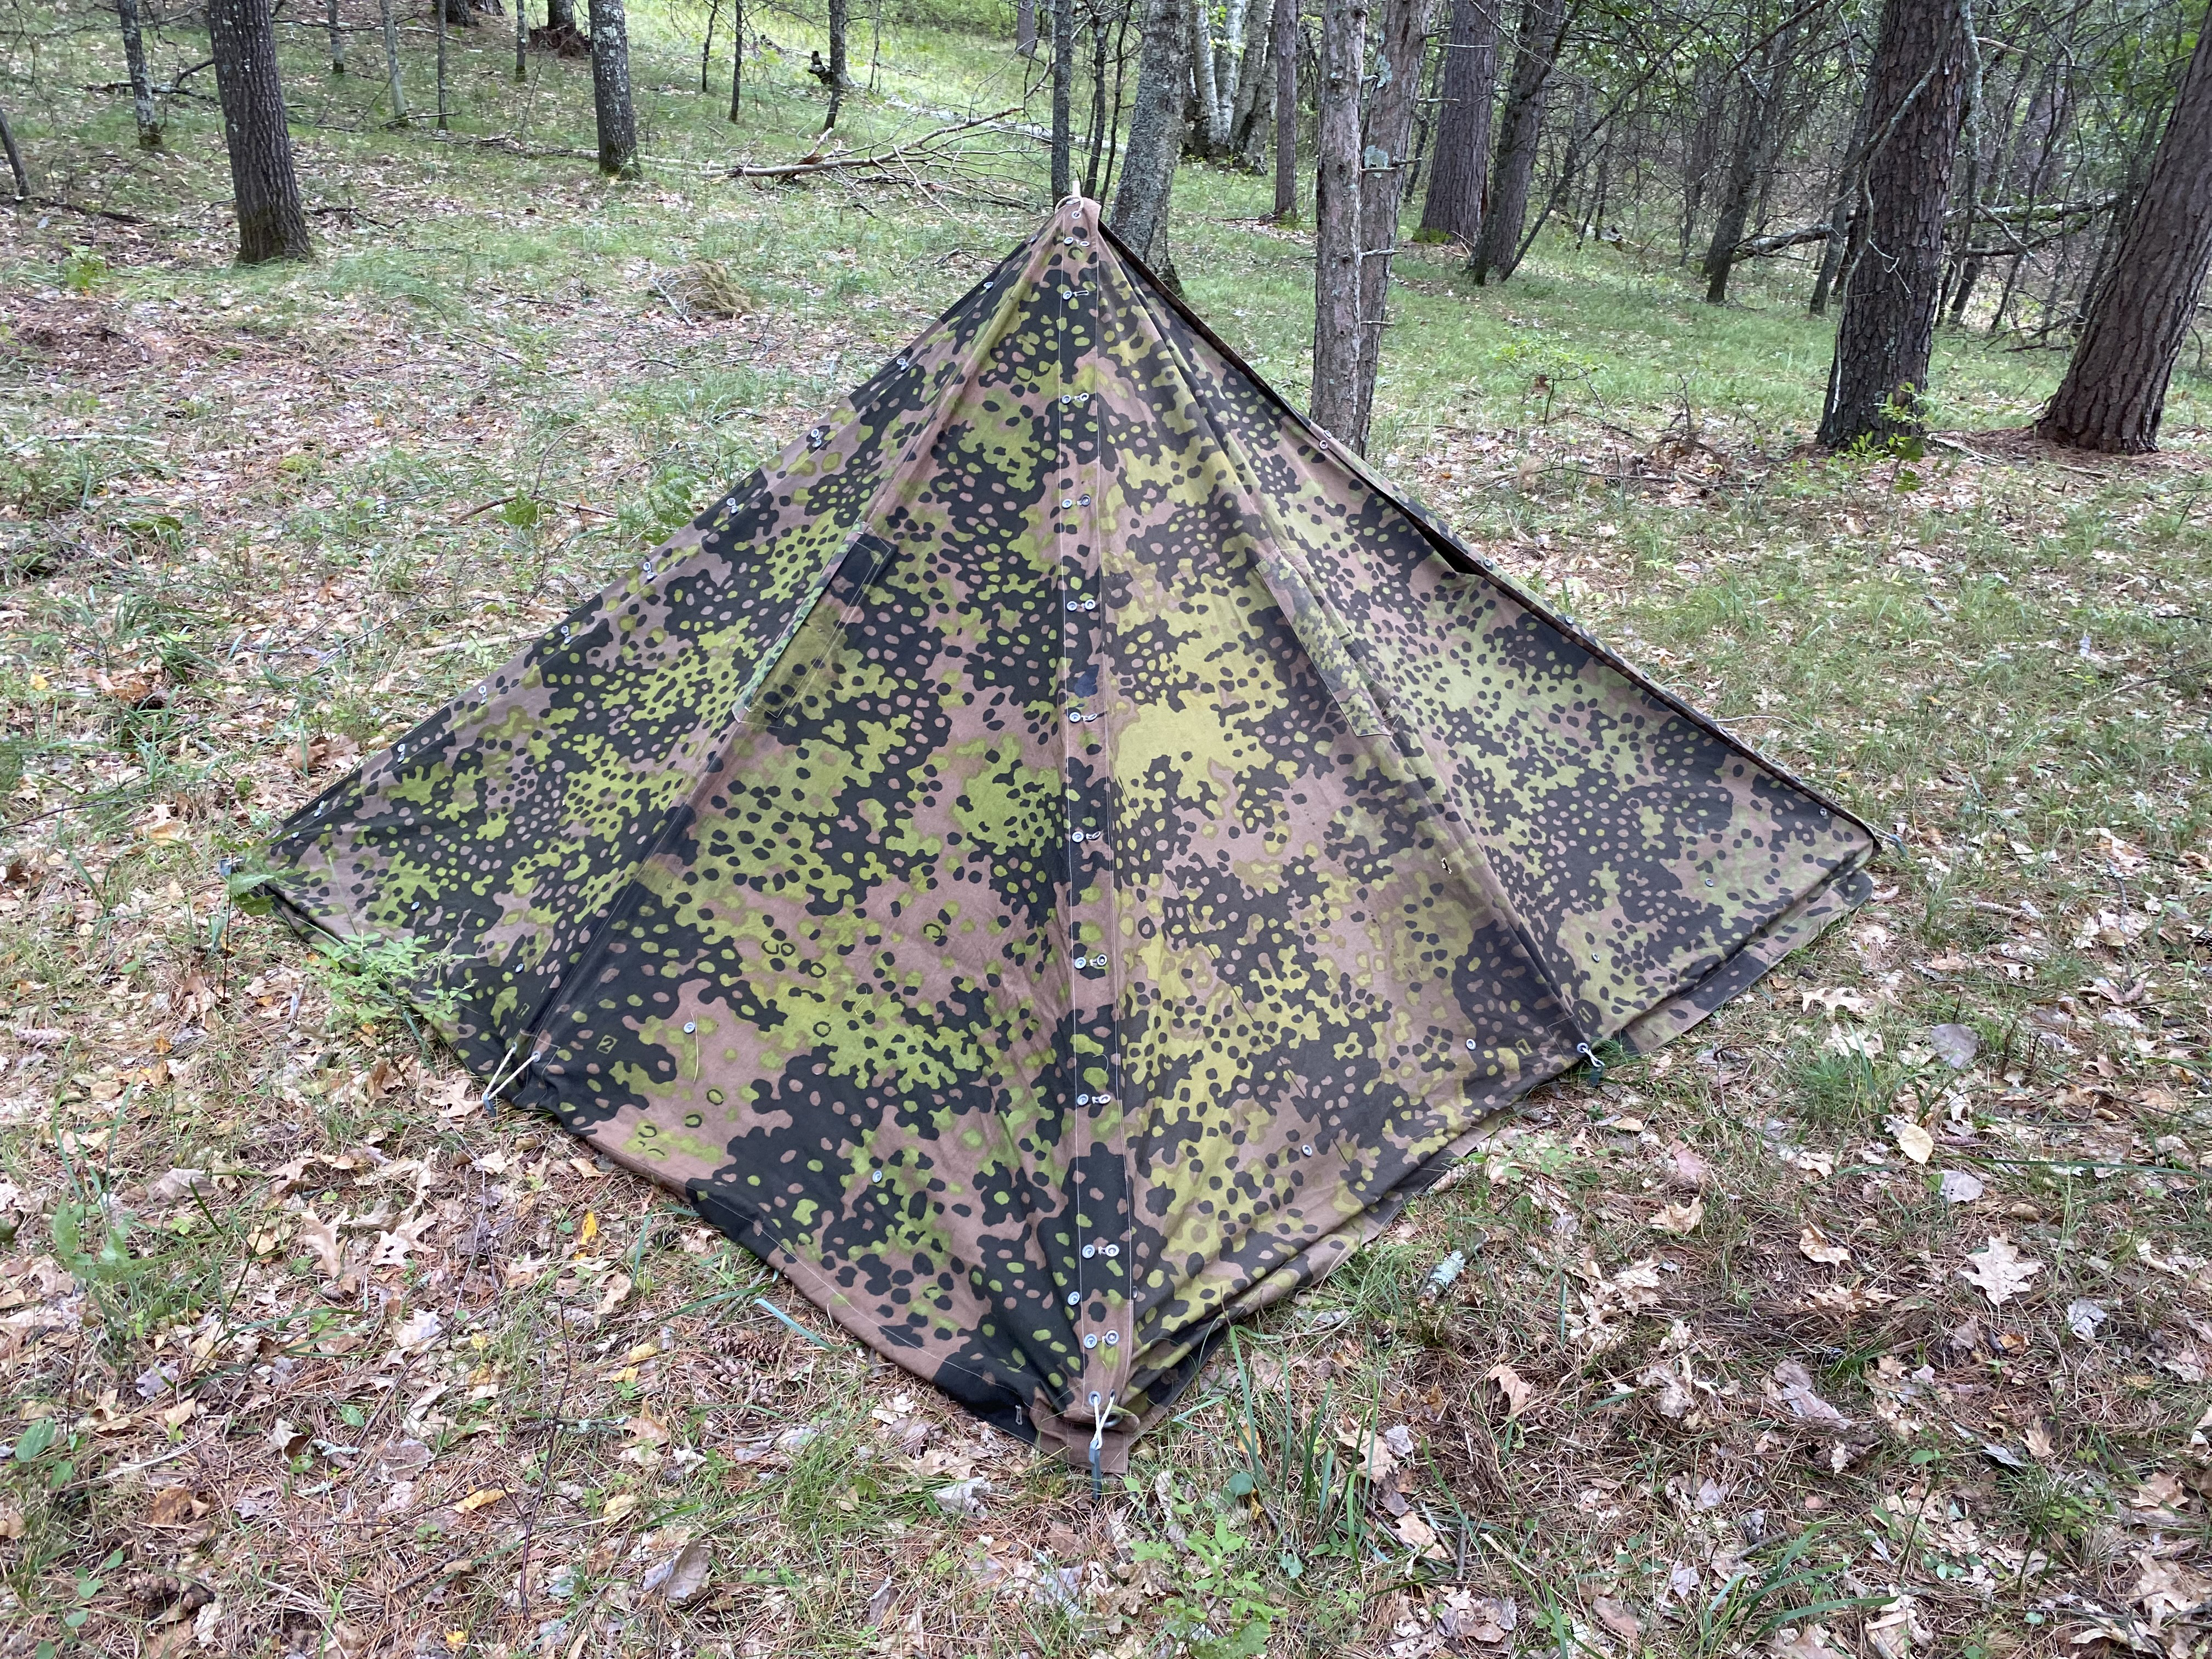
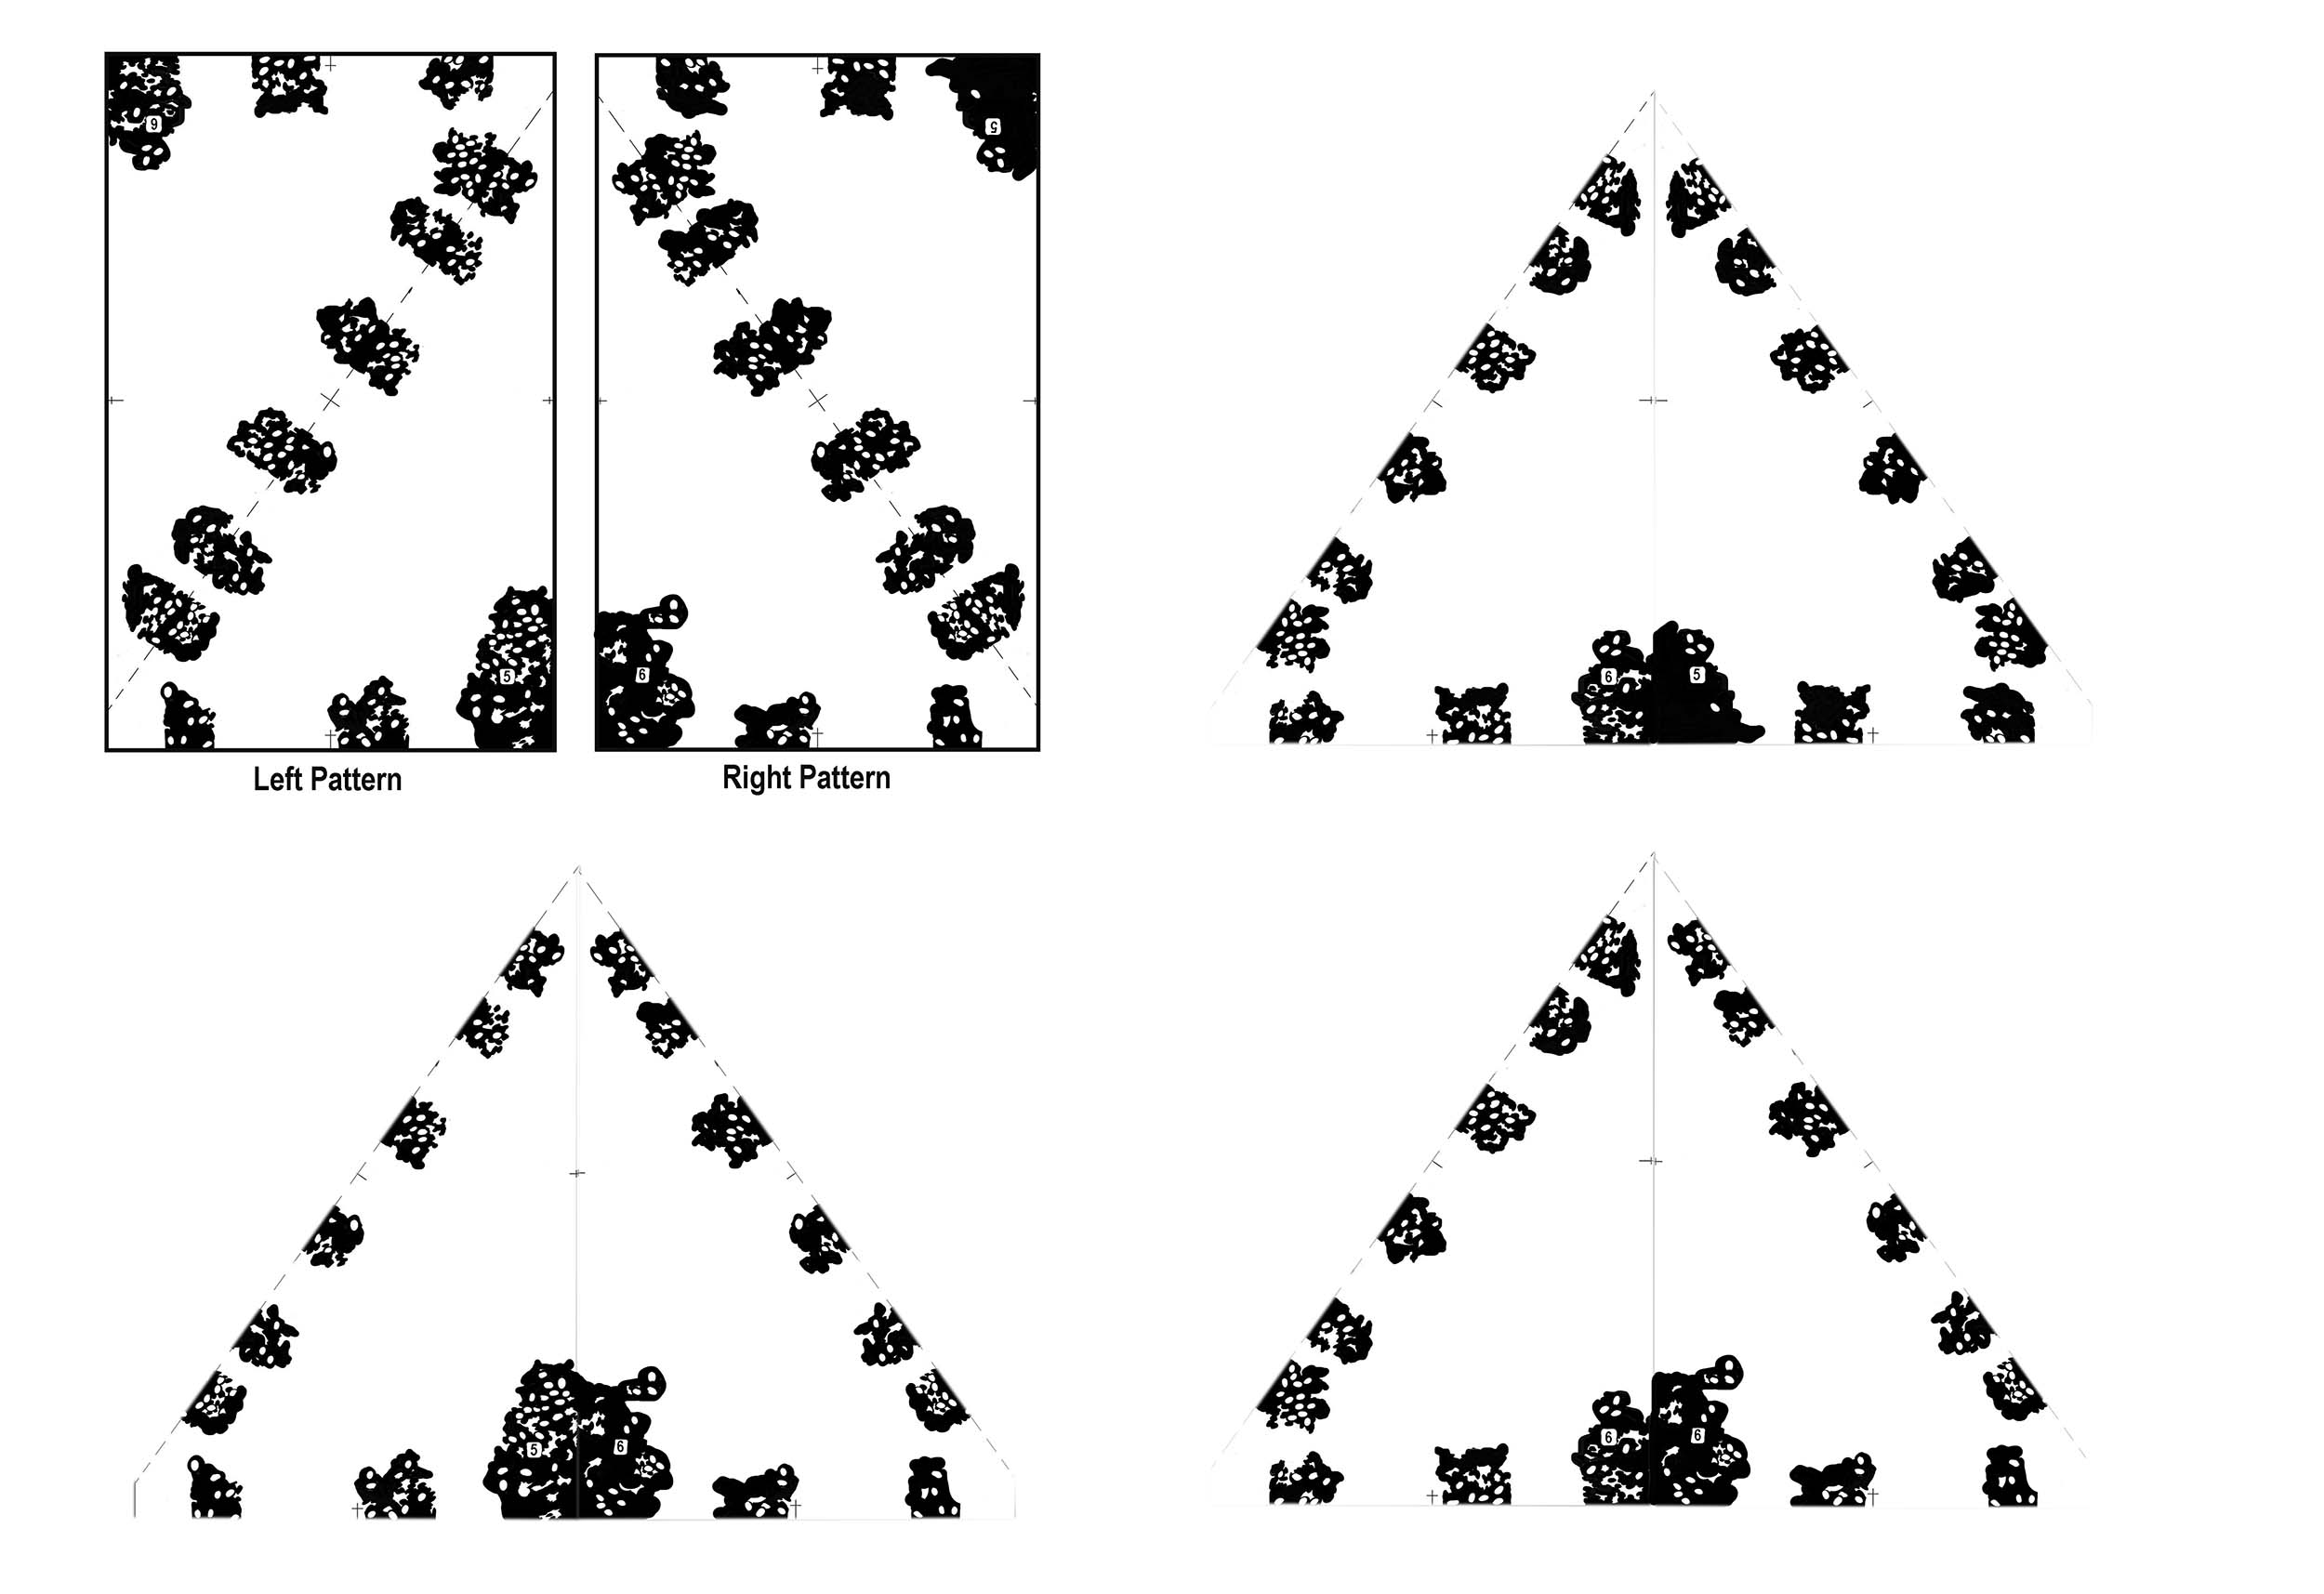
| As designed, any number of planetree shelter quarters will interlock and “flow” |
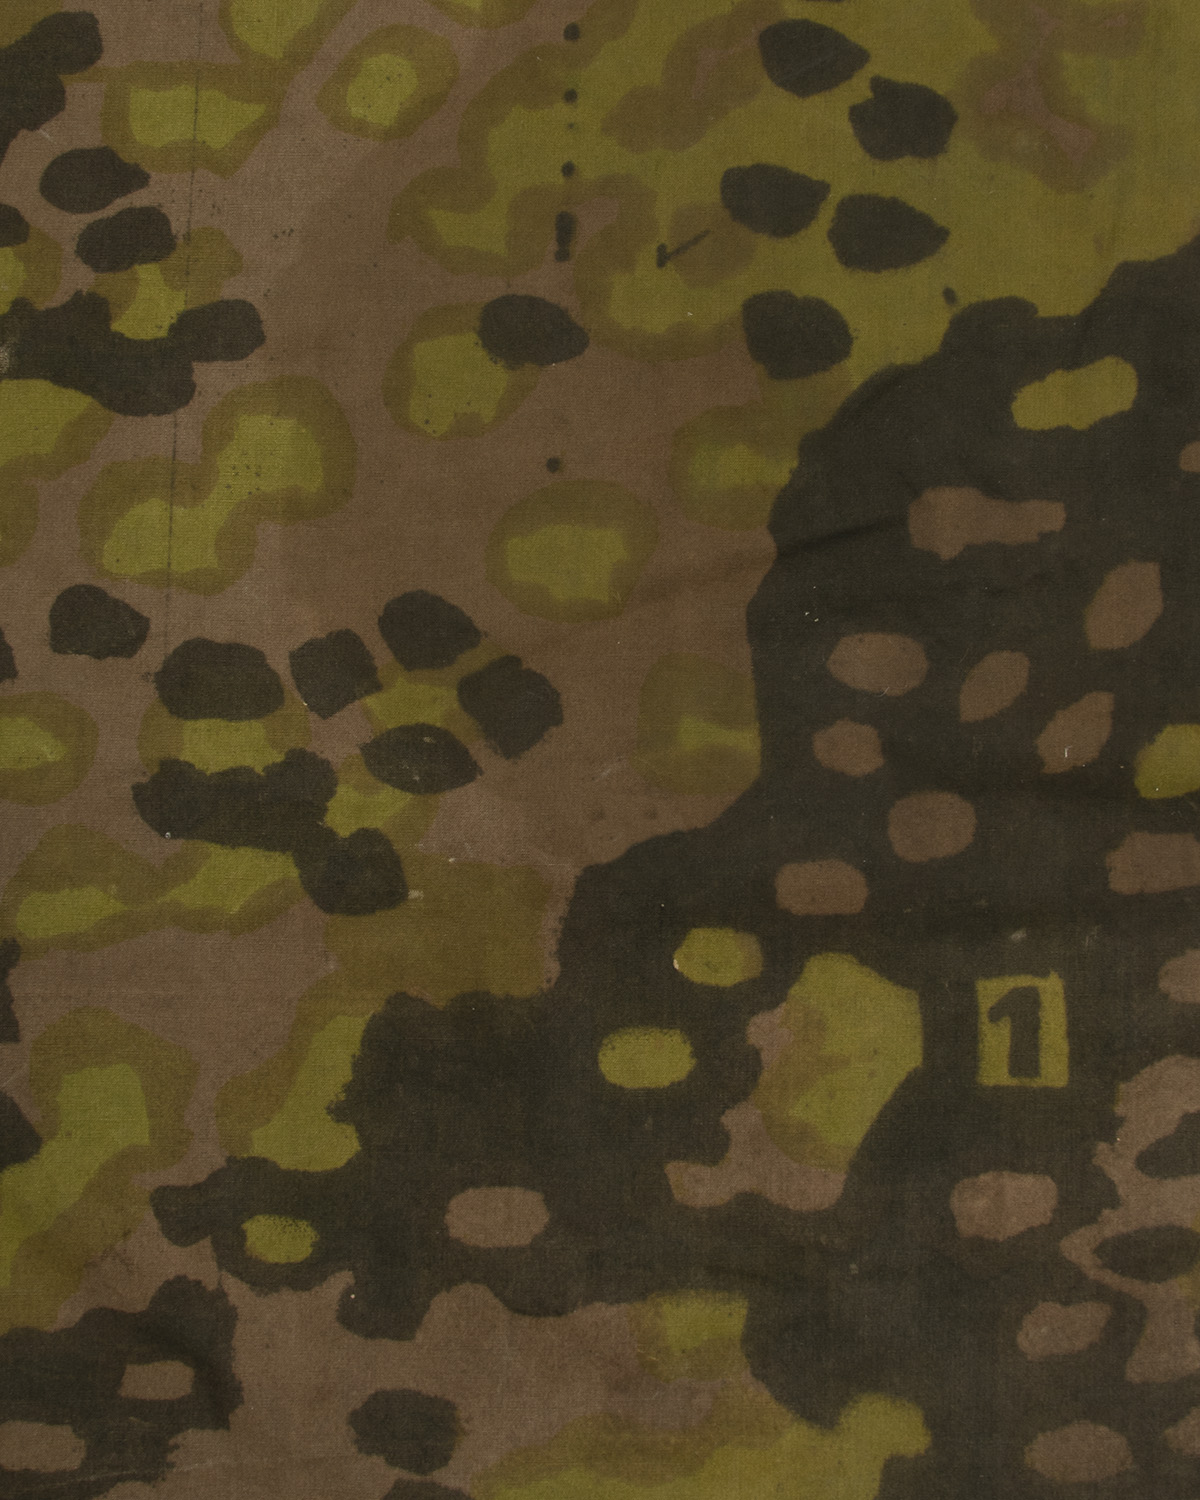
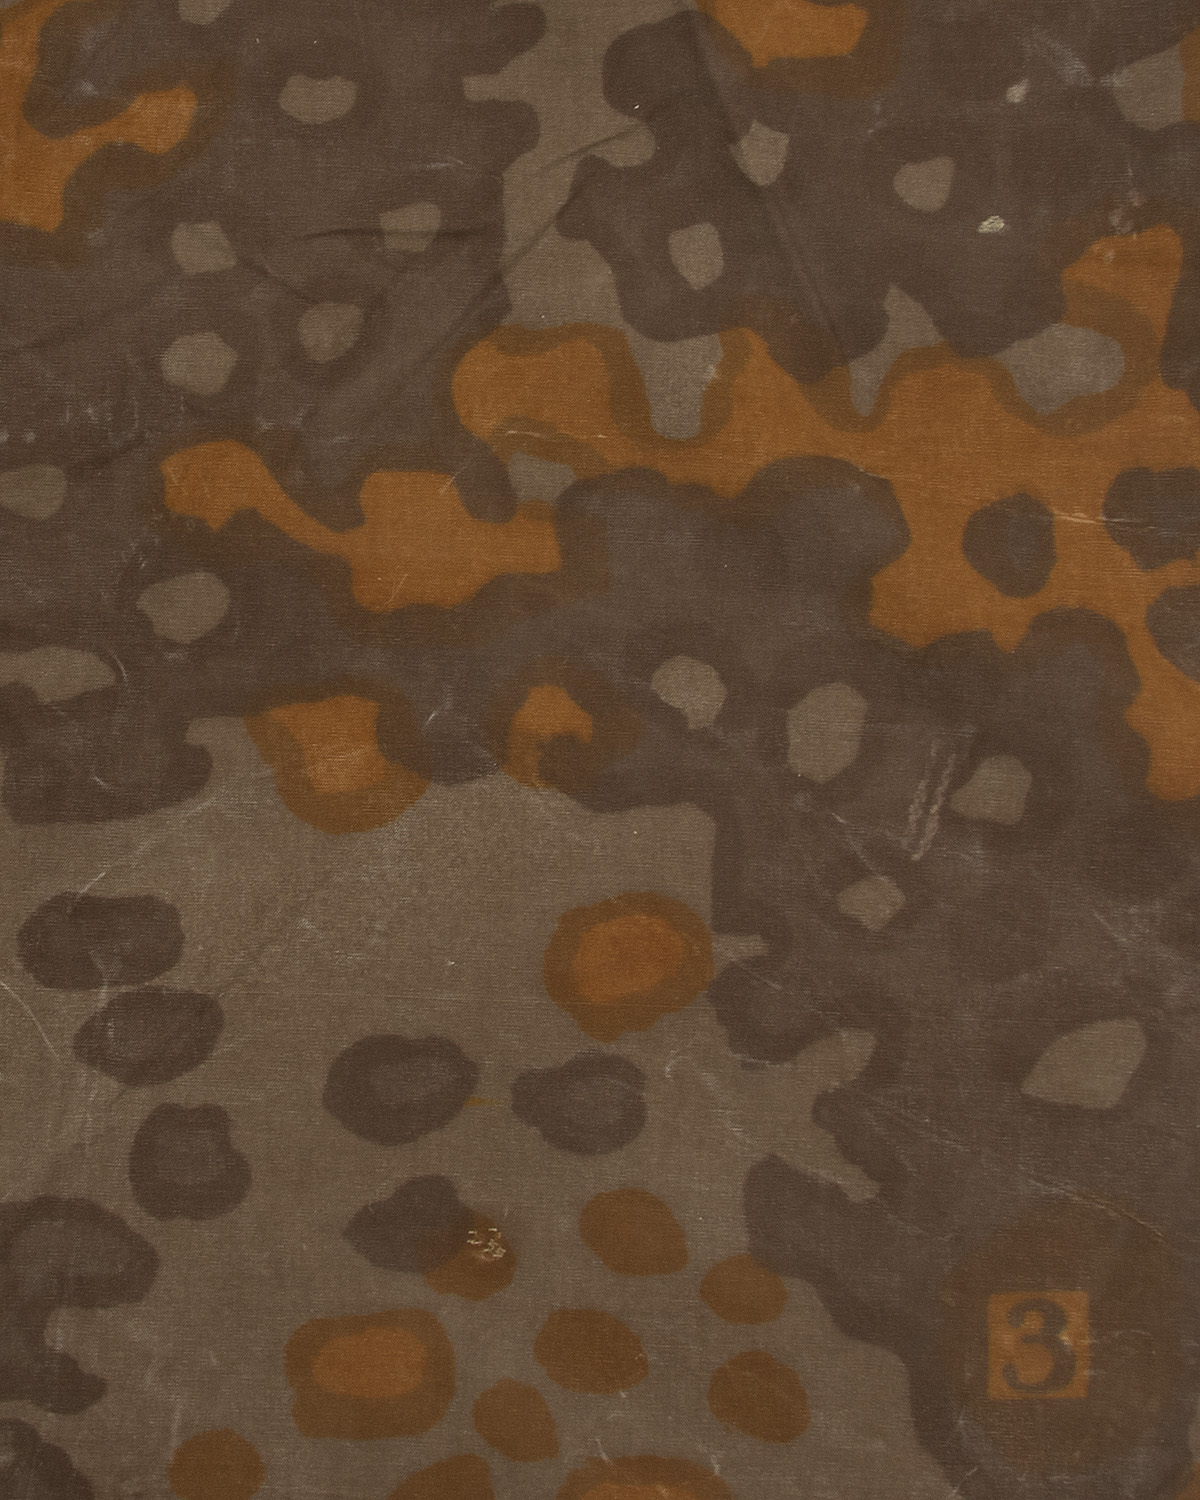
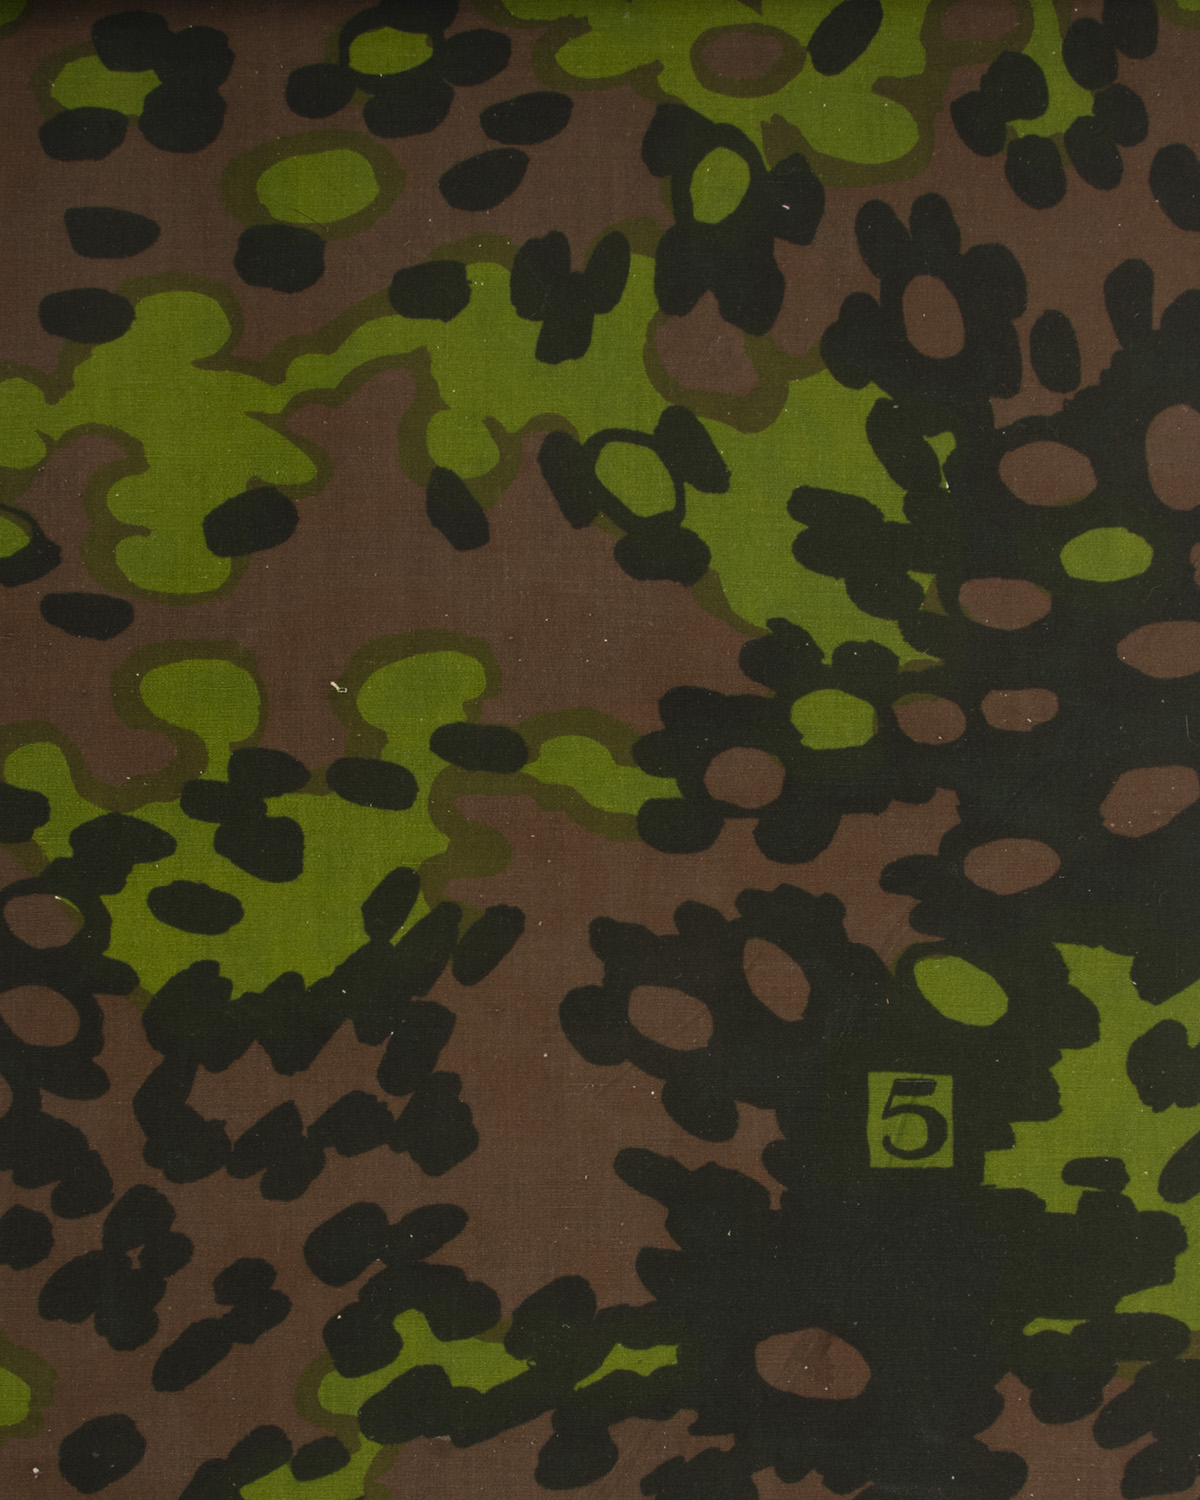
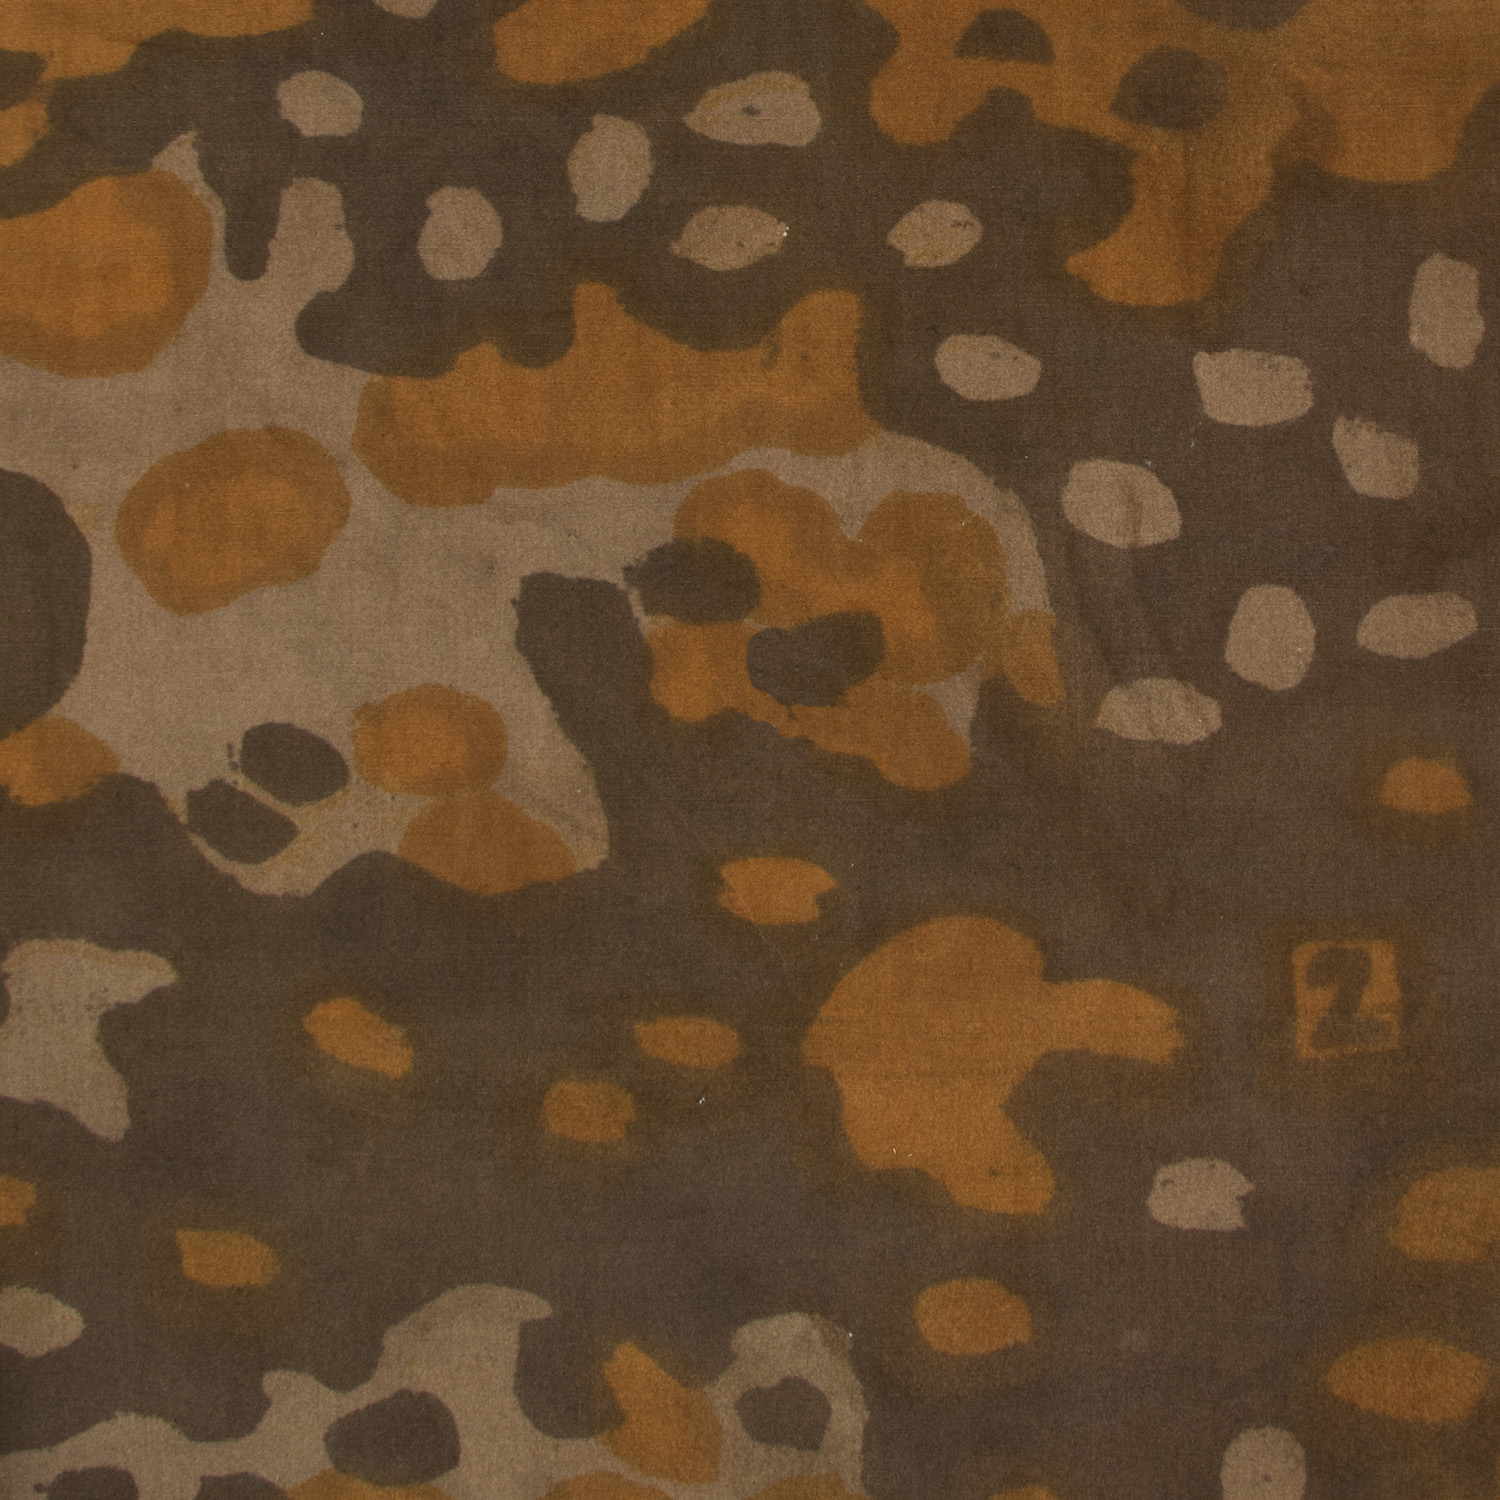
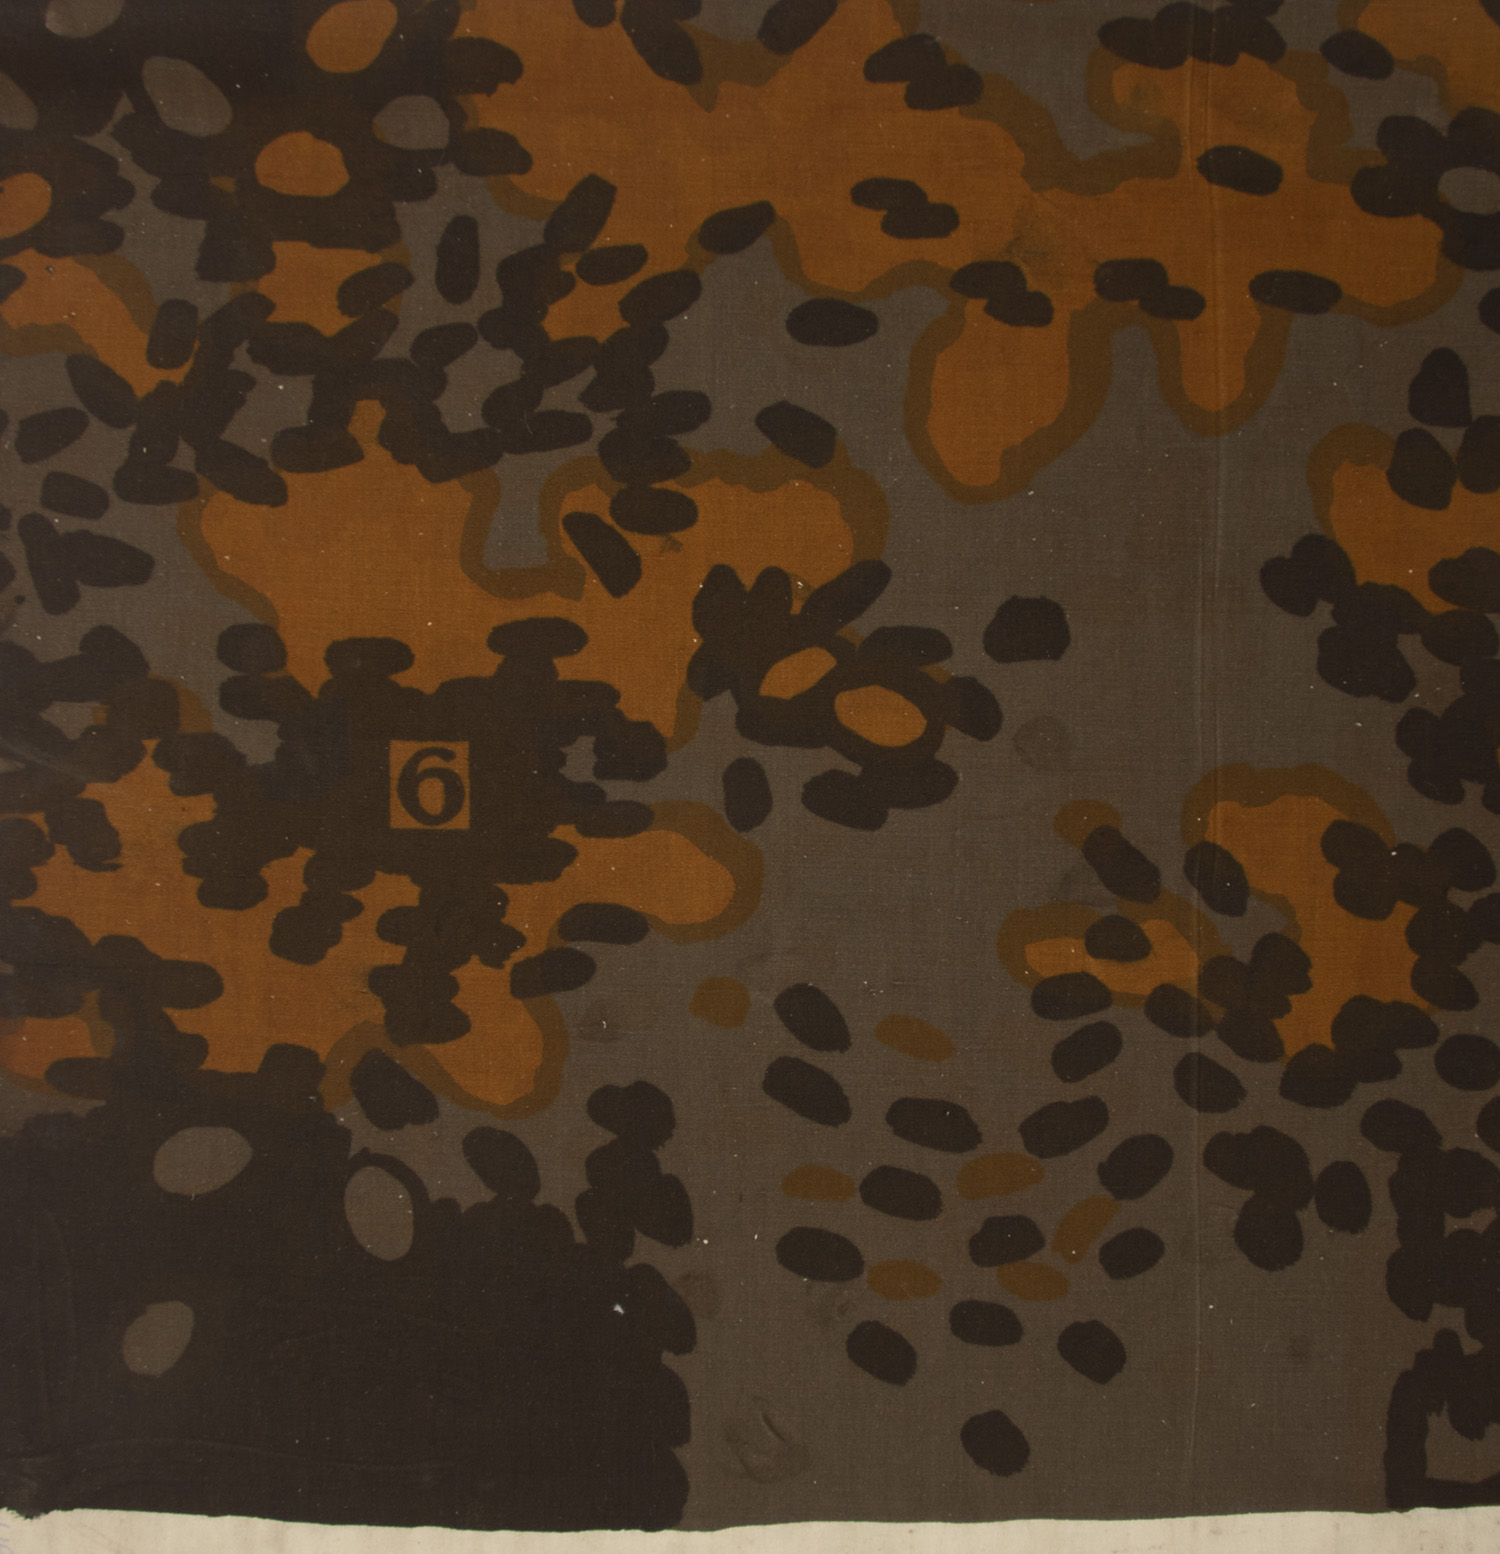
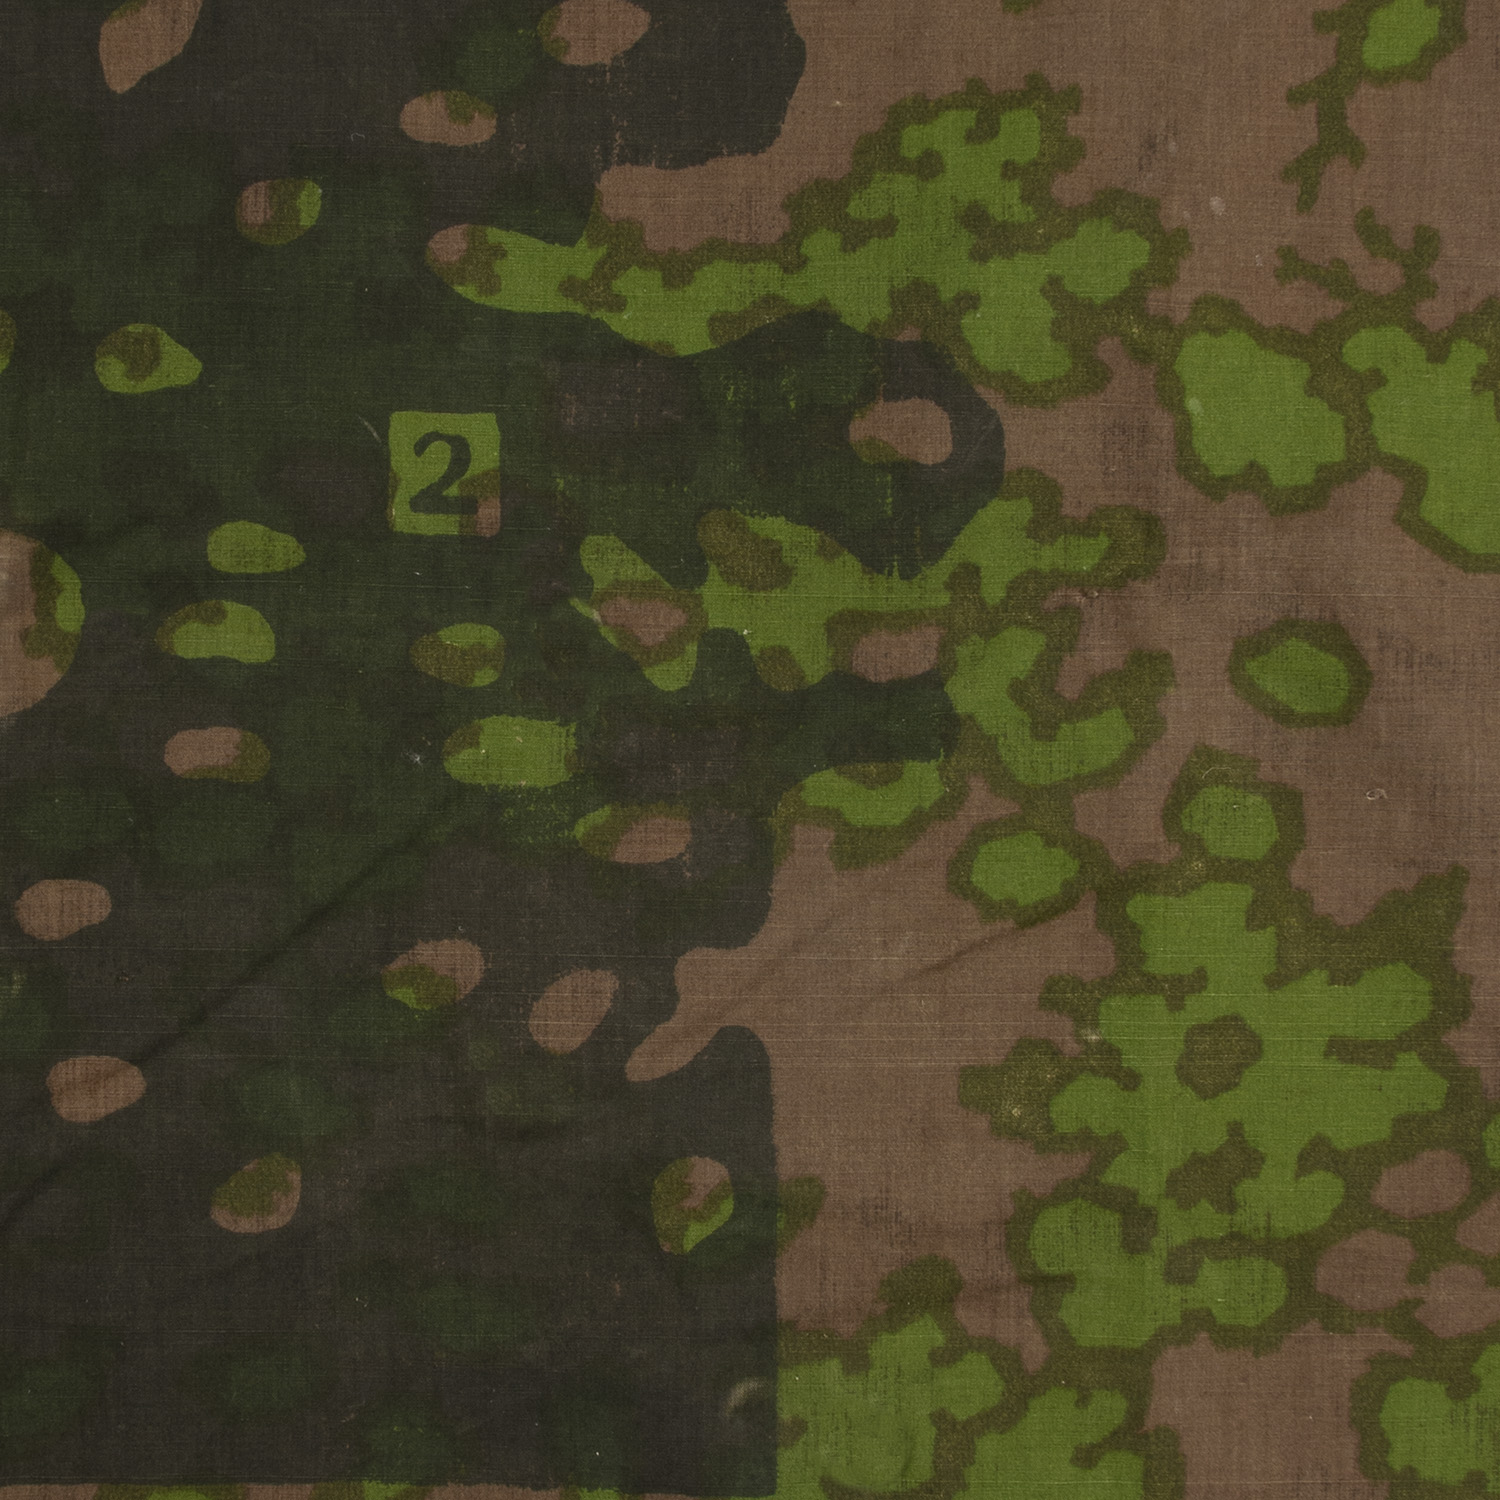
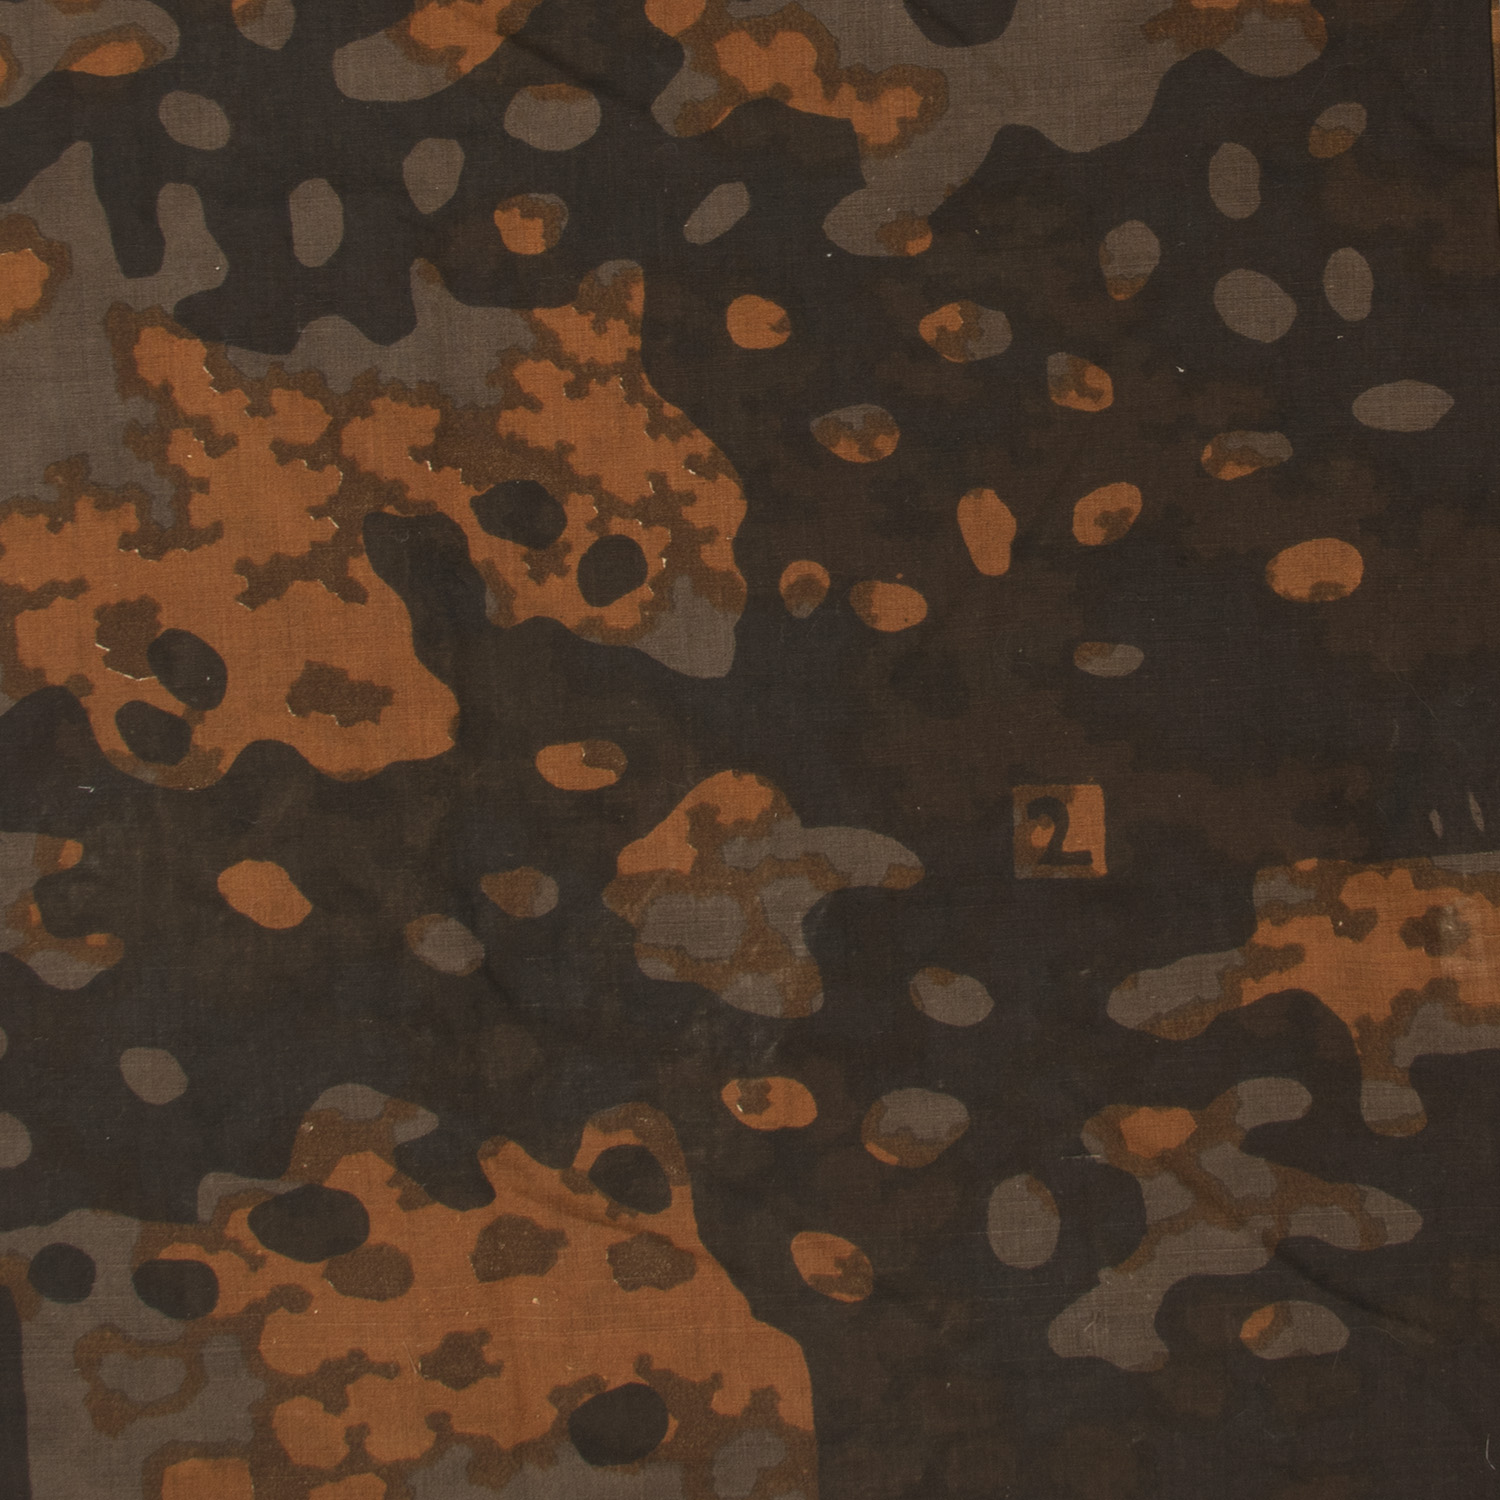
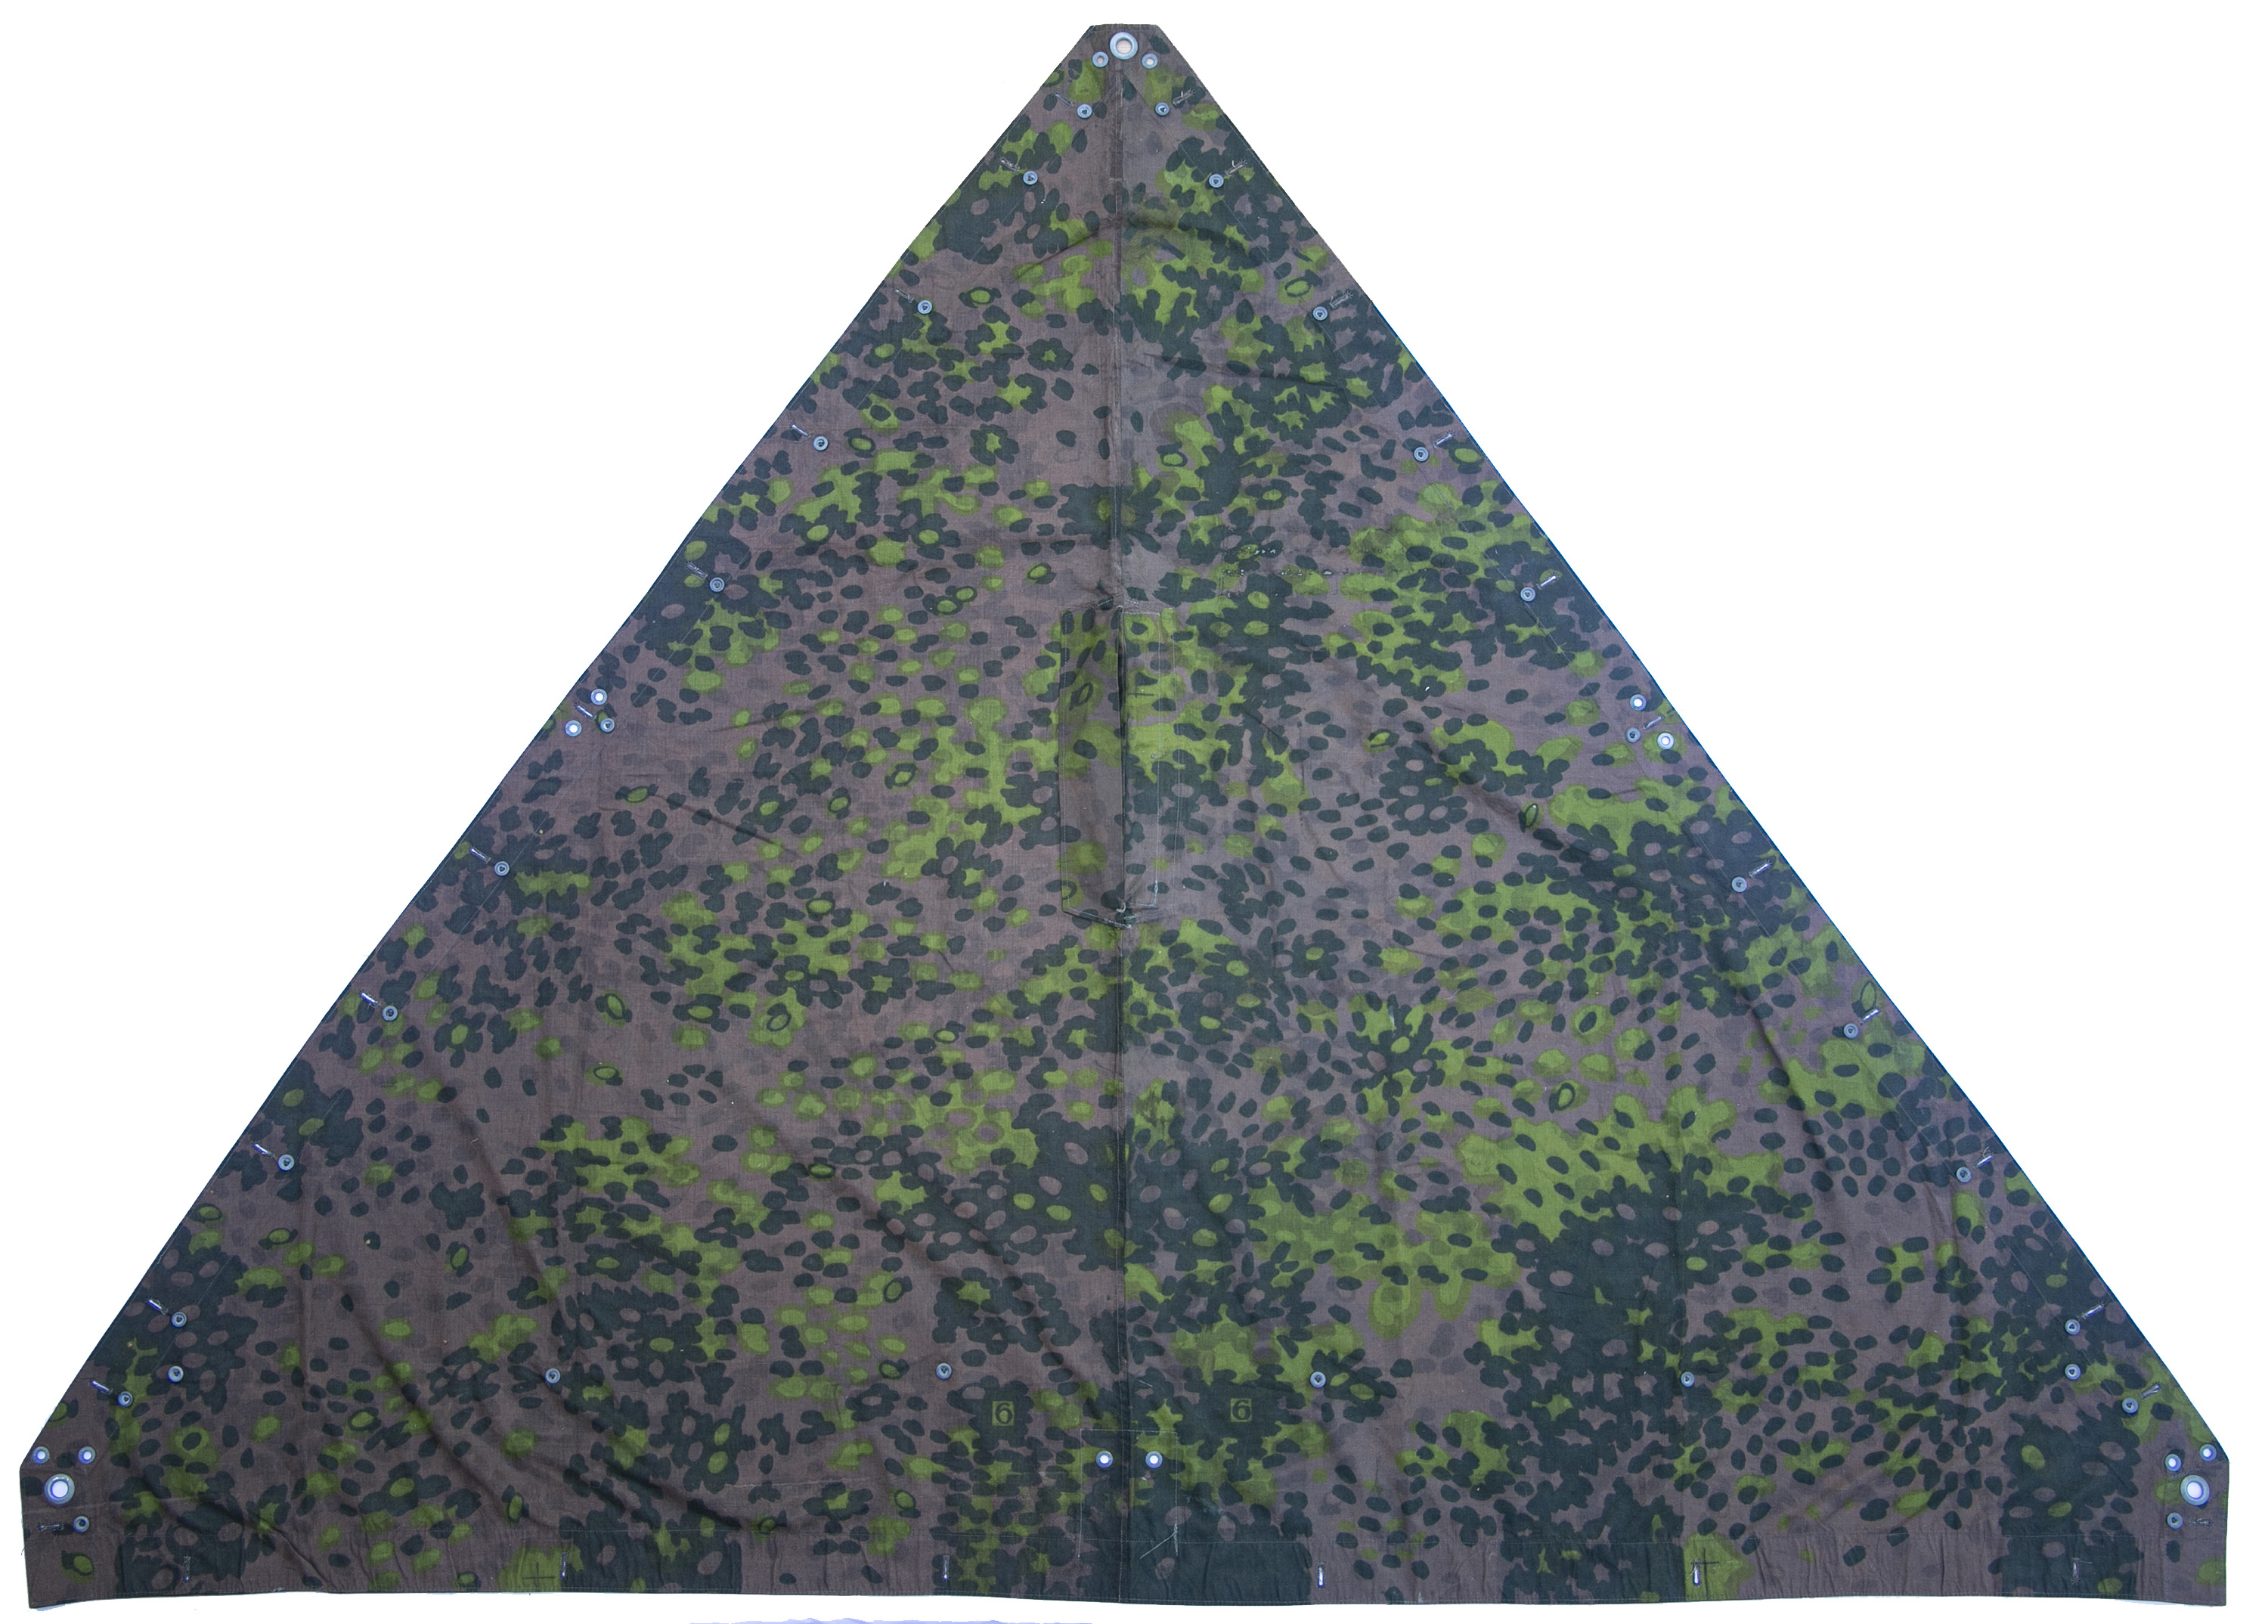
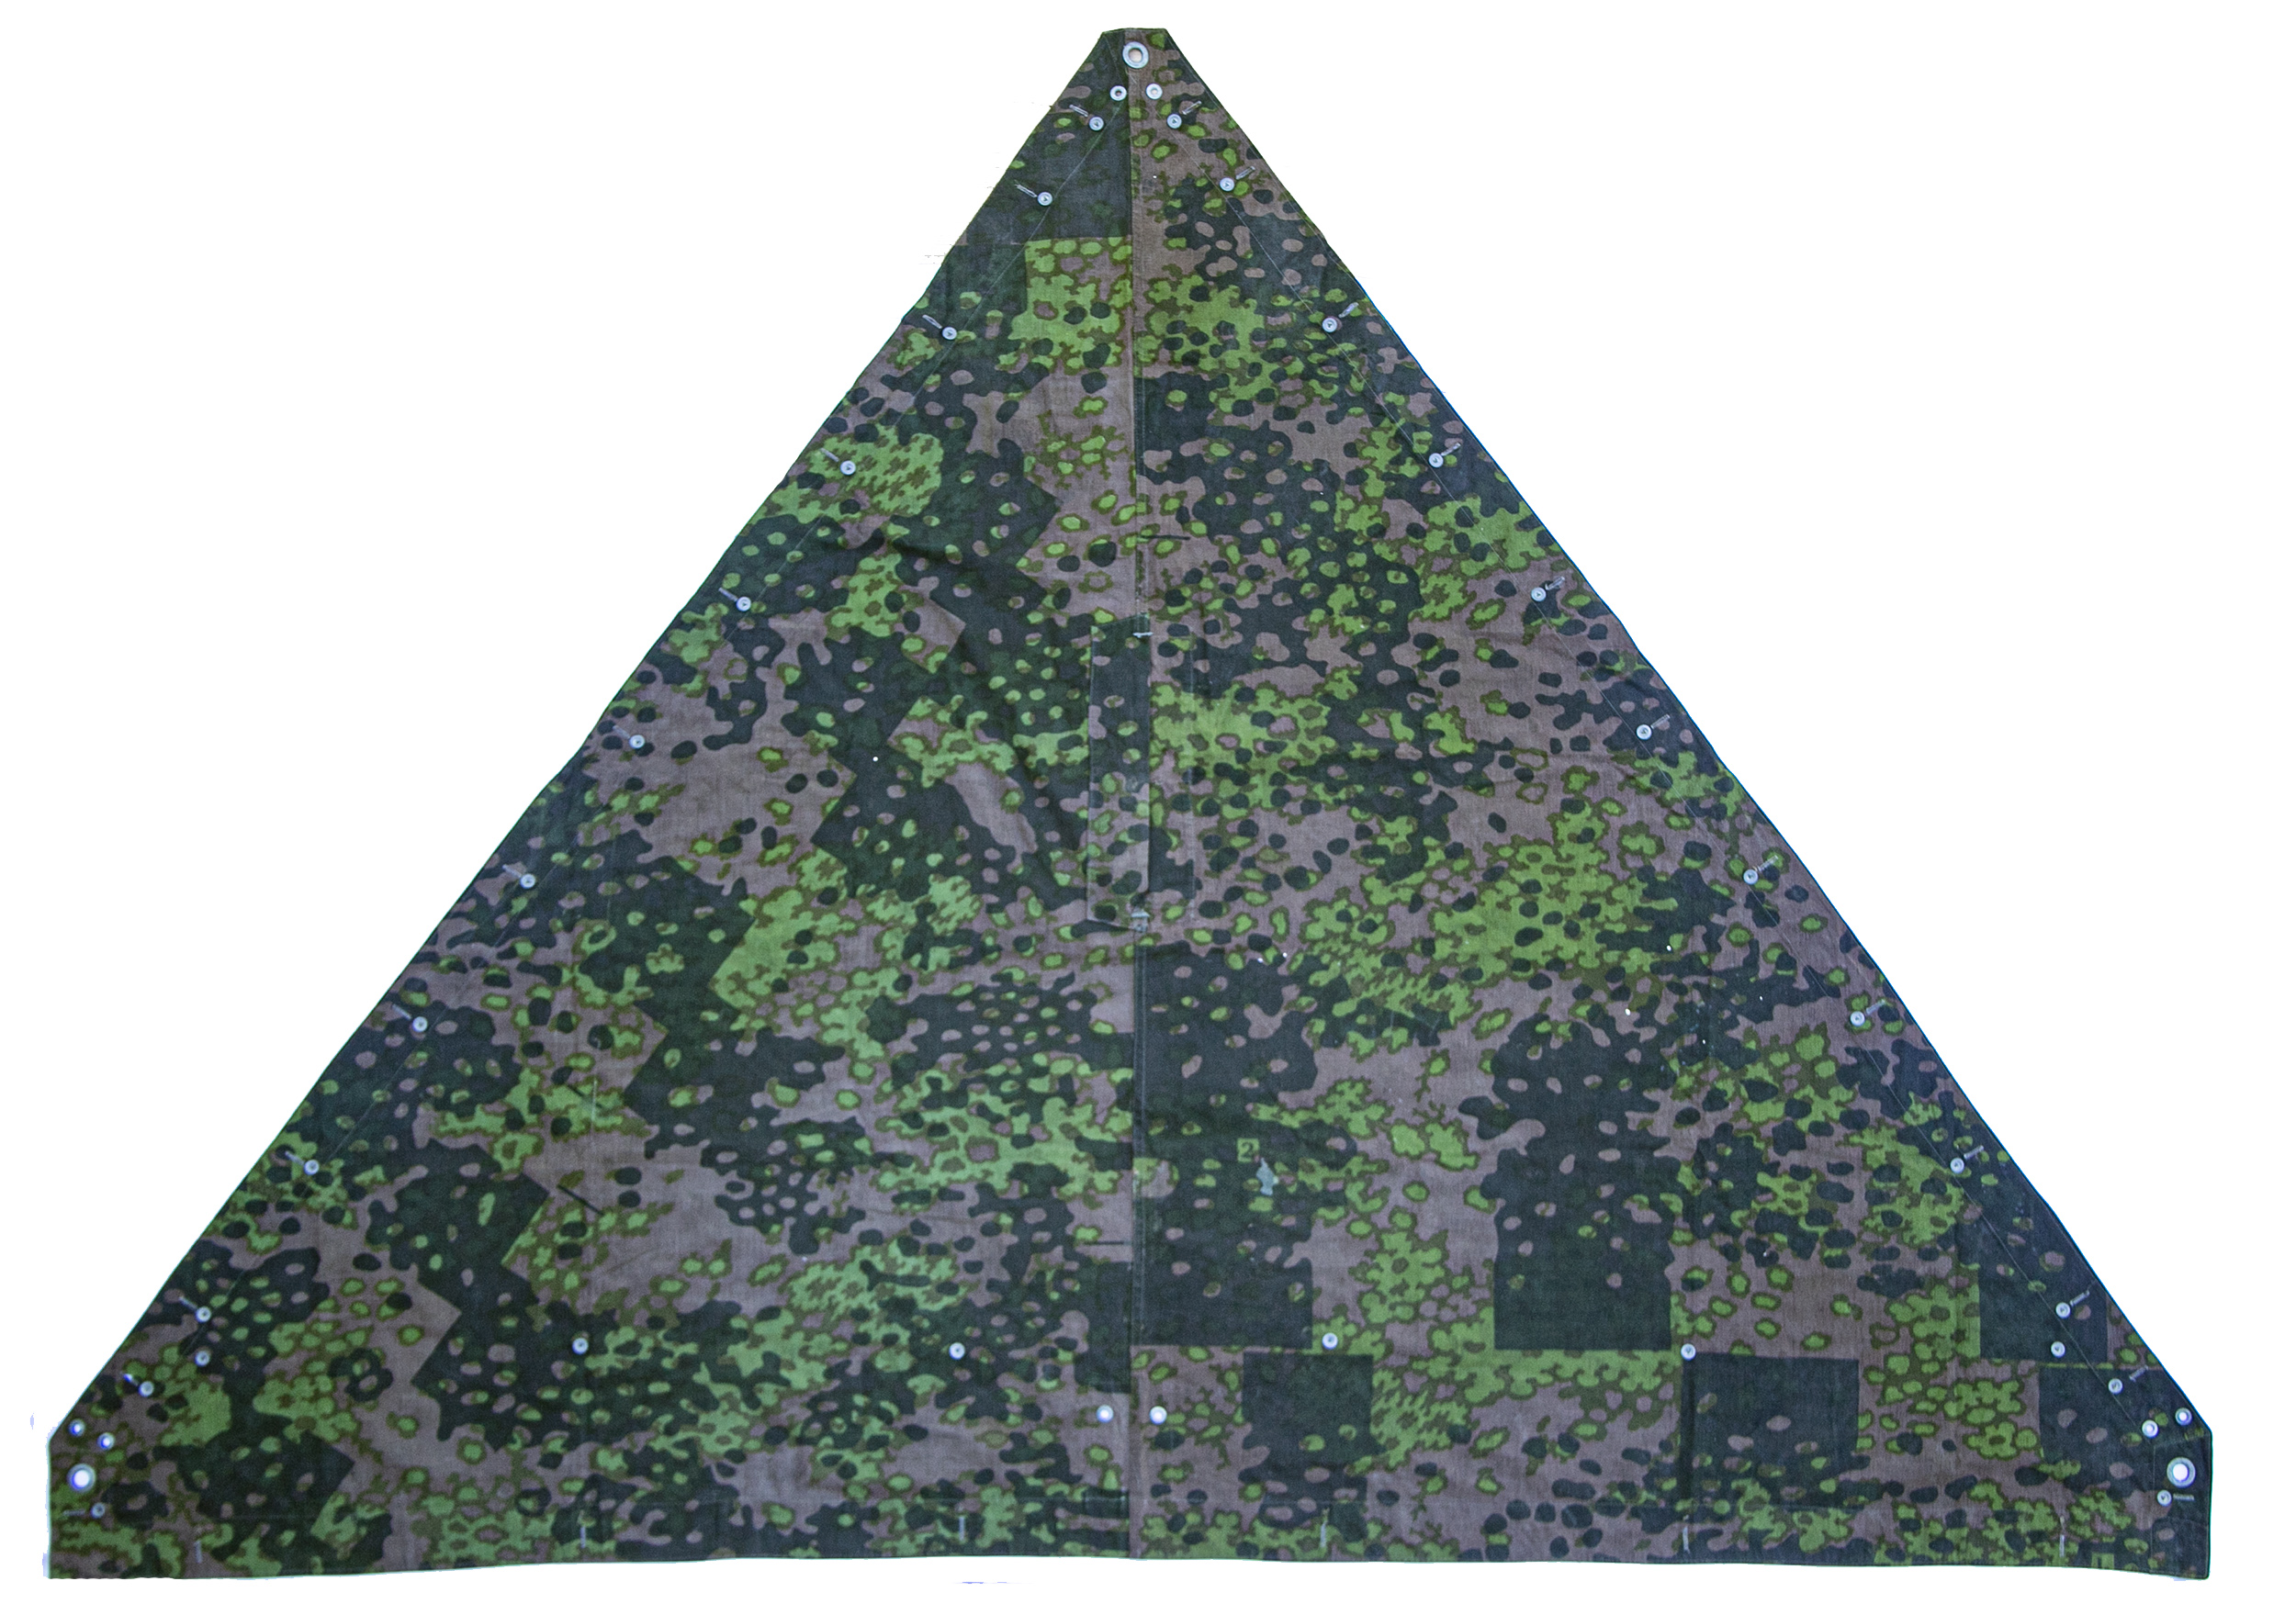
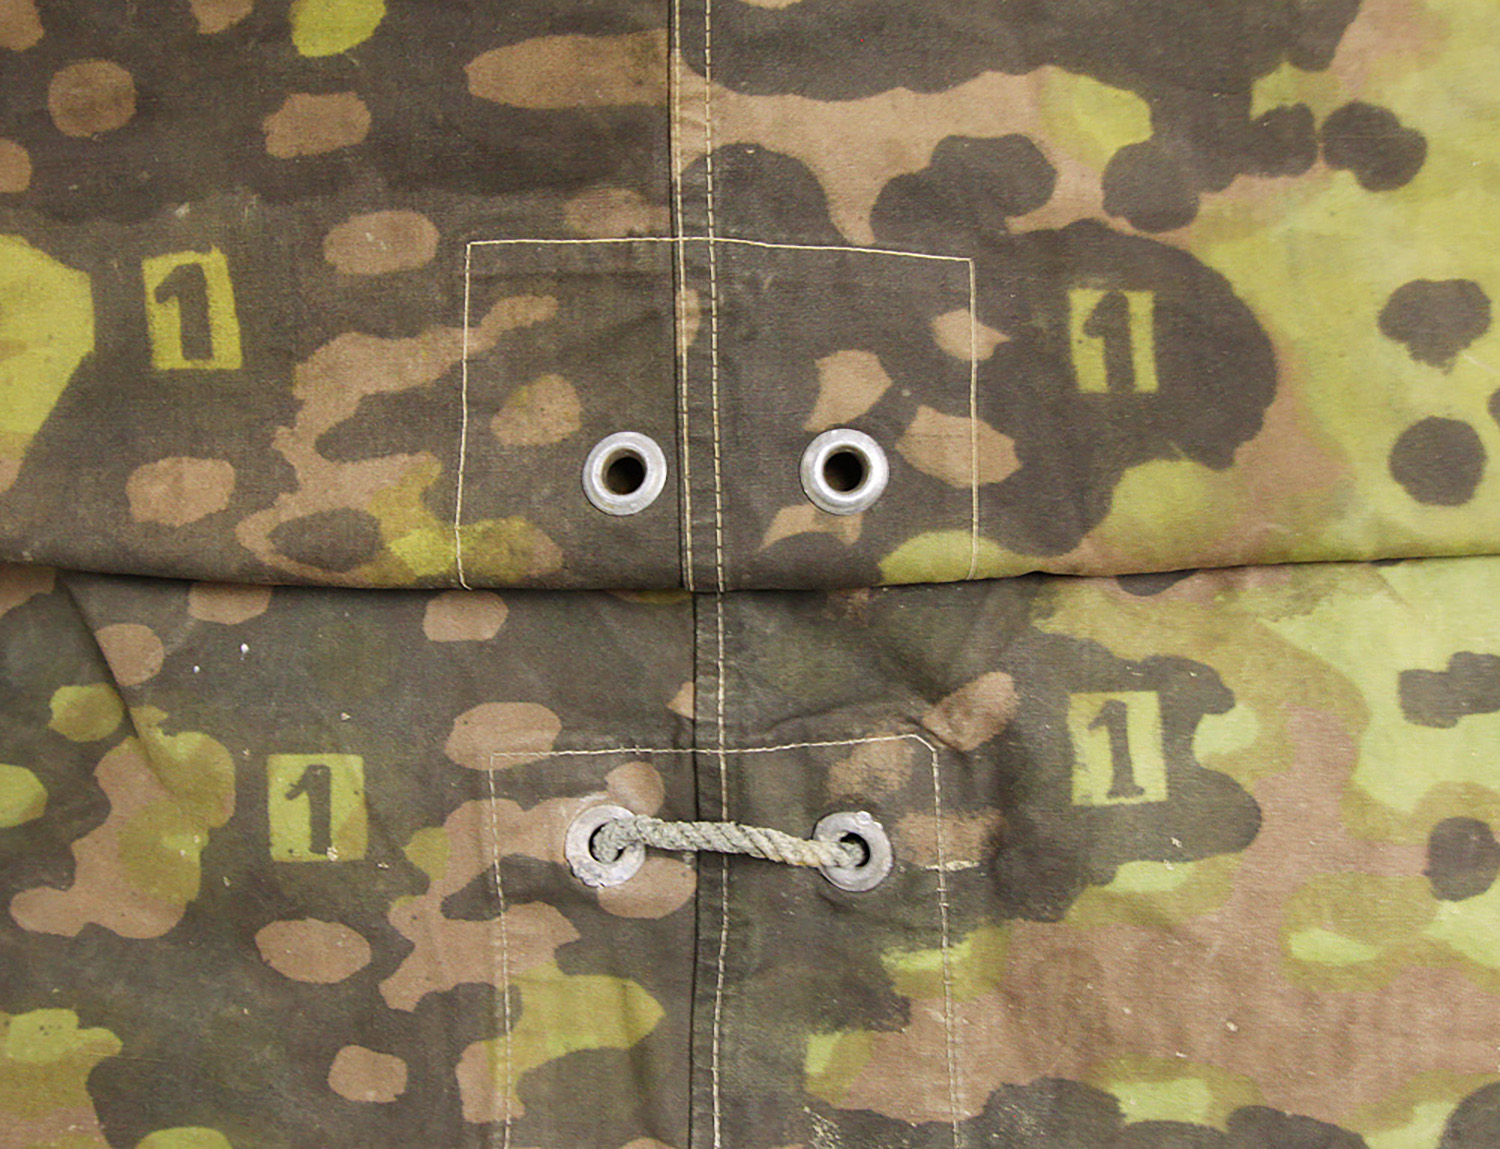
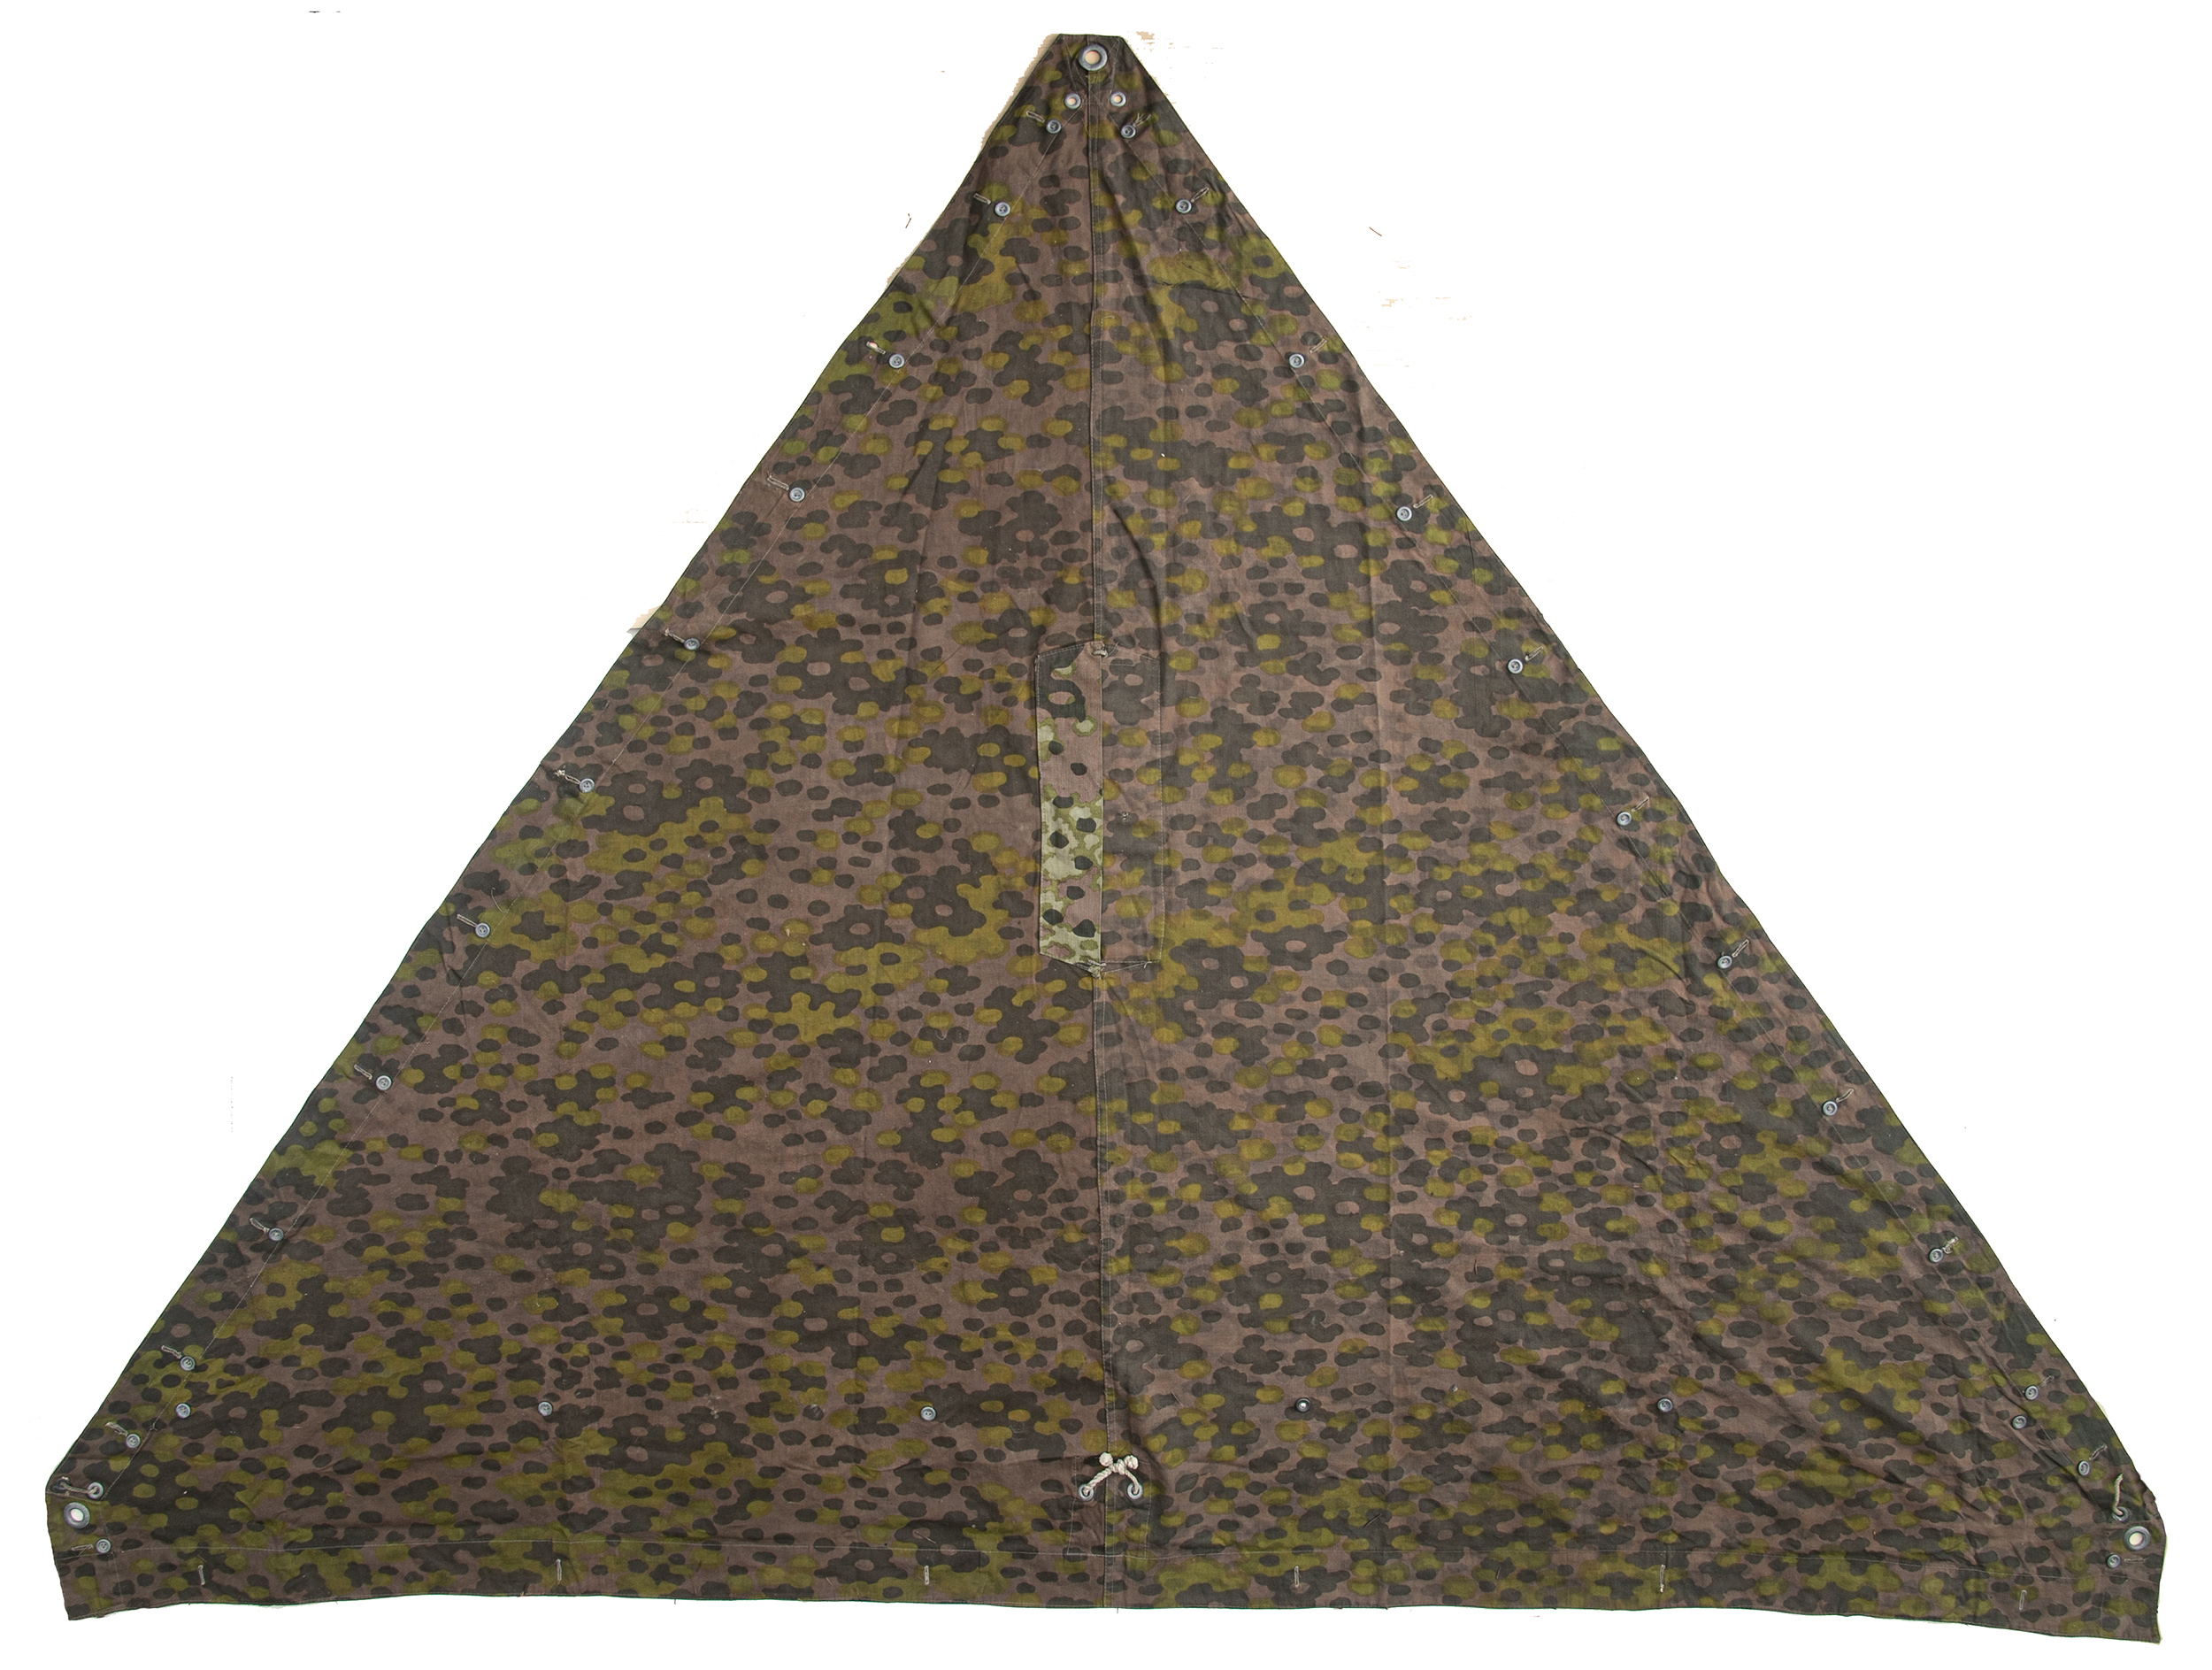
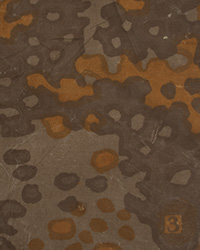
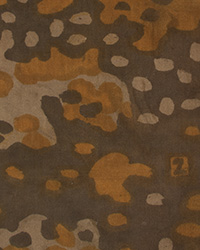
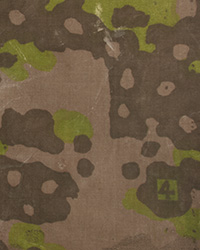
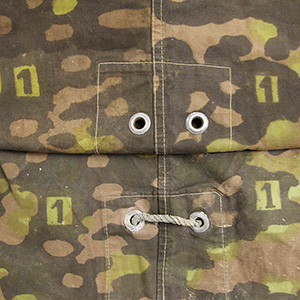
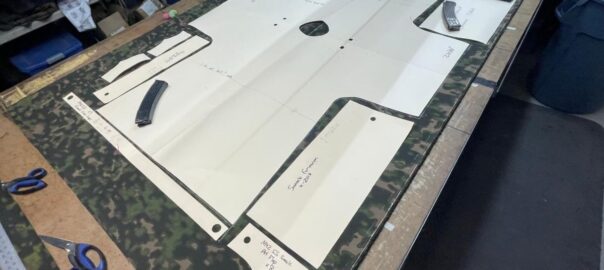
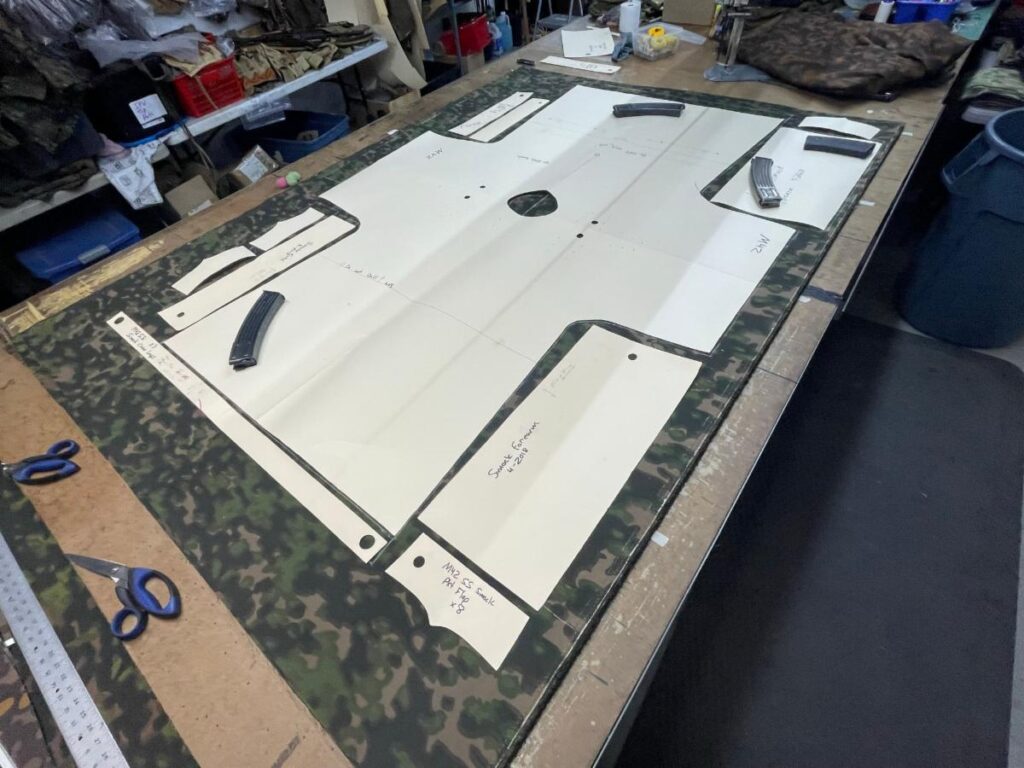
The Designs: The concept is actually ingenious and fairly simple. Each Numbered Planetree pattern actually consists of TWO patterns. Each is roughly 5ft x 7ft, and incorporates a series of dark blocks in a “Z” shape to indicate the cut lines for two Zeltbahn panels. Due to geometric rules, this creates two left or two right panels, necessitating a second pattern to yield the opposite sides. Each pattern has two numbers, one each on opposite corners 1 and 2, 3 and 4, or 5 and 6. These are on both right and left patterns and are used to help the workers doing the printing and those cutting the cloth keep track of which they’re working on.
 |
 |
 |
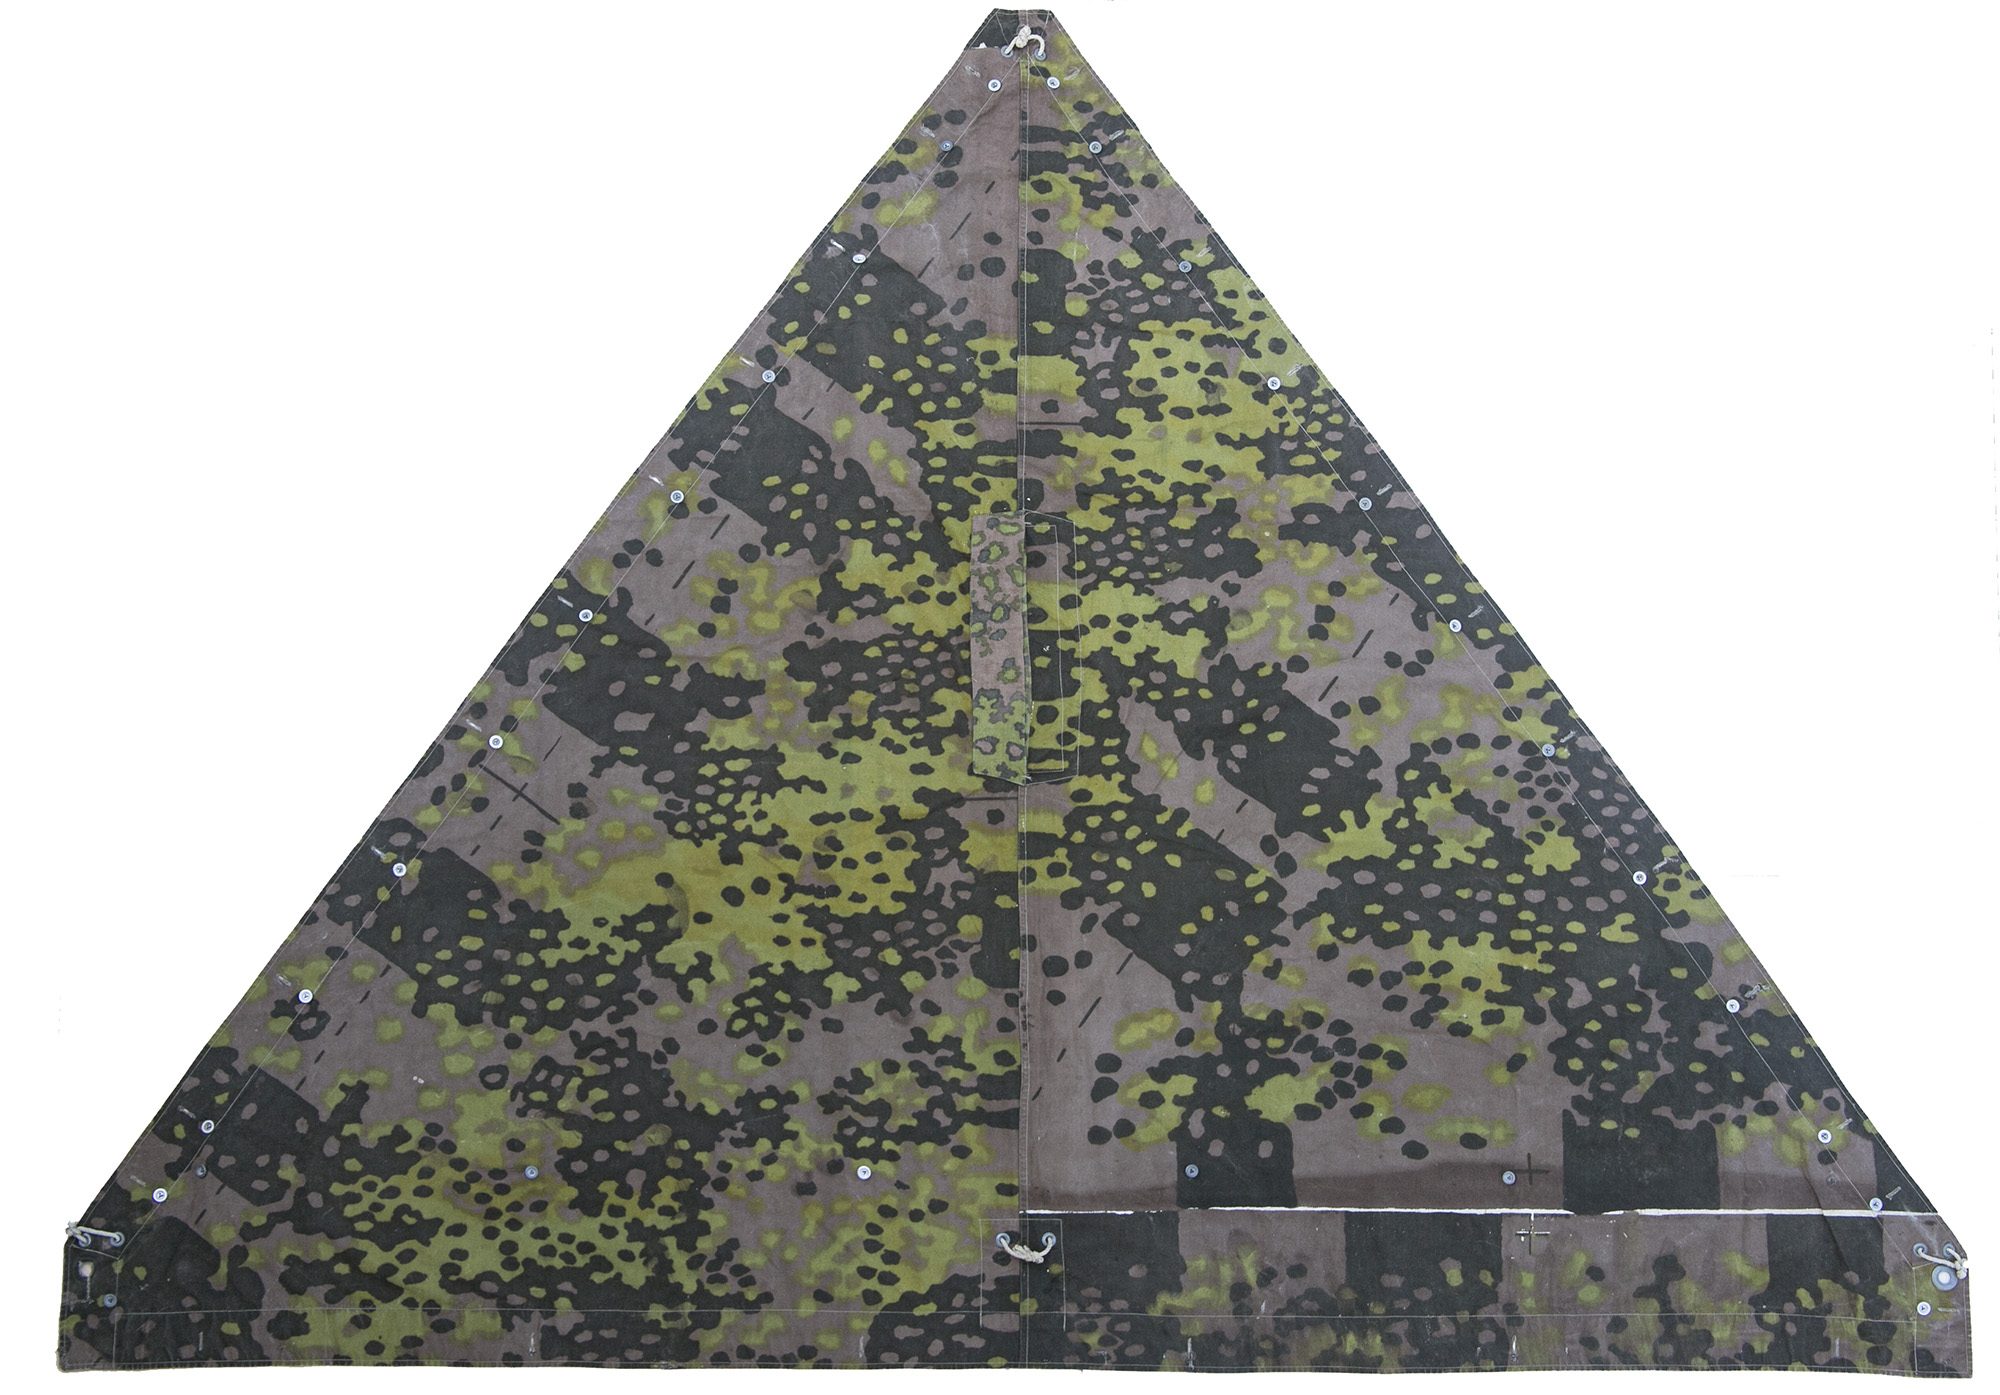
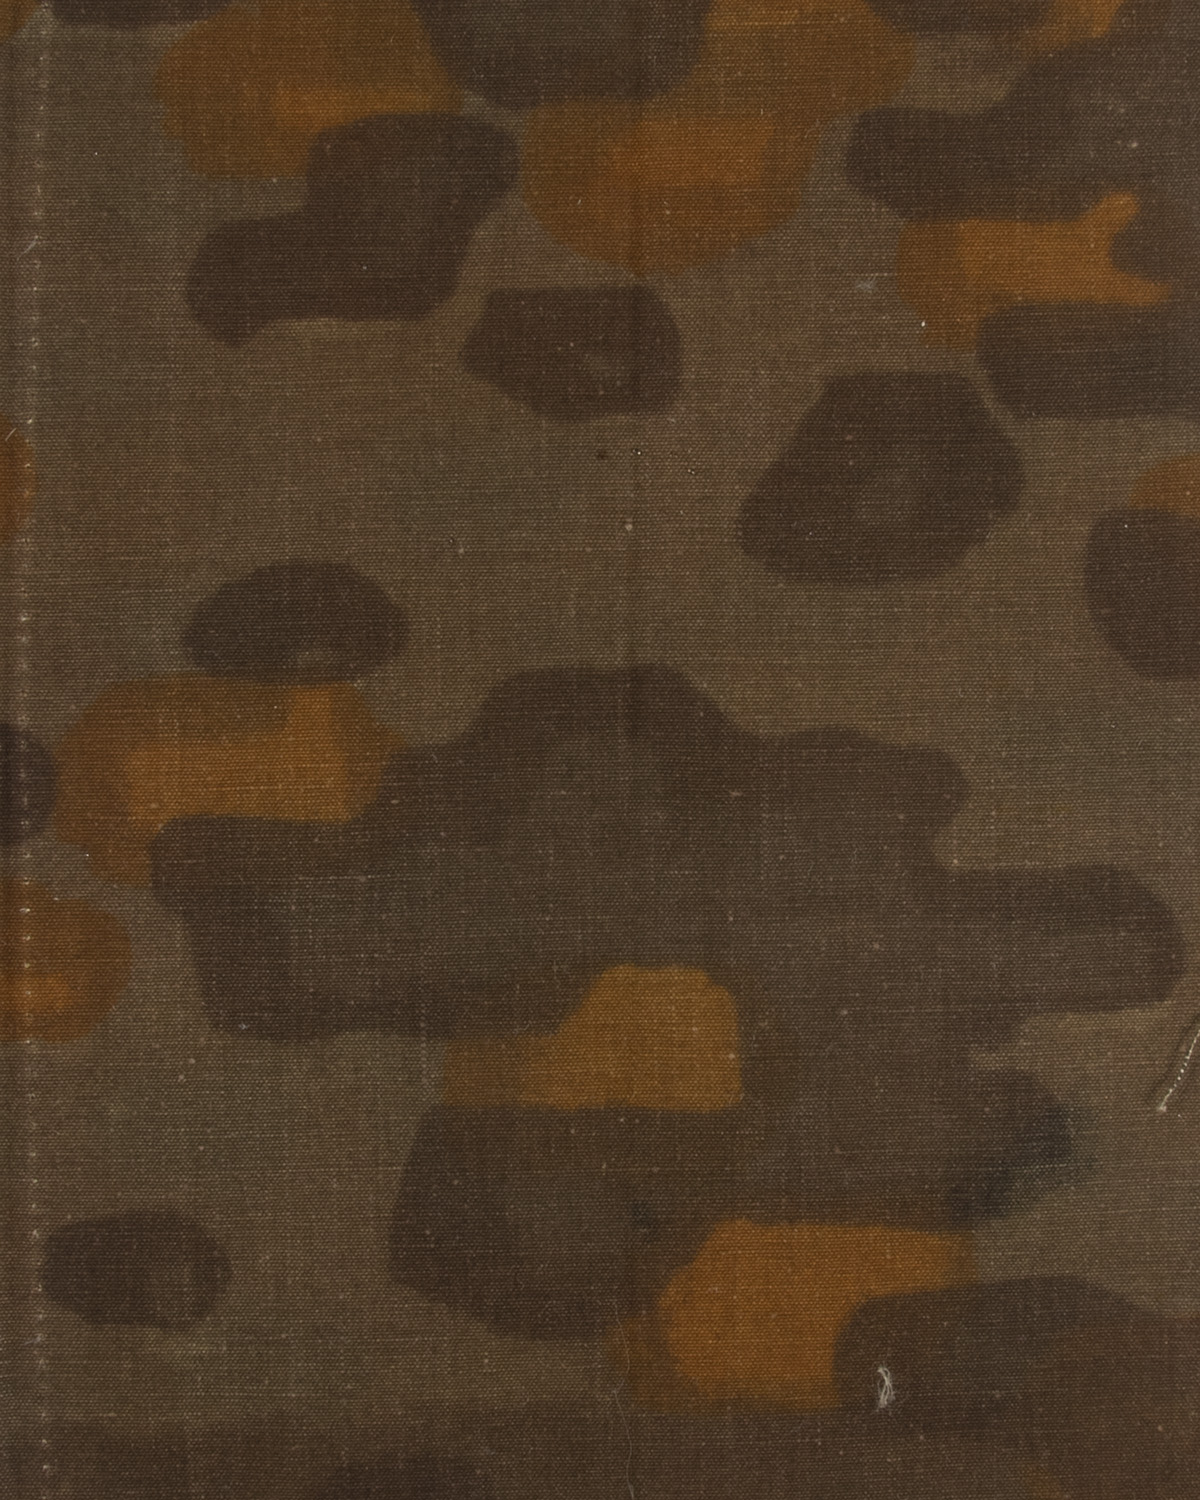
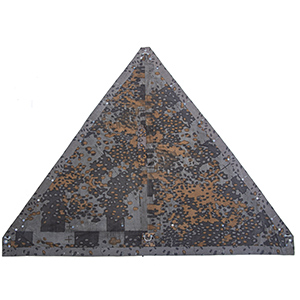
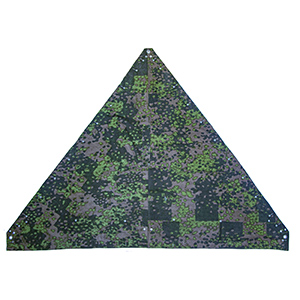
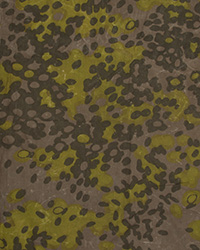
| 1-2 Spring Colors |
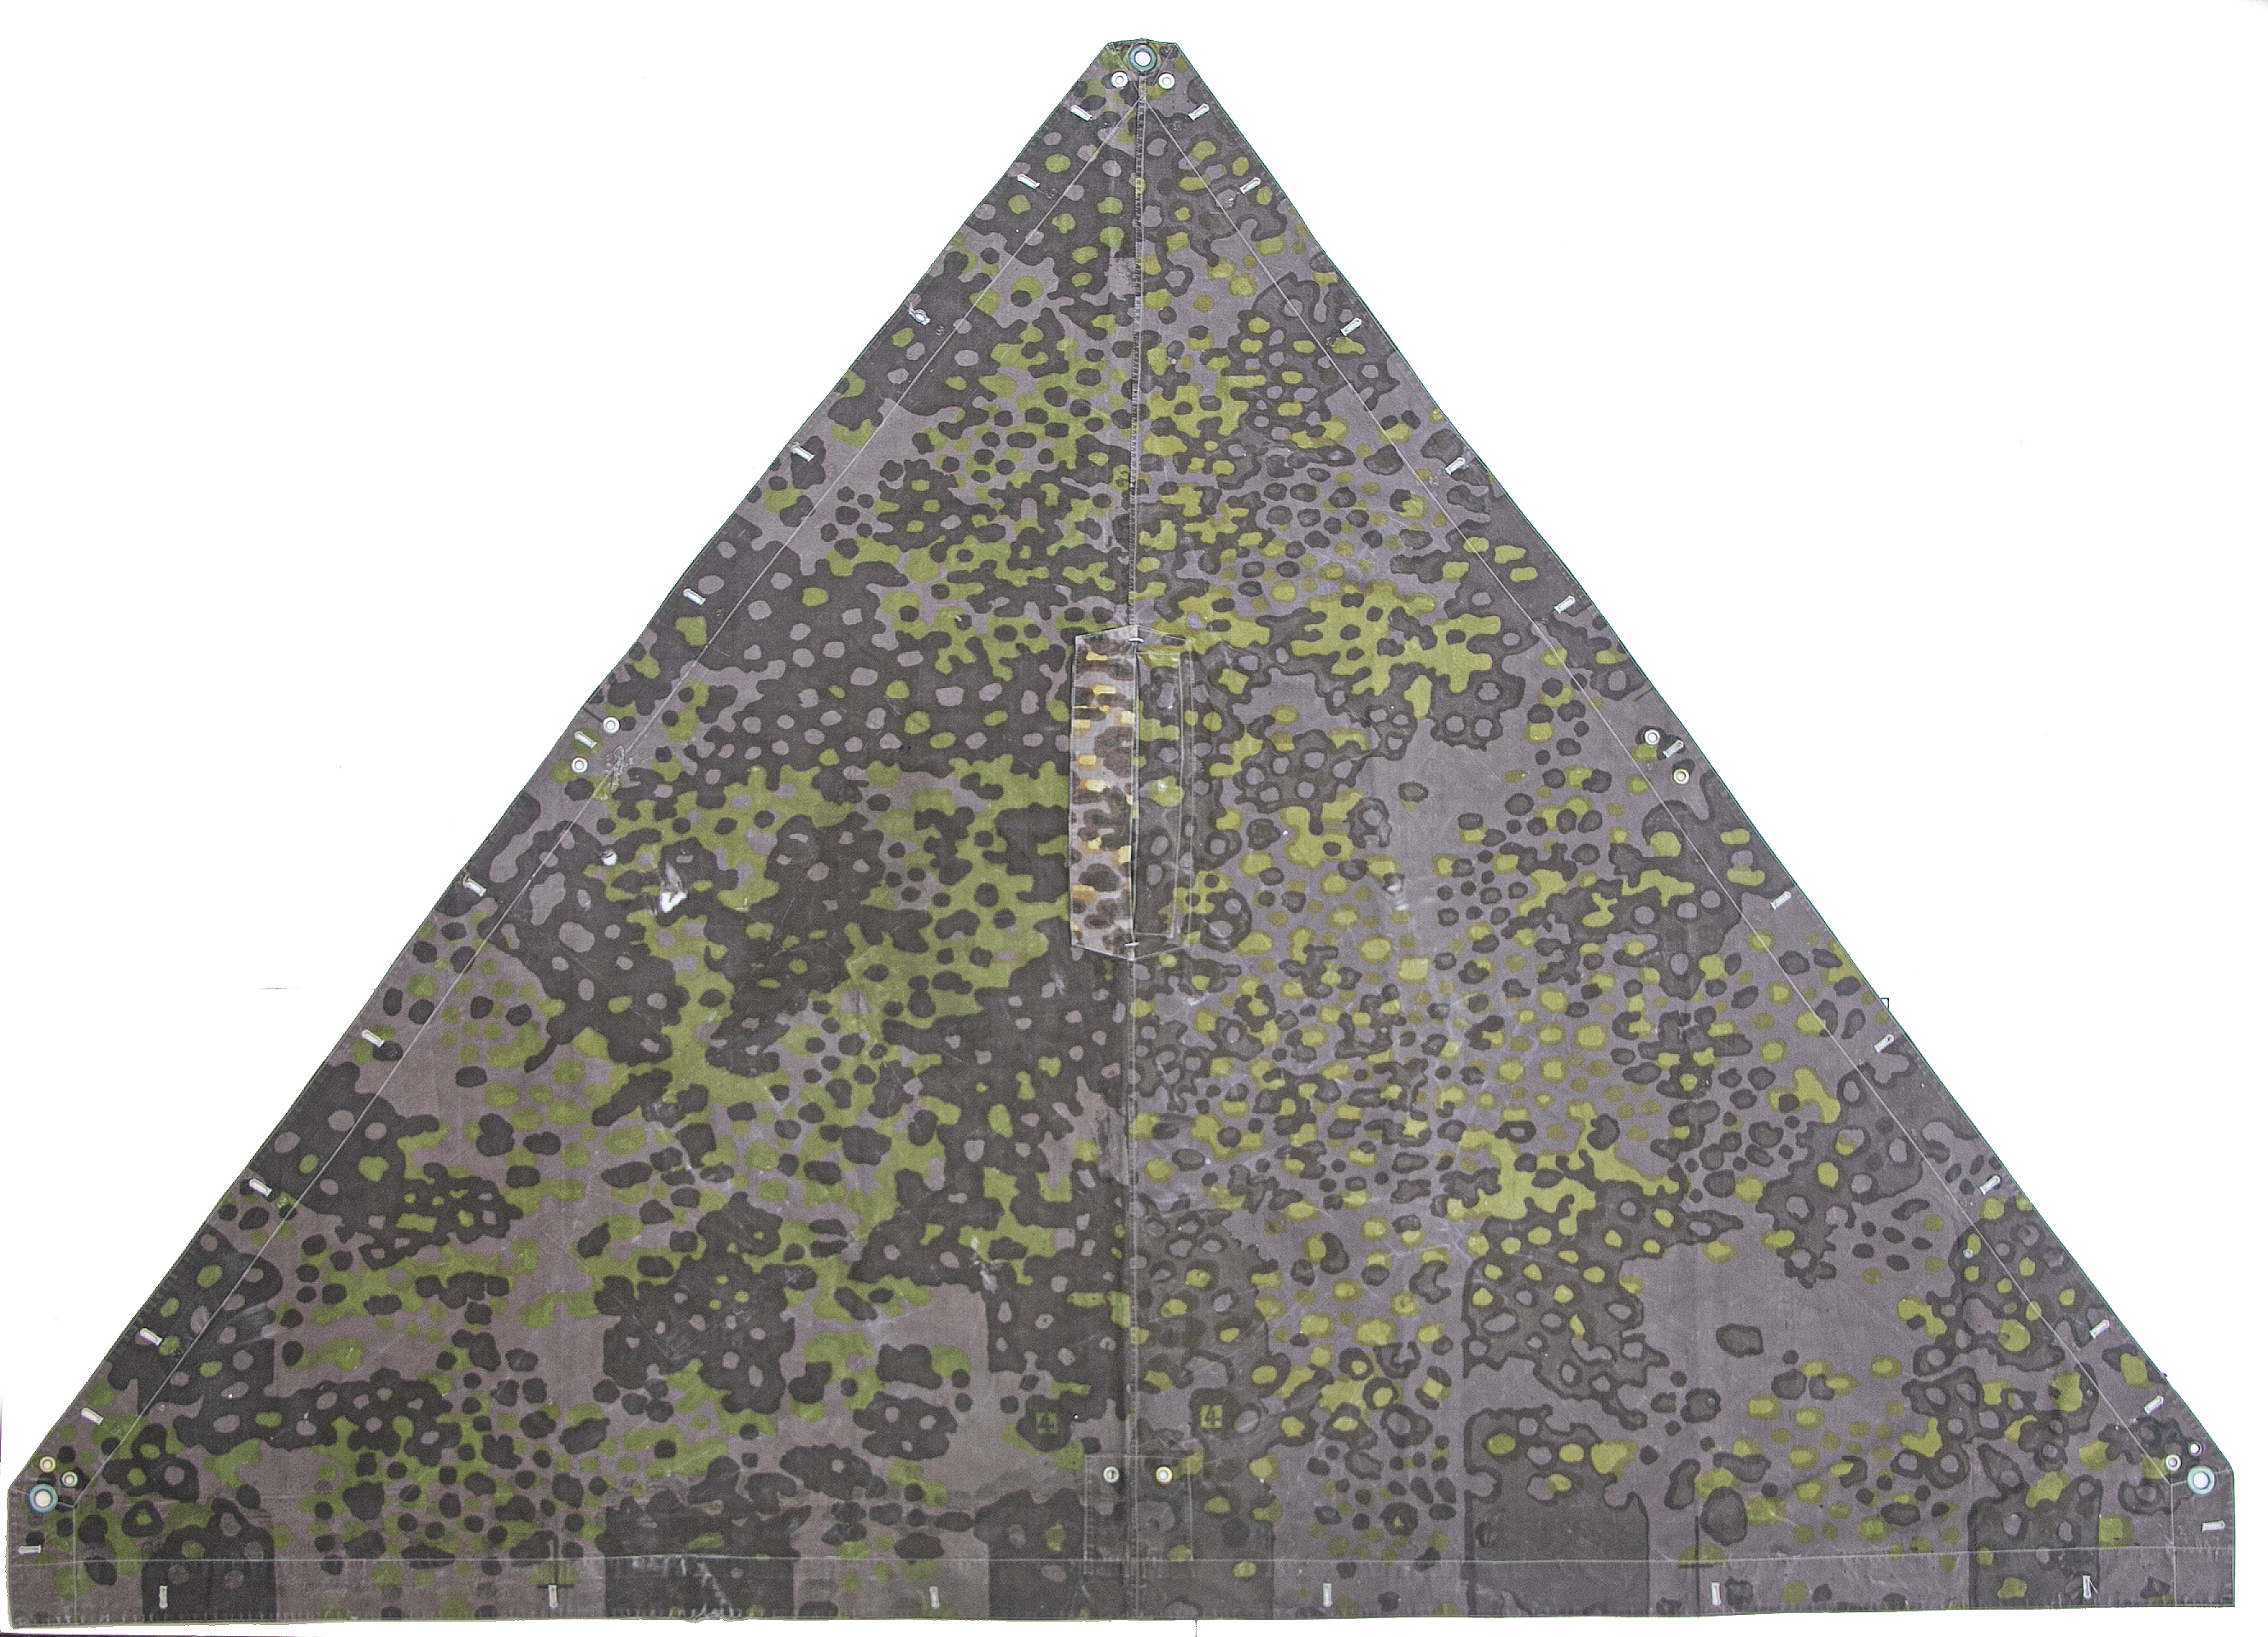
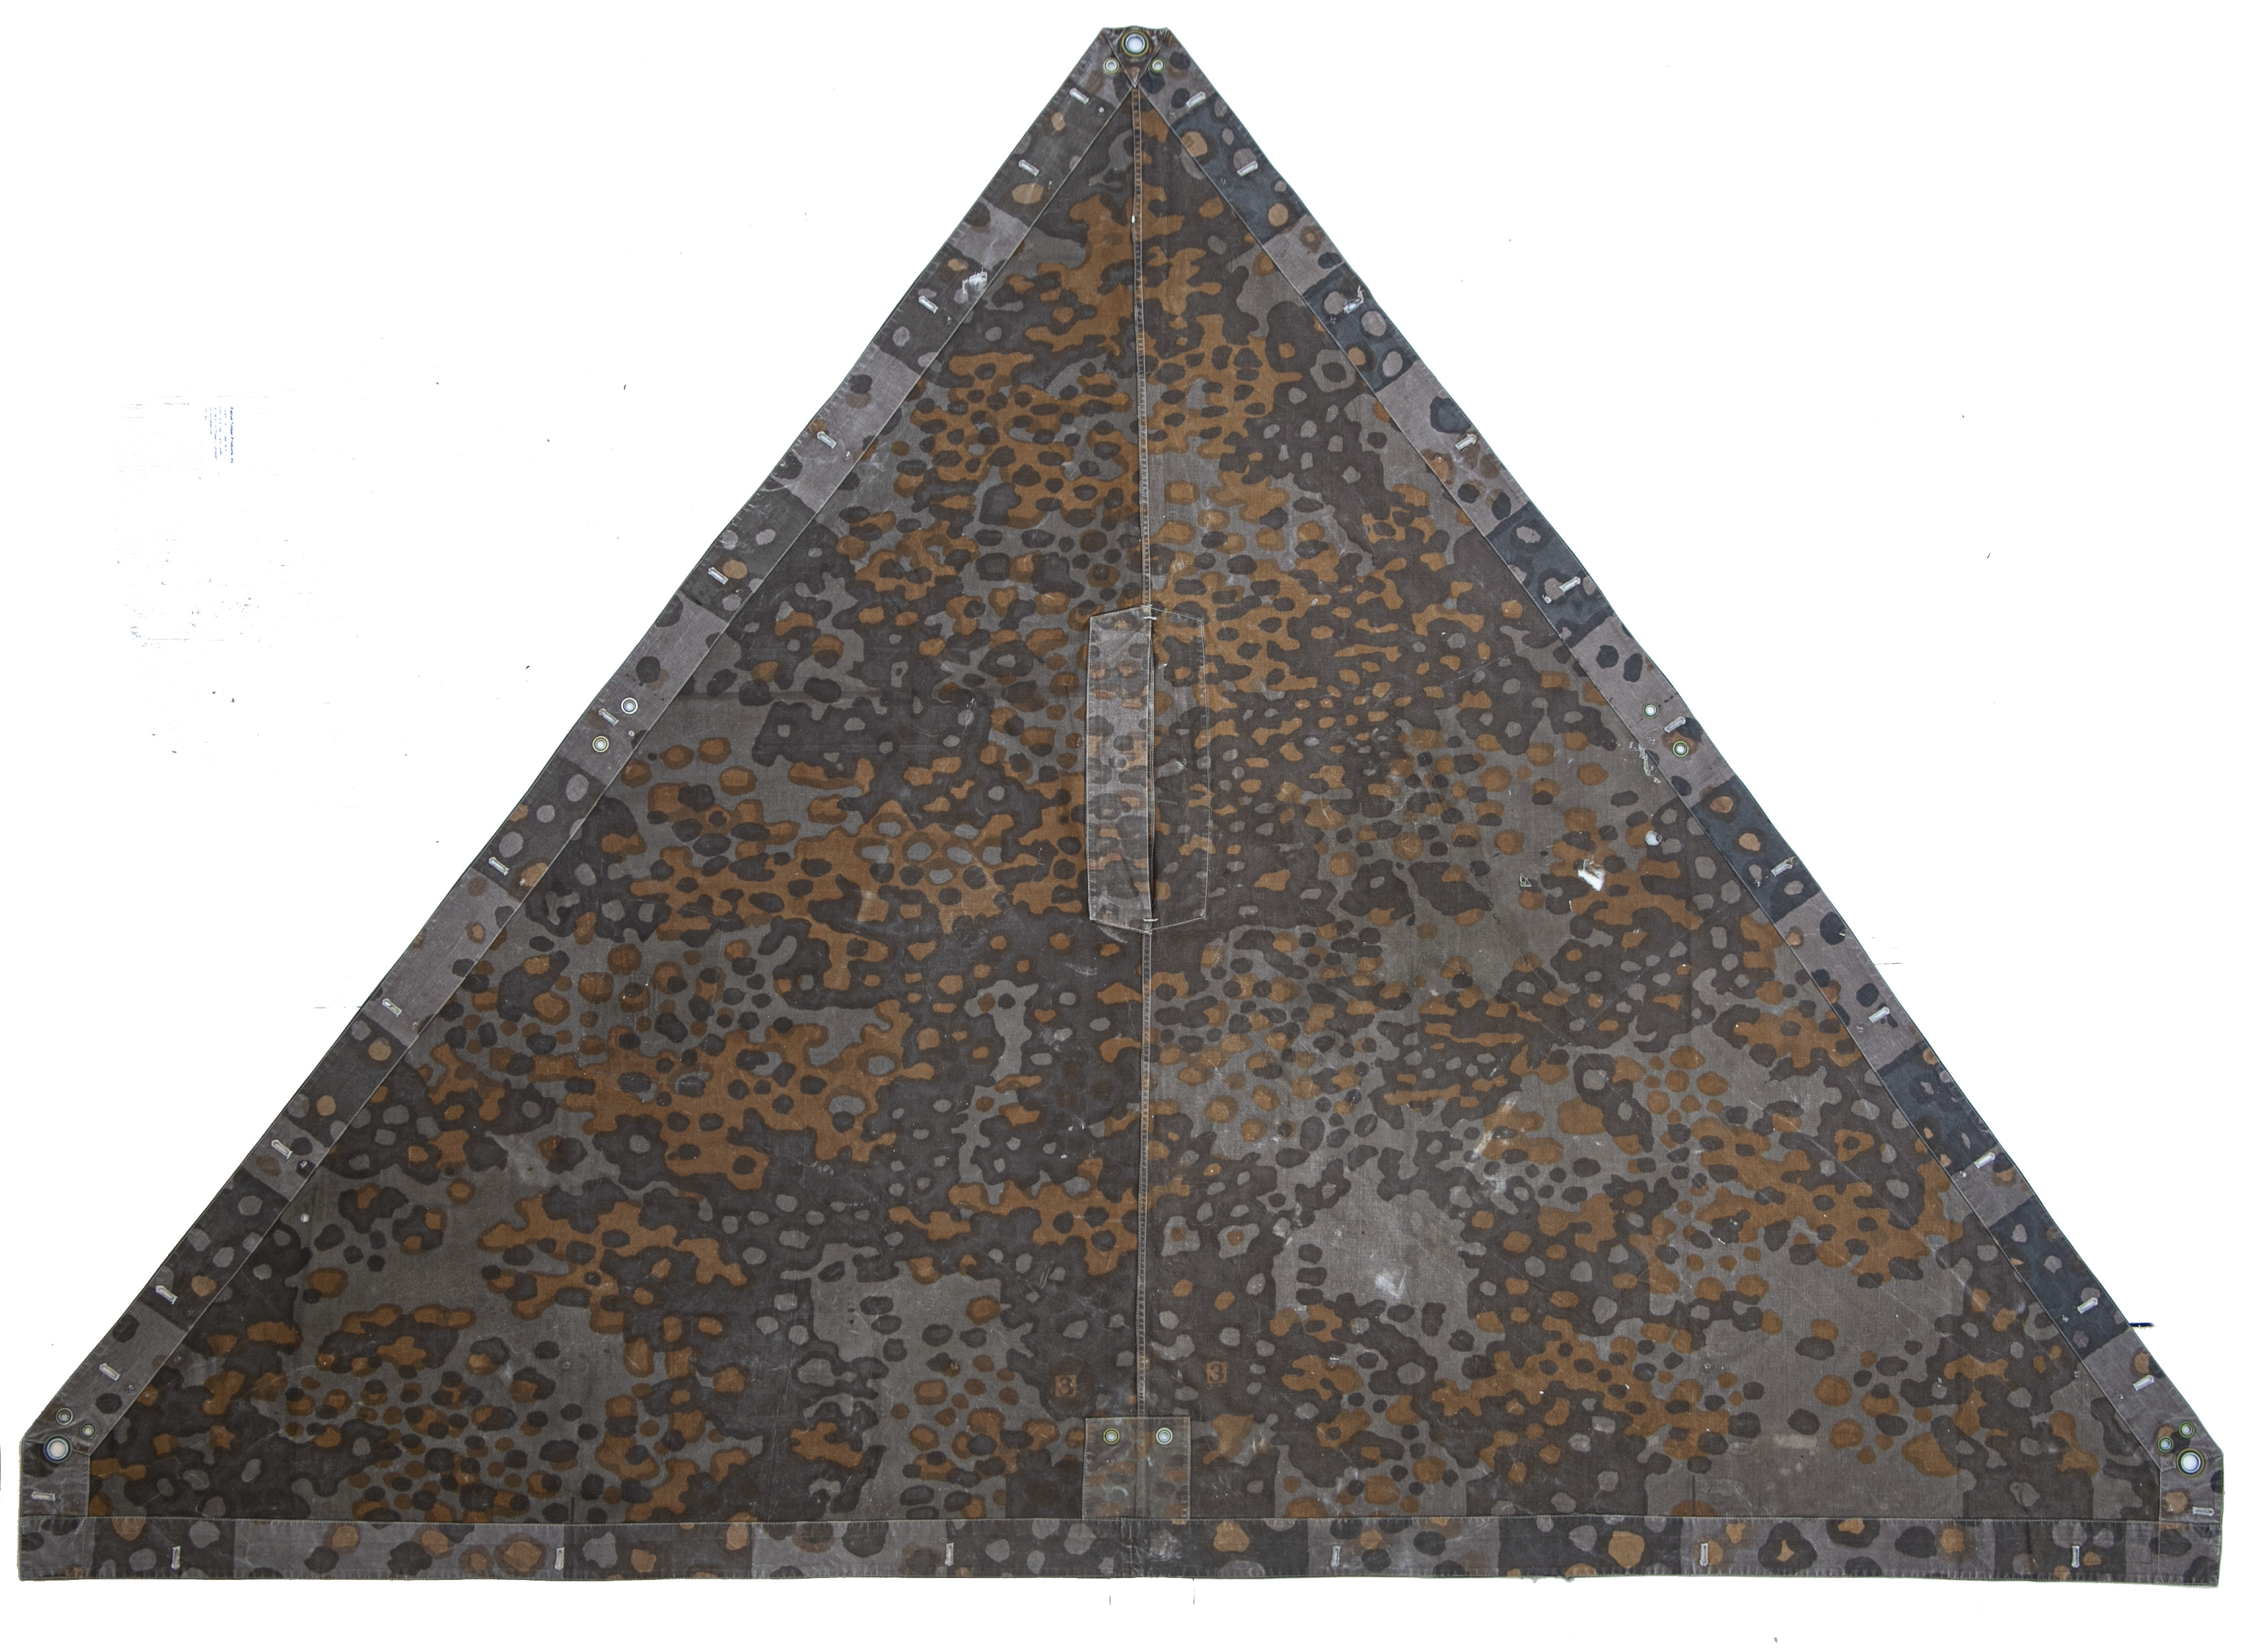
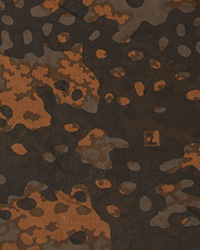
3-4 Fall Colors |
5-6 Spring Colors |
 |
 |
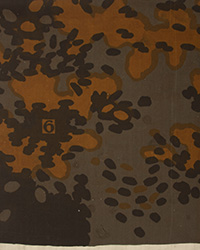 |
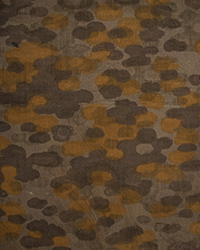
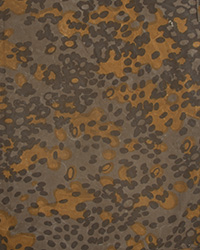
| 1-2 Fall Colors |
3-4 Spring Colors |
5-6 Fall Colors |
Overprint- saving time: By 1943, the Germans had found a way to speed up production of the planetree patterns. Using rotary printing, they applied the two lighter colors from oakleaf and blurred edge, then flat screen printed the dark color over these. (Occasionally this was done in reverse- “underprinting”.) All three numbered patterns were utilized in this way. Of note, the diagonal cutting blocks were moved apart and staggered, like a checkerboard, likely as this presented a more obvious line that the sometimes faint dashed lines. It’s very common to find these shelter quarters assembled with no regard for the assembly design.
Overprint 1-2 Spring Colors |
|
|
Overprint 1-2 Fall Colors |
|
|
.
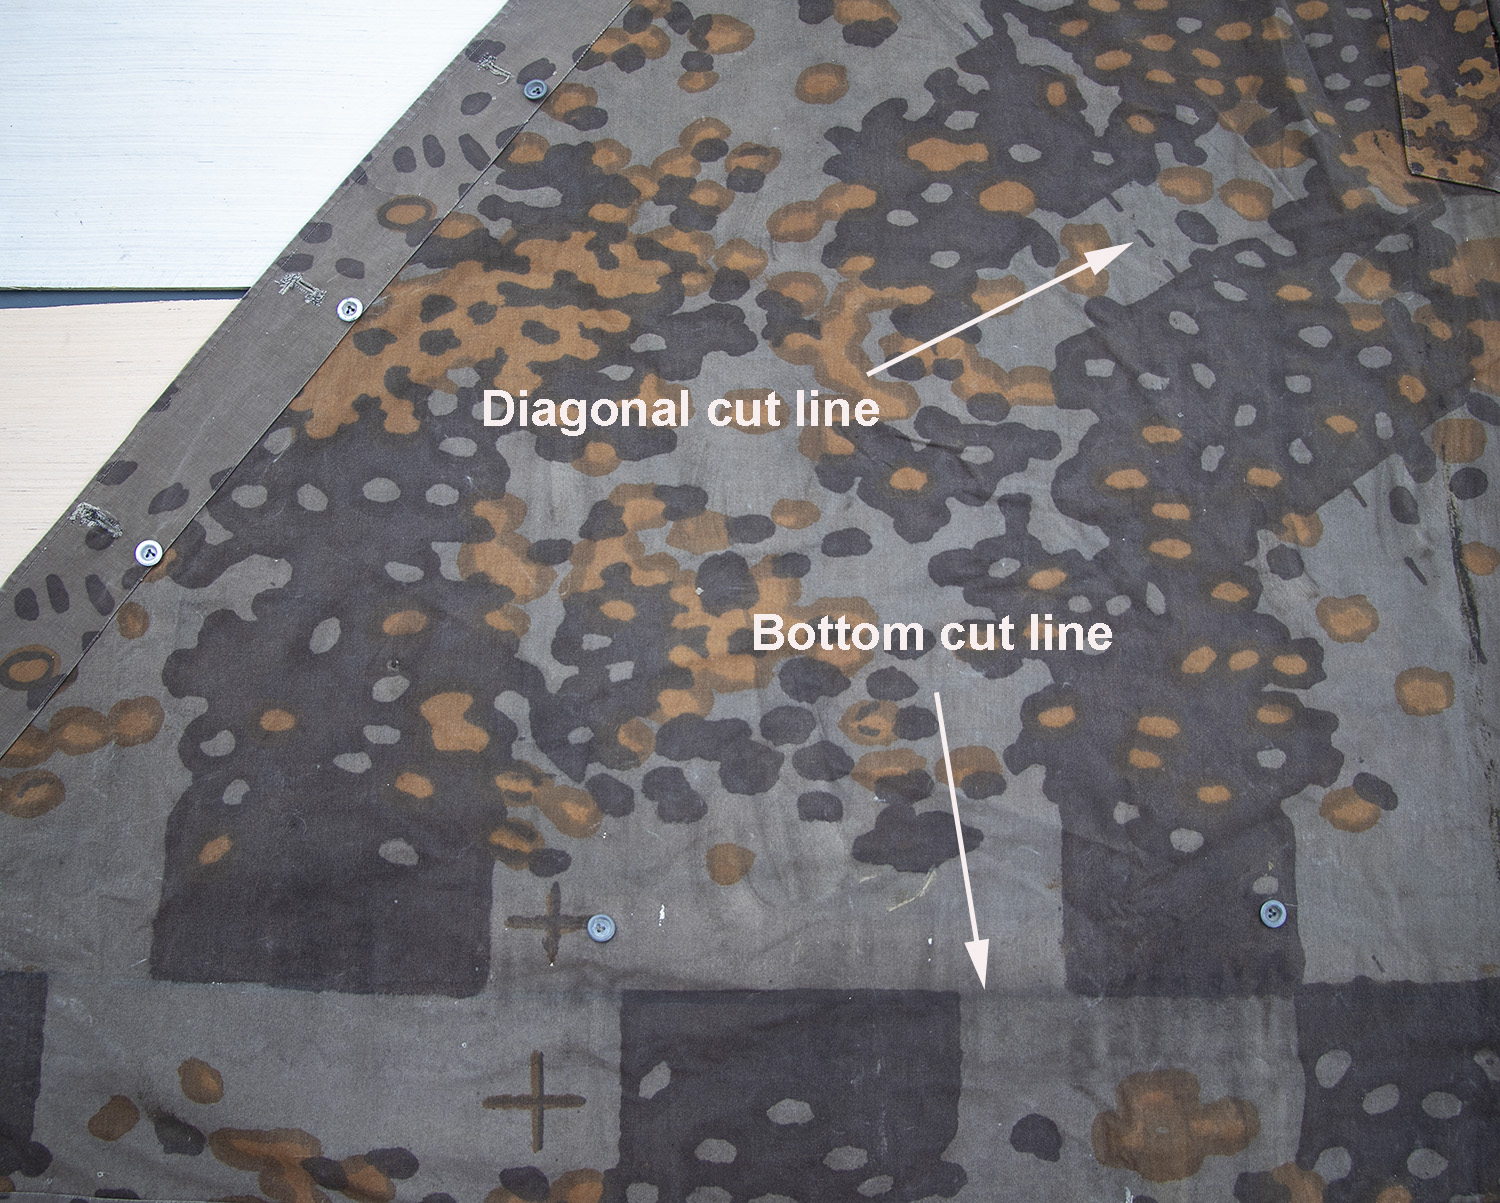
Cutting the panels: For the illustration below, only the key parts of the dark
screen are present, to show how the cutting lines for the right and left
Zeltbahn panels are actually incorporated into the camouflage design, and how
they are designed to be cut. At some point (42-43?) the diagonal dashed lines
were removed and the blocks staggered to indicate the cut line.
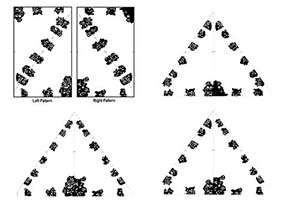
To make a Zeltbahn as designed, required two rolls of fabric. One with left panels in Spring colors, and right panels in Fall colors, and another with right Spring and left Fall. Each print uses three colors- a 4th is created by two of the others overlapping.
The pattern was designed in such a way that all four Zeltbahn panels were unique- in other words, one could have created the right pattern, then simply inverted it (mirror image) to make the left pattern. Likewise the two triangles created by each pattern could have been identical, but they are not. Therefore, each Planetree pattern can result four uniquely different designs. For example the Plantree 5-6 pattern can yield Zeltbahns numbered 5-5, 6-6, 5-6, or 6-5. Thus, the three Planetree patterns potentially create shelter quarters in not three, but twelve unique camouflage patterns.
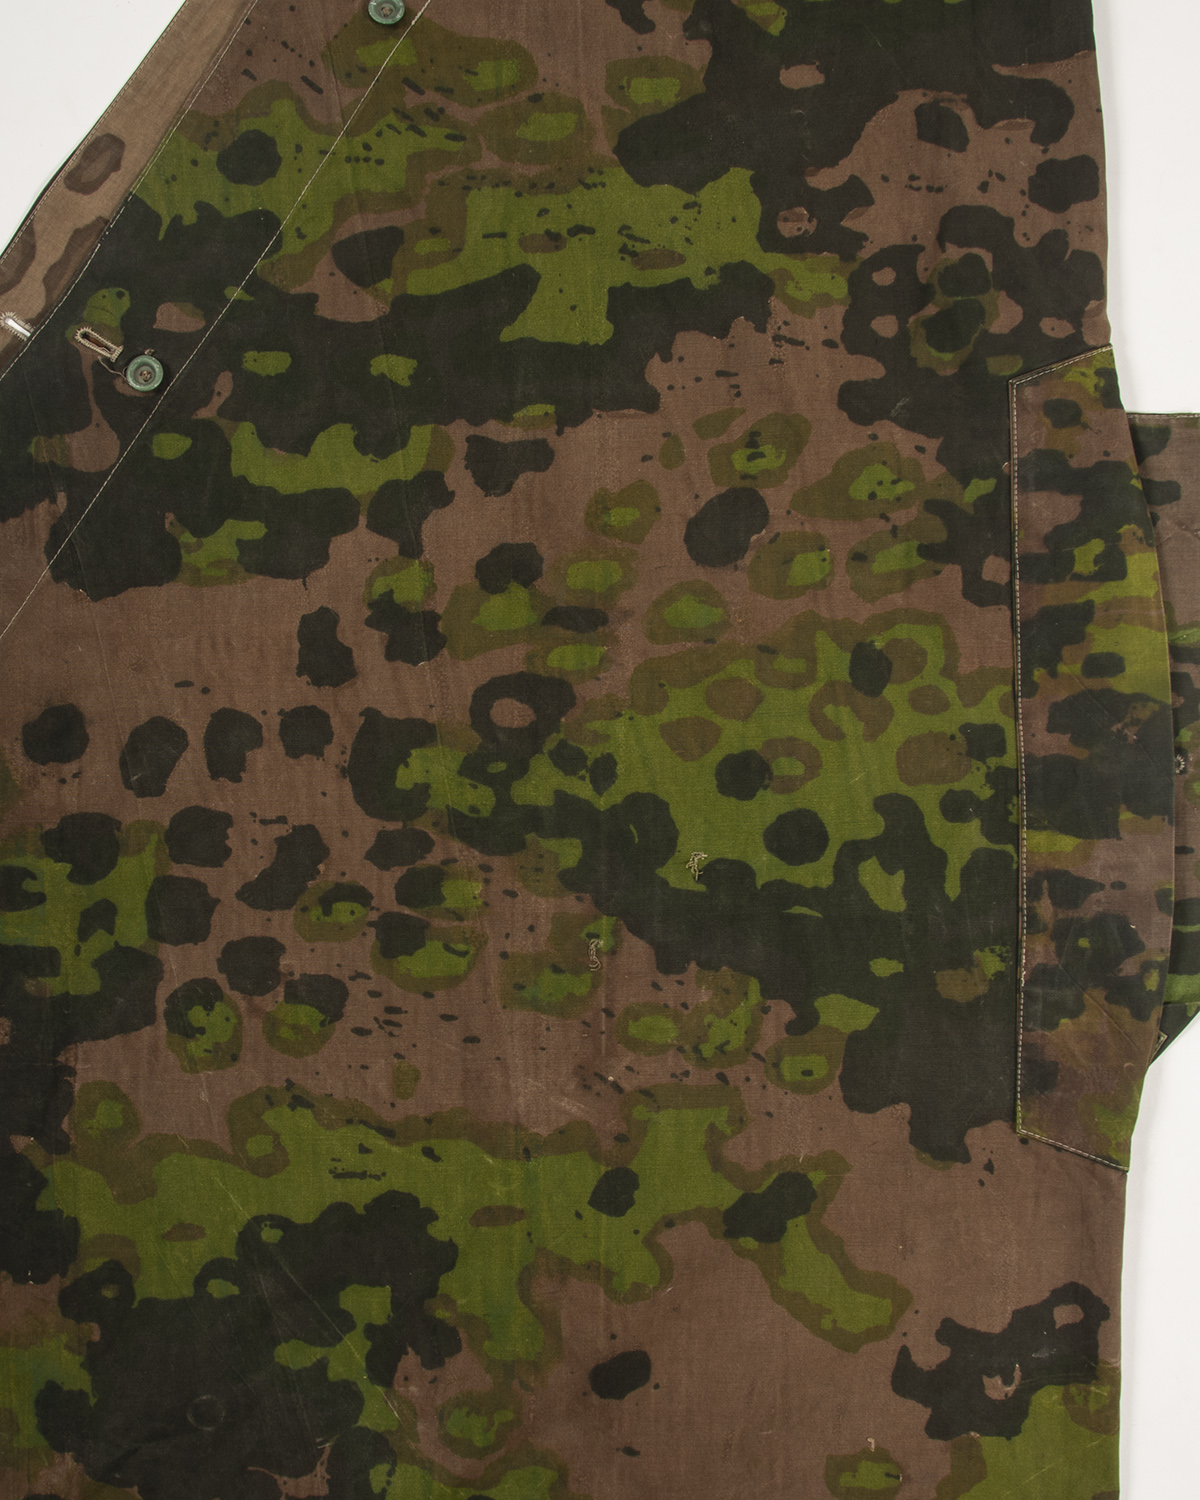
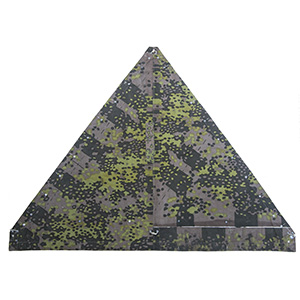
When assembled as designed, the numbers are located toward the bottom center of each Zeltbahn. In order for the camouflage to interlock when buttoned to other shelter quarters, they need to be cut and sewn following the cut lines in the pattern.
 |
 |
 |
|
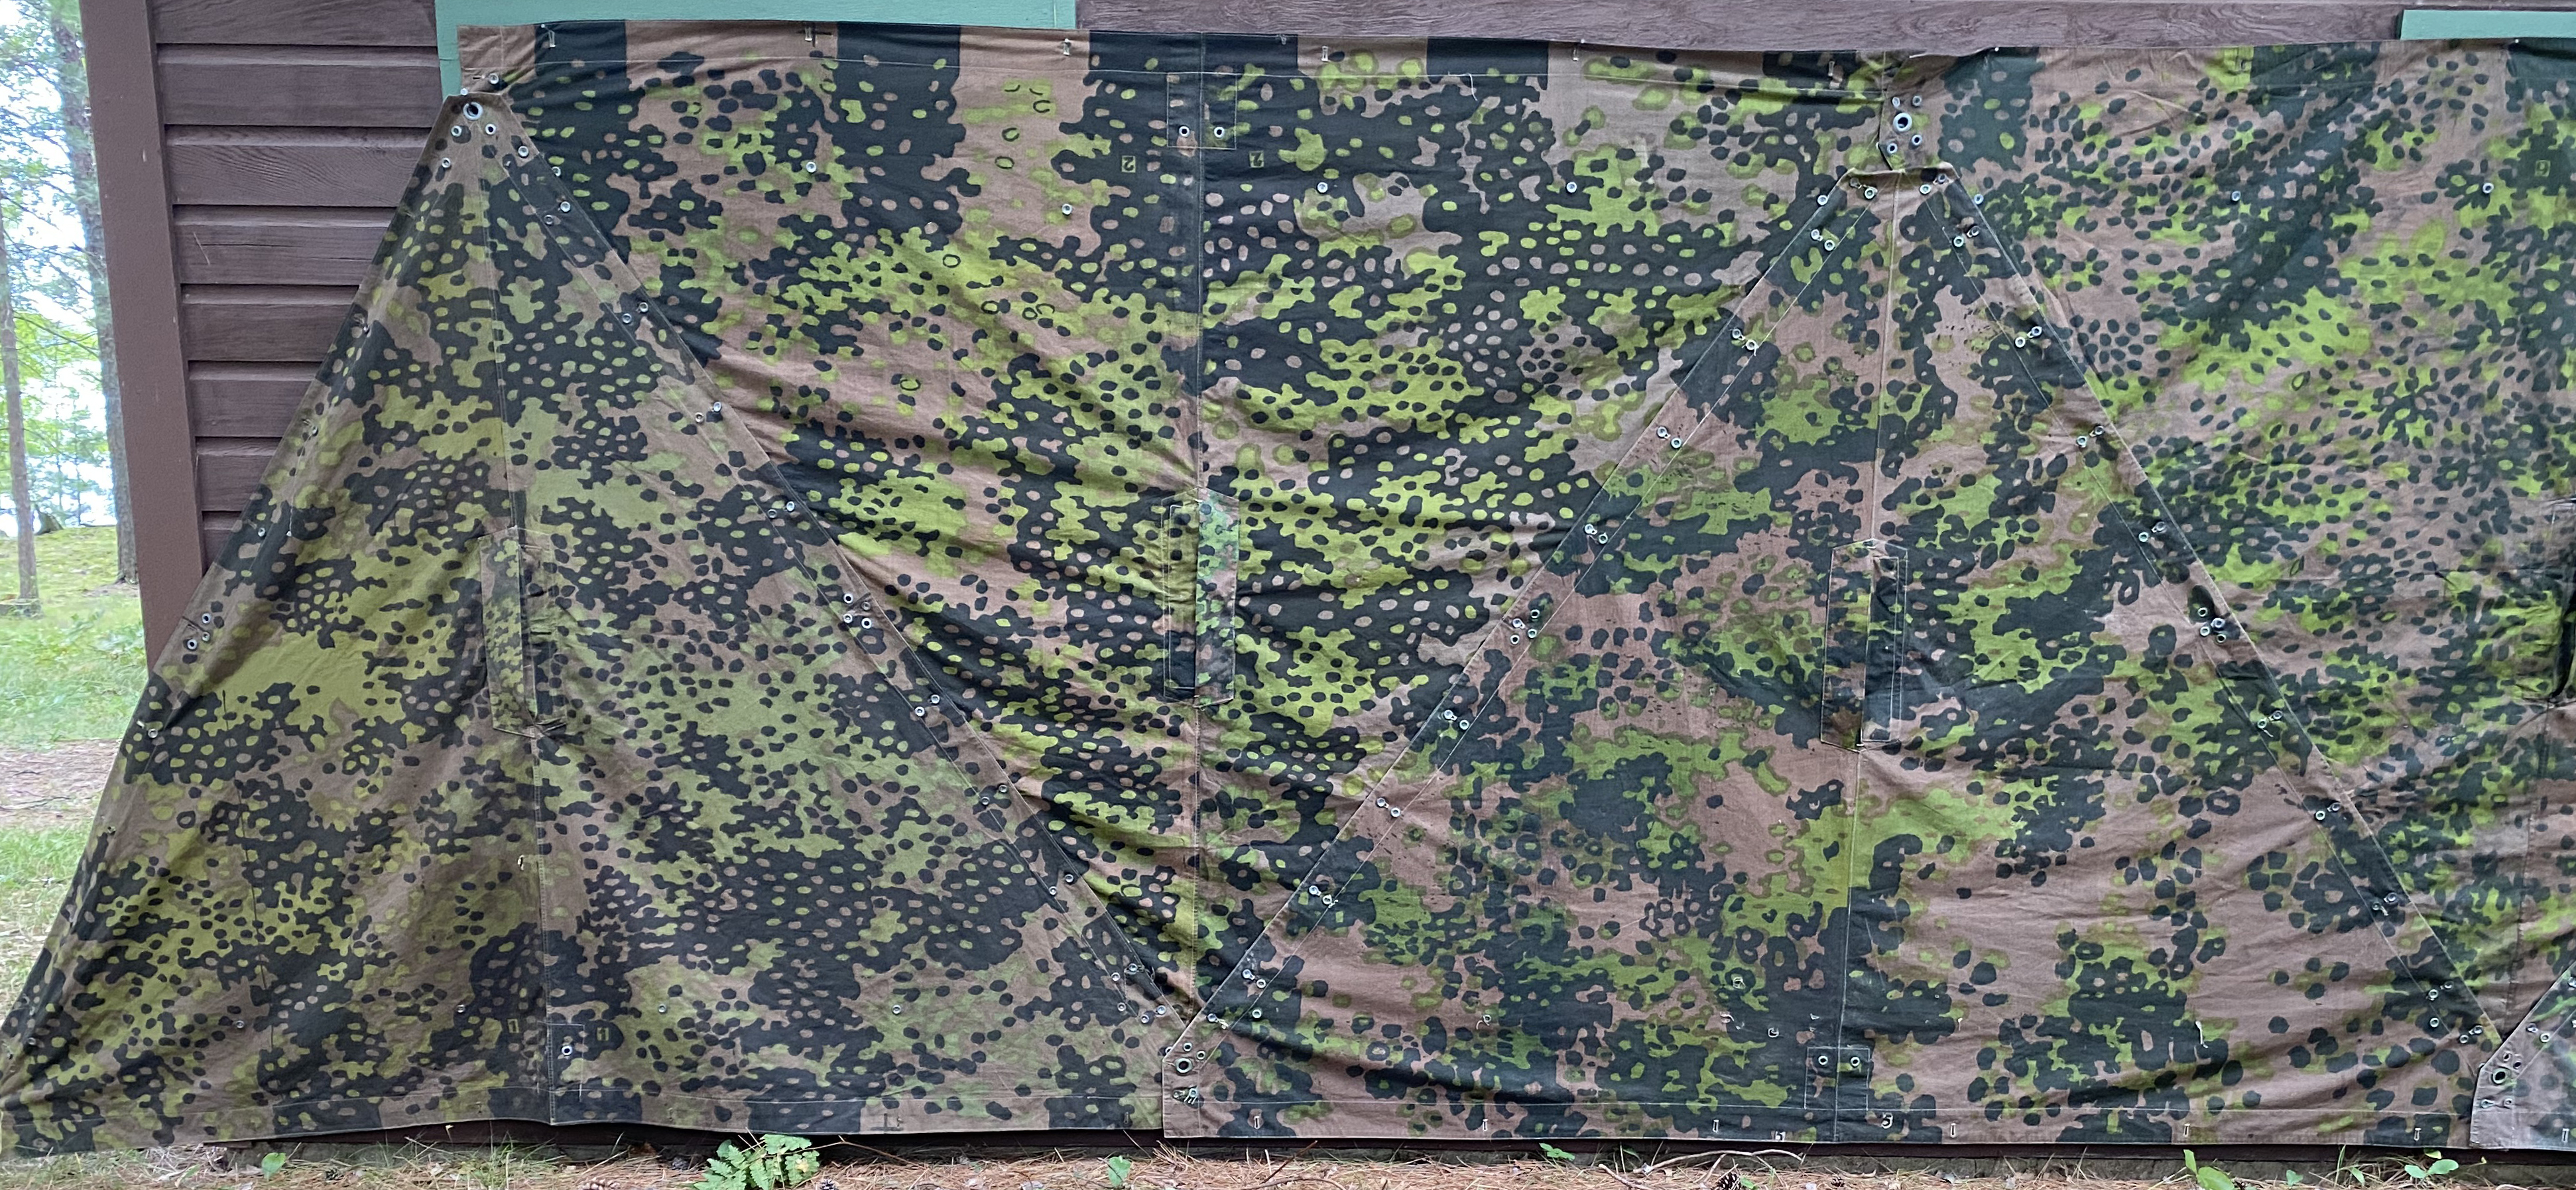
Planetree 1-2 Zeltbahn assembled with two
left side panels, with the left one not even cut
properly. |
Same Zeltbahn at left, Fall side |
“Overprint” 1-2 made from right and left
panels, but the cutting lines were dis-regarded |
|
Assembly- didn’t always go as planned: Inevitably, the contractors did not always follow the designers’ intentions when cutting and sewing Zeltbahns. It is not uncommon to encounter original Zeltbahns which were not assembled “as designed”. Hence I did not use the term “incorrectly” to describe this condition. Somewhat ironically, when this occurs, the regular arrangement of the cutting blocks is actually detrimental to the concealment effect as they tend to stand out.
Why three patterns? The answer, although not documented, appears to be self evident. Randomization and nearly total elimination of any visible repetition in the patterns. In one of the references in Mike Beaver’s book, it says that Schick was given free reign to create the best camouflage possible, irregardless of cost since lives were at stake. The number and style of these patterns basically means that among a platoon of troops wearing planetree smocks and helmet covers, the chance of any two men having identical garments is nil. Brilliant, ingenious, but a logistical nightmare.
Printing: Rotary printing had recently been developed, but it was not possible to create and utilize rollers with a circumference of 7 feet. The only way to achieve Schick’s goal of a pattern large enough that did not repeat on the Zeltbahn, was via the much slower method of flat screen printing. Rotary printing is infinitely more efficient- one can print thousands of meters per day as opposed to perhaps a few hundred at best with the hand operated flat screen method. Even today, the largest rollers available are about 24 inches in circumference. Once the War began, and the Waffen SS exploded from 18,000 troops to hundreds of thousands, rotary printed patterns had to be developed in order to keep pace with the supply needs. Despite this, the Planetree patterns appear to have been produced until the end of the War.
Rainbows of colors: All original German camouflage patterns exhibit a wide range of shades. Yes, there were surely color standards. However, the dyes were likely hand mixed, and even a slight deviation from the color formulas can cause notable variations. On some examples, it’s apparent that the dyes were too thin- with substantial bleeding around the edges of the colors, or extremely pale shades when too little pigment was in the mix. Additionally, as the War went on, the fabric quality varied. Changes in the fiber content as well as poorly prepped fabric can cause a number of printing irregularities.
|
 |
|
|
Note the substantial differences just in the numbers. |
|
Variations in the pattern- hand painted screens: If one compares two camouflage of the same pattern, small variations in the pattern will be apparent. This is due to the screens
being made manually with drawing fluid. Essentially, the reverse of each color was painted onto the fine mesh to create as stencil. Occasionally, on samples where the dye was the proper viscosity and the screen pressed tightly on the fabric, one cane actually see the brush marks at the edge of the color blocks made when the worker was creating the mask.
Thus, even two apparently identical items, same maker and year,
will show minor differences in the pattern if you lay them right next to
each other and compare point to point. They tend to be 85-95%
identical, but some spots are bigger or smaller, a few may be missing
and the cut blocks sometimes aren’t staggered very much. Roller patterns
are the same way. This is also why 44 dot has “big & small” dots.
Different screens created by different hands at different times. Hans painted outside the lines while Franz went inside the lines = a substantial variation in small spots.
Also, the ink was sometimes thinned more causing more bleed- ie:
fatter numbers softer edges on the blobs and so forth. Like the top
zelt in the pic below.
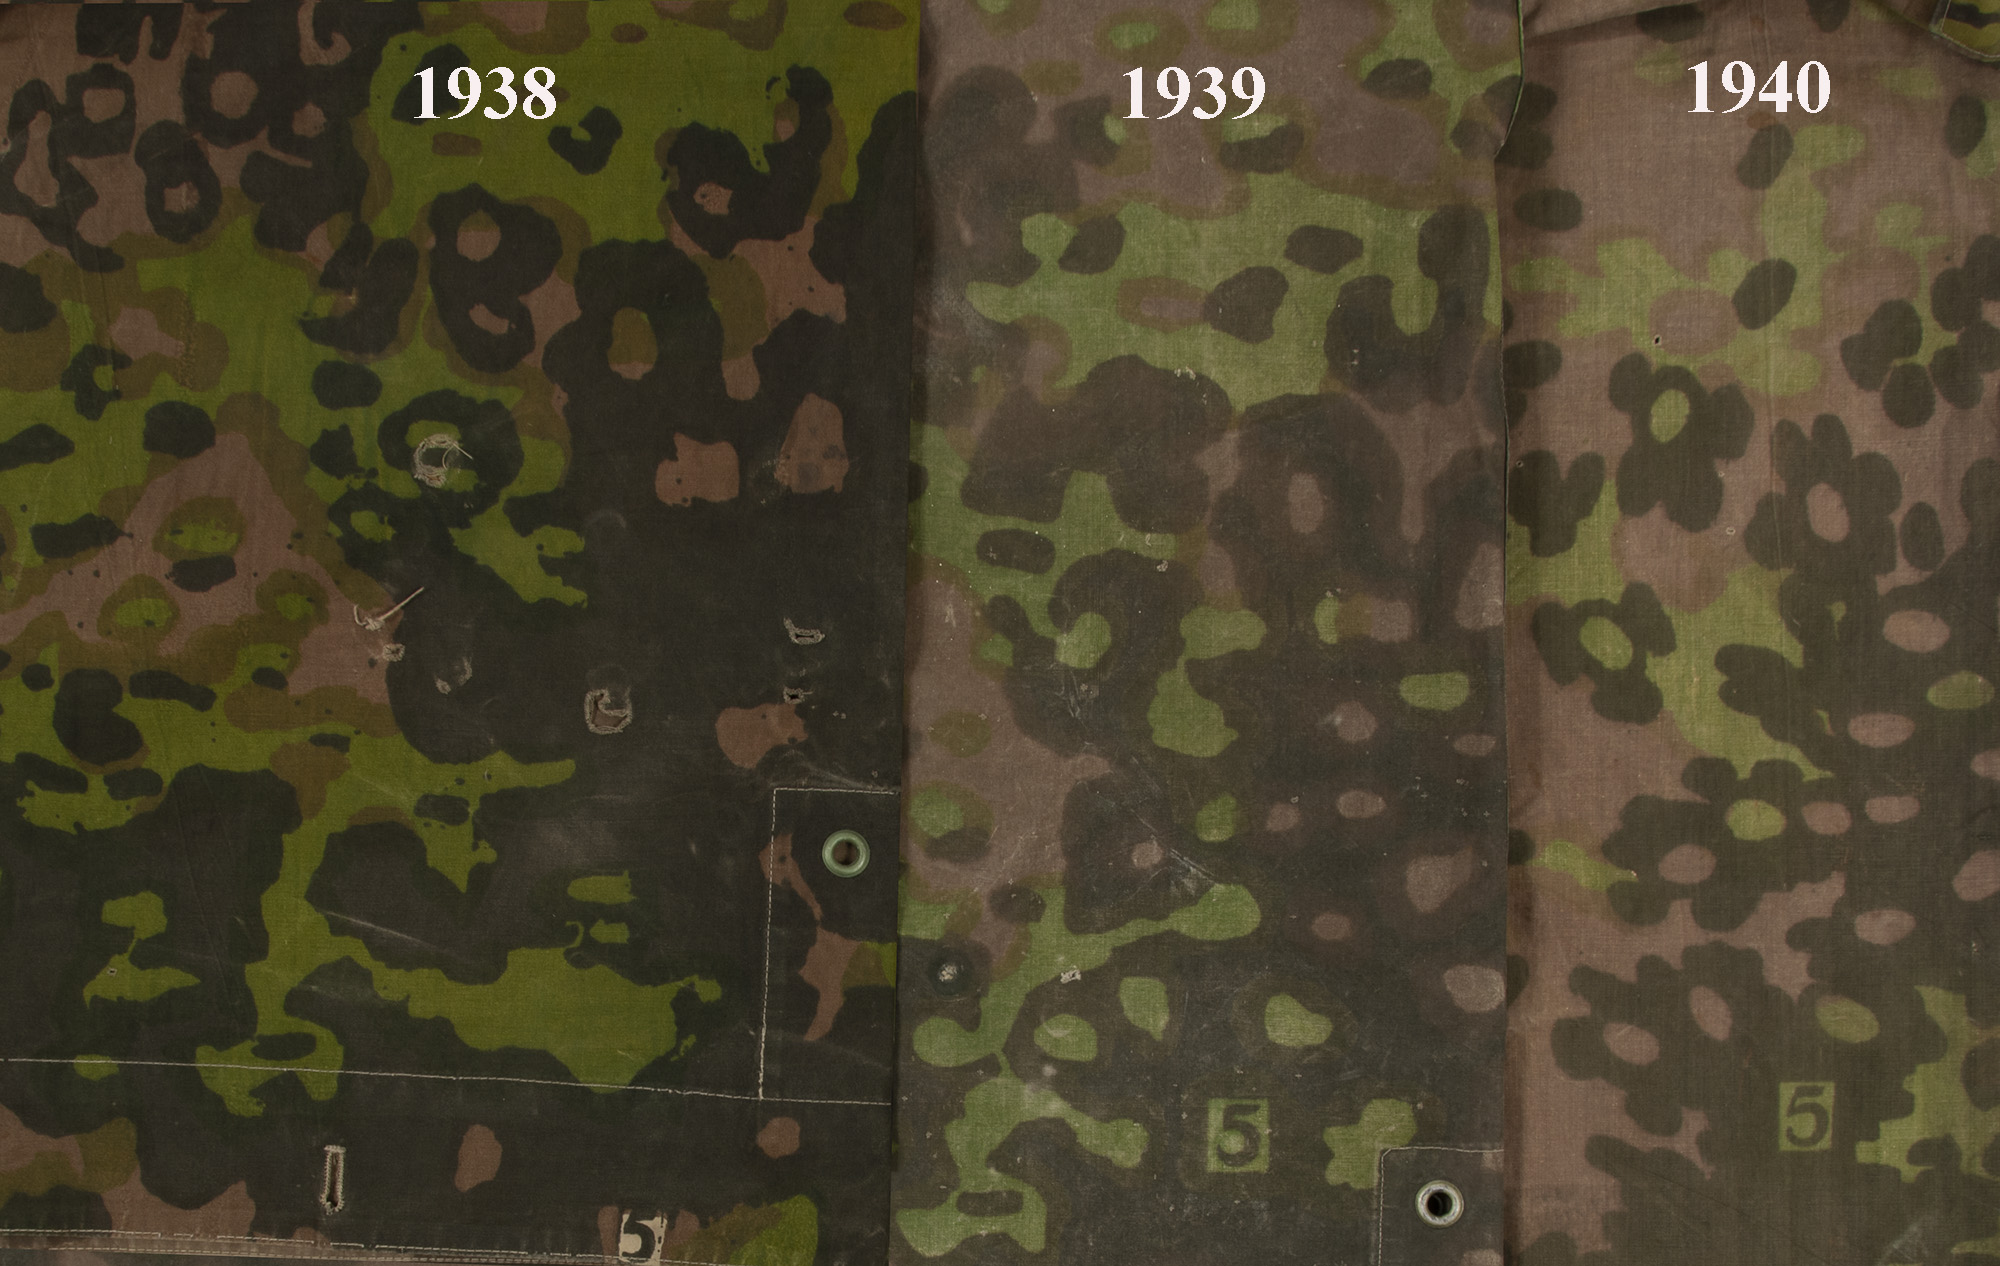
Transitions: In addition to the variations with individual screens, the patterns were constantly being changed, adjusted and improved. There is a distinct trend of breaking up the larger color blocks as time went on. Pre-war renditions of the patterns have larger areas of open color with no blobs or spots. That said, when compared year over year, the lineage is very clear.
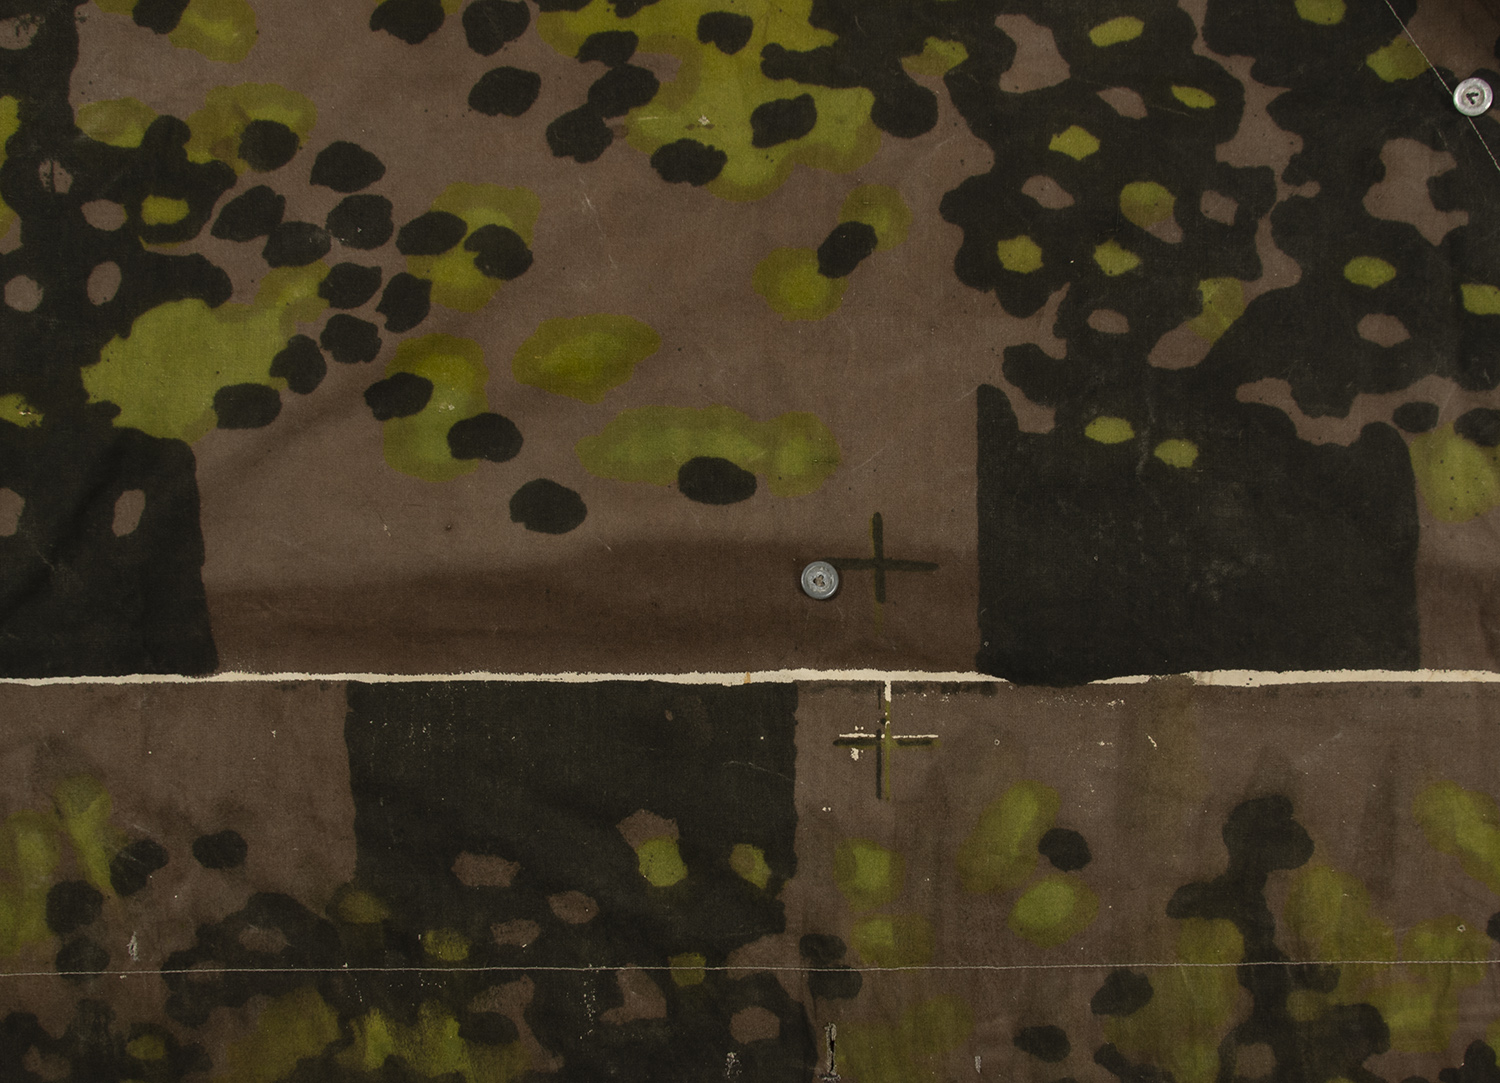
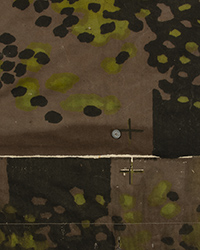
The little crosses: Each flat screen pattern incorporates register marks- small crosses to allow the printers to align the screens so the colors overlap properly. They are typically positioned in the middle and on each side of the artwork.
 |
 |
 |
Planetree 5-6 diagonal cut
lines. |
Planetree 1-2 bottom & diagonal
cut lines, plus register marks. |
Later checkerboard diagonal
cut lines, Overprint 1-2. |
Cutting: The design of the shelter quarter panels was incorporated into the camouflage patterns. The bottom lines were indicated by staggered blocks and the diagonal edge used dashed lines. On later screens, this was often changed to staggered blocks as well.
 |
|
|
The classic miss- the screens
weren’t aligned quite right from
one repeat to the next. |
|
|
Misses: Often one observes white lines or streaks on period Planetree camouflage. These are simply due to the screens not having been placed perfectly over the fabric during printing, leaving a small area without dye. It most frequently occurs at the joints where each repeat meets (along the top or bottom “cut blocks” but can also occur along the sides or anywhere the fabric had a crease or fold.
| . |
 |
. |
| . |
Dribble, dribble, messy, messy…. |
. |
Drips & Smears: When the workers lifted the screens to move to the next panel, dye often dripped off the bottom leaving dibbles on the fabric. Likewise, the screens occasionally had ink spilled on the bottom surface which was then transferred to the next panel, leaving a vairety of smudges or smears.
Screw ups: Occasionally, screen errors are encountered. These range from colors swapped between screens (which leads to some very odd looking prints), to wrong panels or numbers on the reverse sides and, in several cases, different patterns being printed on the Spring and Fall side. These were done by hand, likely under pressure and possibly by workers who were less than motivated.
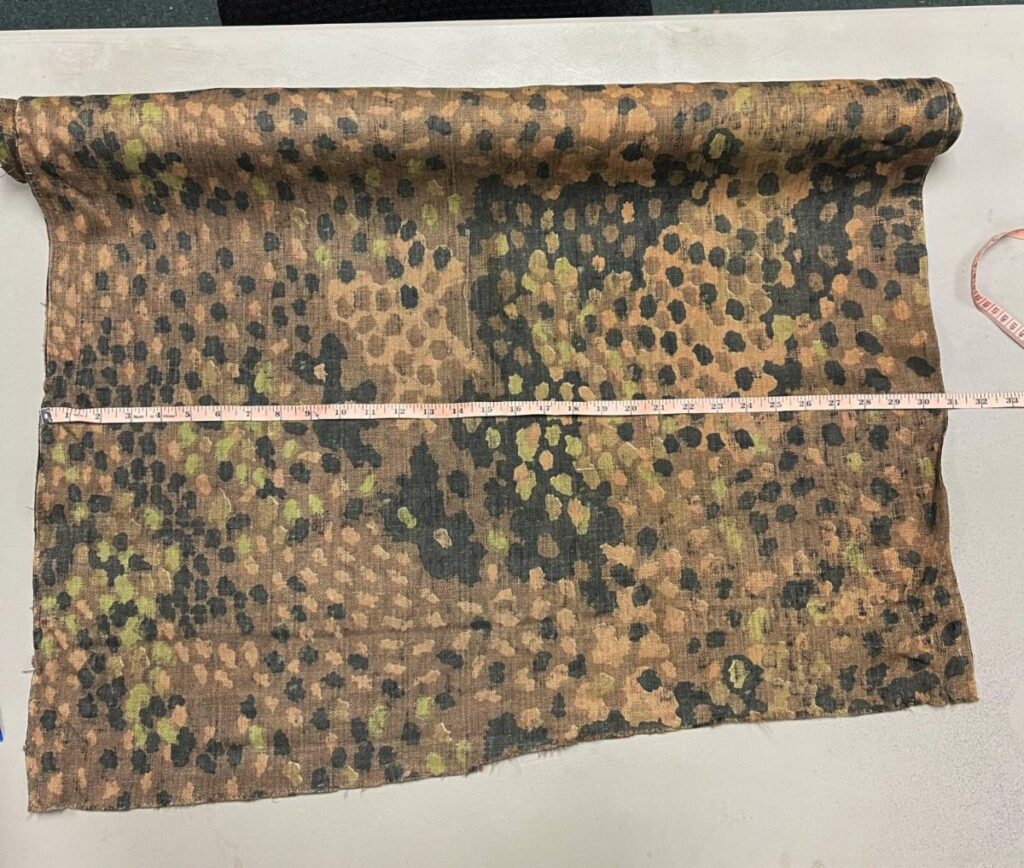
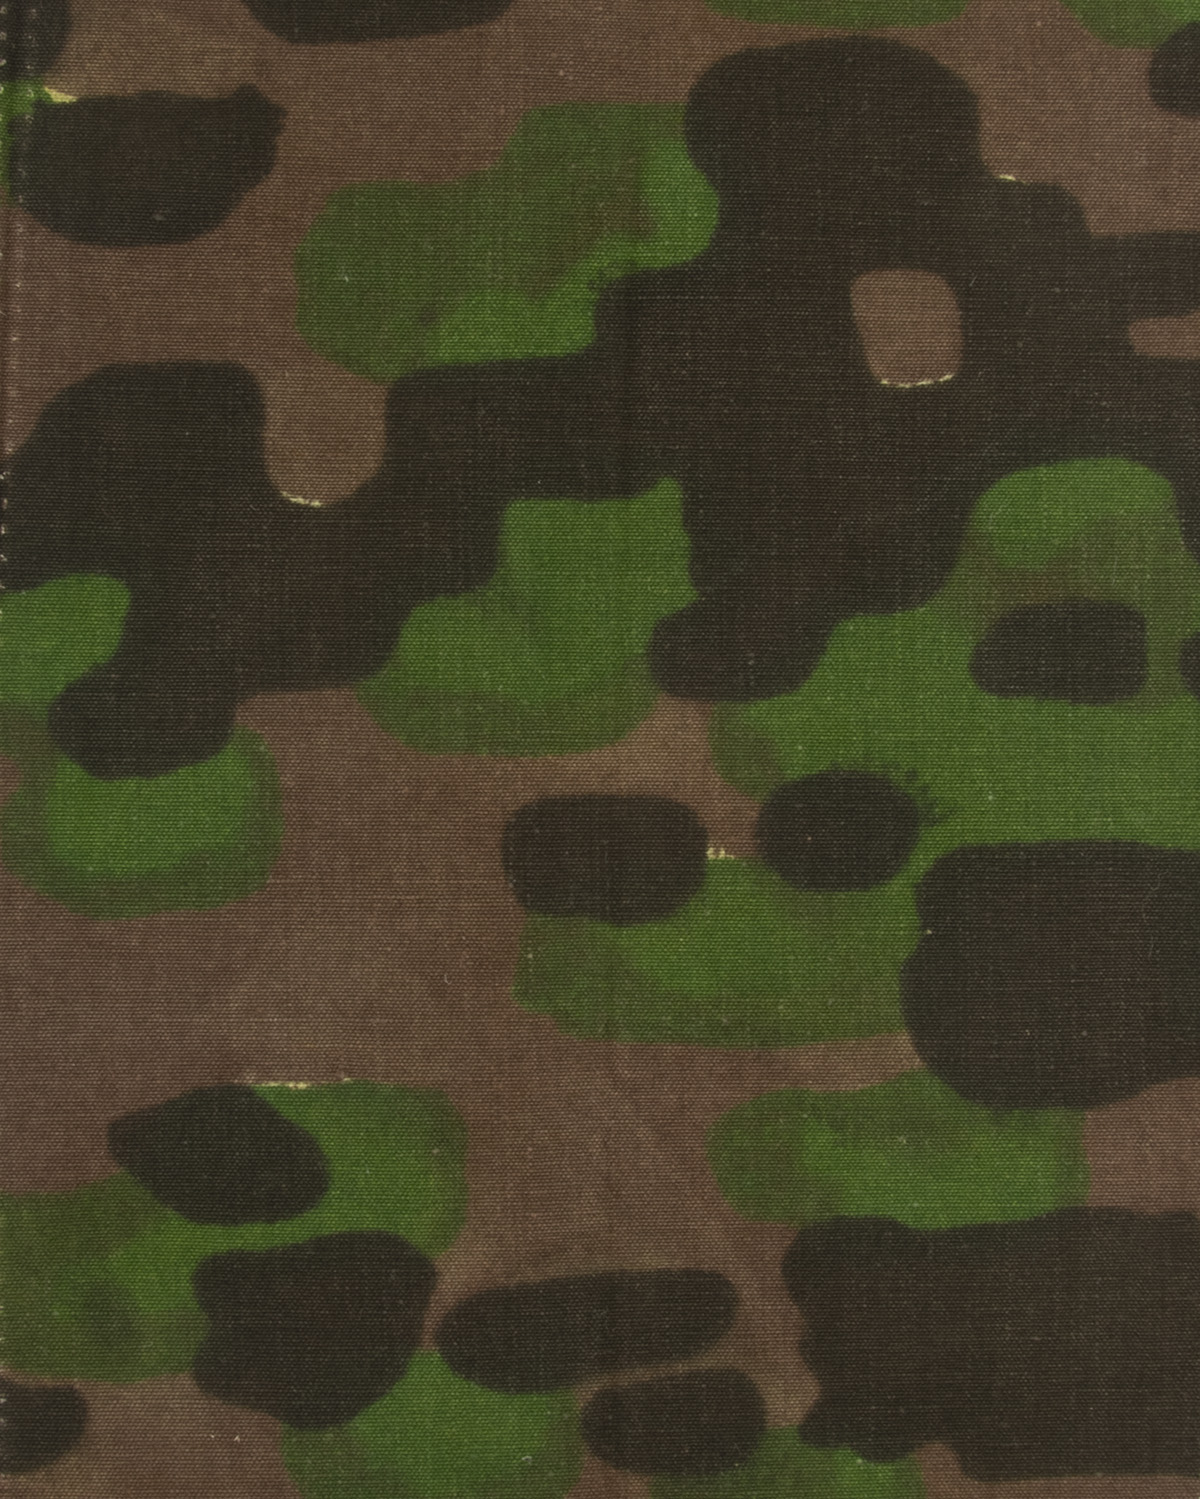
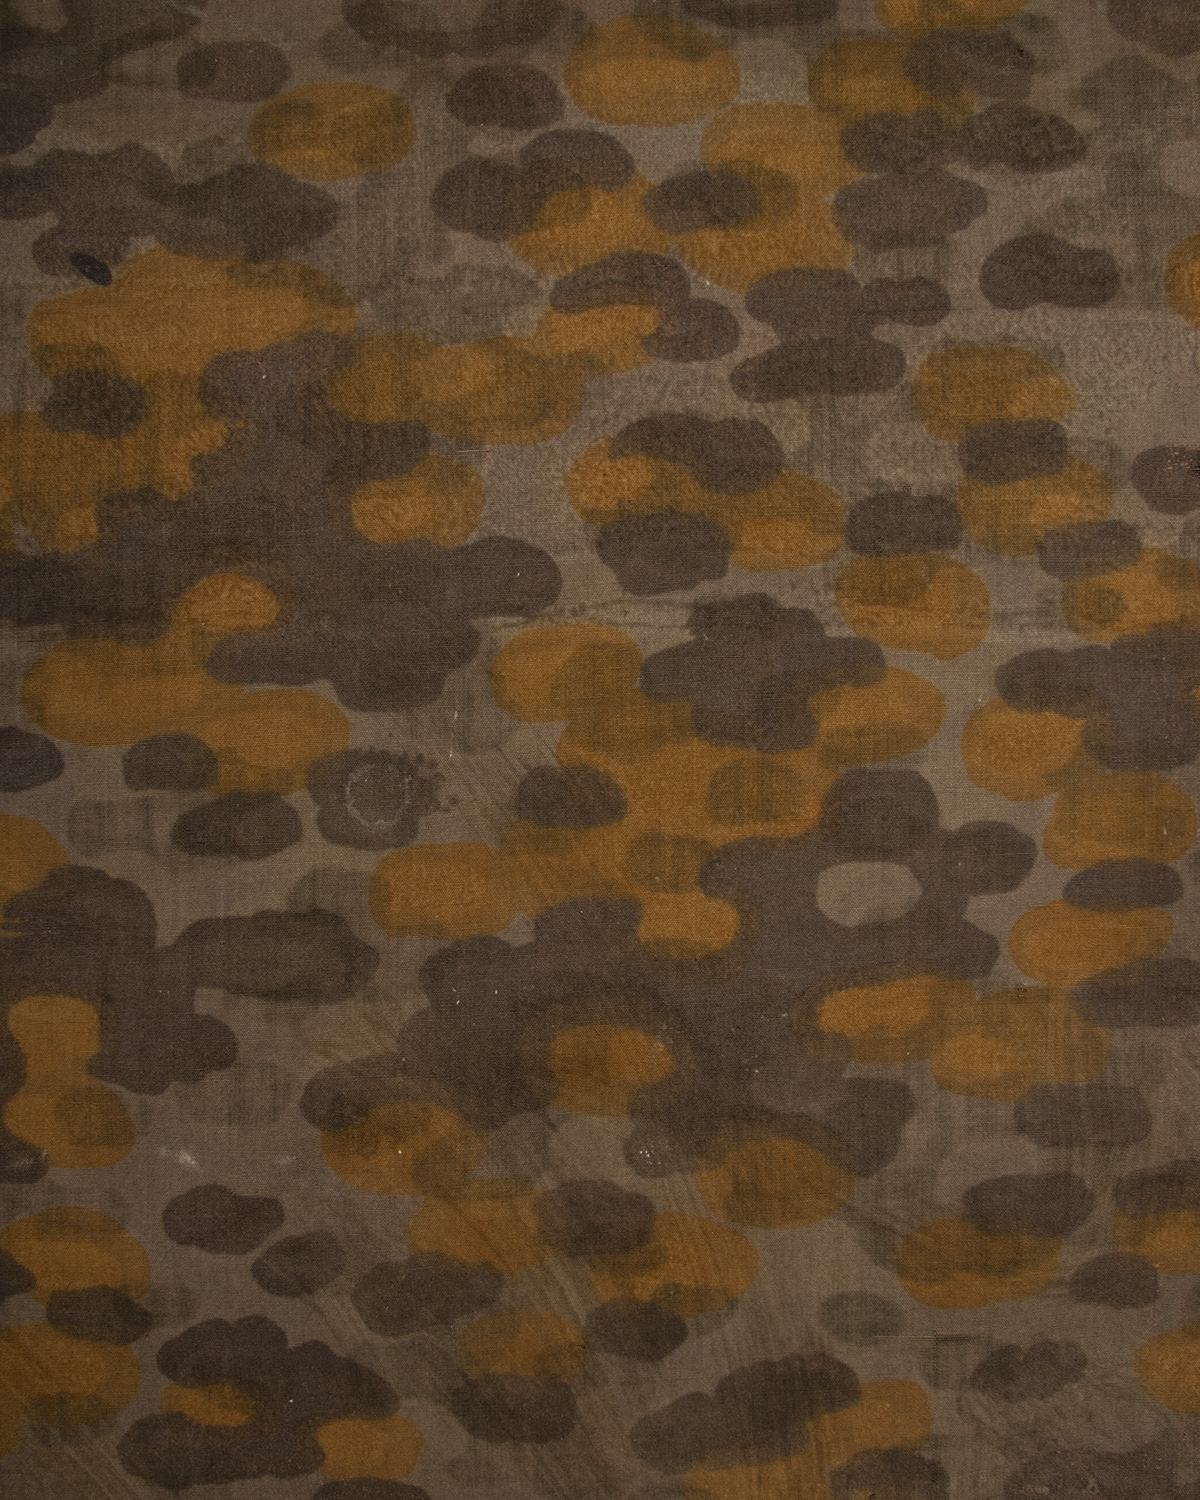
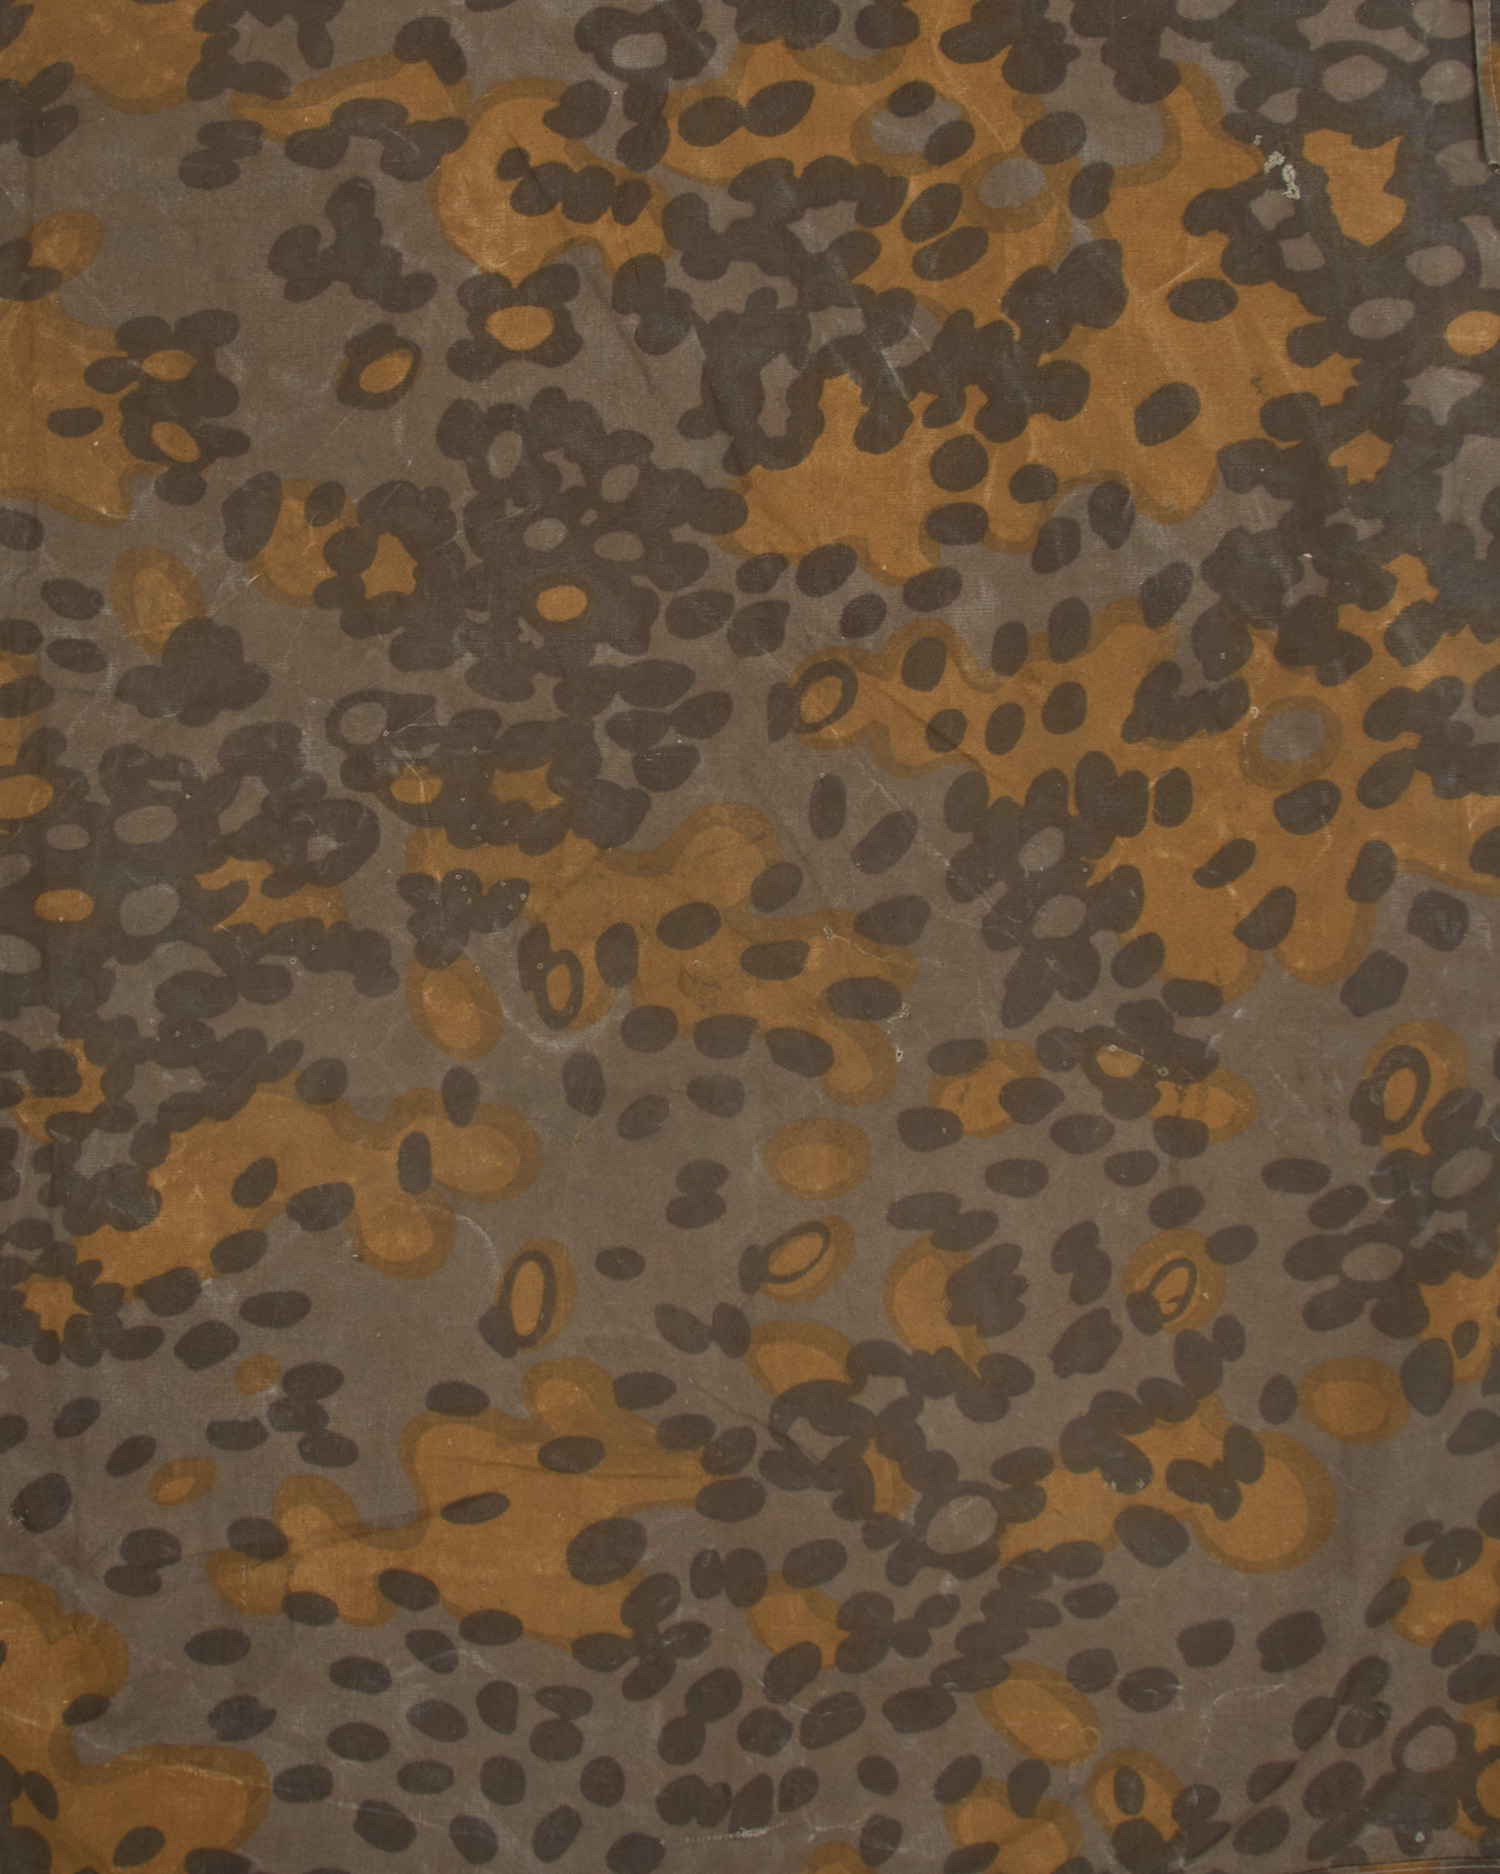
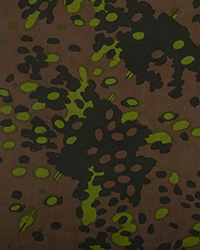
The other Planetree Patterns- No numbers: There are four other “Planetree” patterns without numbers and cut lines. The first two are Lateral and Polyspot (early & late variants). Although also printed with flat screens, their repeat is much smaller- about 30 inches- which just happens to be the distance from shoulder to hem on a smock. Given the effort put into the numbered designs to avoid a repeat on shelter halves, I find the size of these patterns to be too convenient to be a mere coincidence. I’m confidant that these designs were designed to be used for smock production.

Lateral, Spring Colors |
Polyspot, (Late) Spring Colors |
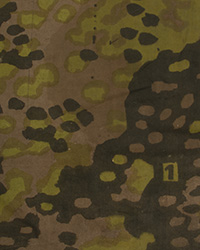
Un-numbered 5-6, Spring Colors |

Lateral, Fall Colors |
Polyspot, (Late) Fall Colors |
Un-numbered 5-6, Fall Spring |
Lateral appears as early as 1937 (as small parts on numbered Planetree Zeltbahns), and early style helmet covers (usually with hand tacked spring tops). One or two M38 smocks are known to exist. I consider it highly likely that some complete shelter quarters were manufactured in Lateral (due to it’s presence on shelter quarters) but to date, no surviving examples have been photographed.
Polyspot is likewise rather rare, with a handful of smocks, covers, caps and shelter quarters known to exist. All of these appear to be of 1940-43 manufacture.
The third pattern retains the large repeat of the numbered designs, yet it dispenses with the blocks and cut lines entirely. It’s appearance is strikingly similar to the 5-6 Planetree pattern- thus collectors refer to it as “Un-numbered 5-6”. The pattern does not repeat meaning it’s also 5ft x 7ft. I suspect this was an attempt to create a design that didn’t require right and left patterns and all the special cutting efforts while still maintaining the camouflage effect. It does not interlock with the other patterns. Likewise uncommon, a handful of original examples of M42 smocks, shelter quarters and helmet covers exist
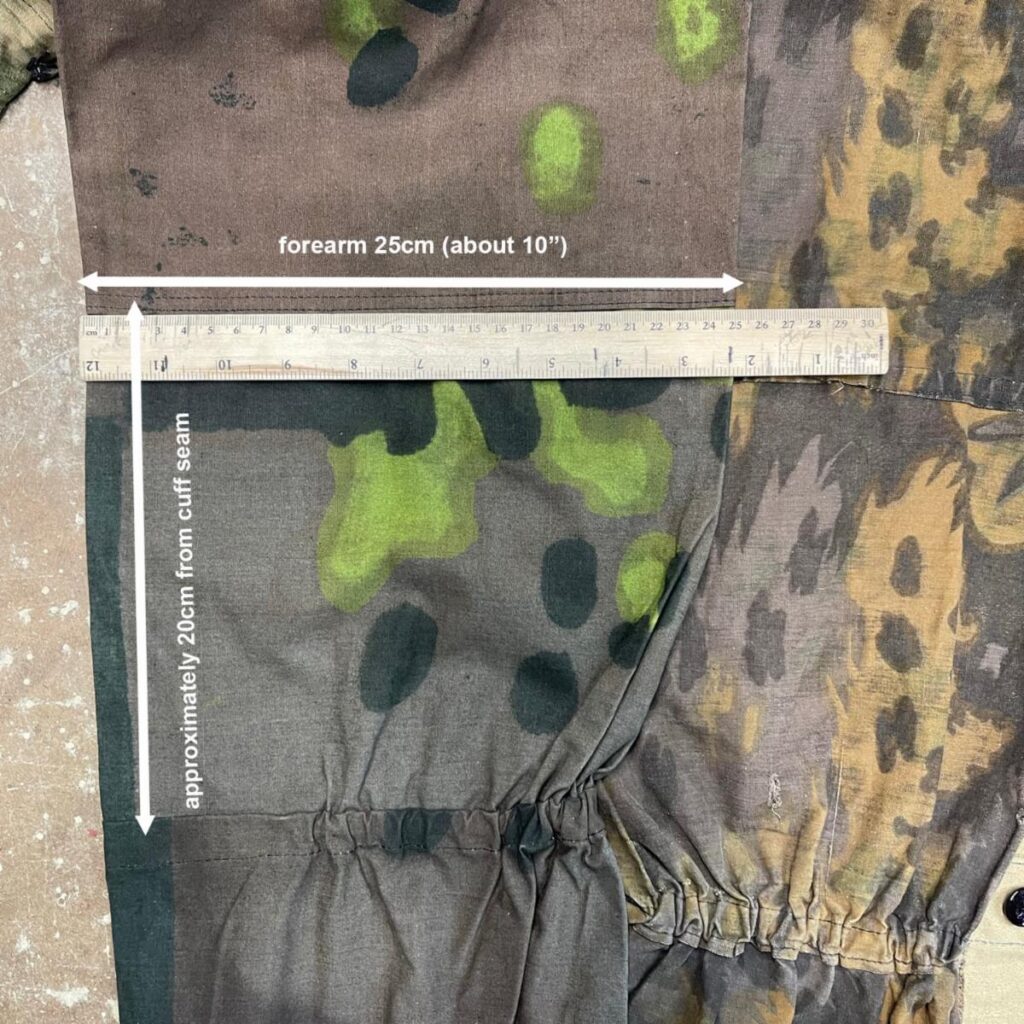
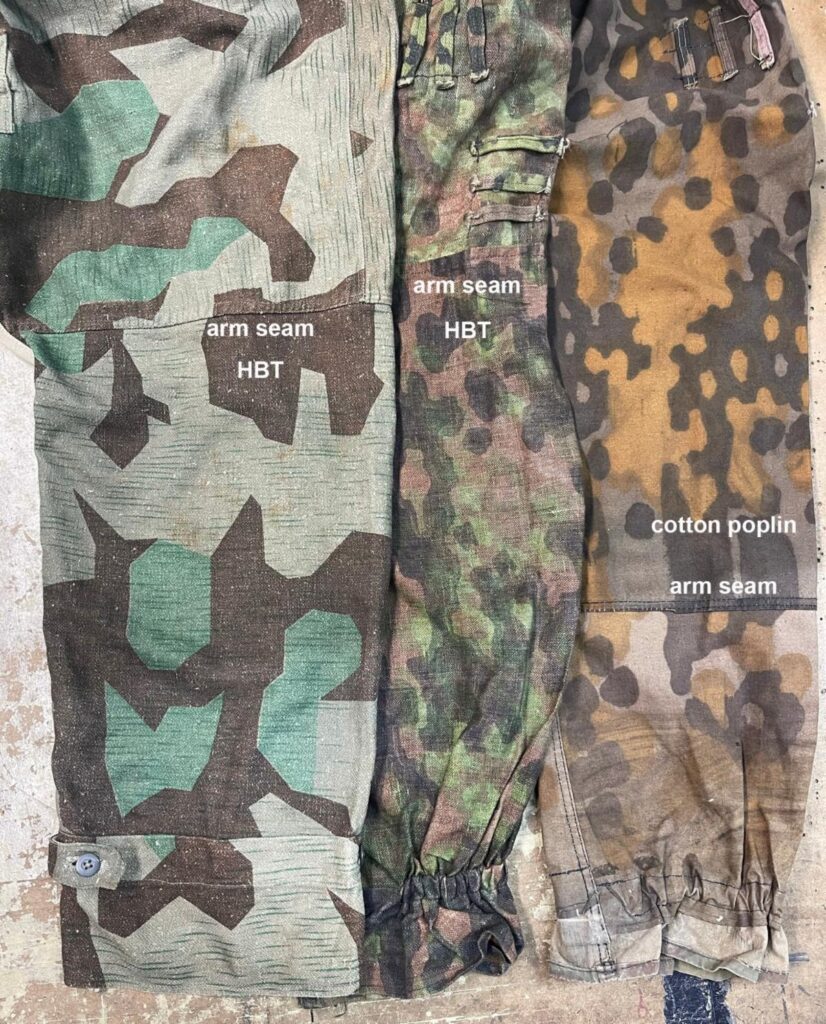
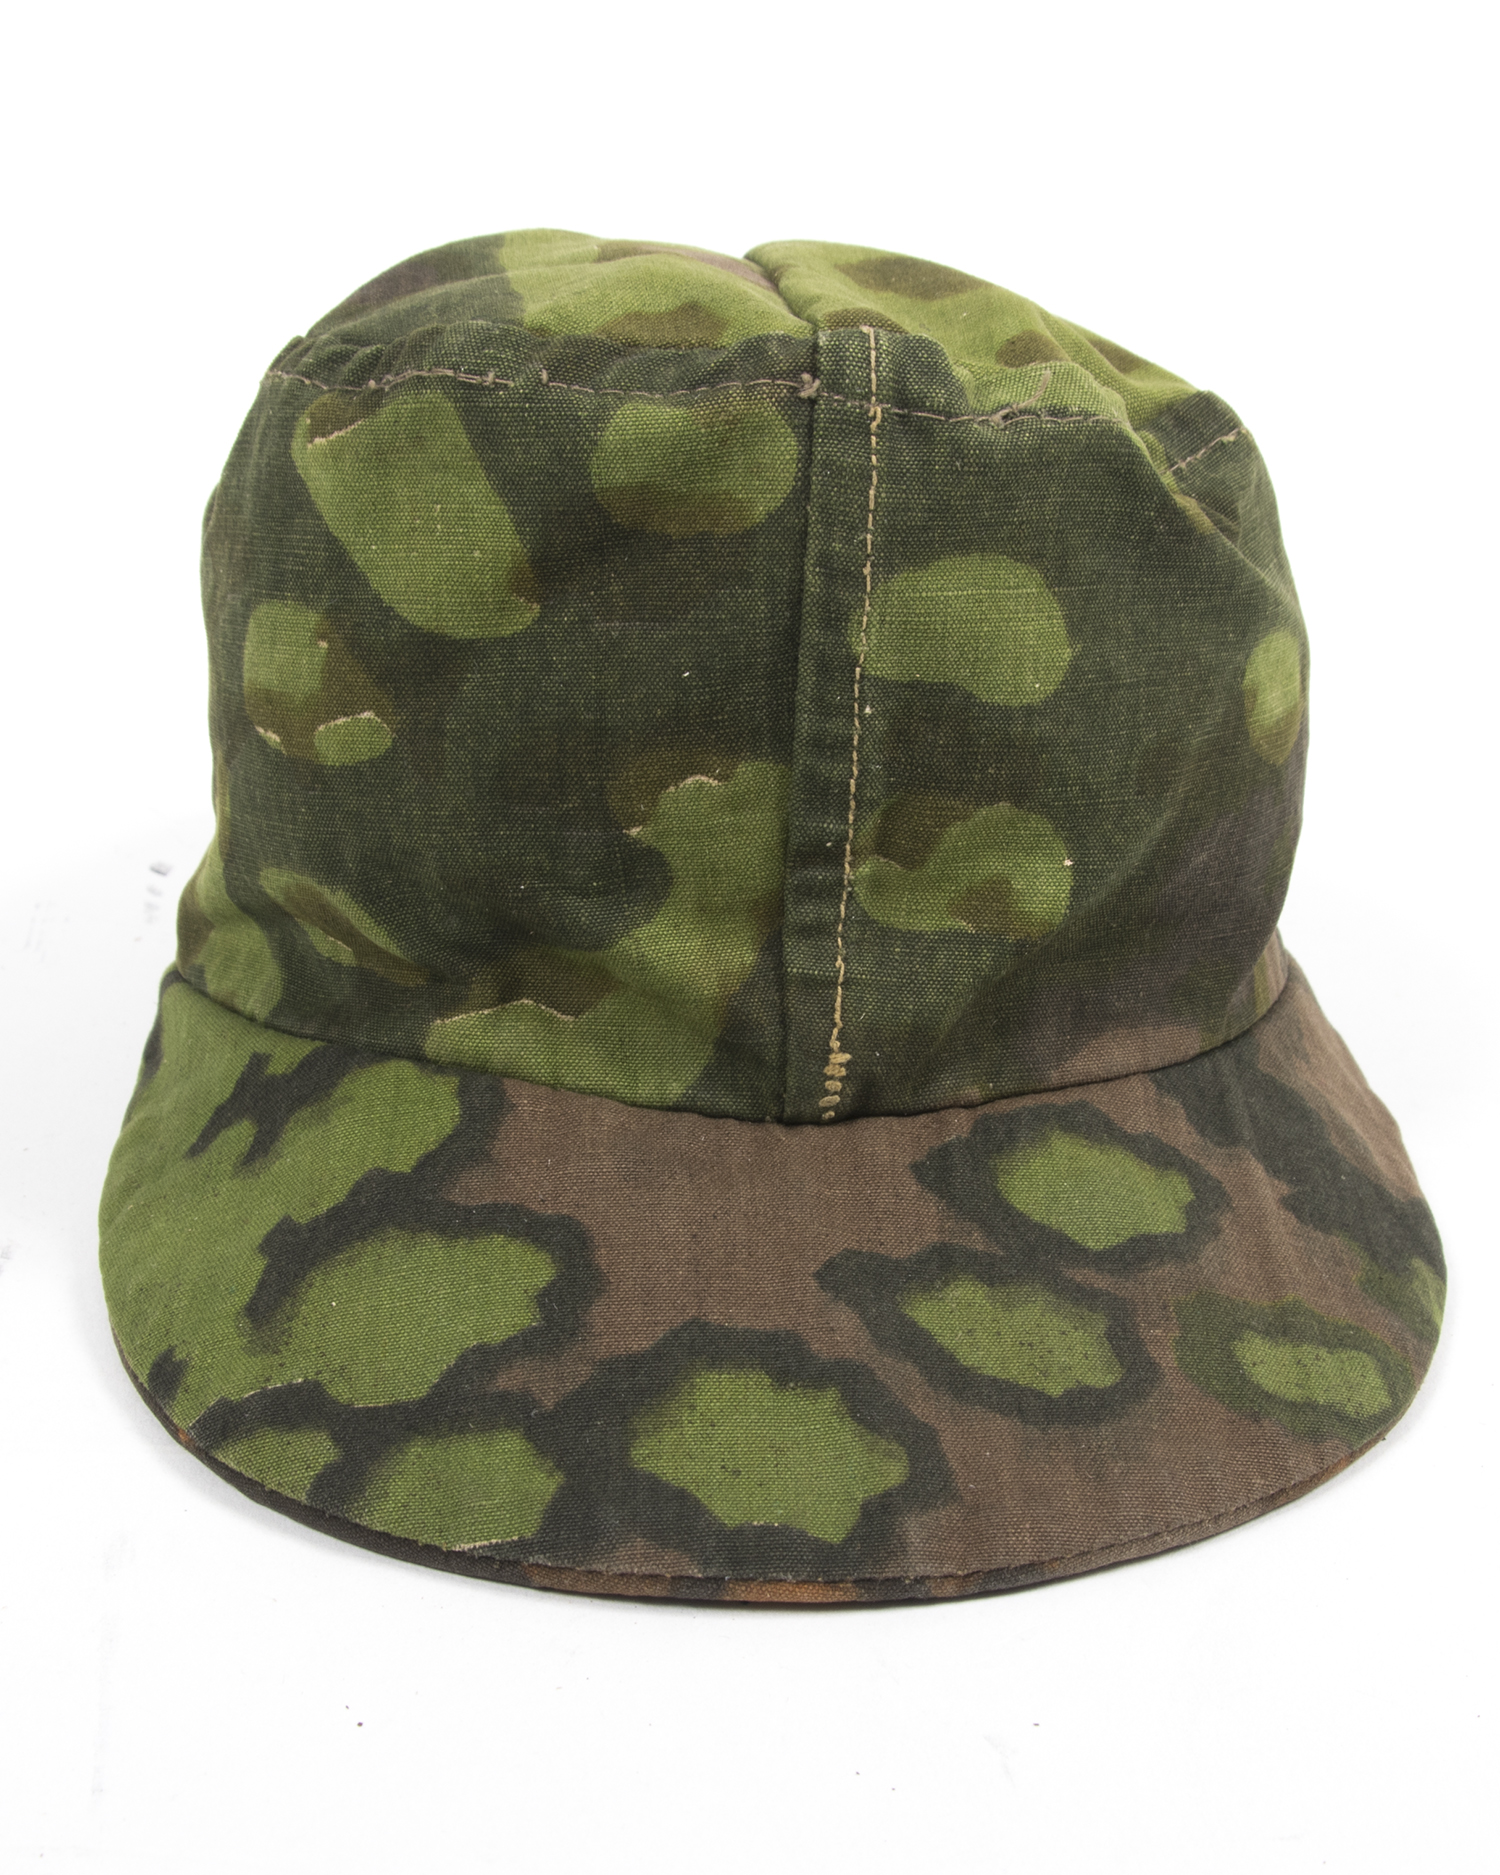
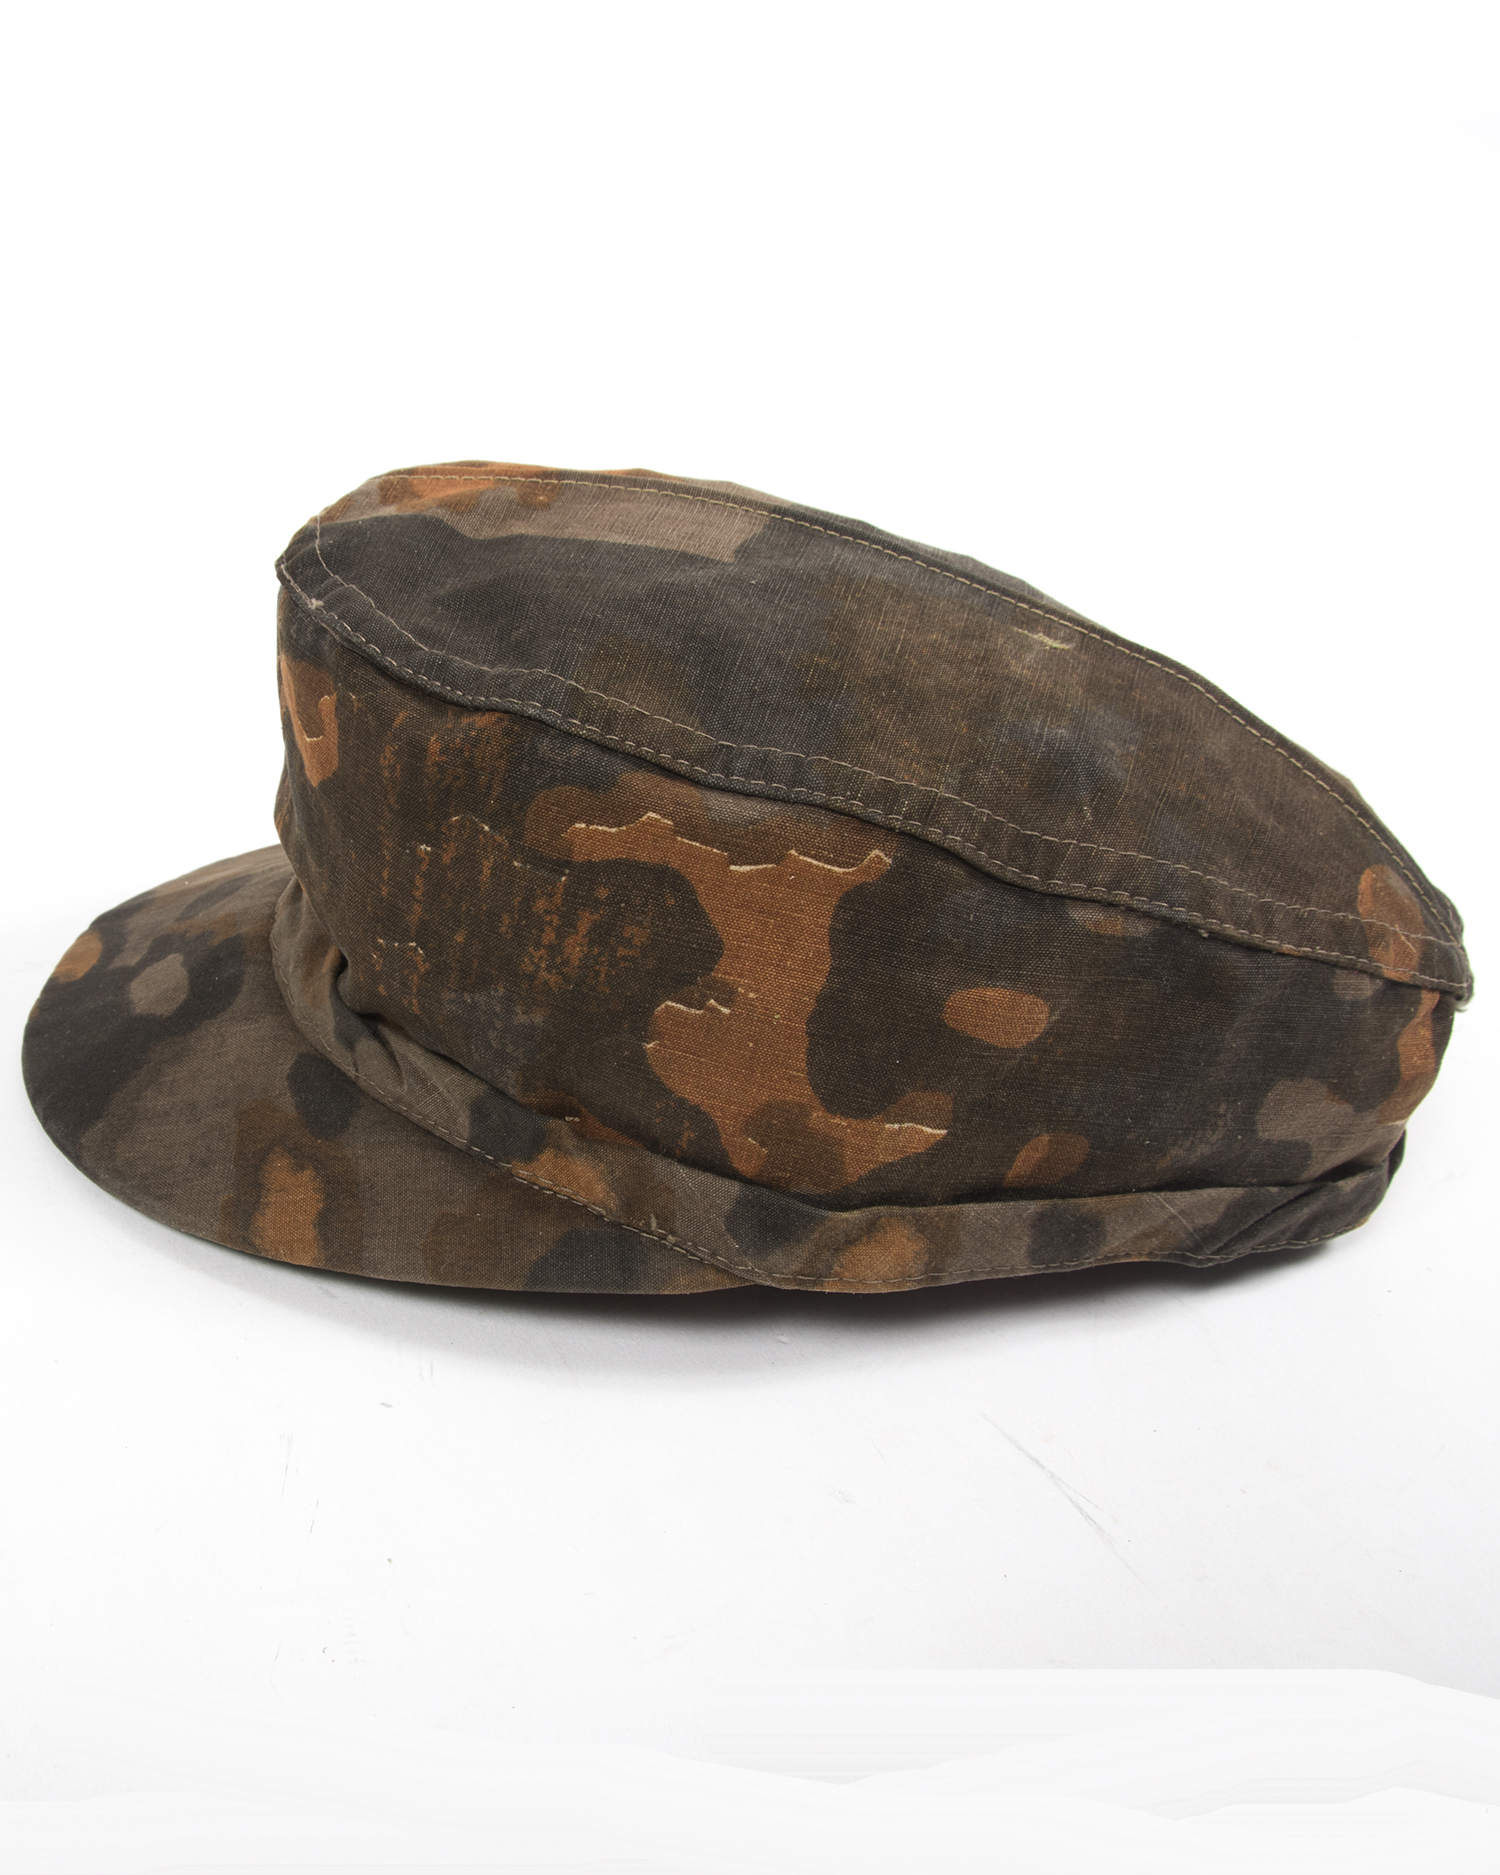
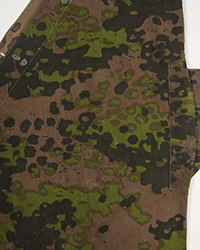
Garments: All of the planetree patterns, both with and without numbers, were used in the manufacture of caps, helmet covers and the famous Tarnjacken. The original intent may have been to reserve the numbered patterns for shelter quarters but it obviously did not last long. The cut lines and blocks were of no concern when making garments and the fabric was stacked and cut like any other.

 This is the last installment on the ins and outs of the most expensive helmet decorations in the universe.
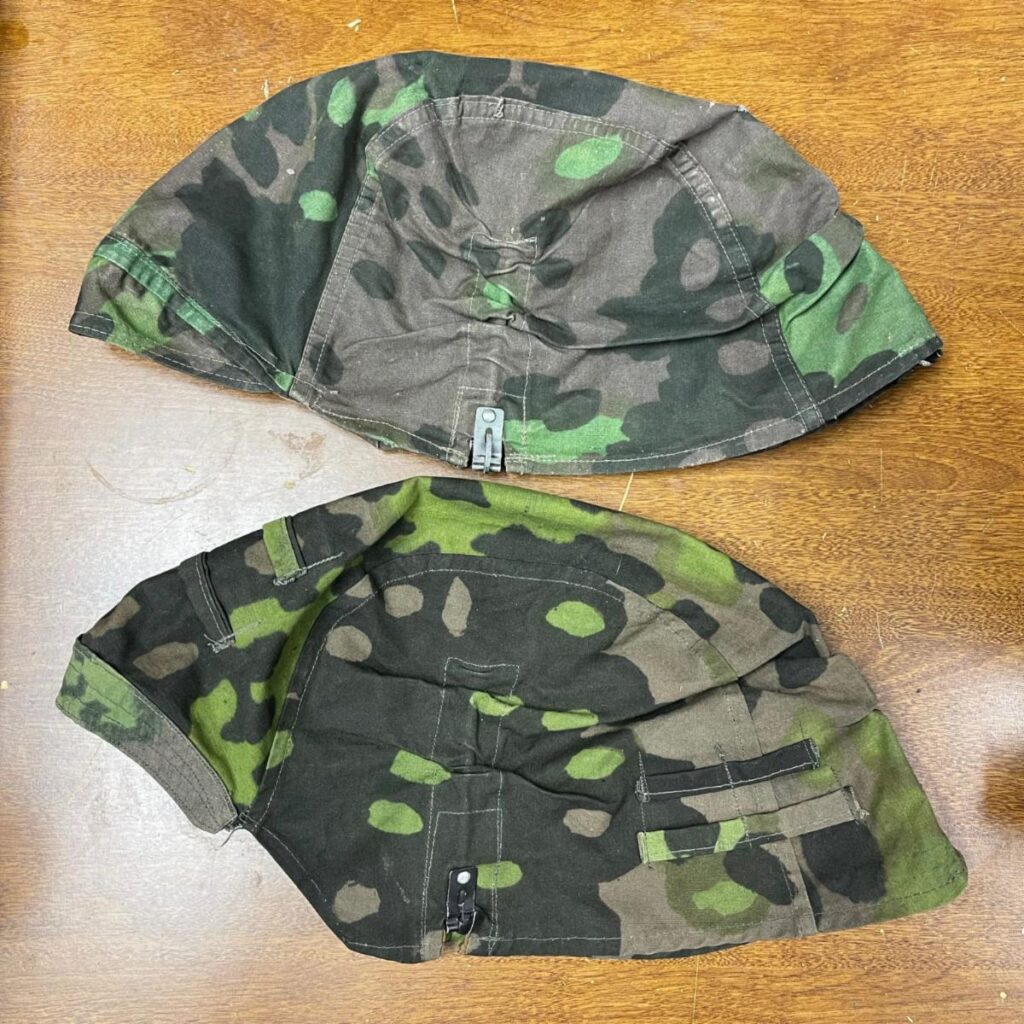
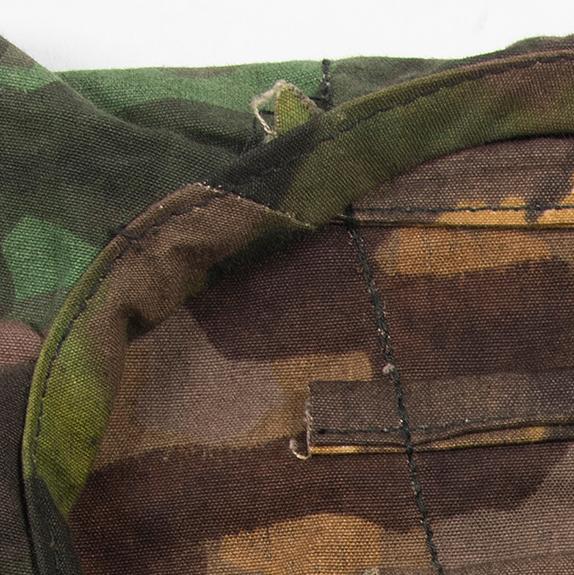

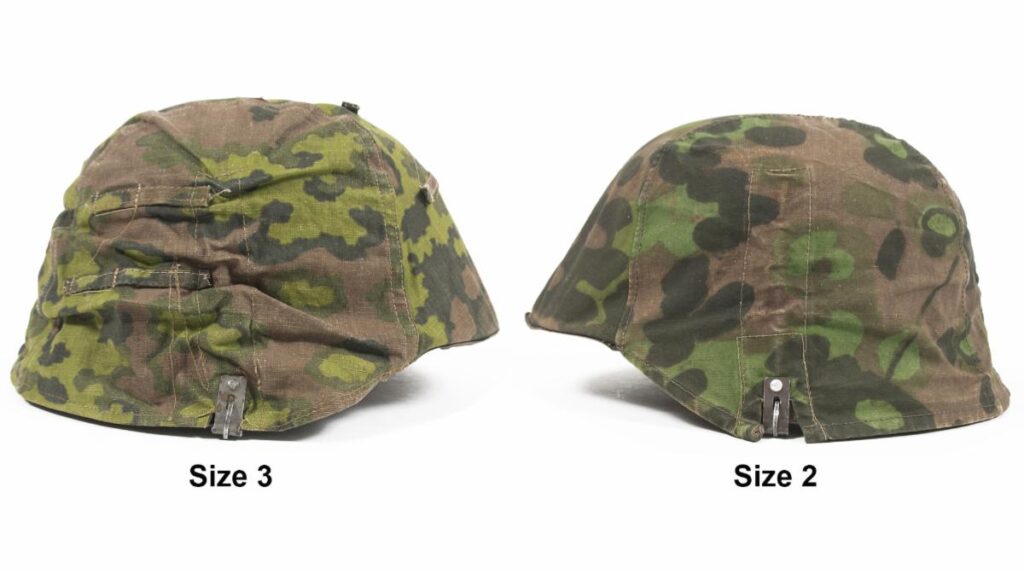 The two original covers used for our patterns.
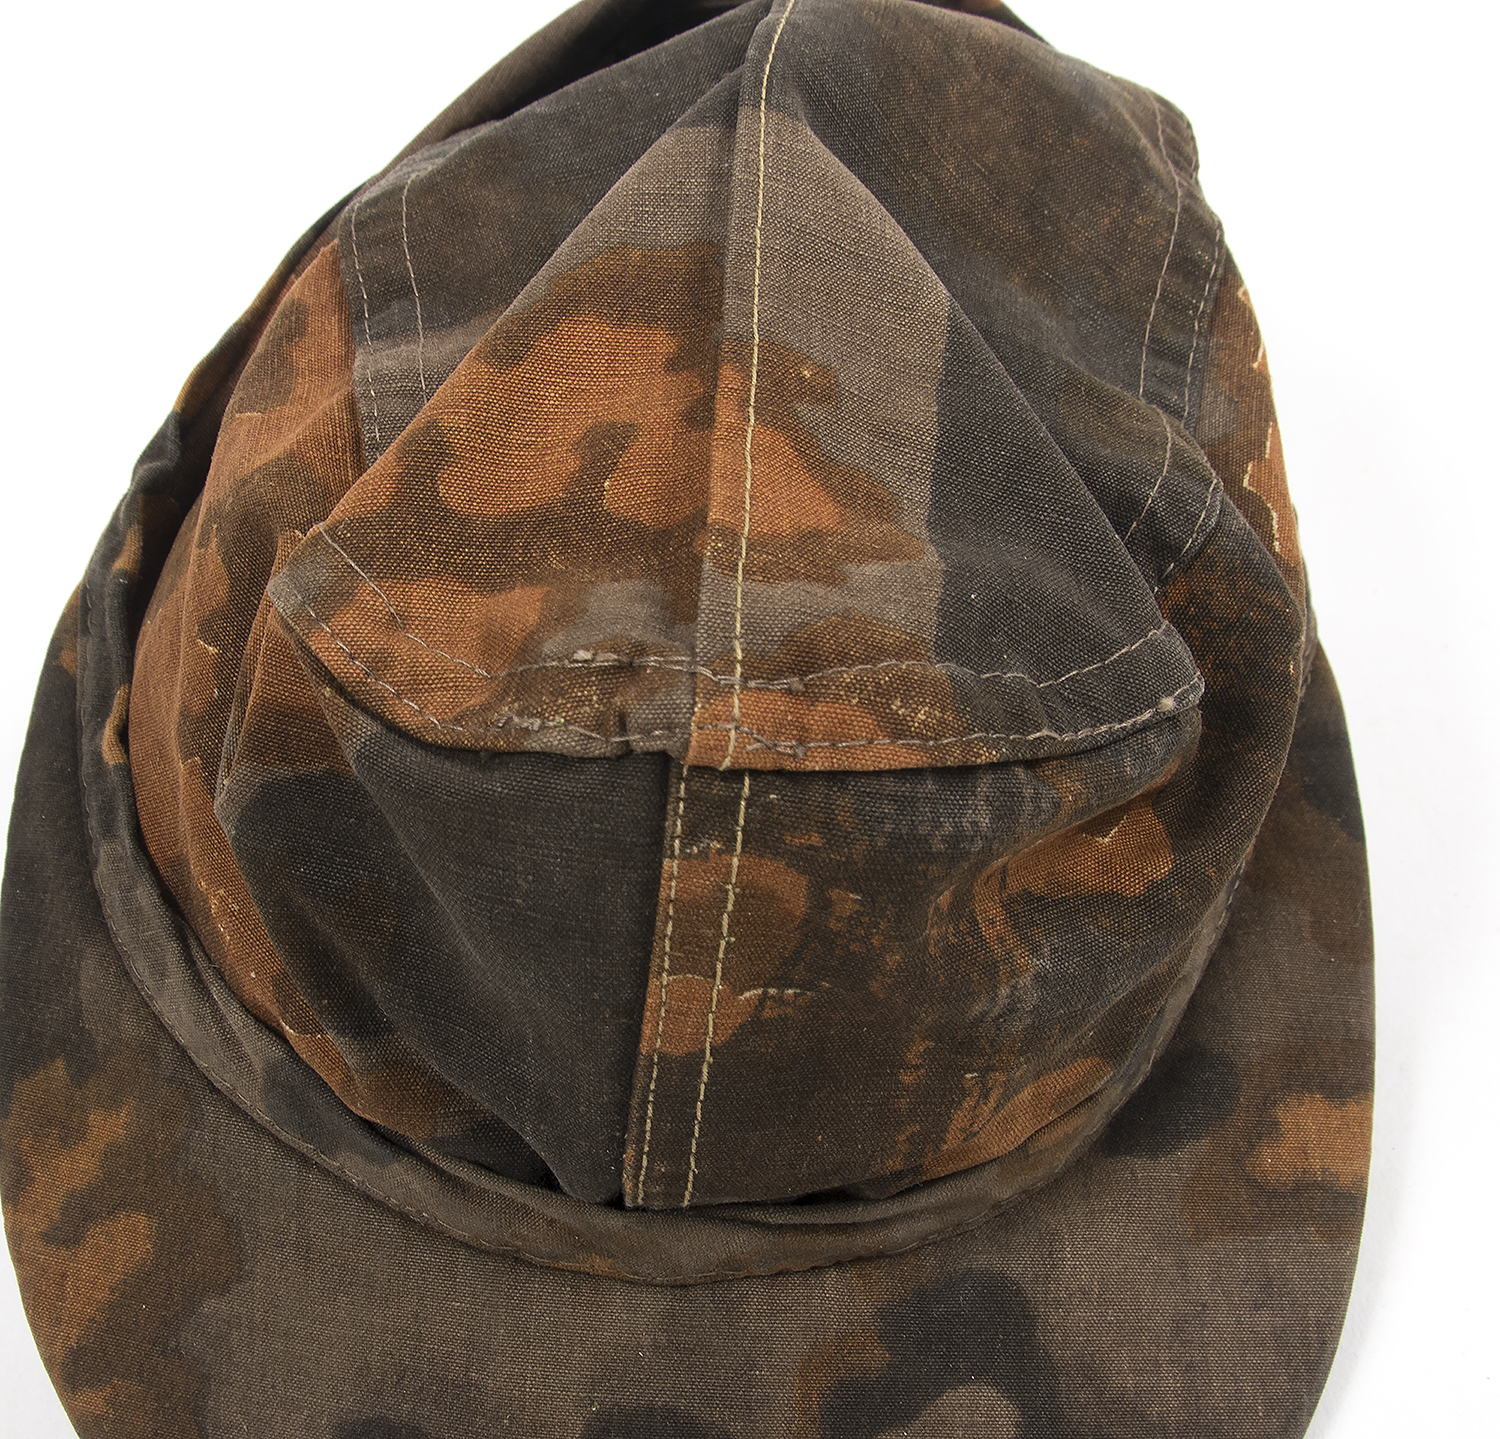
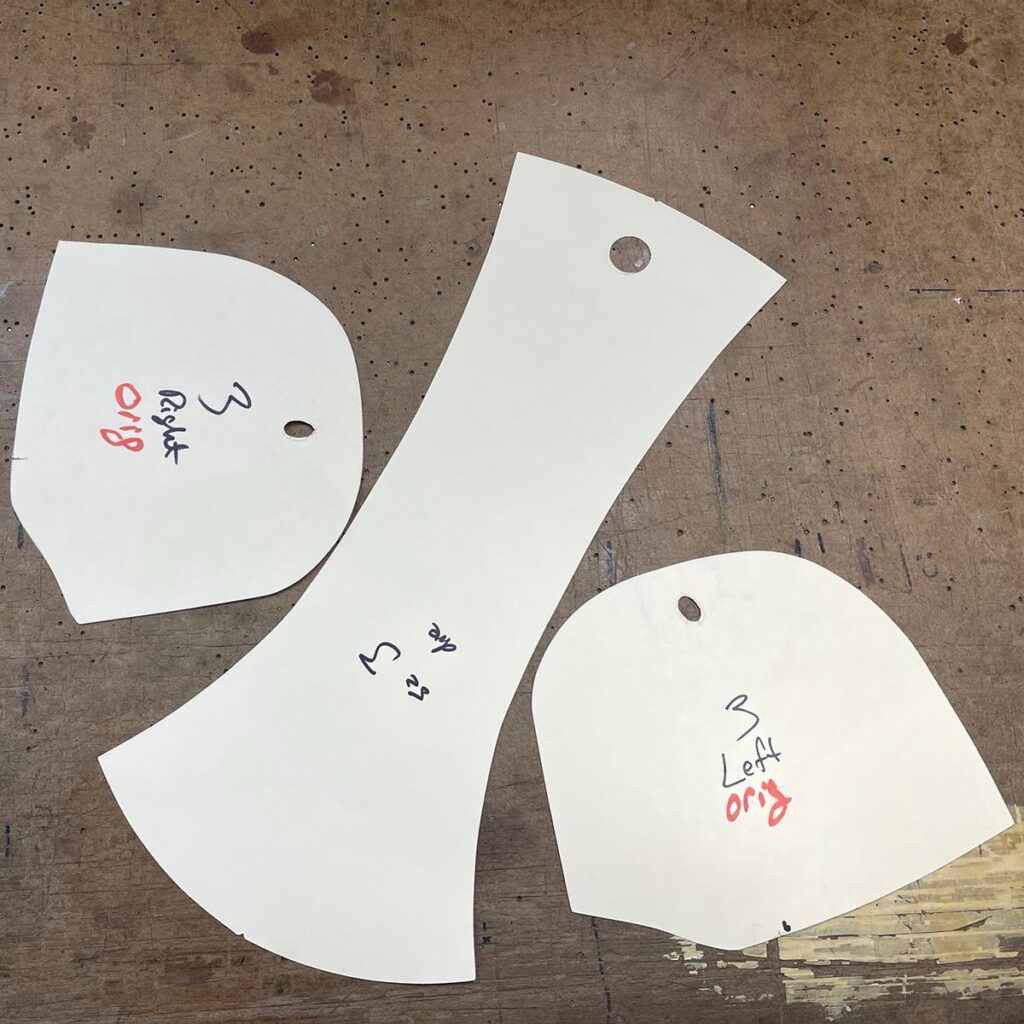 The three main panels of a cover
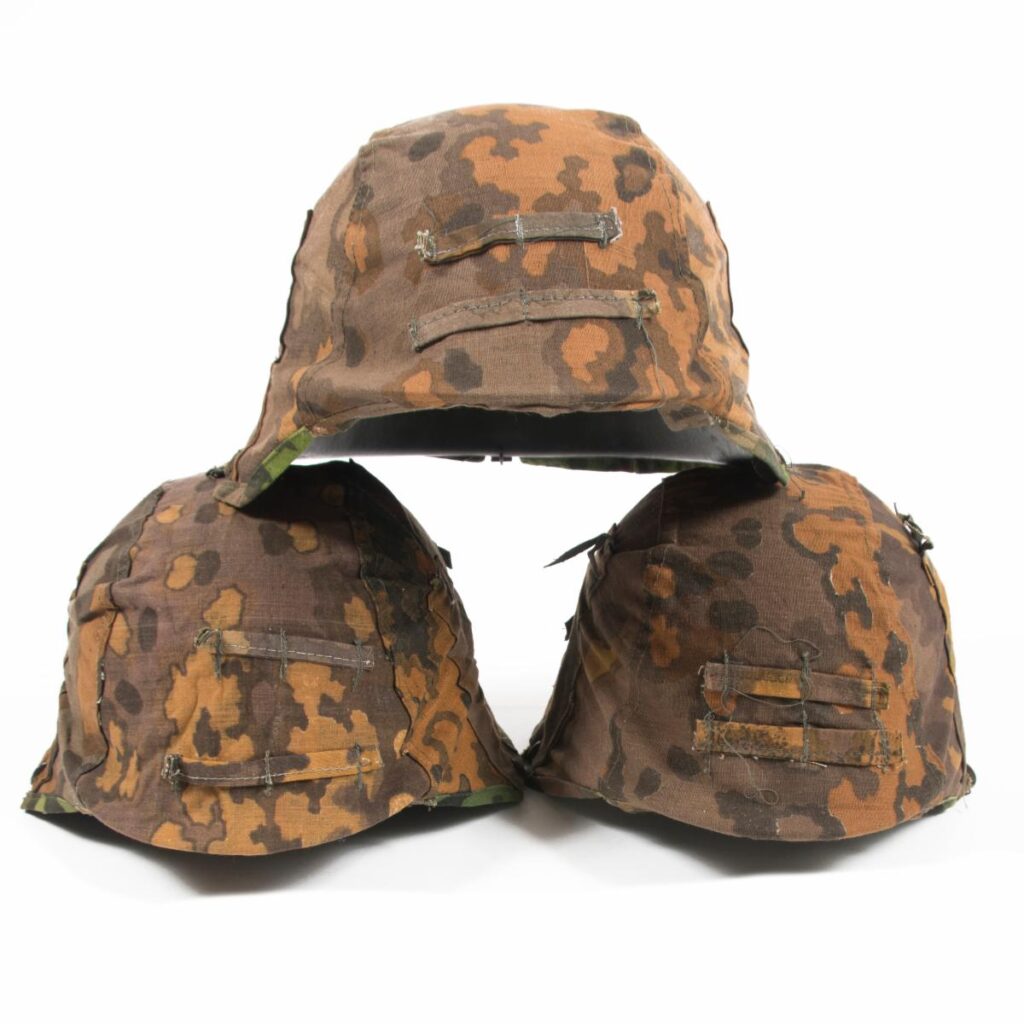
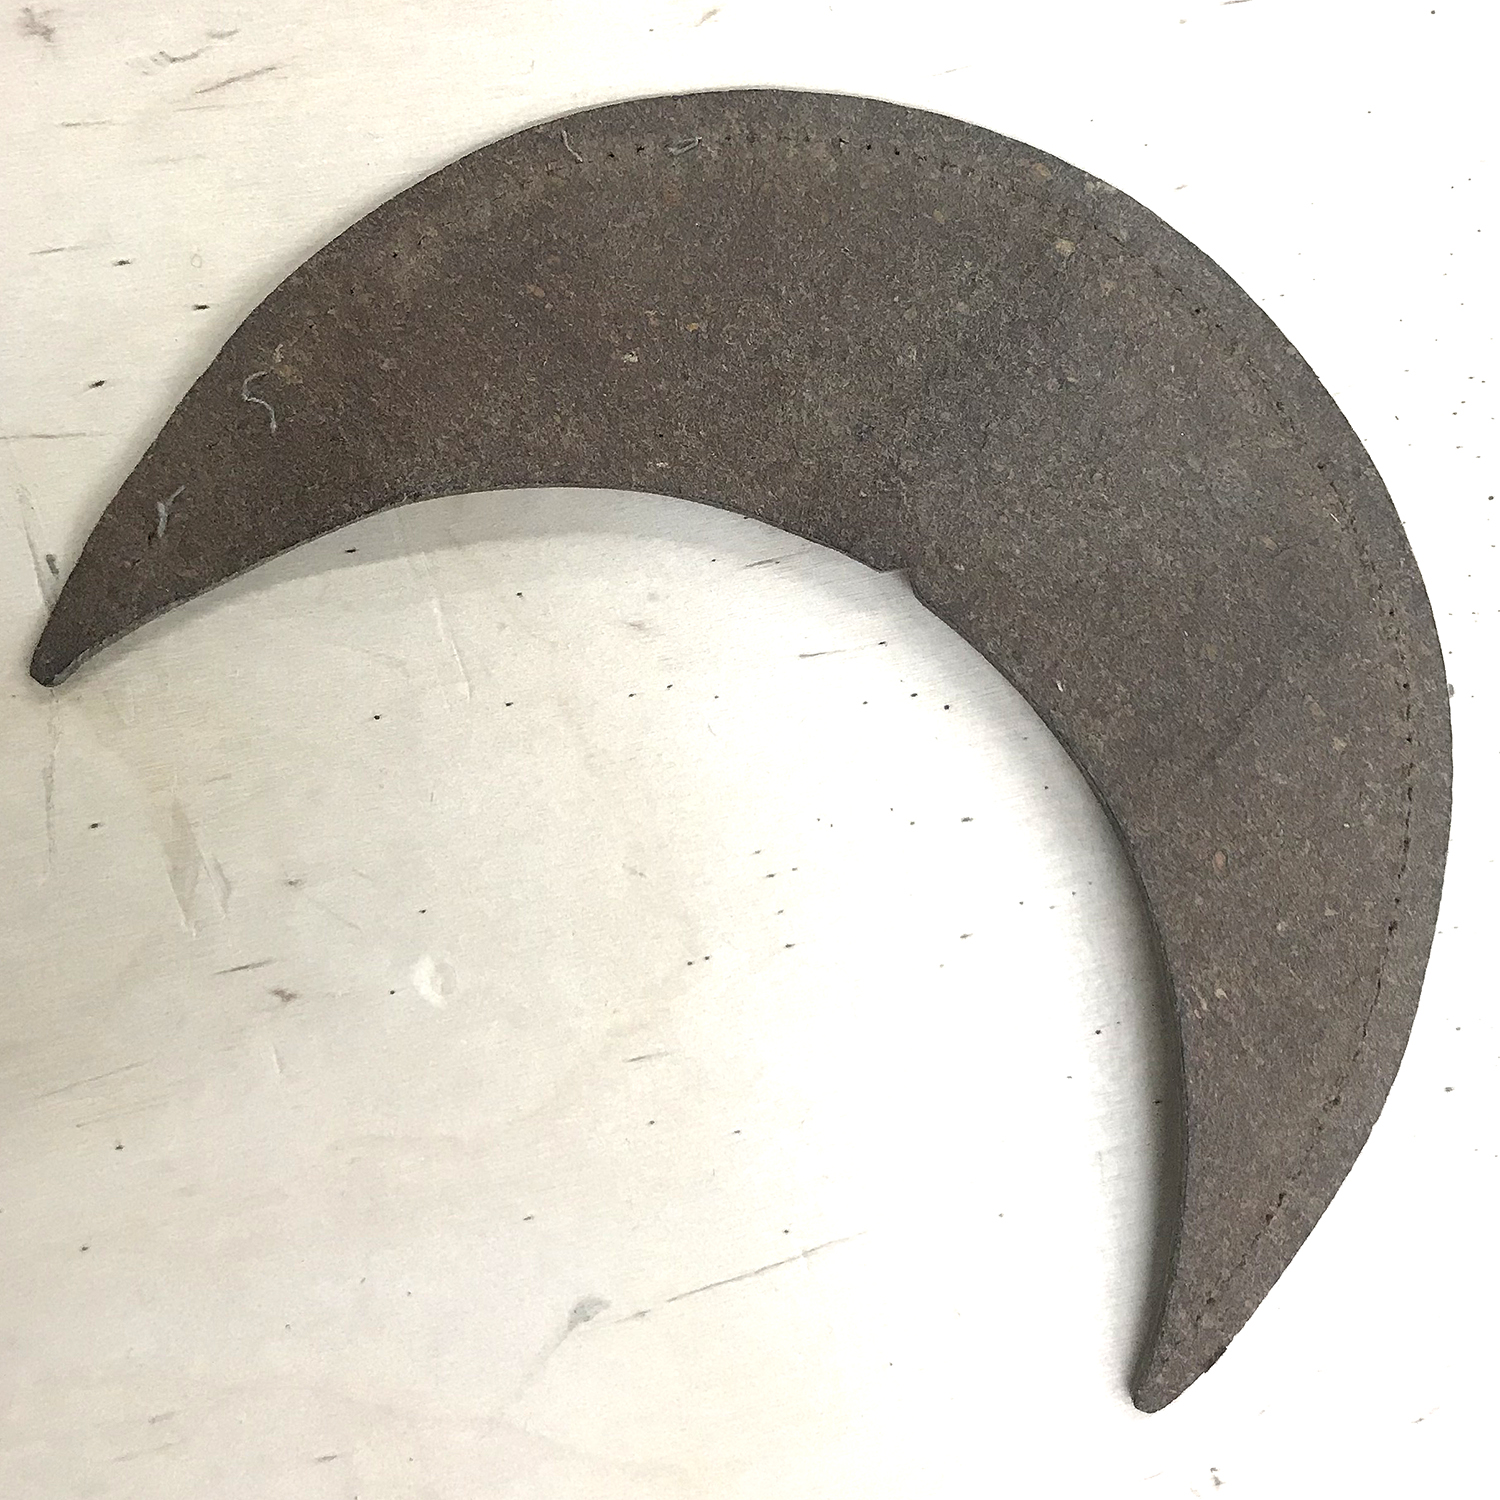
 One punch = 30 panels