31 December, 2018
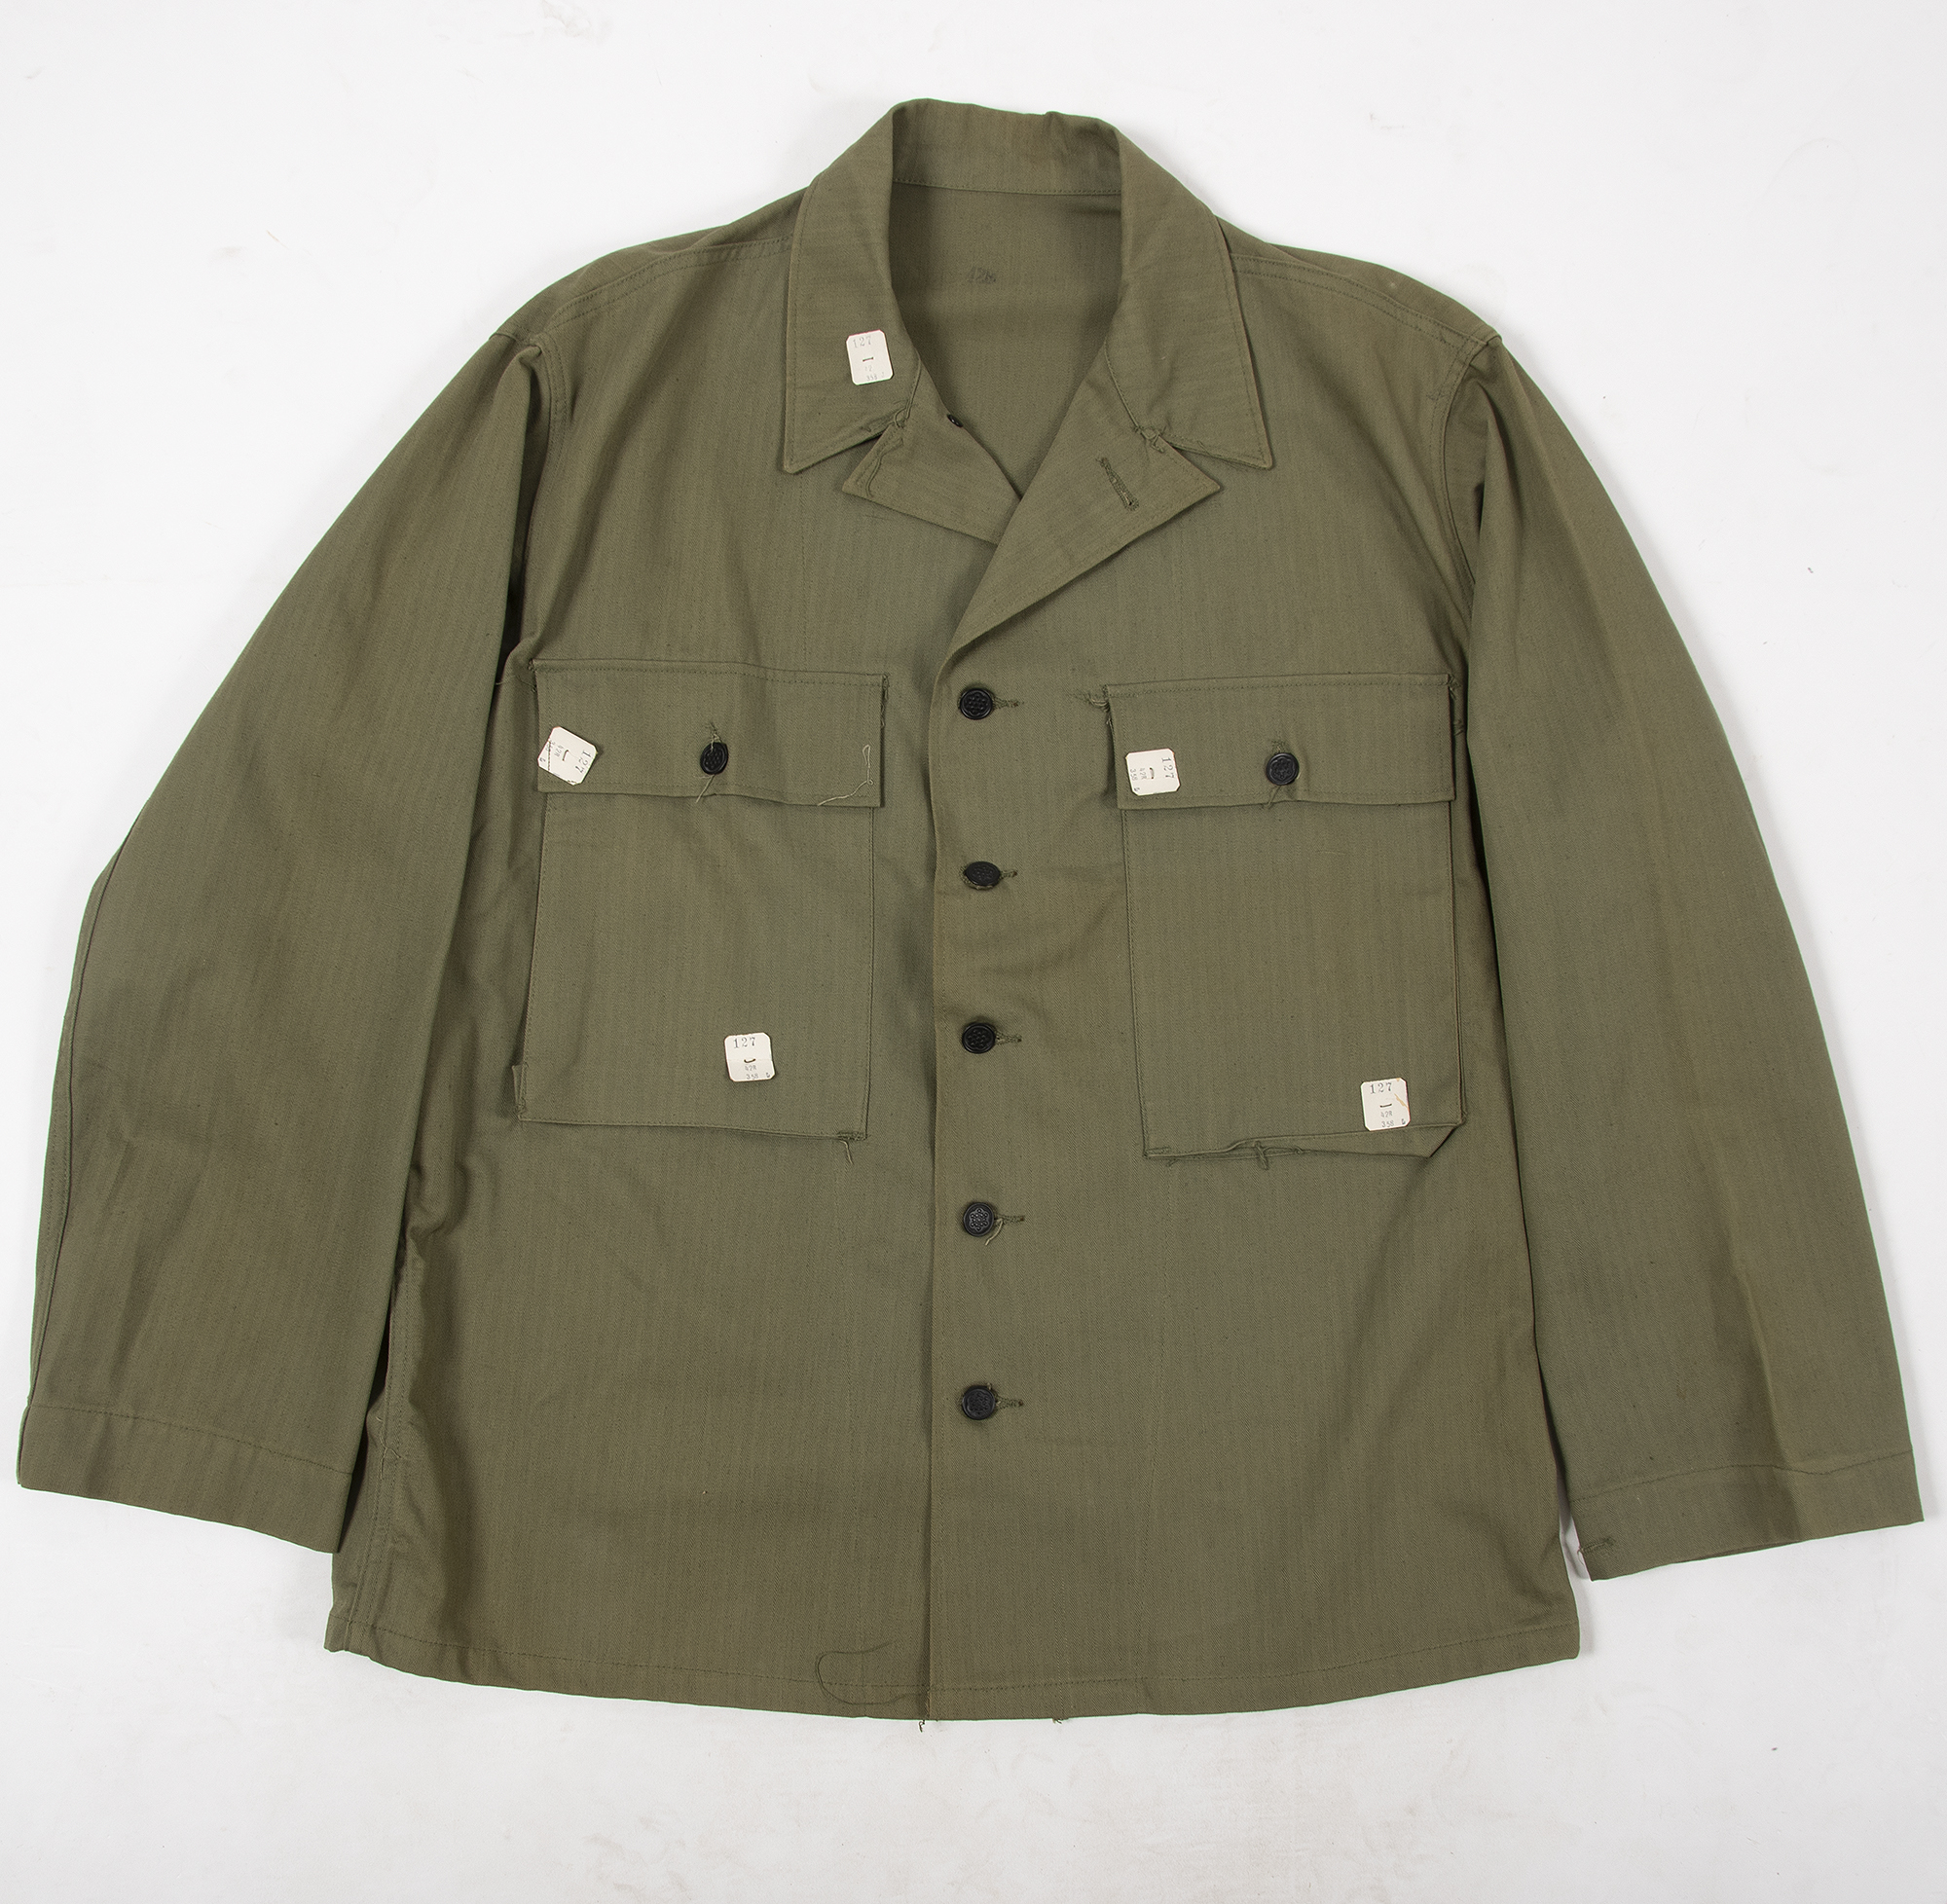
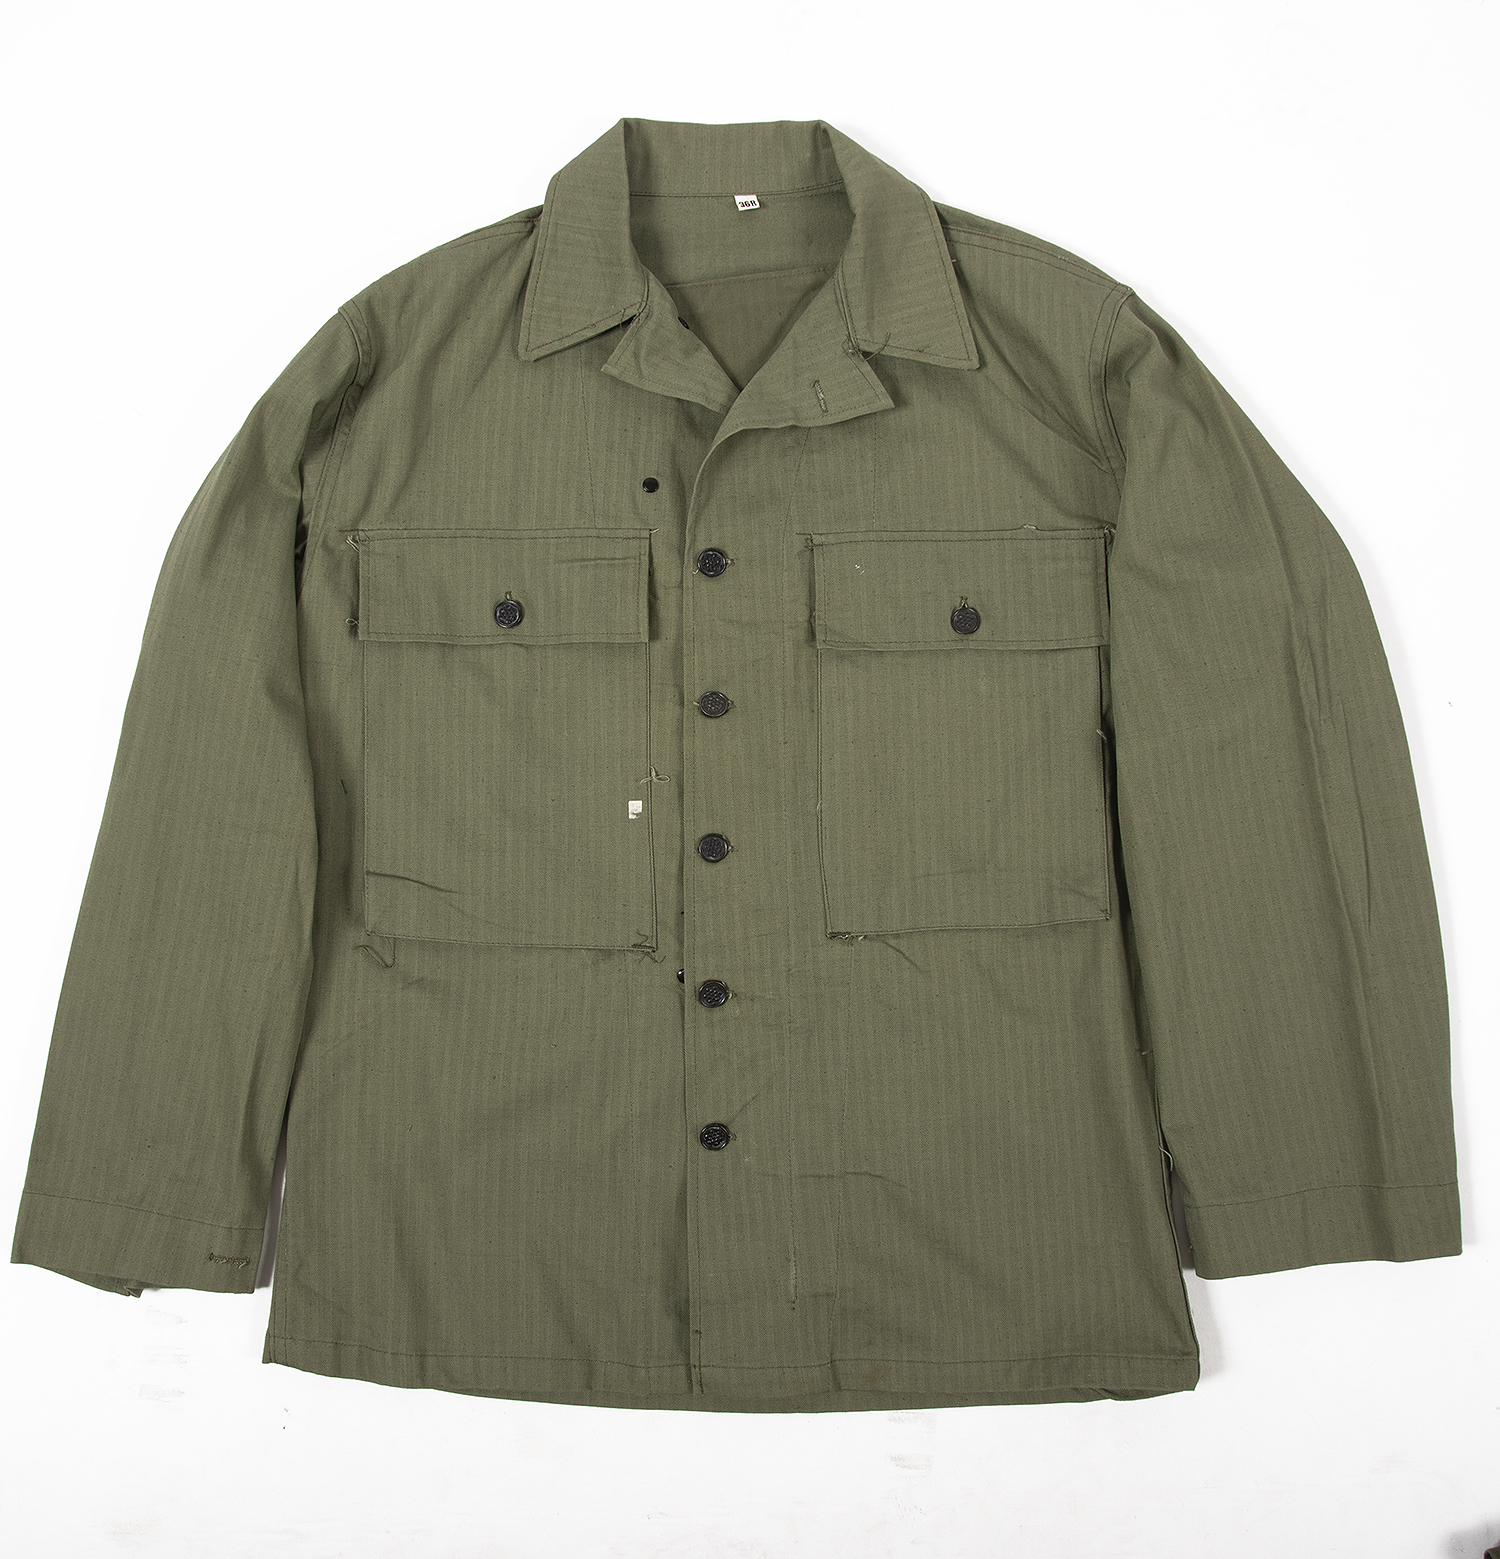
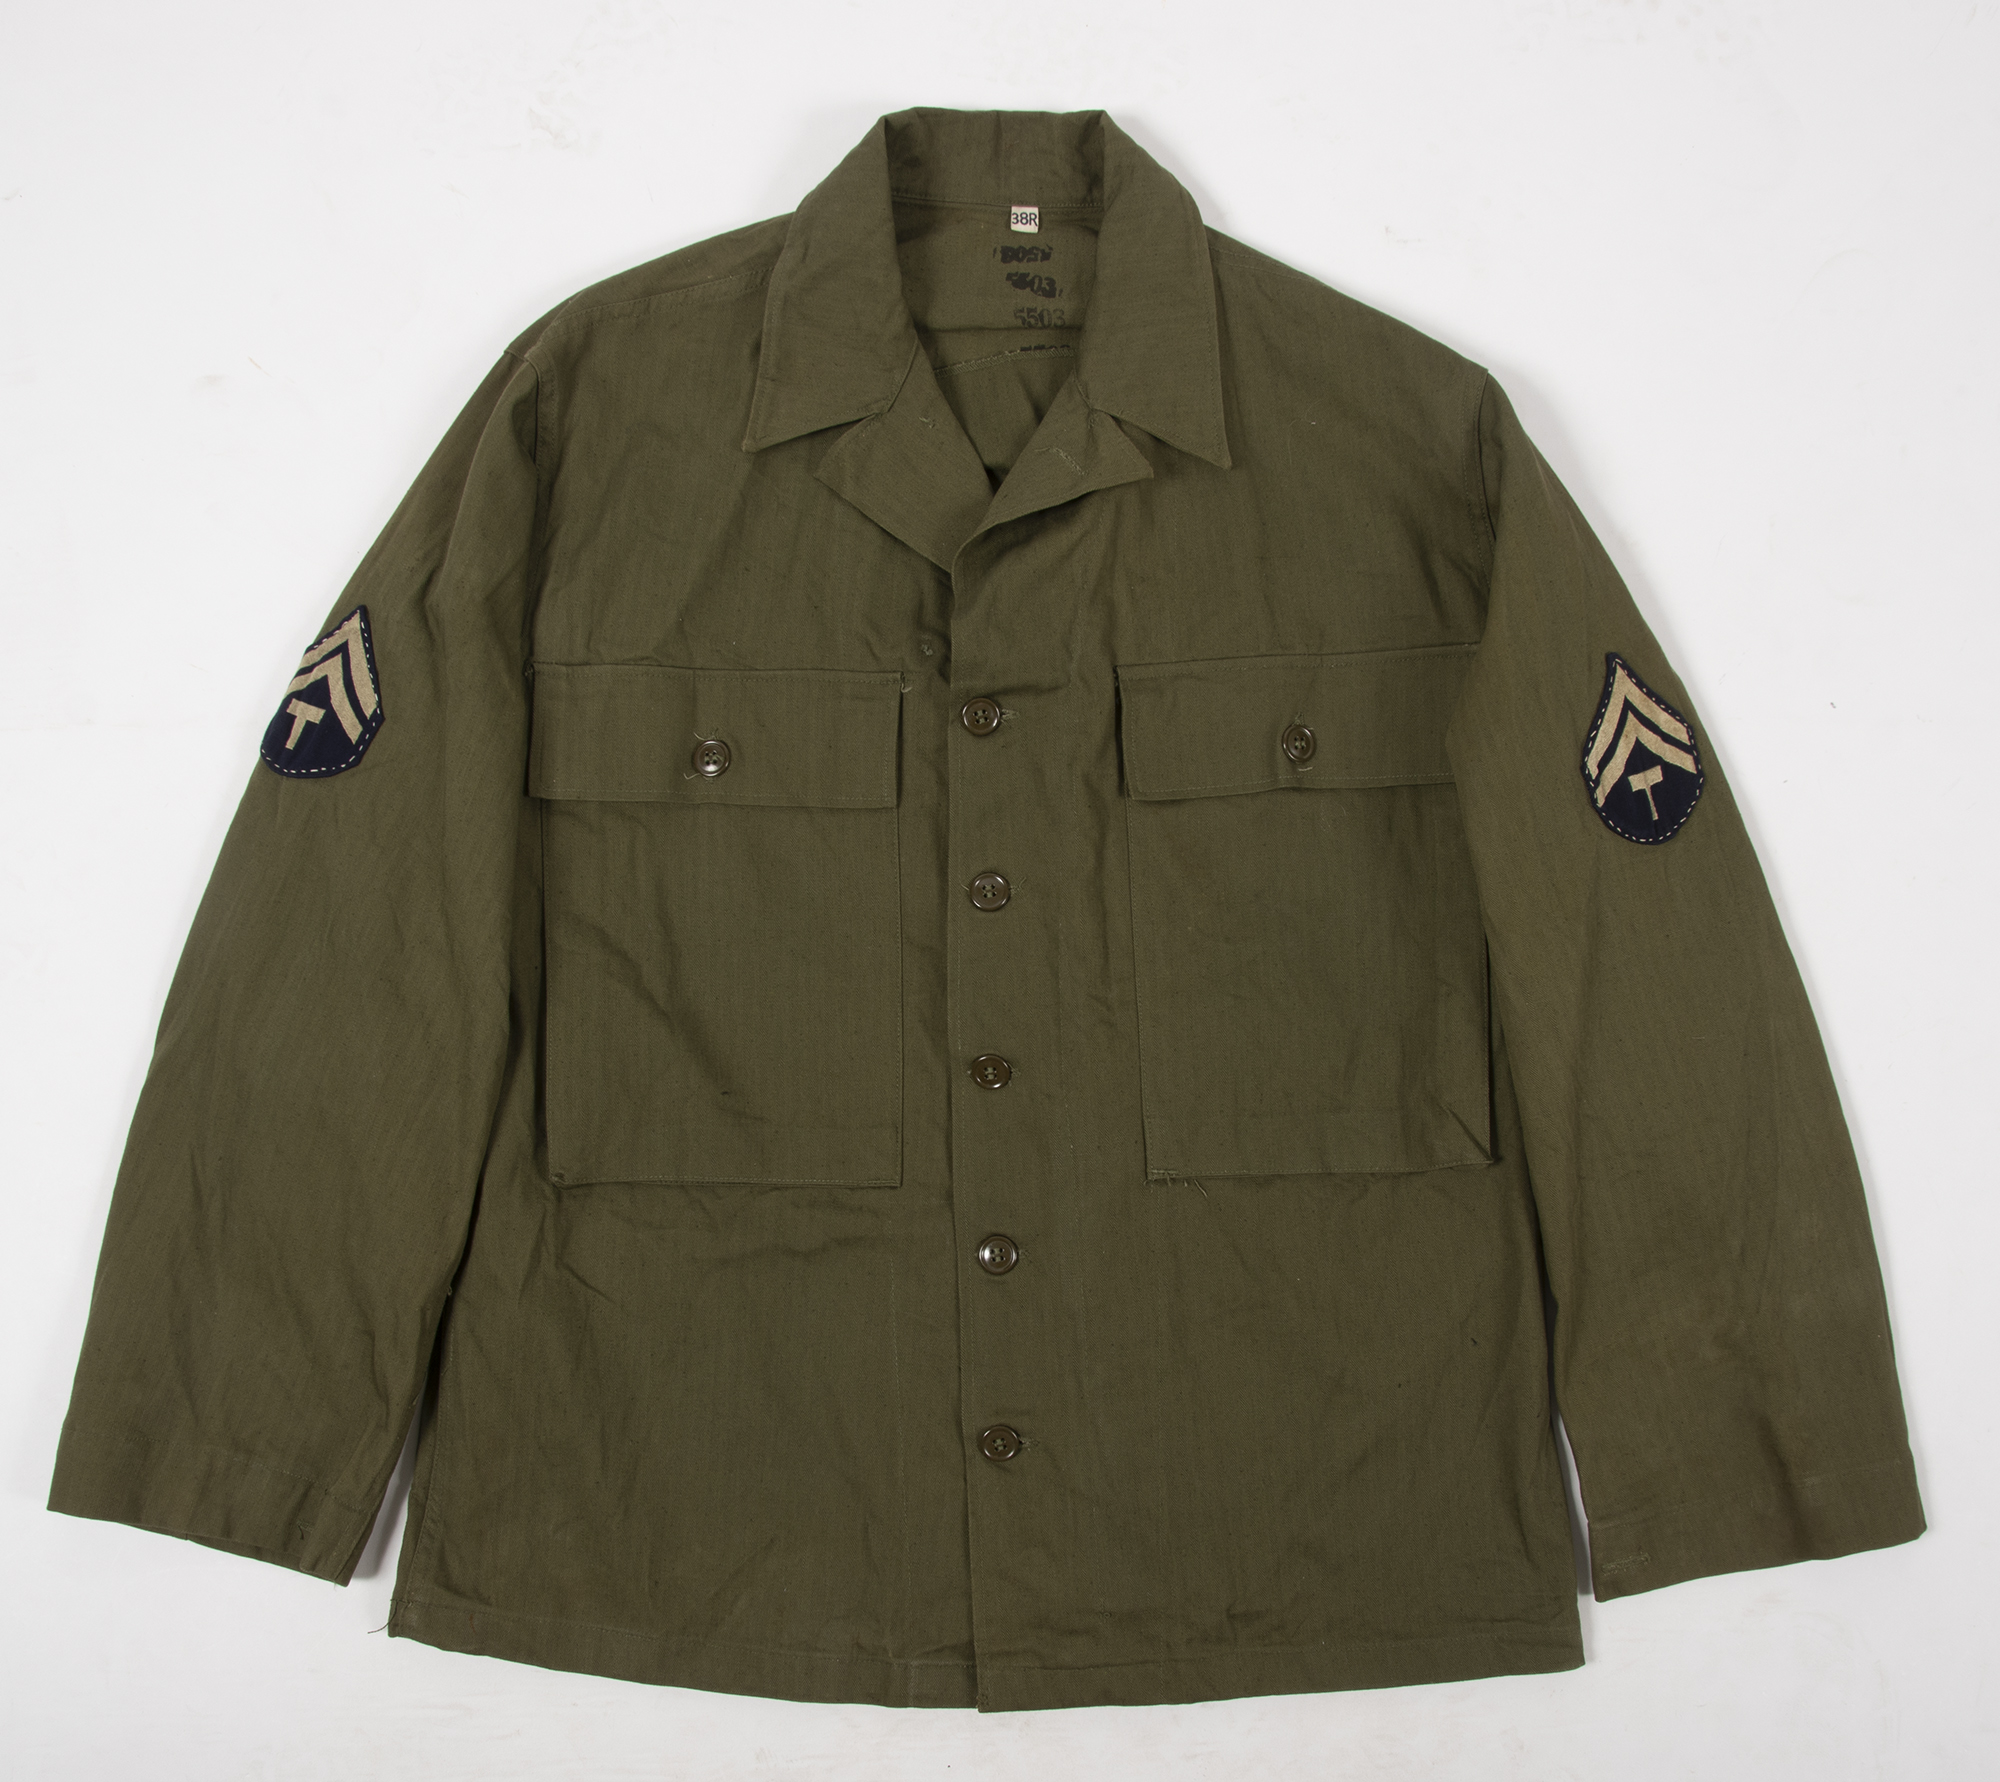
The M1943 Field Jacket was the main component of the the US Army’s improved combat uniform issued in the latter part of the Second World War. This jacket, with only minor design changes, was issued to American troops for the next 50 years, and is still manufactured today for the civilian market.
The United States entered WWII with her troops wearing “Parson’s jackets” (M1941’s) and wool serge trousers as their field/ combat uniform. The M1941 Jackets were found to be wanting almost immediately- they were not warm, they weren’t wind or water proof, they were too short and they had an open collar. When washed the wool lining shrank more than the cotton shell leading to a decidedly awkward appearance. The trouser fabric was too thin causing them to wear out quickly, they lacked warmth and they often split apart at the seams. The flood of complaints from troops in the field compelled the Army to take action.
The Quartermaster Corps quickly convened a panel of advisers, including designers from several large clothing manufacturers, to create an entirely new field uniform to address these concerns. The ensuing drama was worthy of a miniseries and is too long to address here, but it was the typical human conflict of common sense and good research data colliding with fragile, over-sized egos of a few high ranking individuals. Luckily for American soldiers, the former ultimately persevered and the M1943 Field Uniform was born.
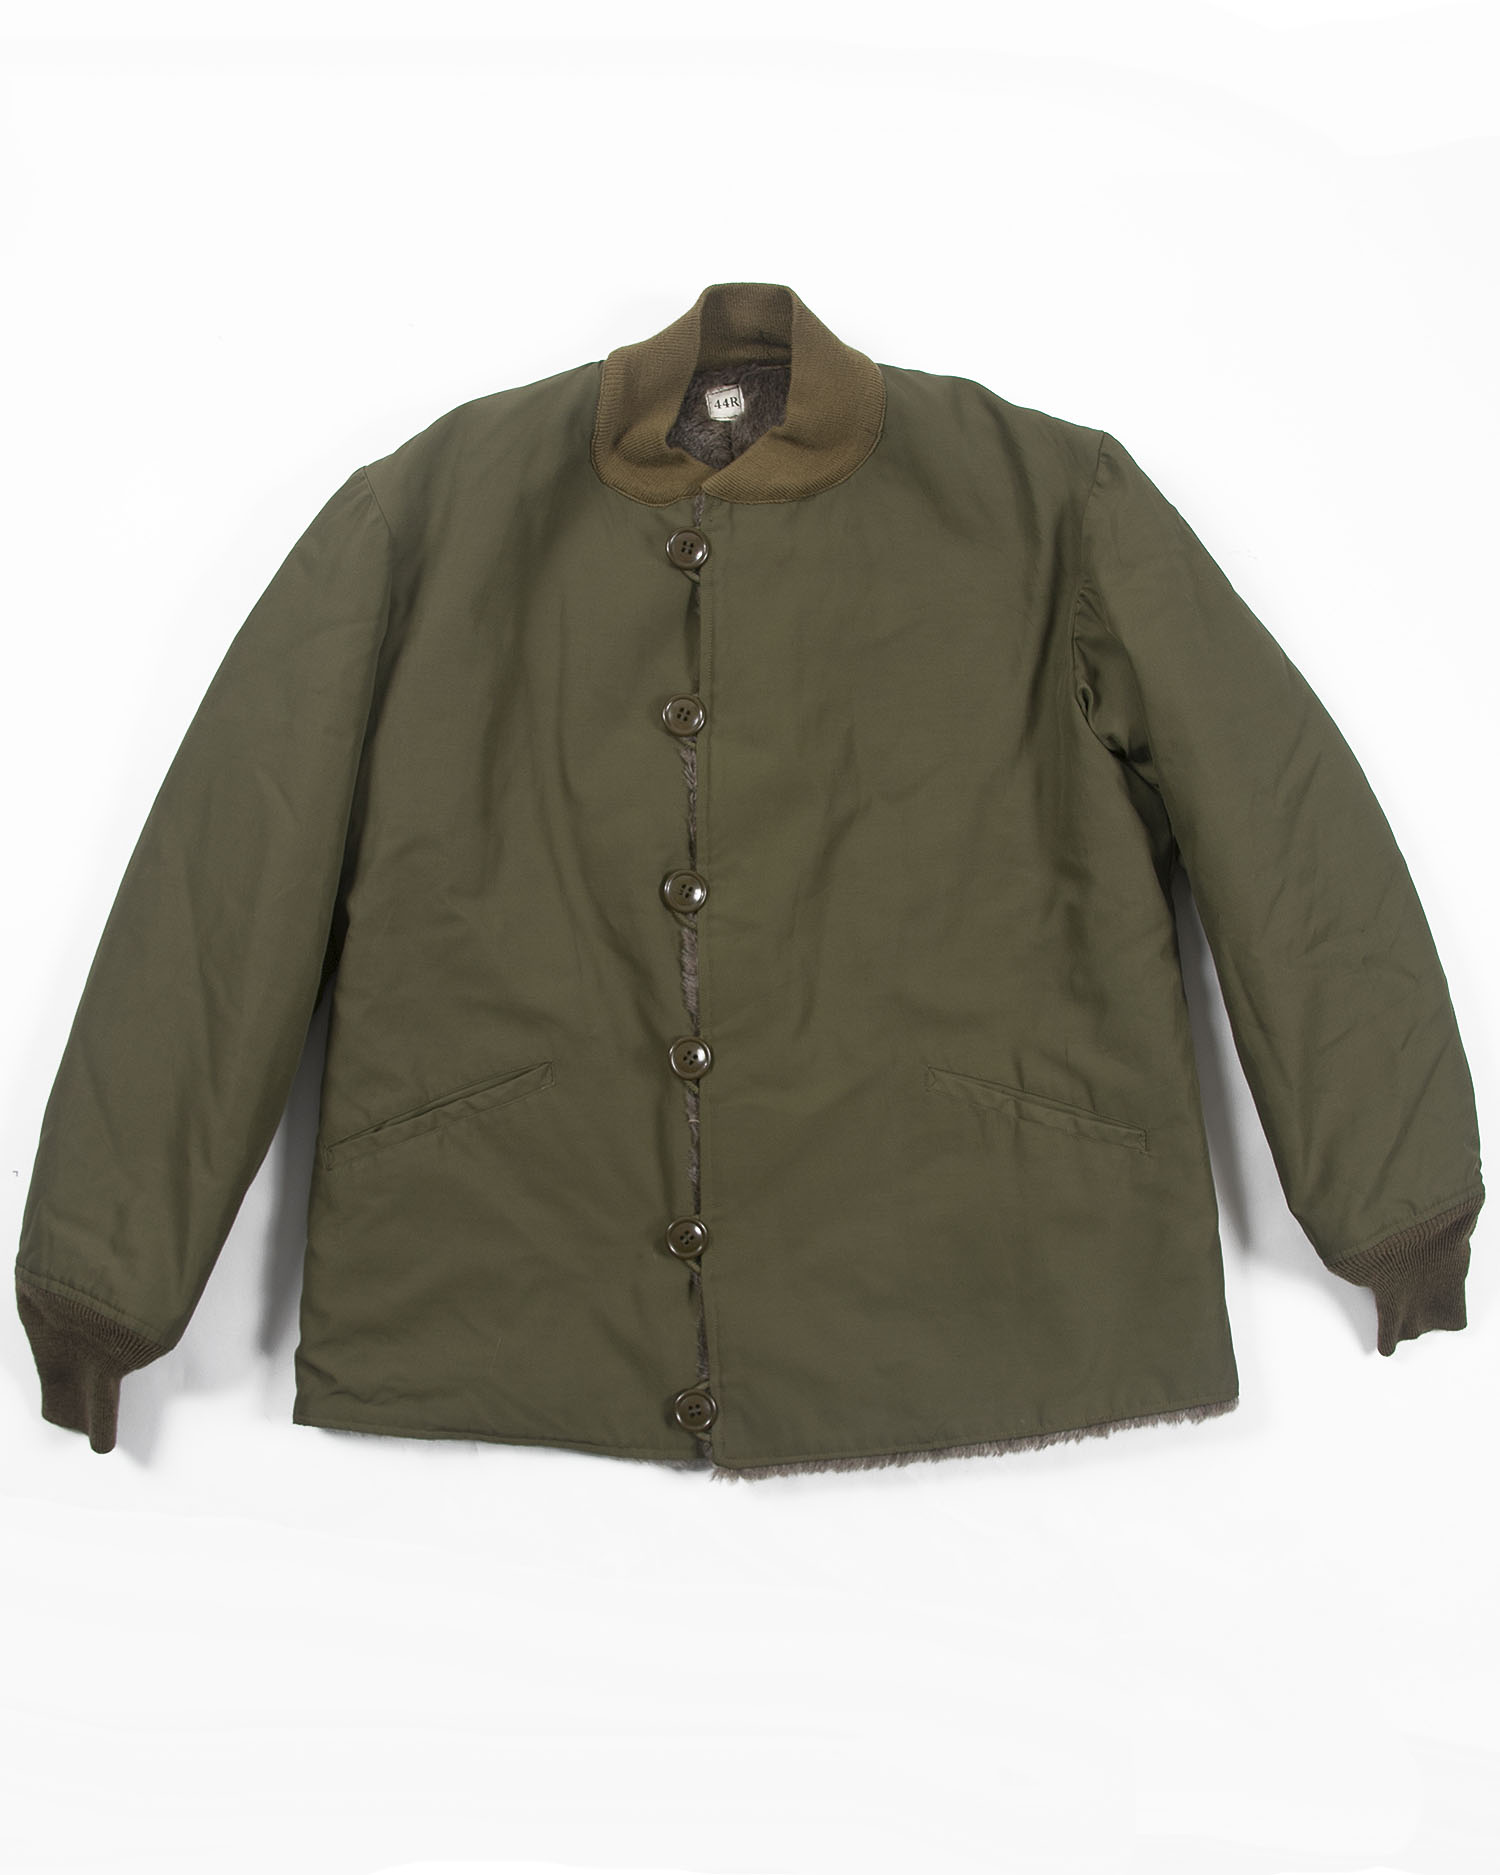
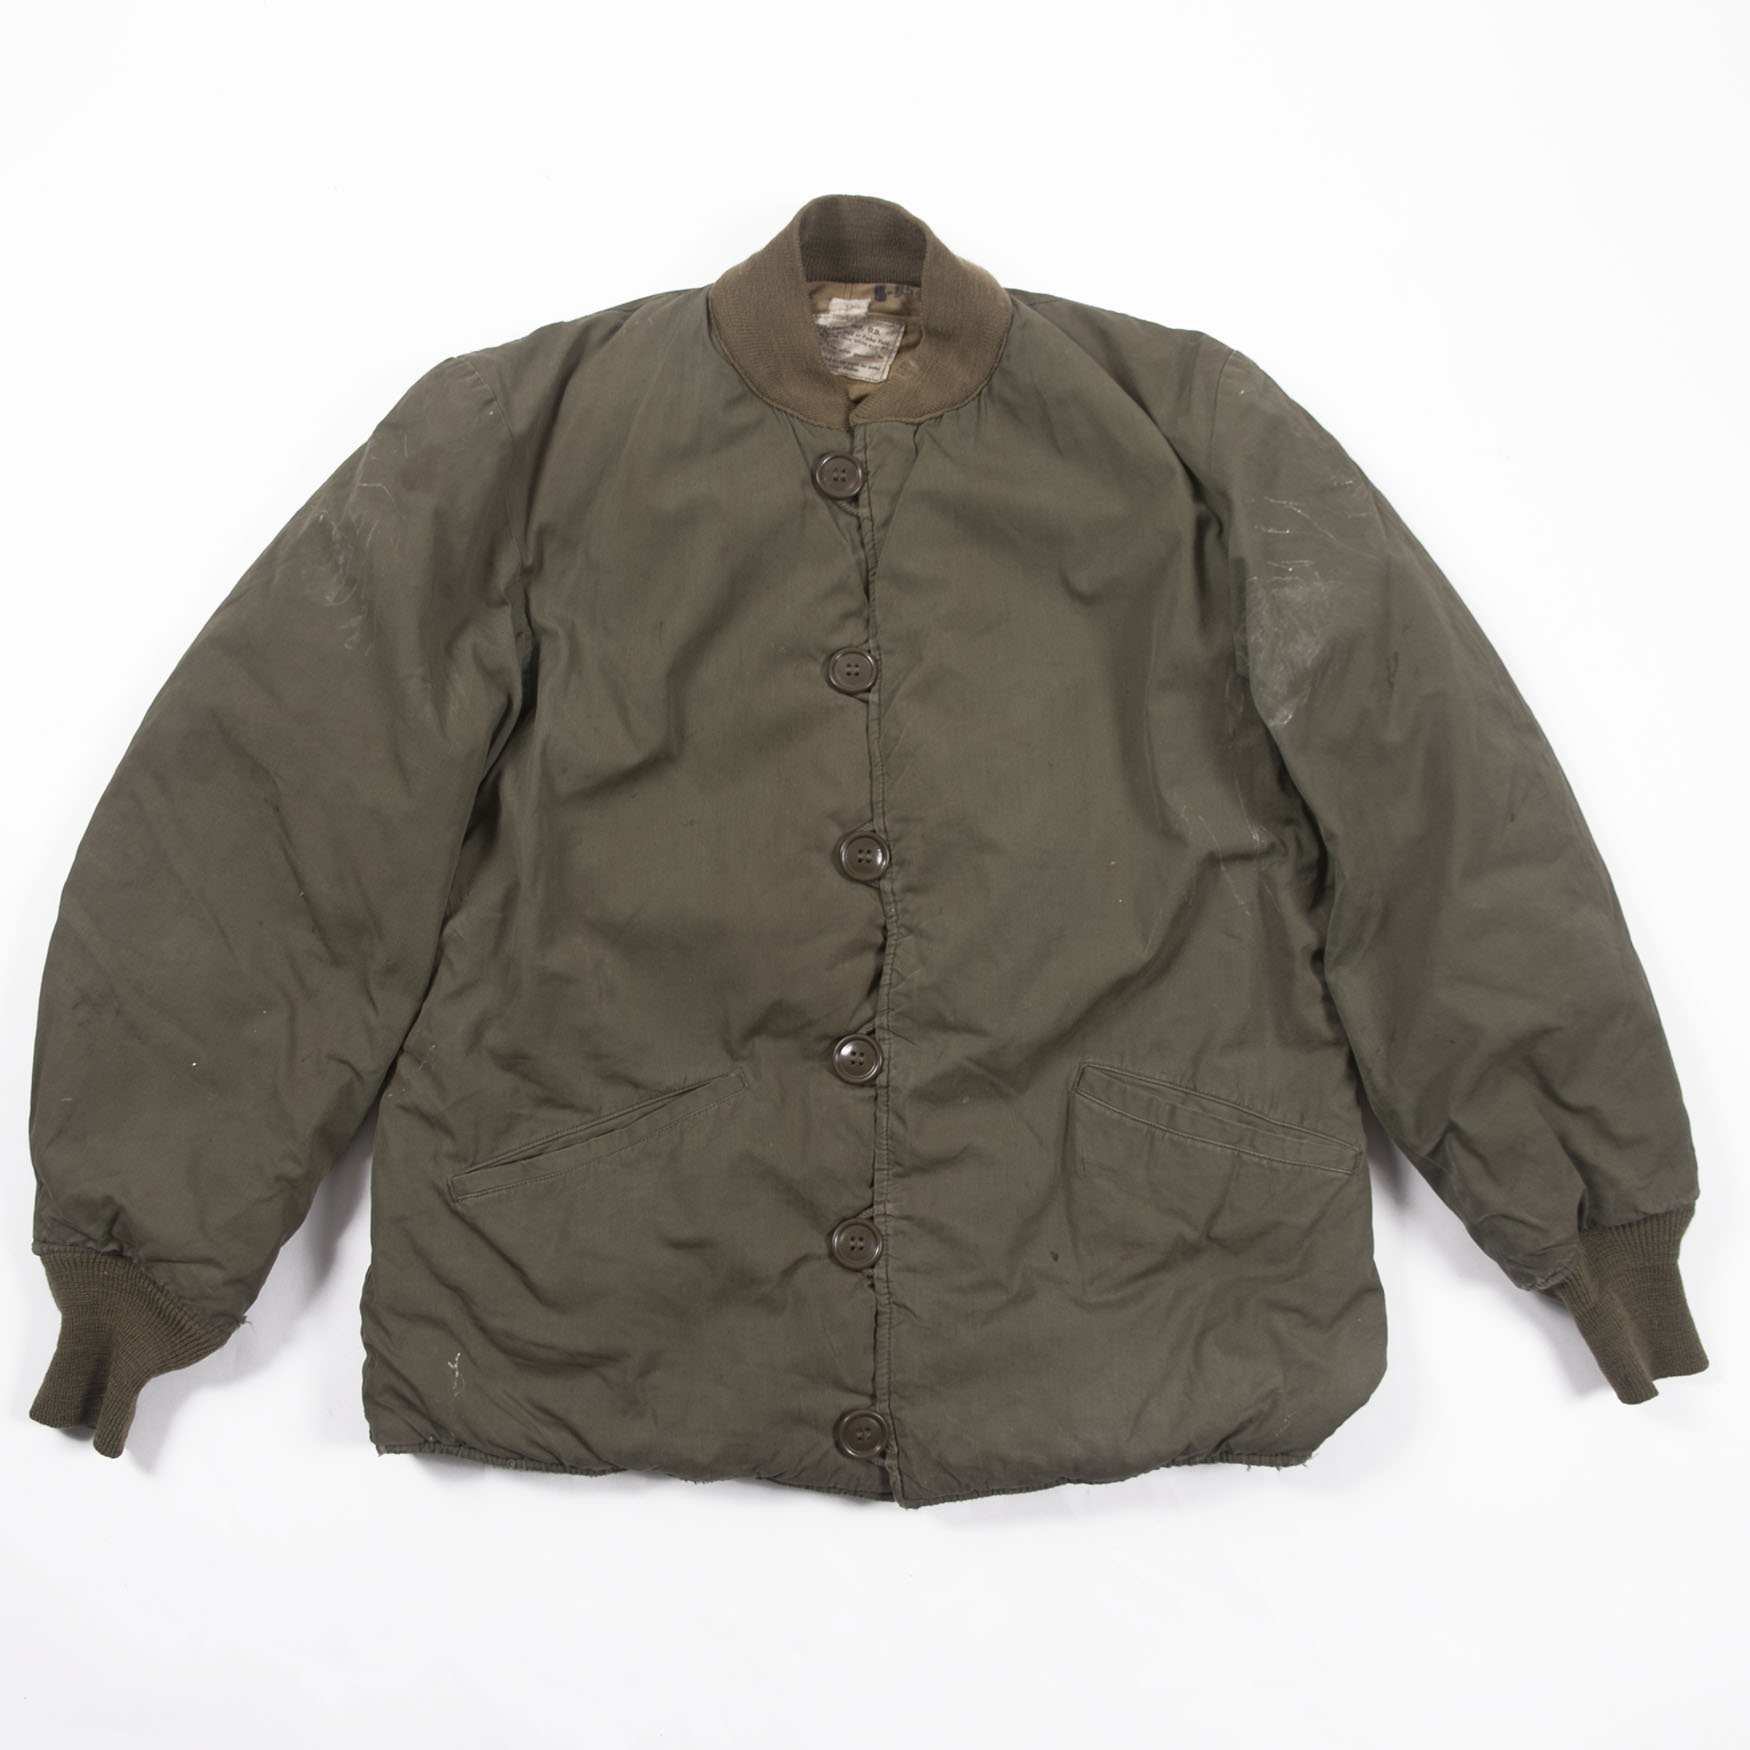
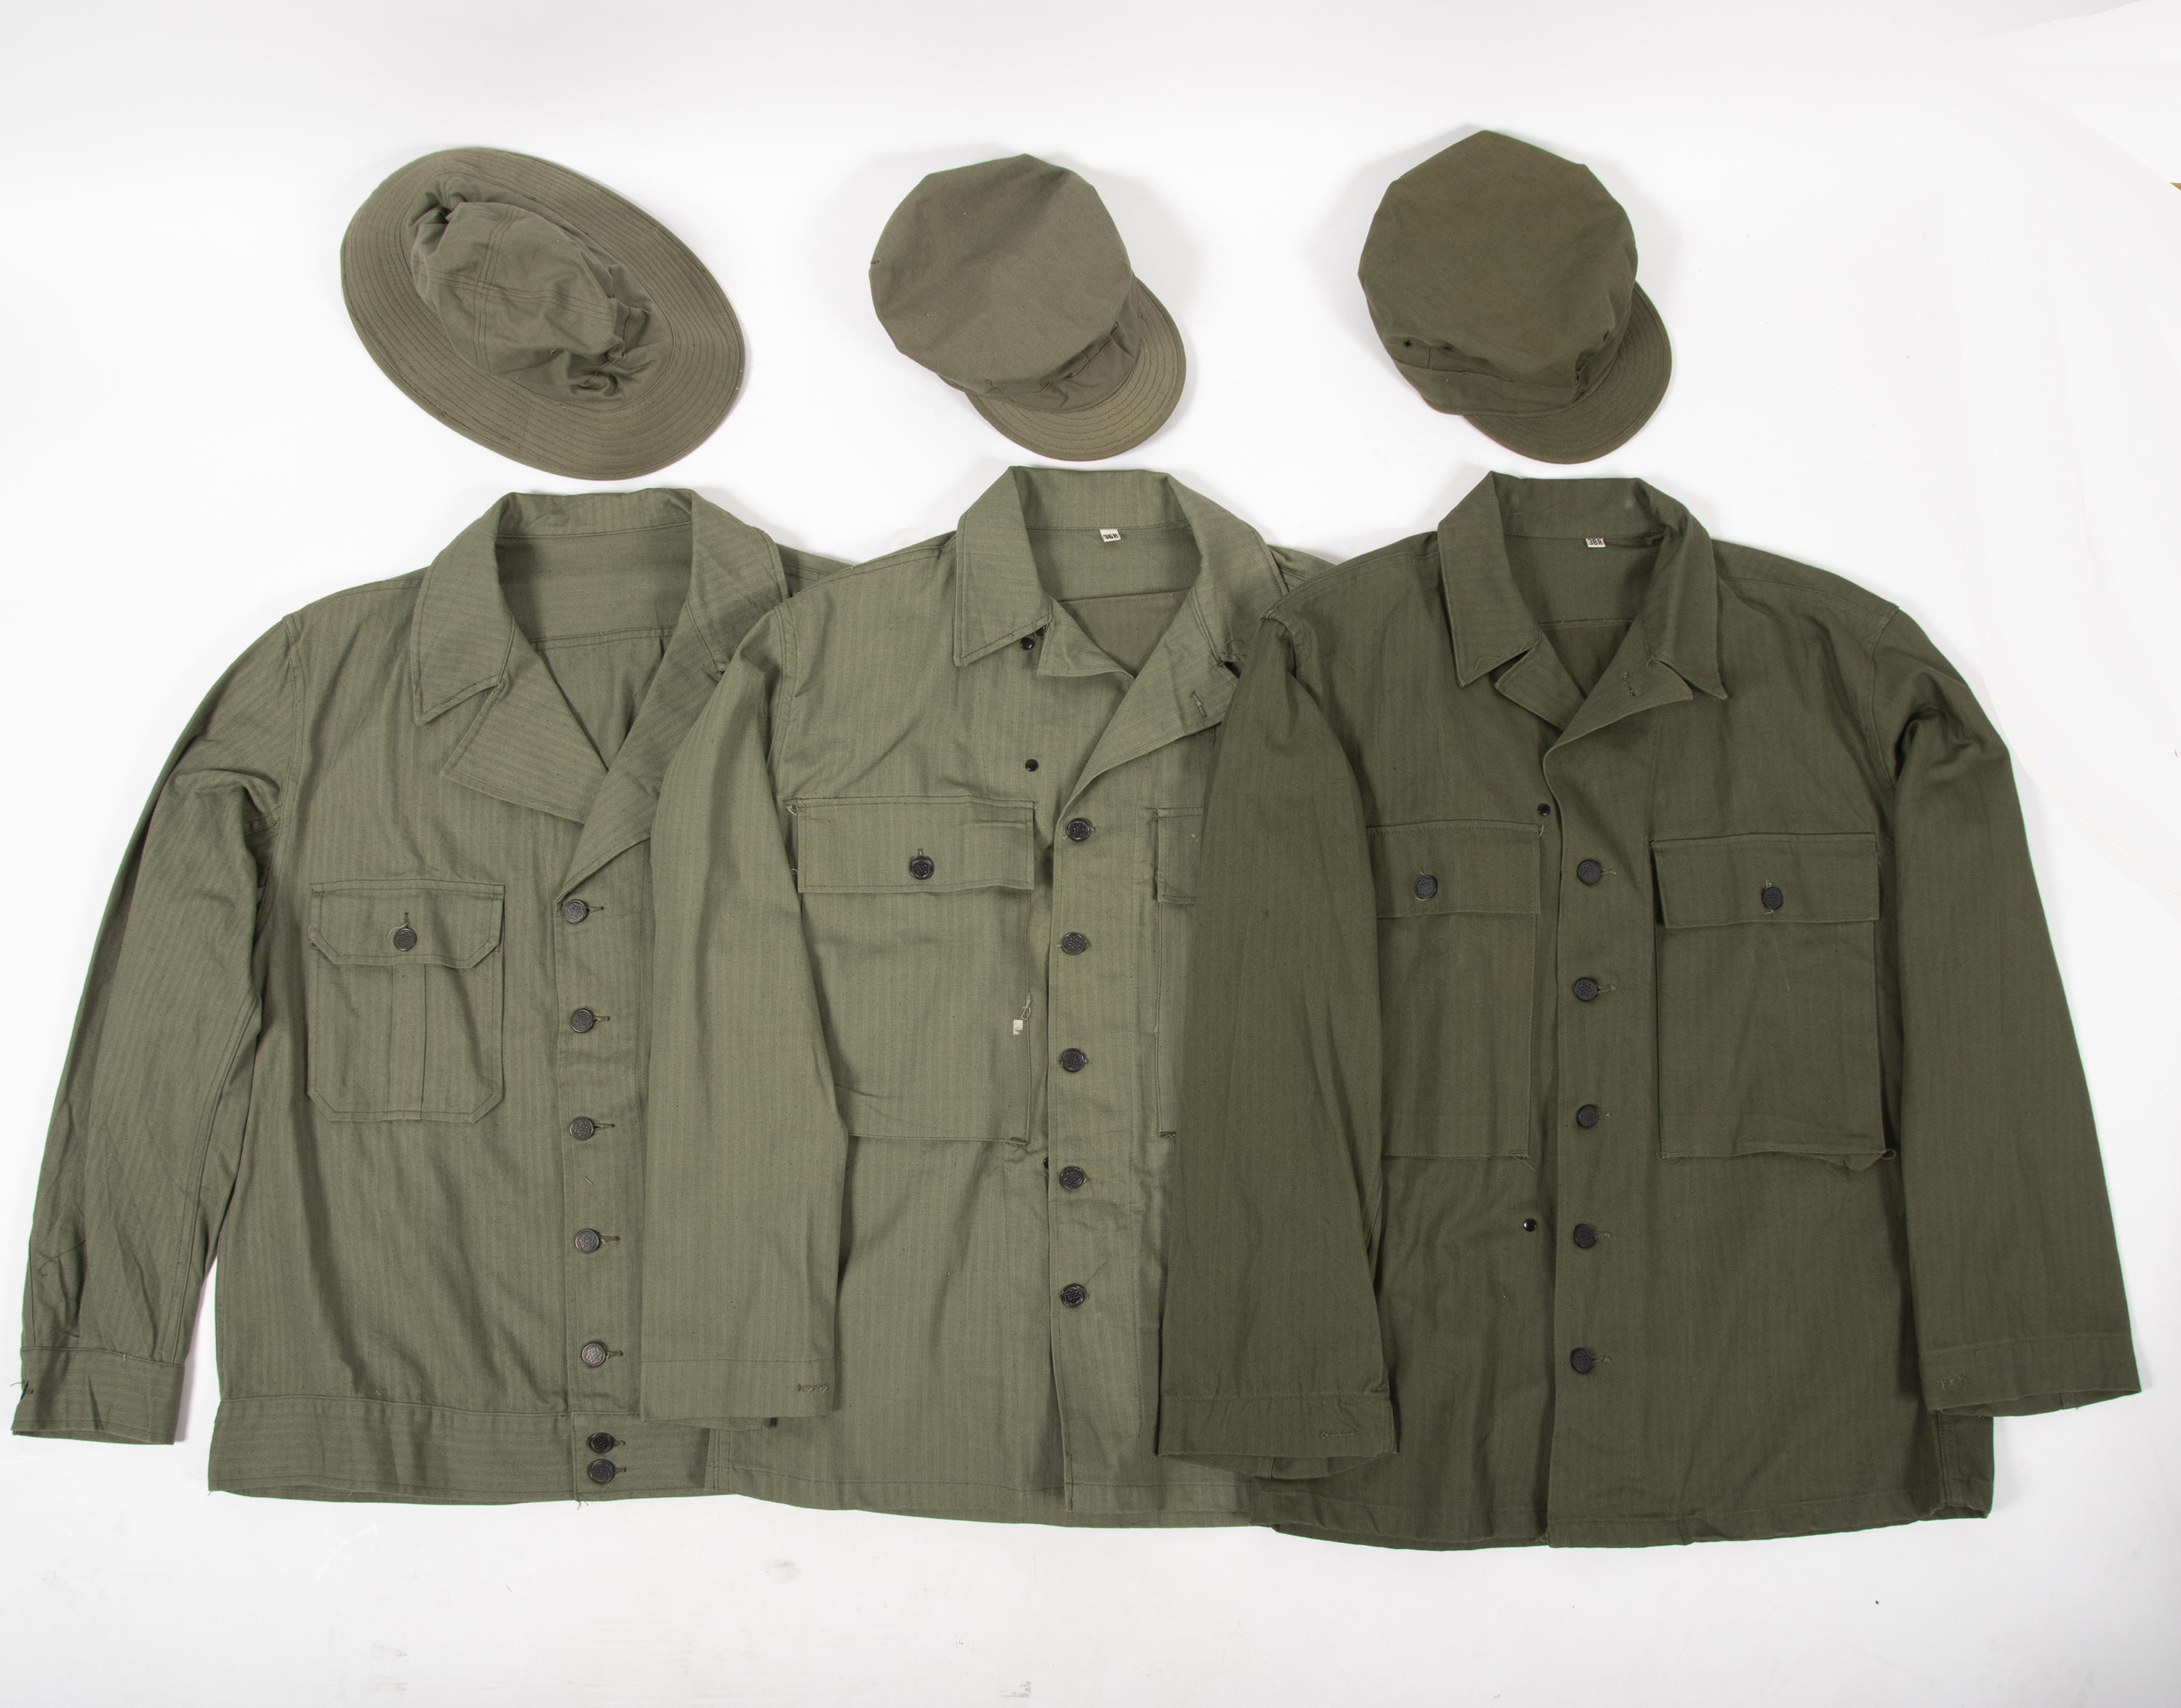
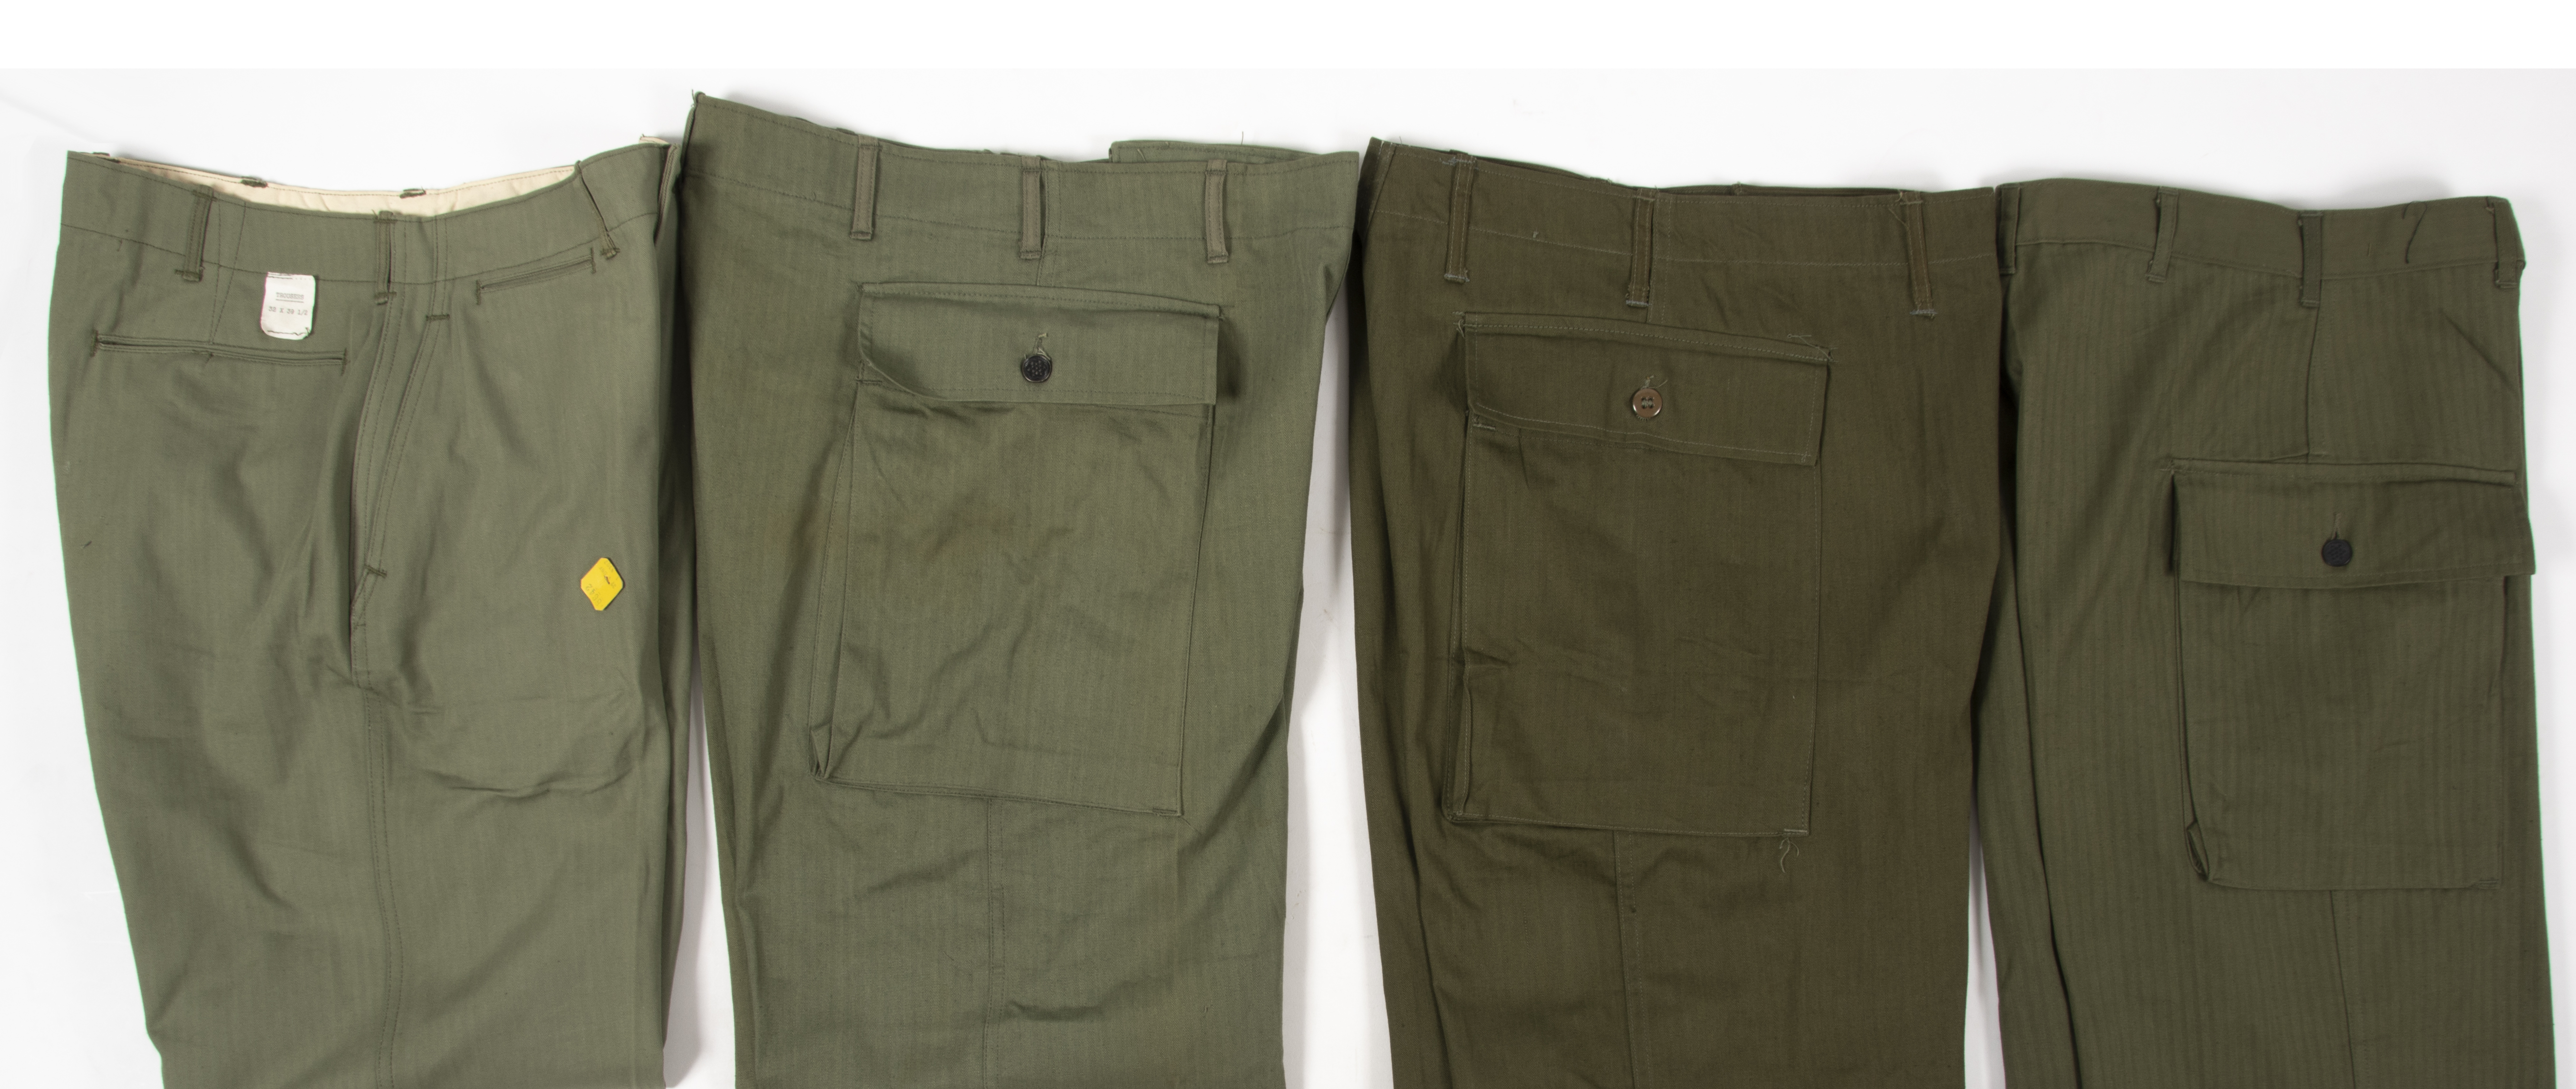
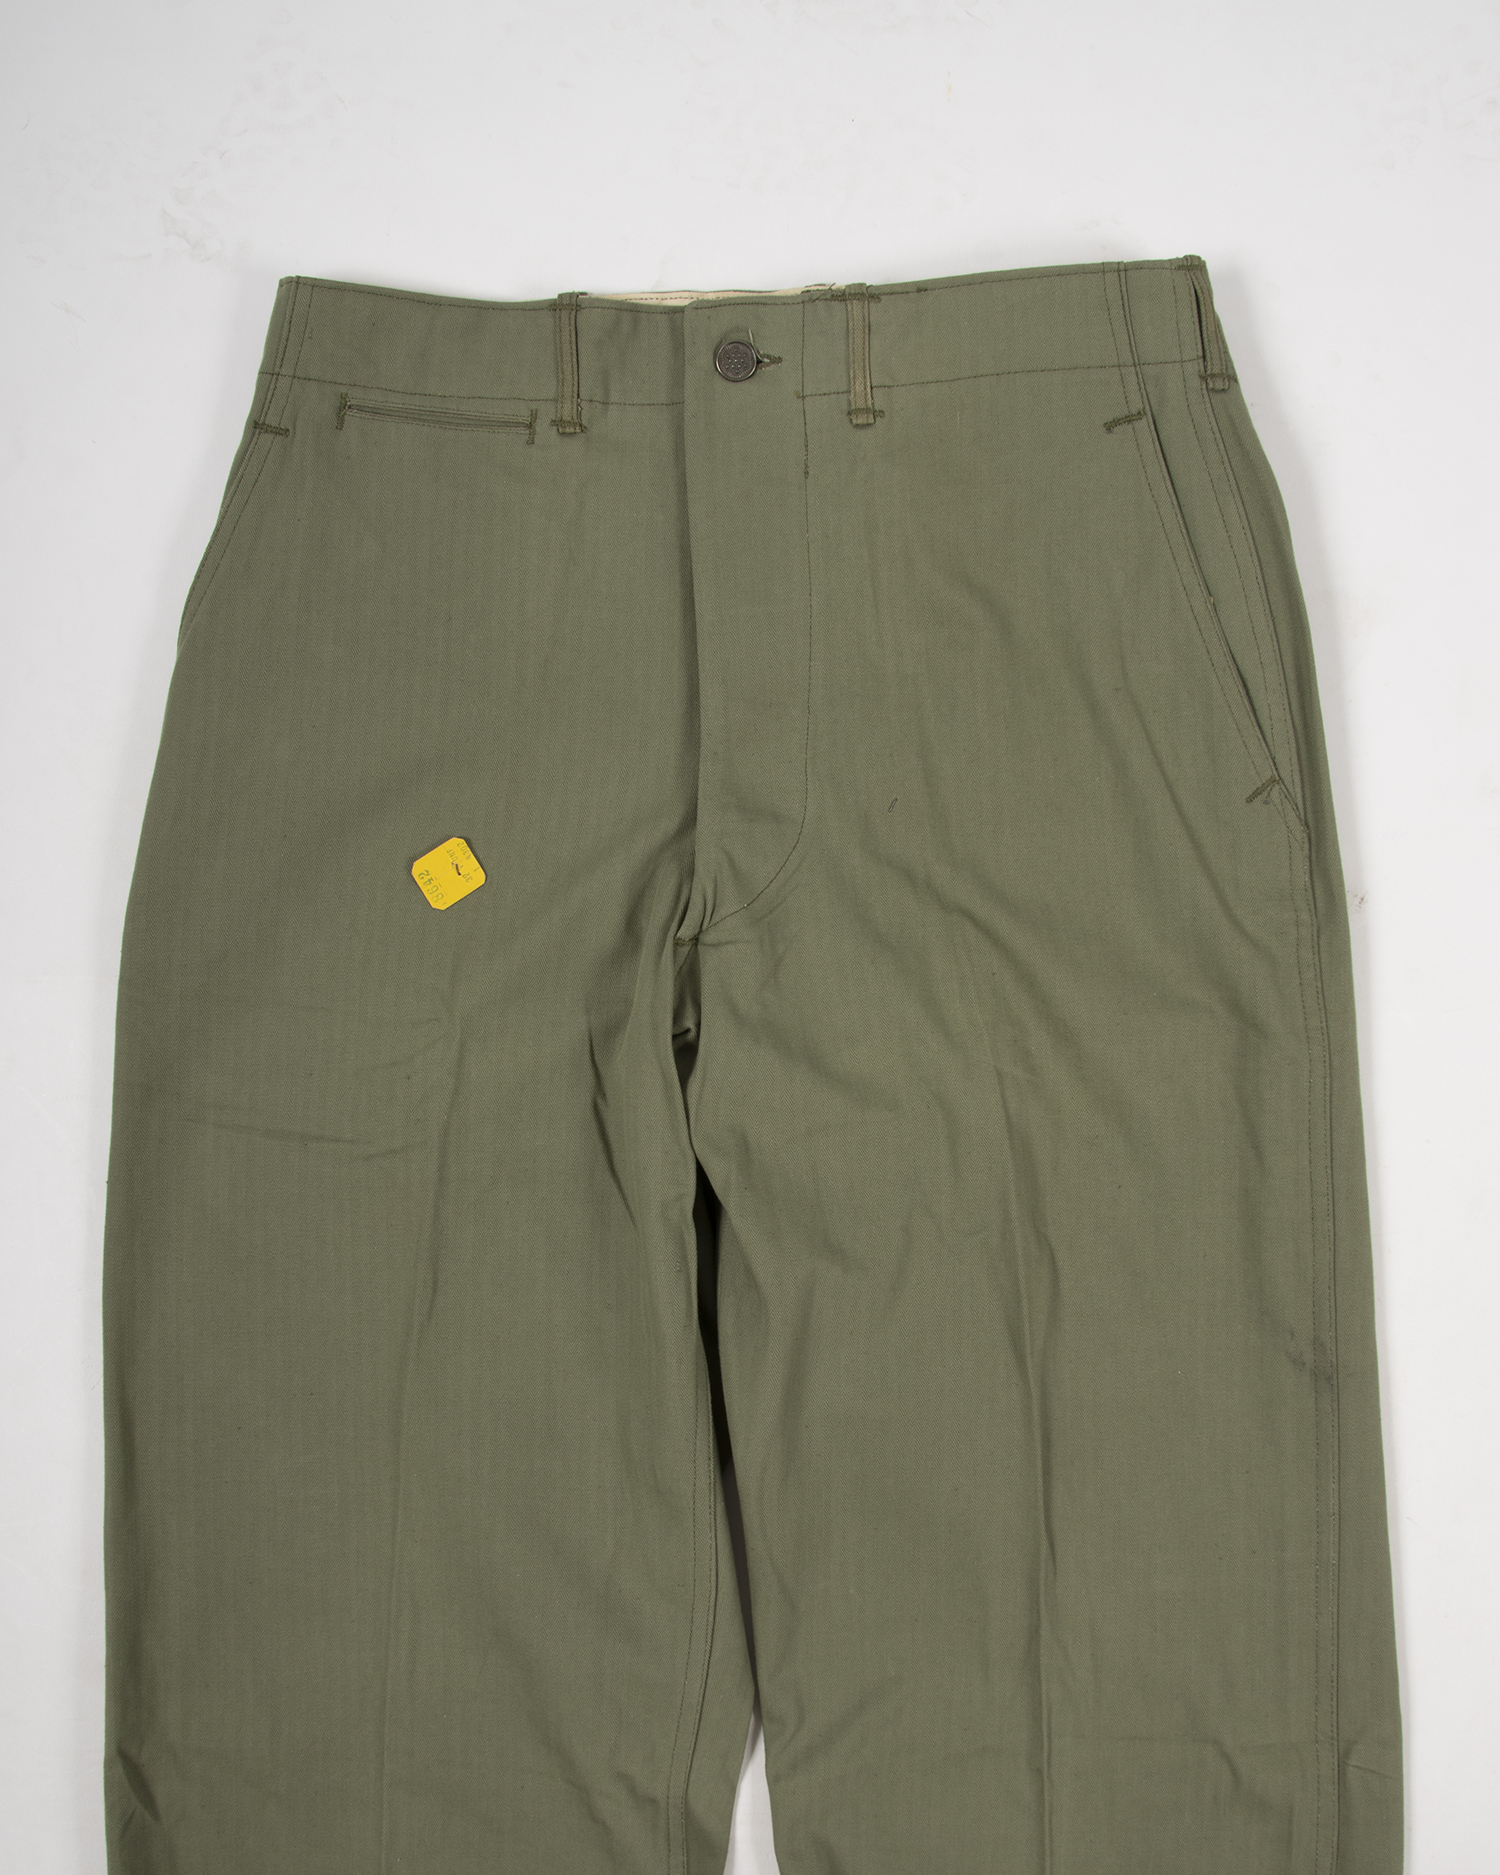
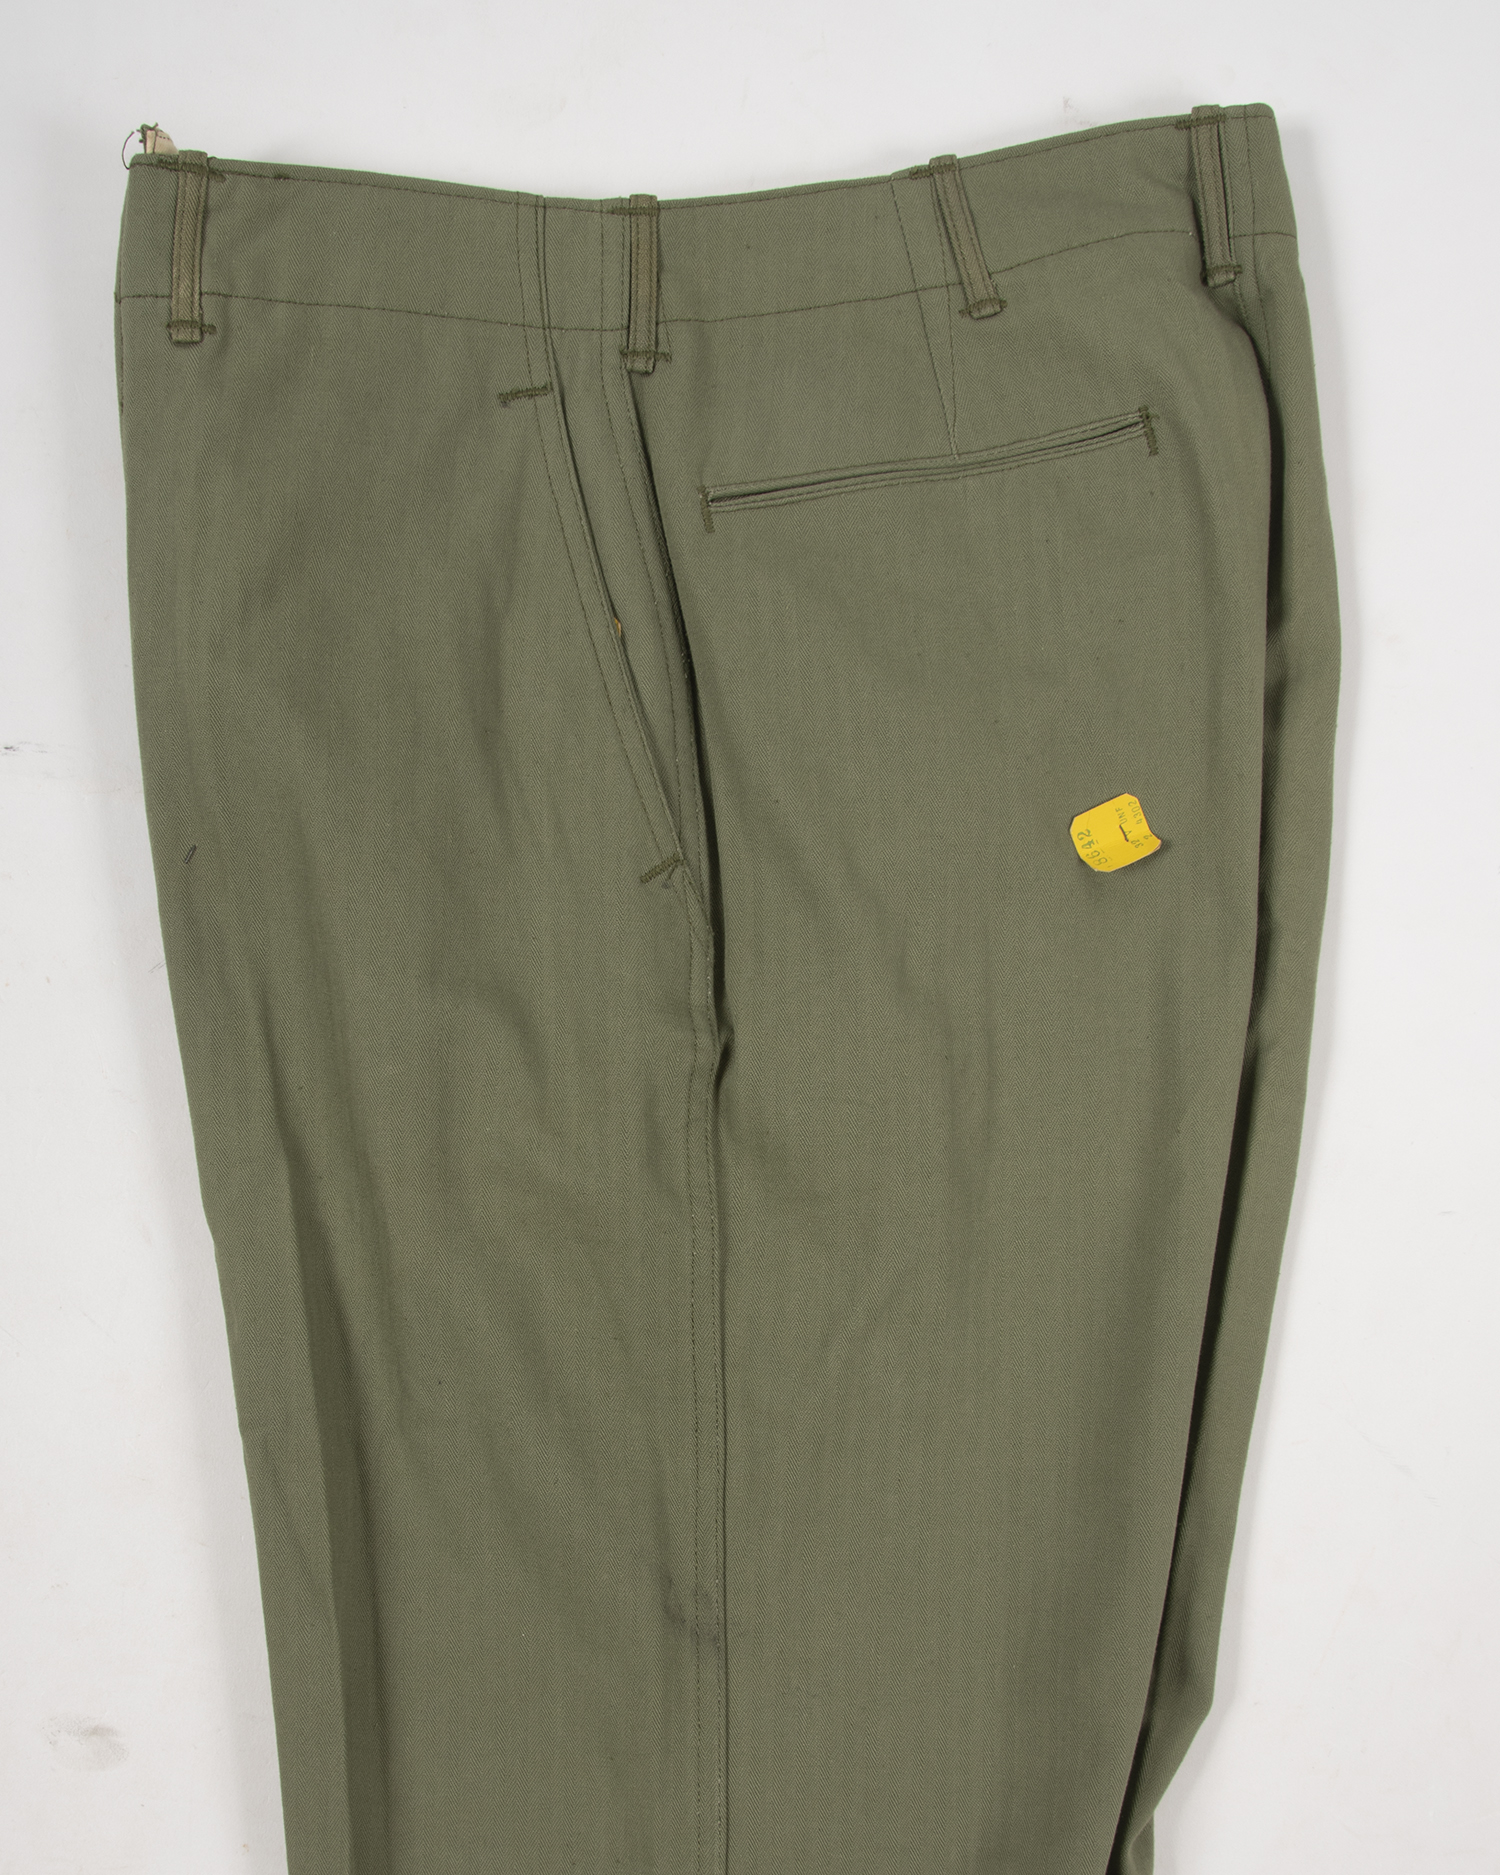
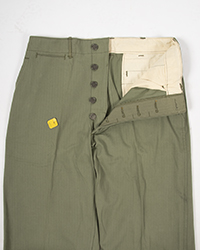
The new field uniform was a layered system consisting of the field jacket, jacket liner, field trousers, and hood. Layering retains body heat far better than a single garment, while also permitting the wearer to add or remove layers to according to the temperature. This post will cover the jackets issued in WWII.
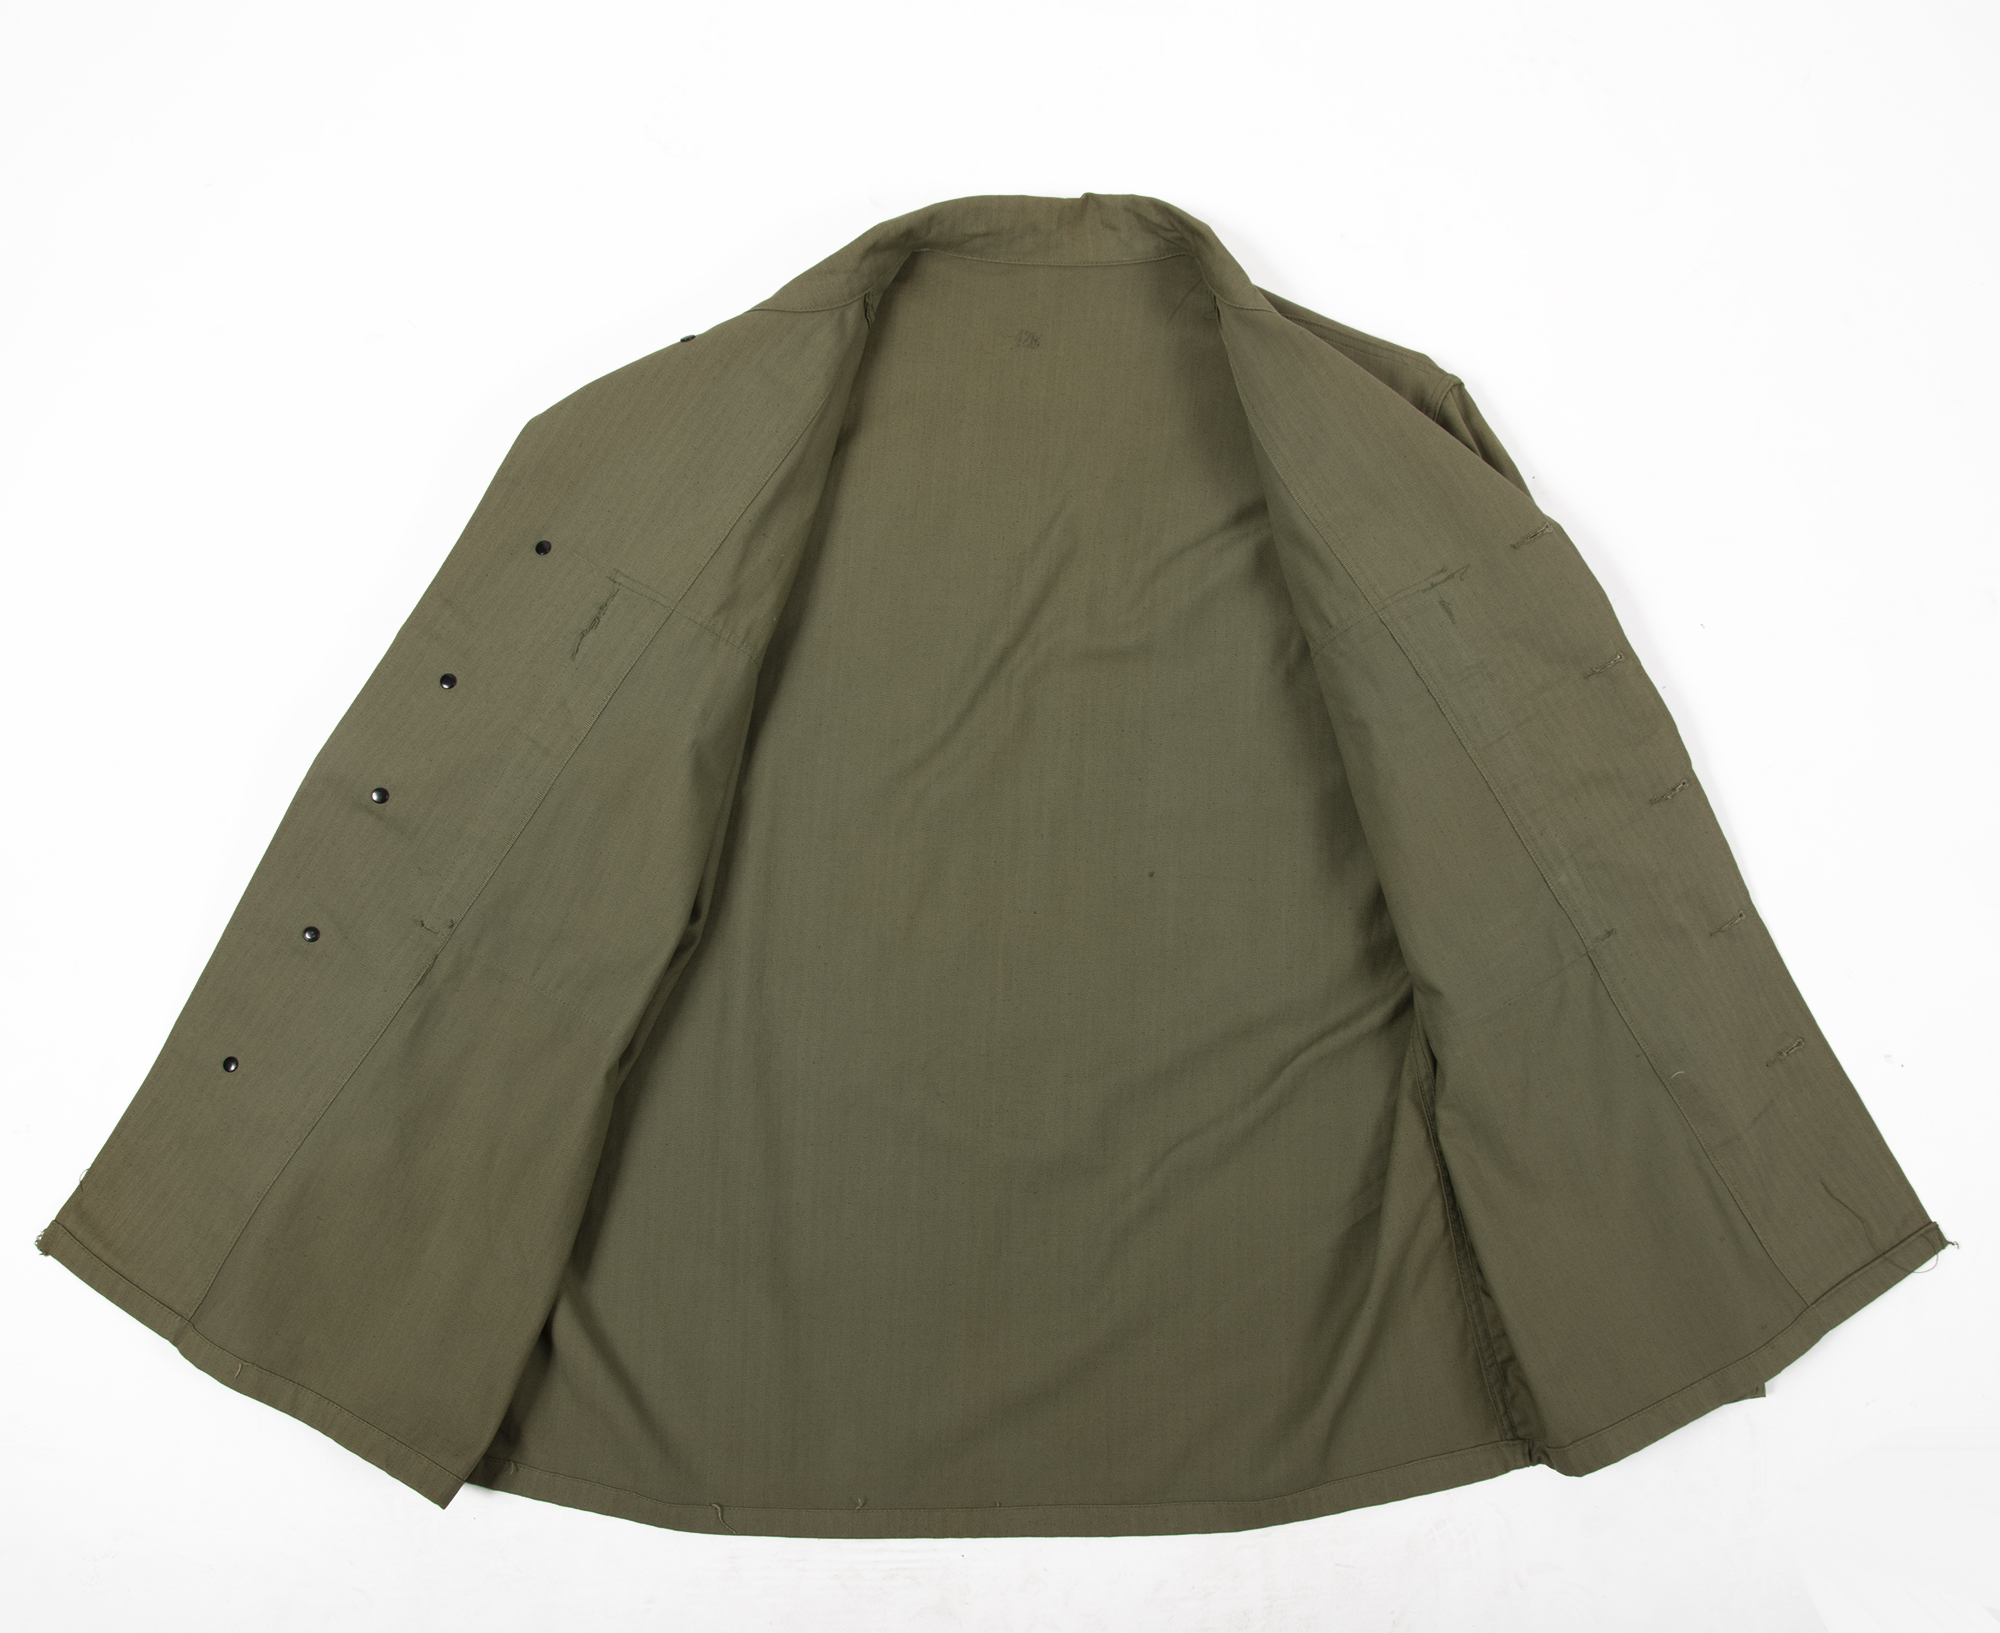
One of the major shortcomings of the M41 Jacket was its lack of warmth and total lack of water repellency. The thin poplin shell fabric was obviously not the appropriate choice for the new jacket. In 1942, the only way to have water and wind proof fabric was to coat it with rubber, which was impractical. The best option was to use cotton cloth made with tightly woven, very fine yarns and treat it with chemical finishes to help them repel water as much as possible. Ultimately a tough cotton sateen cloth was chosen for the outer garments, which provided a decent degree of protection. The wool lining of previous coats was dispensed with (although a test batch of wool lined M43’s was supposedly made) as it necessitated dry cleaning and had the aforementioned shrinkage problems. A cotton poplin lining was used instead since a separate liner was planned.
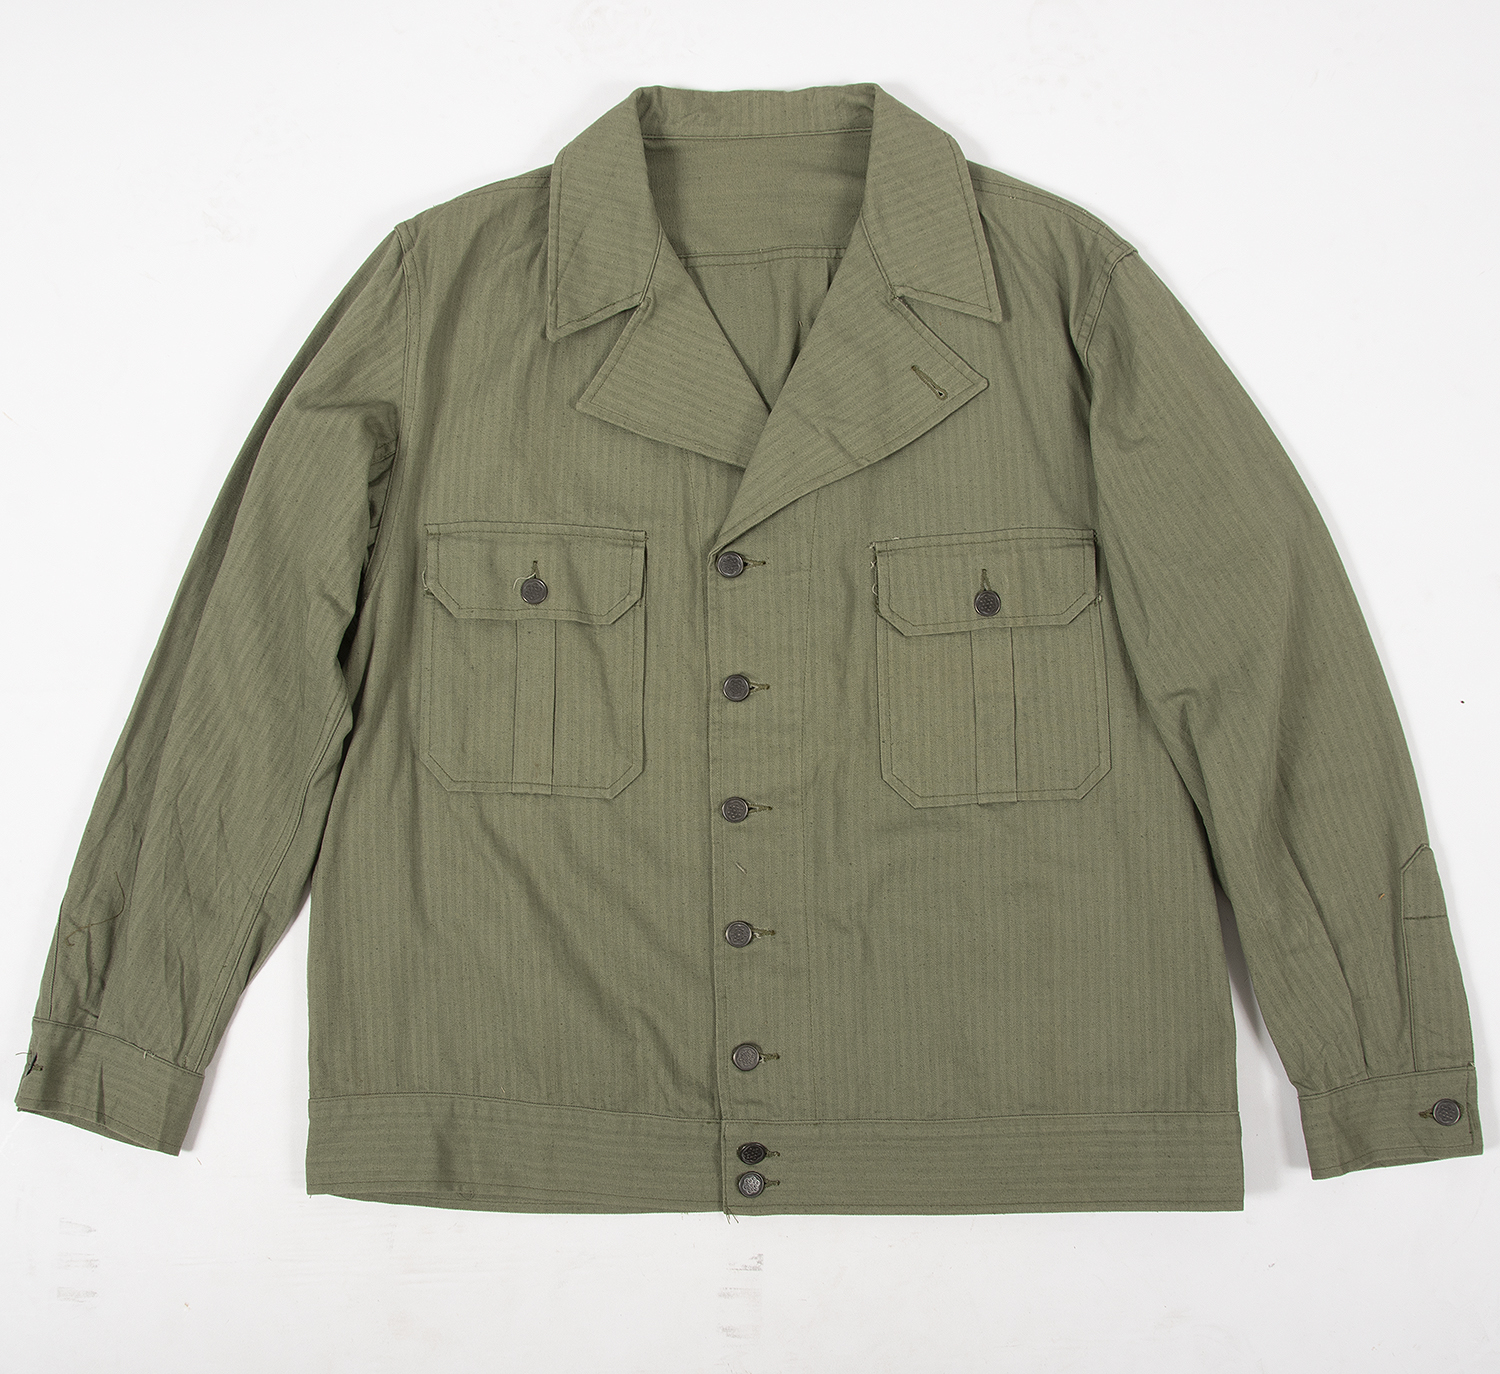
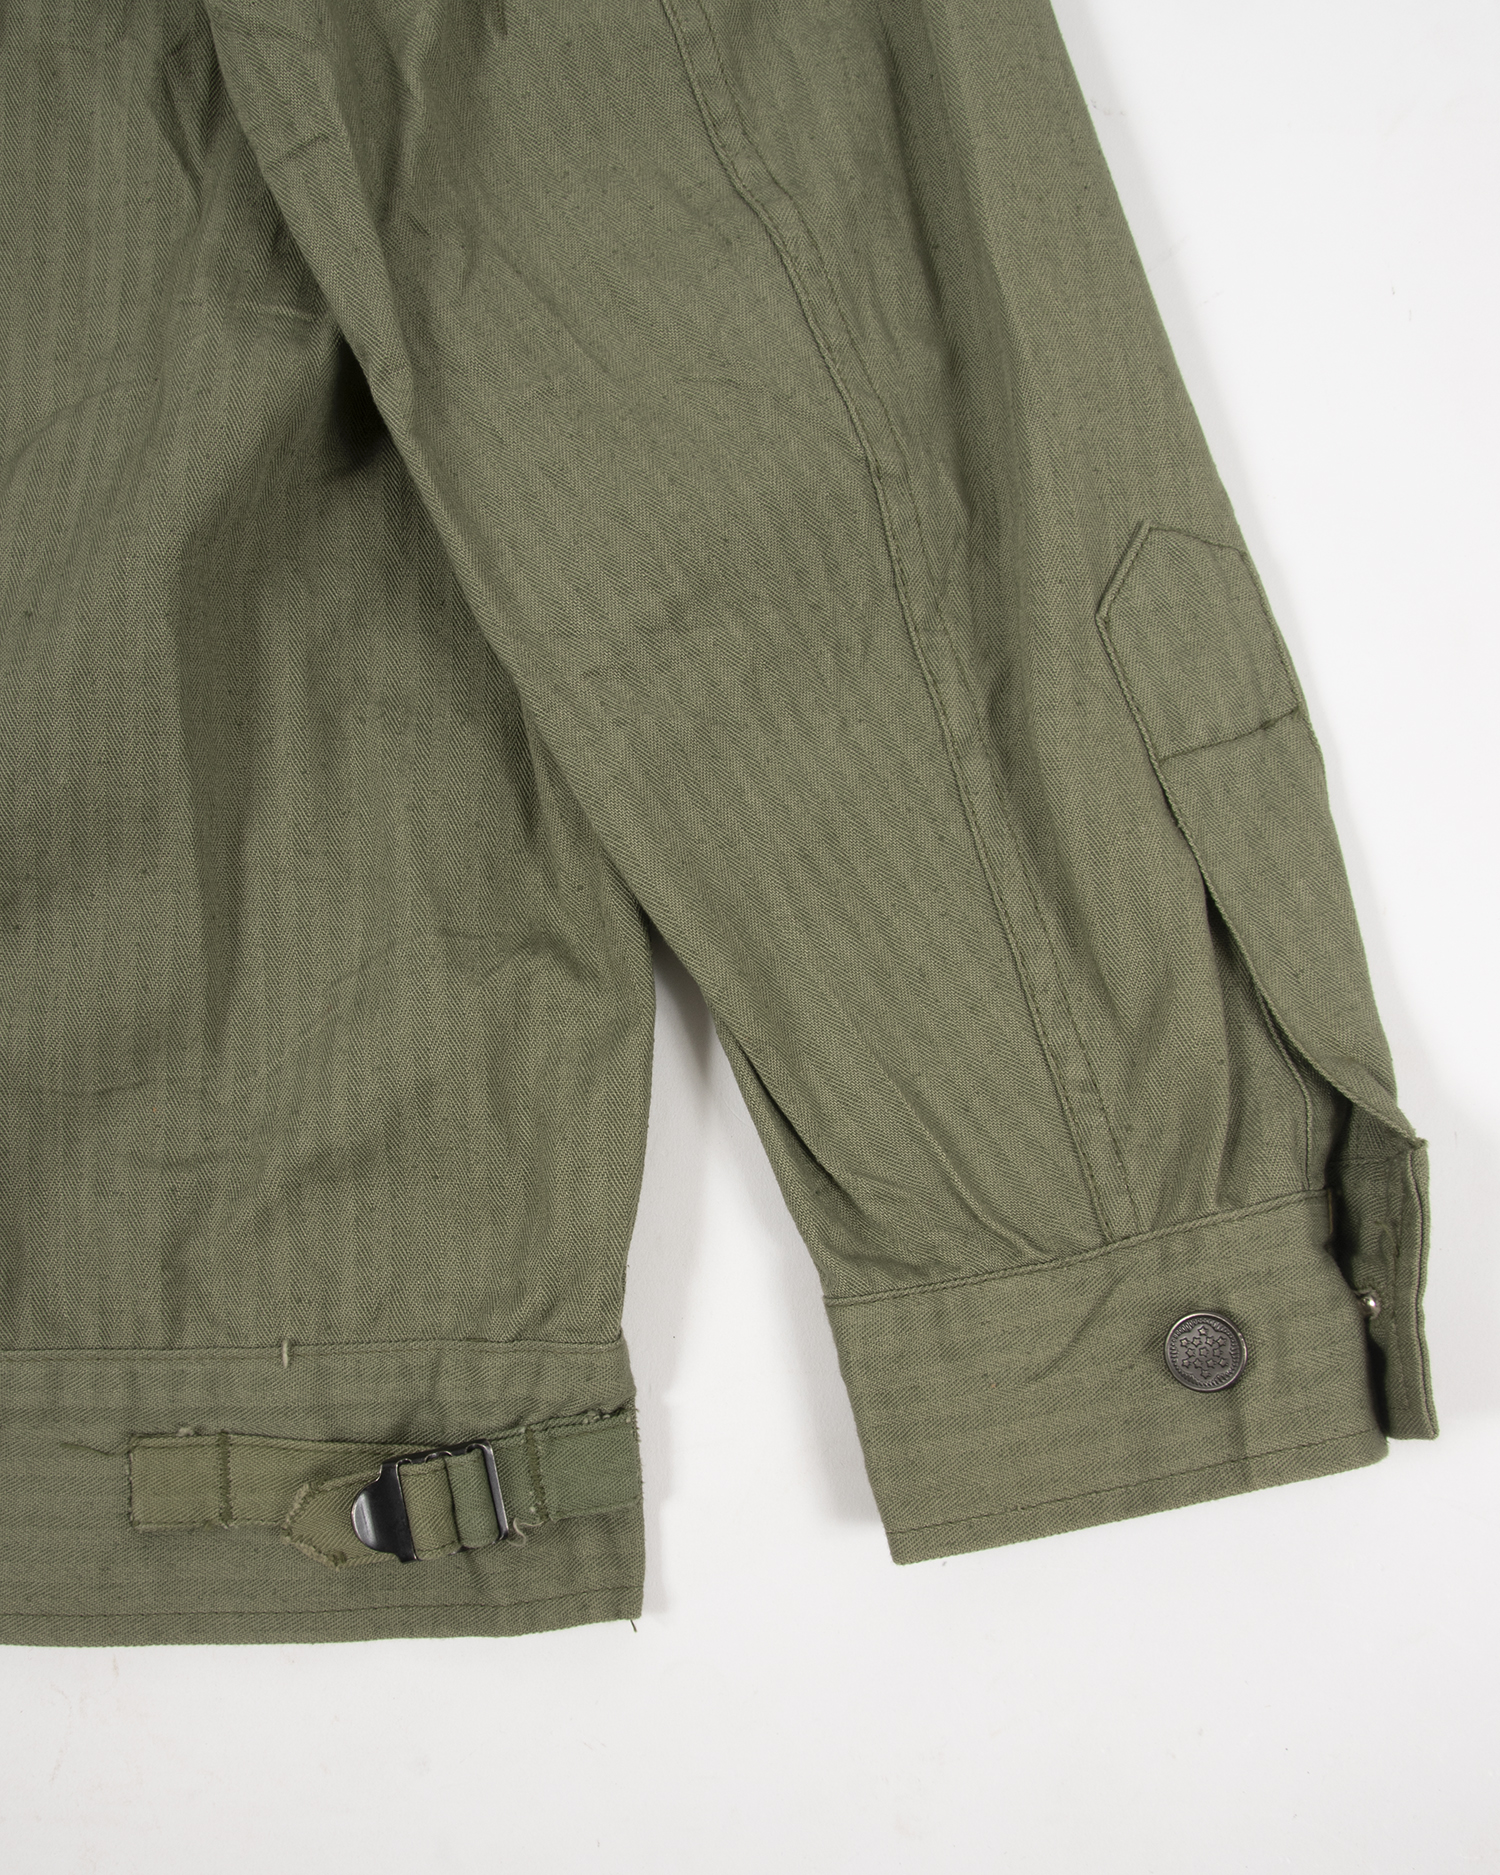
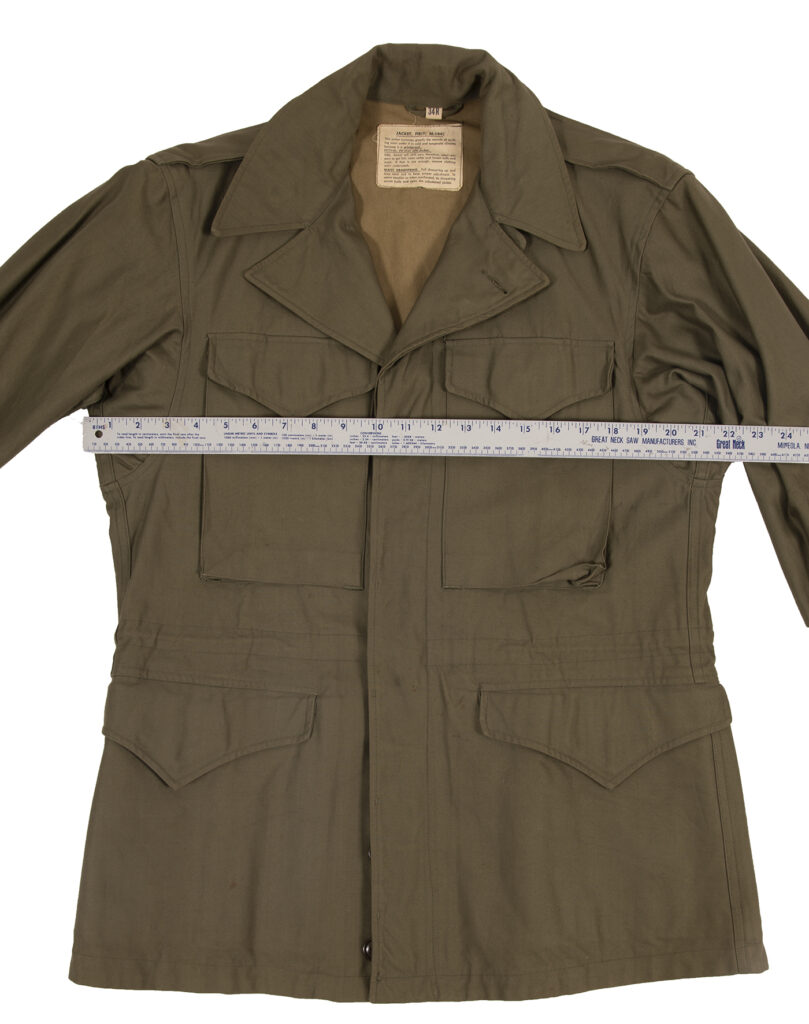
The pattern of the jacket was a remarkable exercise in common sense. The cut was loose and roomy for freedom of movement and to allow more layers of clothing to fit underneath. Four large pockets were provided, with the lower two being internally reinforced with 3/4″ webbing to better distribute weight when stuffed with ammo and grenades. To help keep the wind out, the cuffs and collar could be closed tightly and a drawstring was provided at the waist. The designers decided against using a zipper as they often broke and were difficult to operate with gloves on. However, it is not uncommon to find WWII jackets tailor modified with various types of zippers.
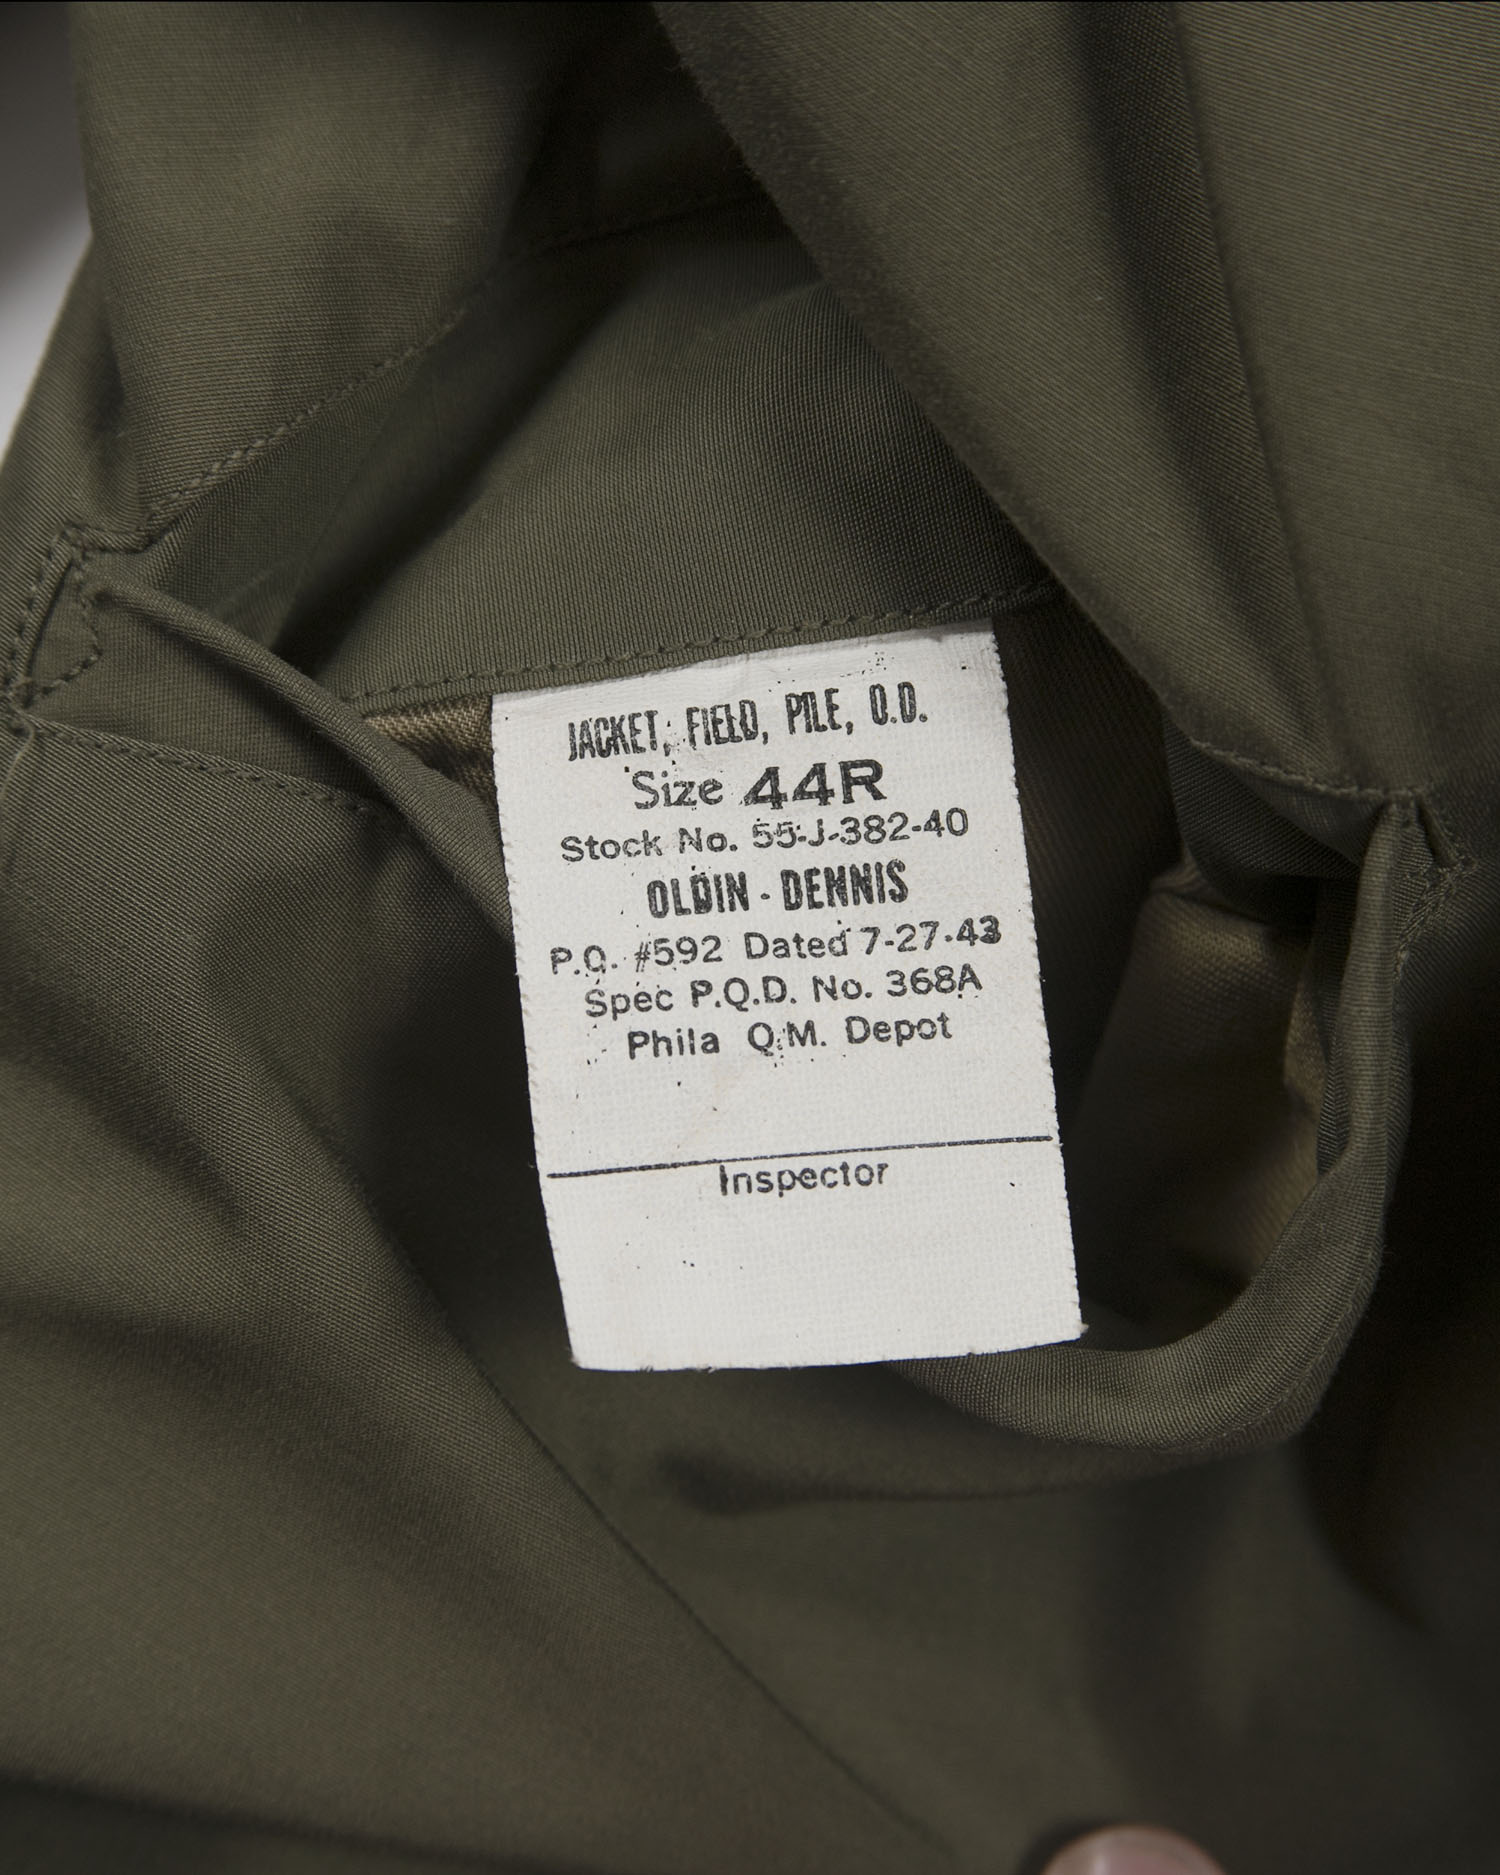
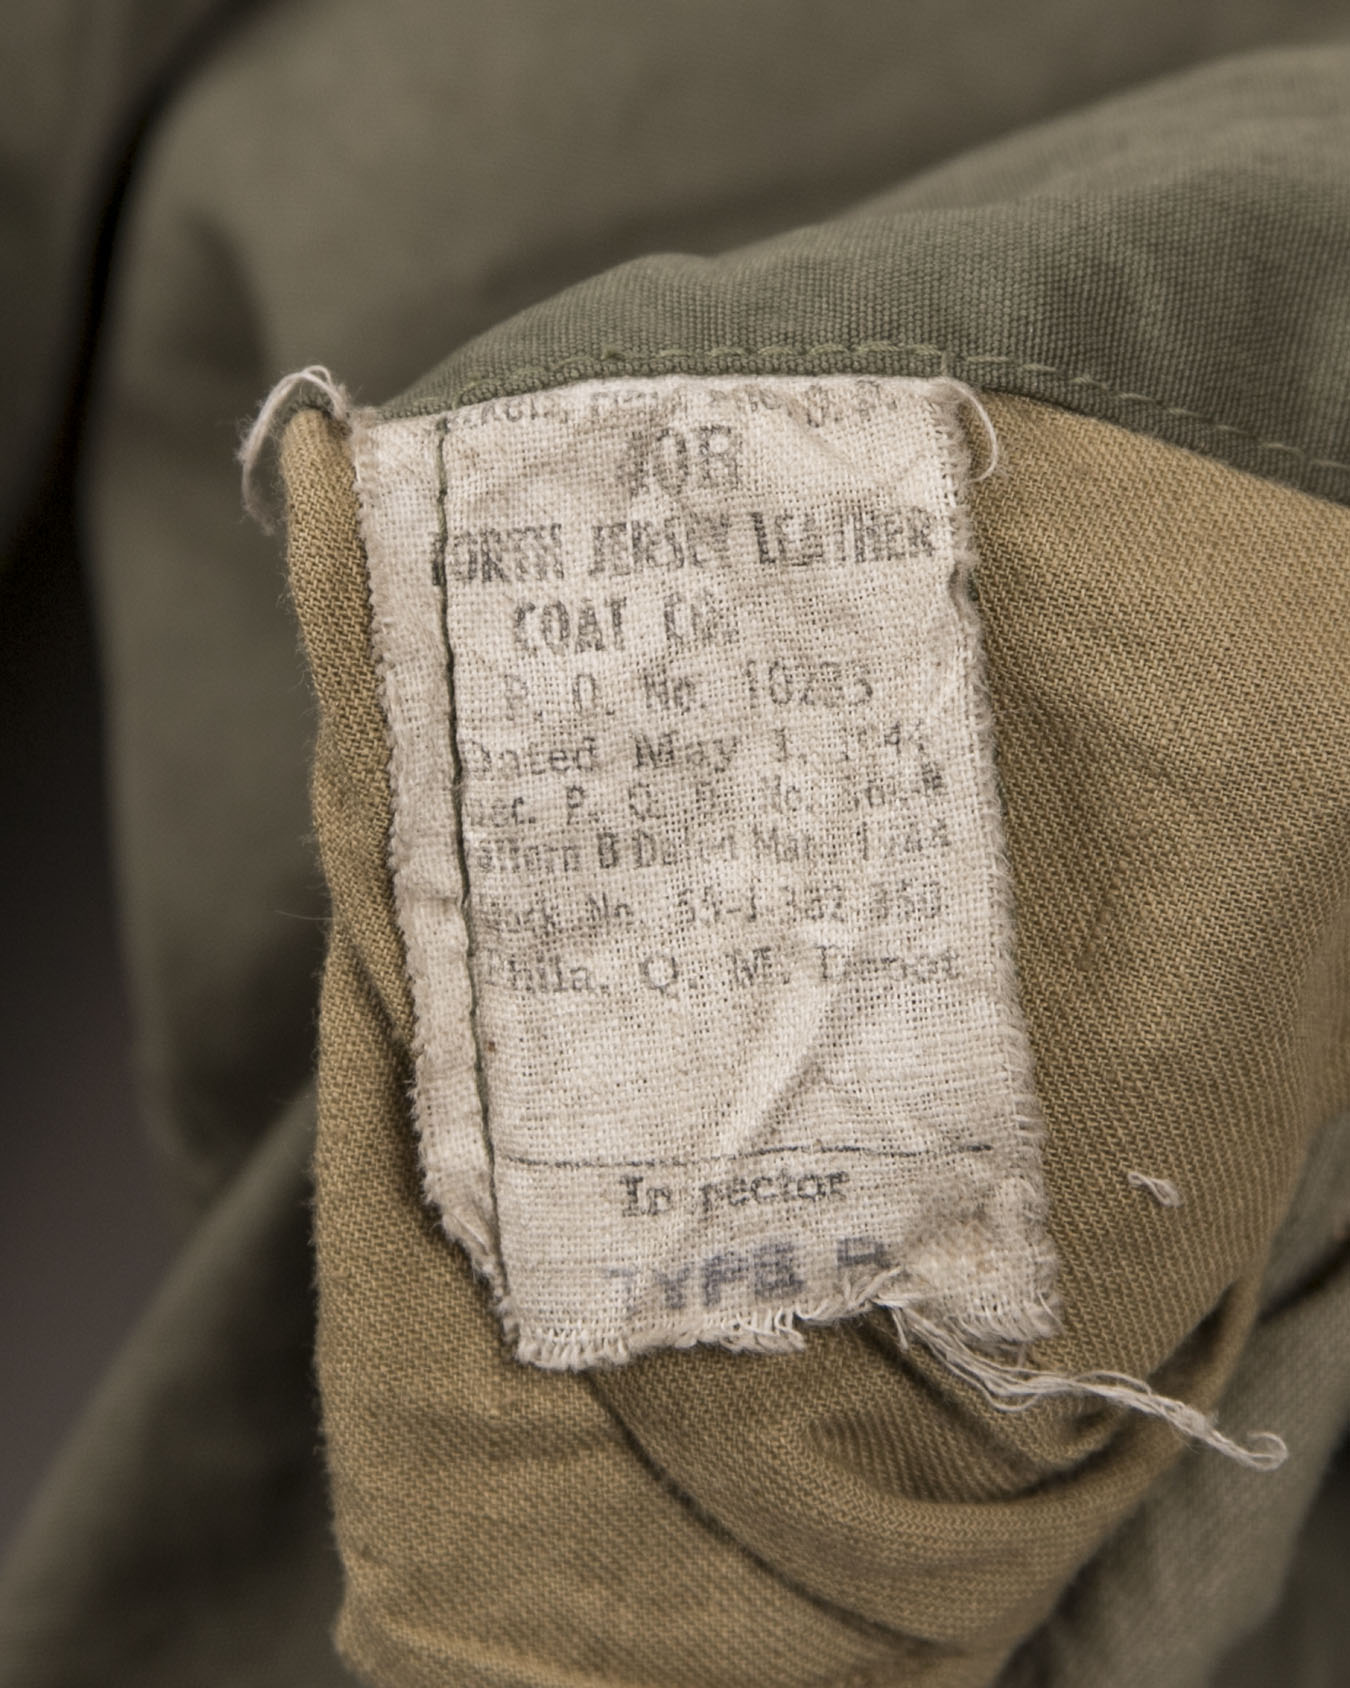
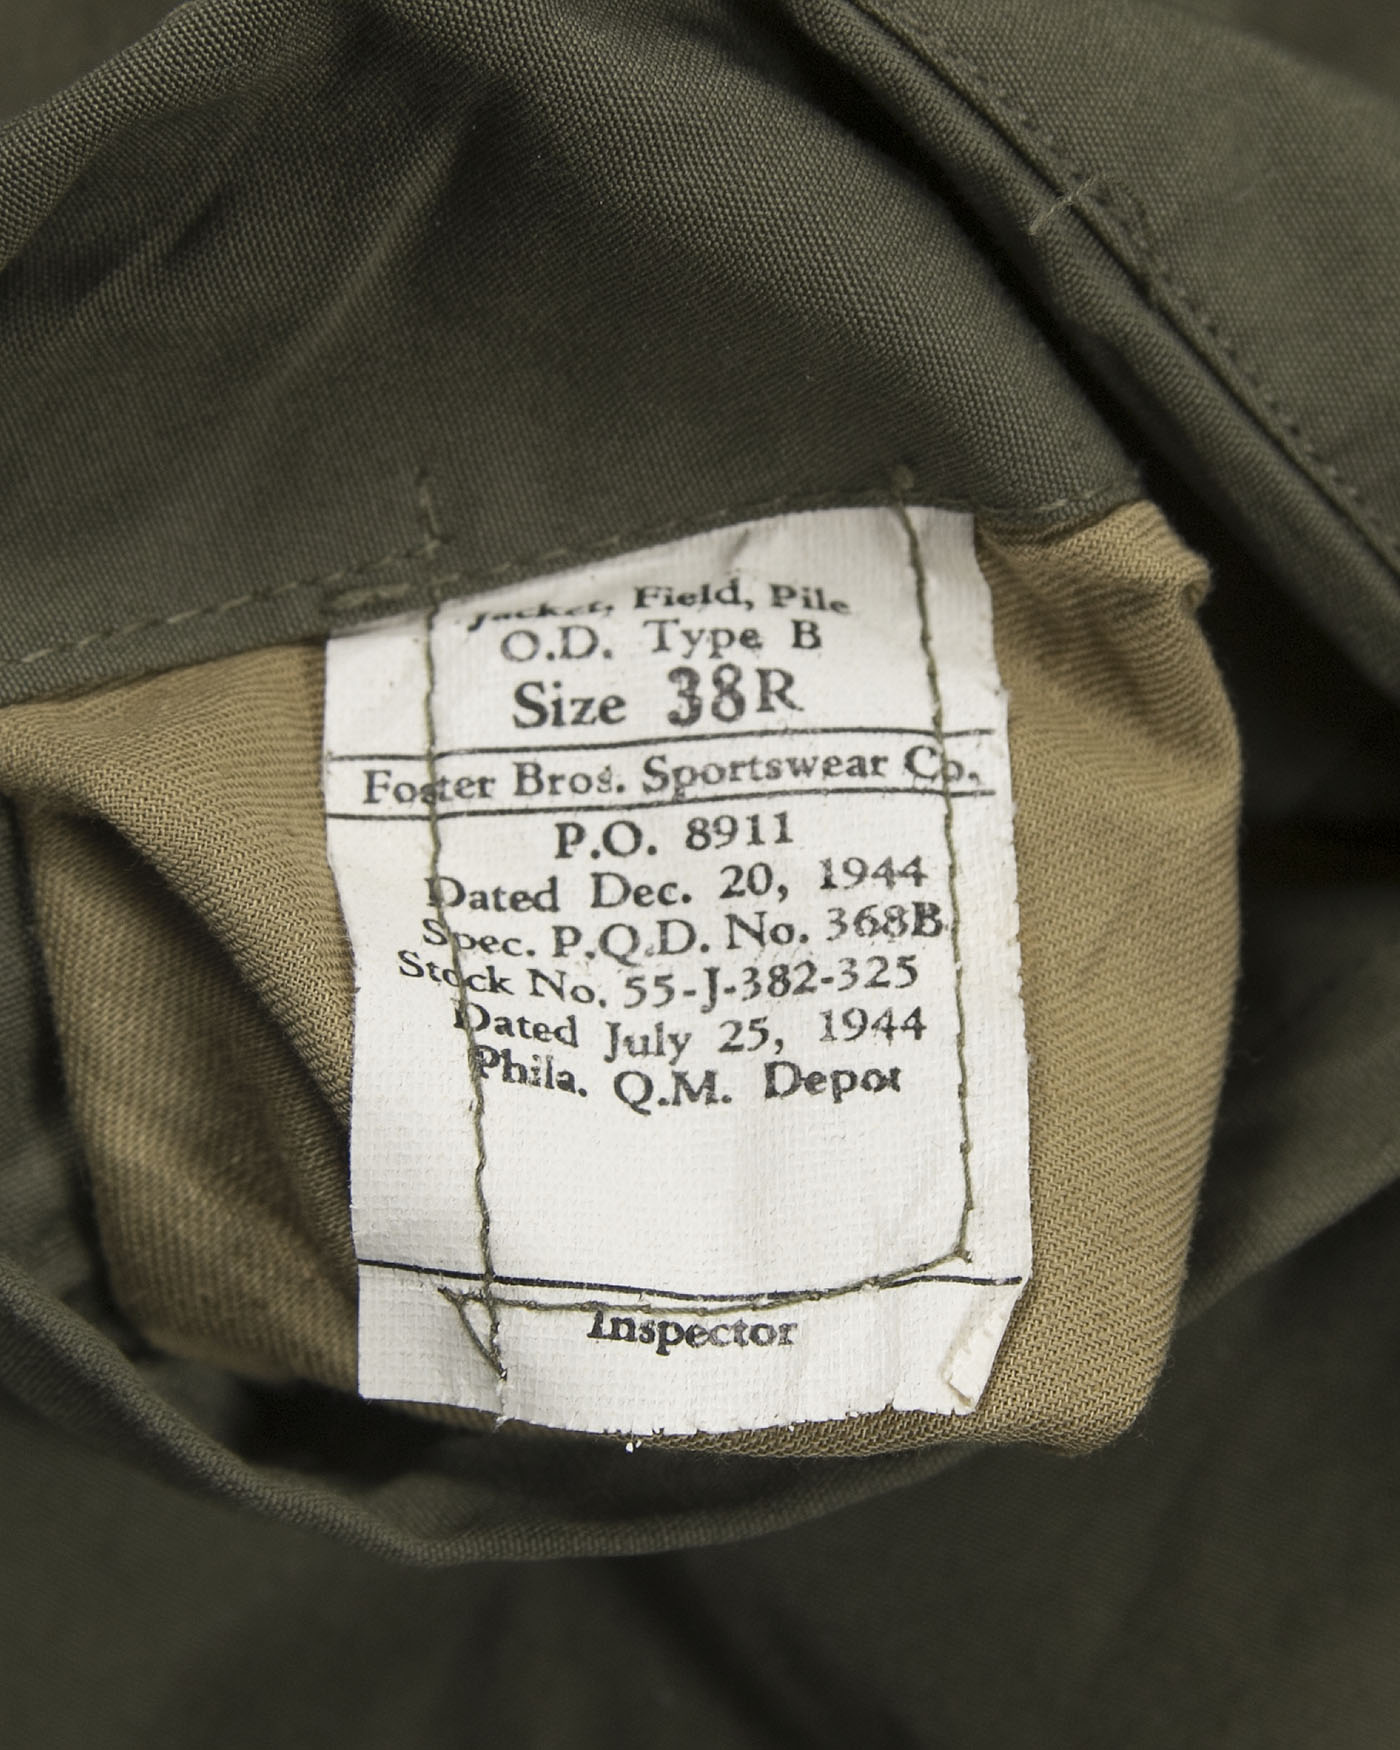
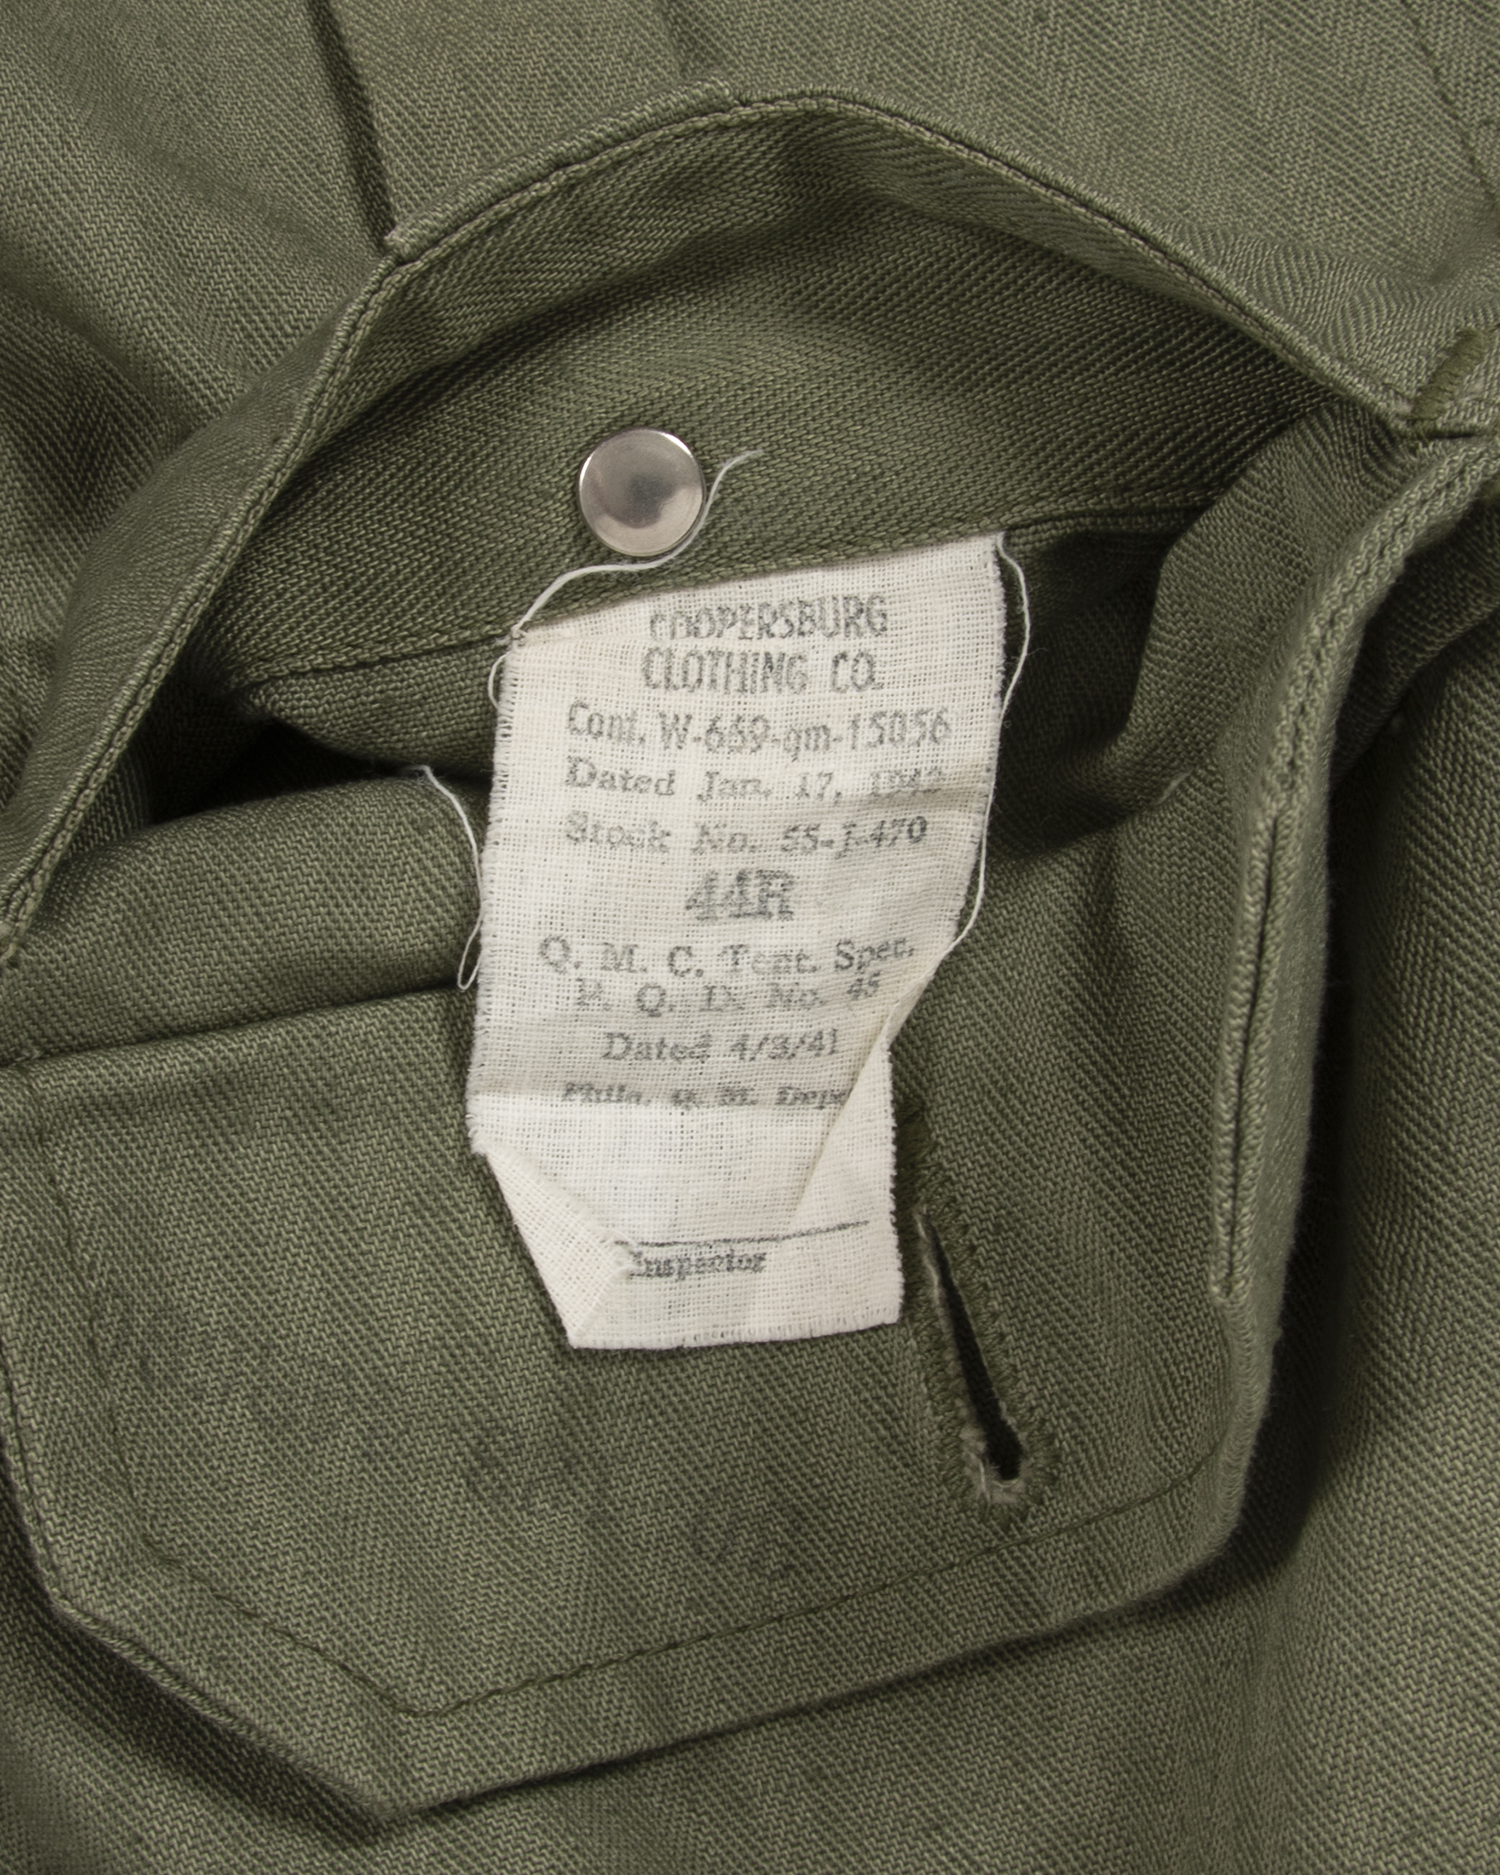
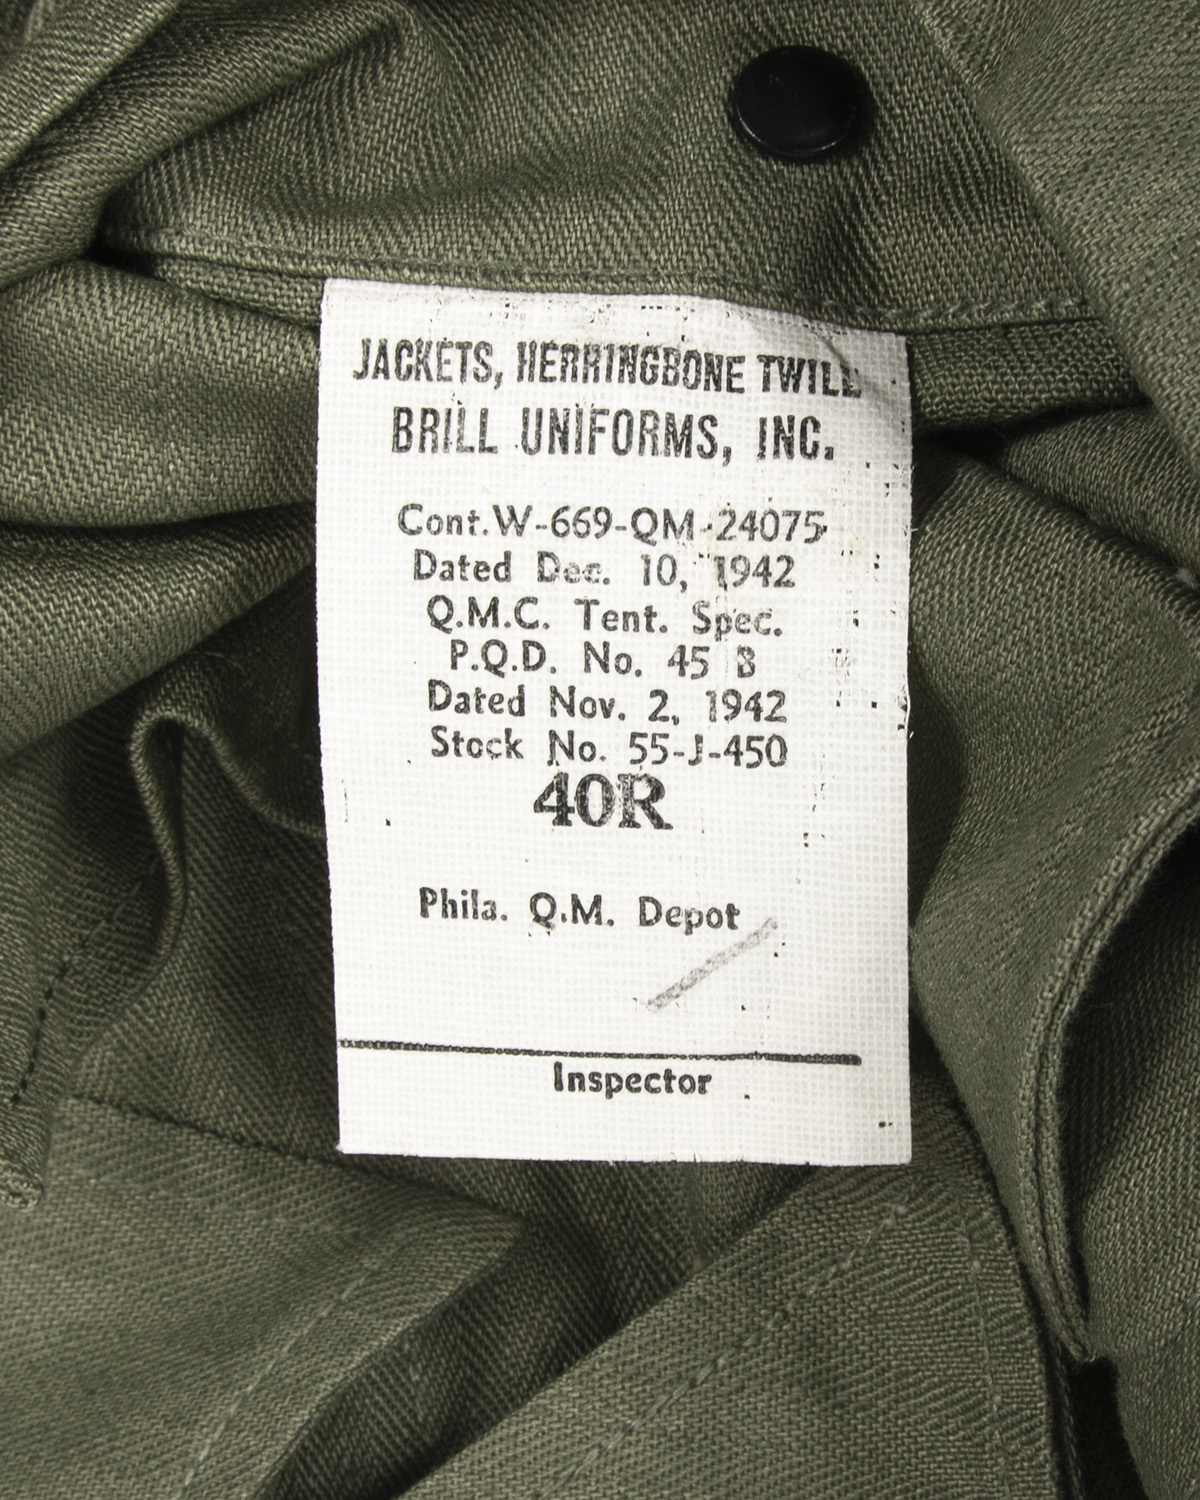
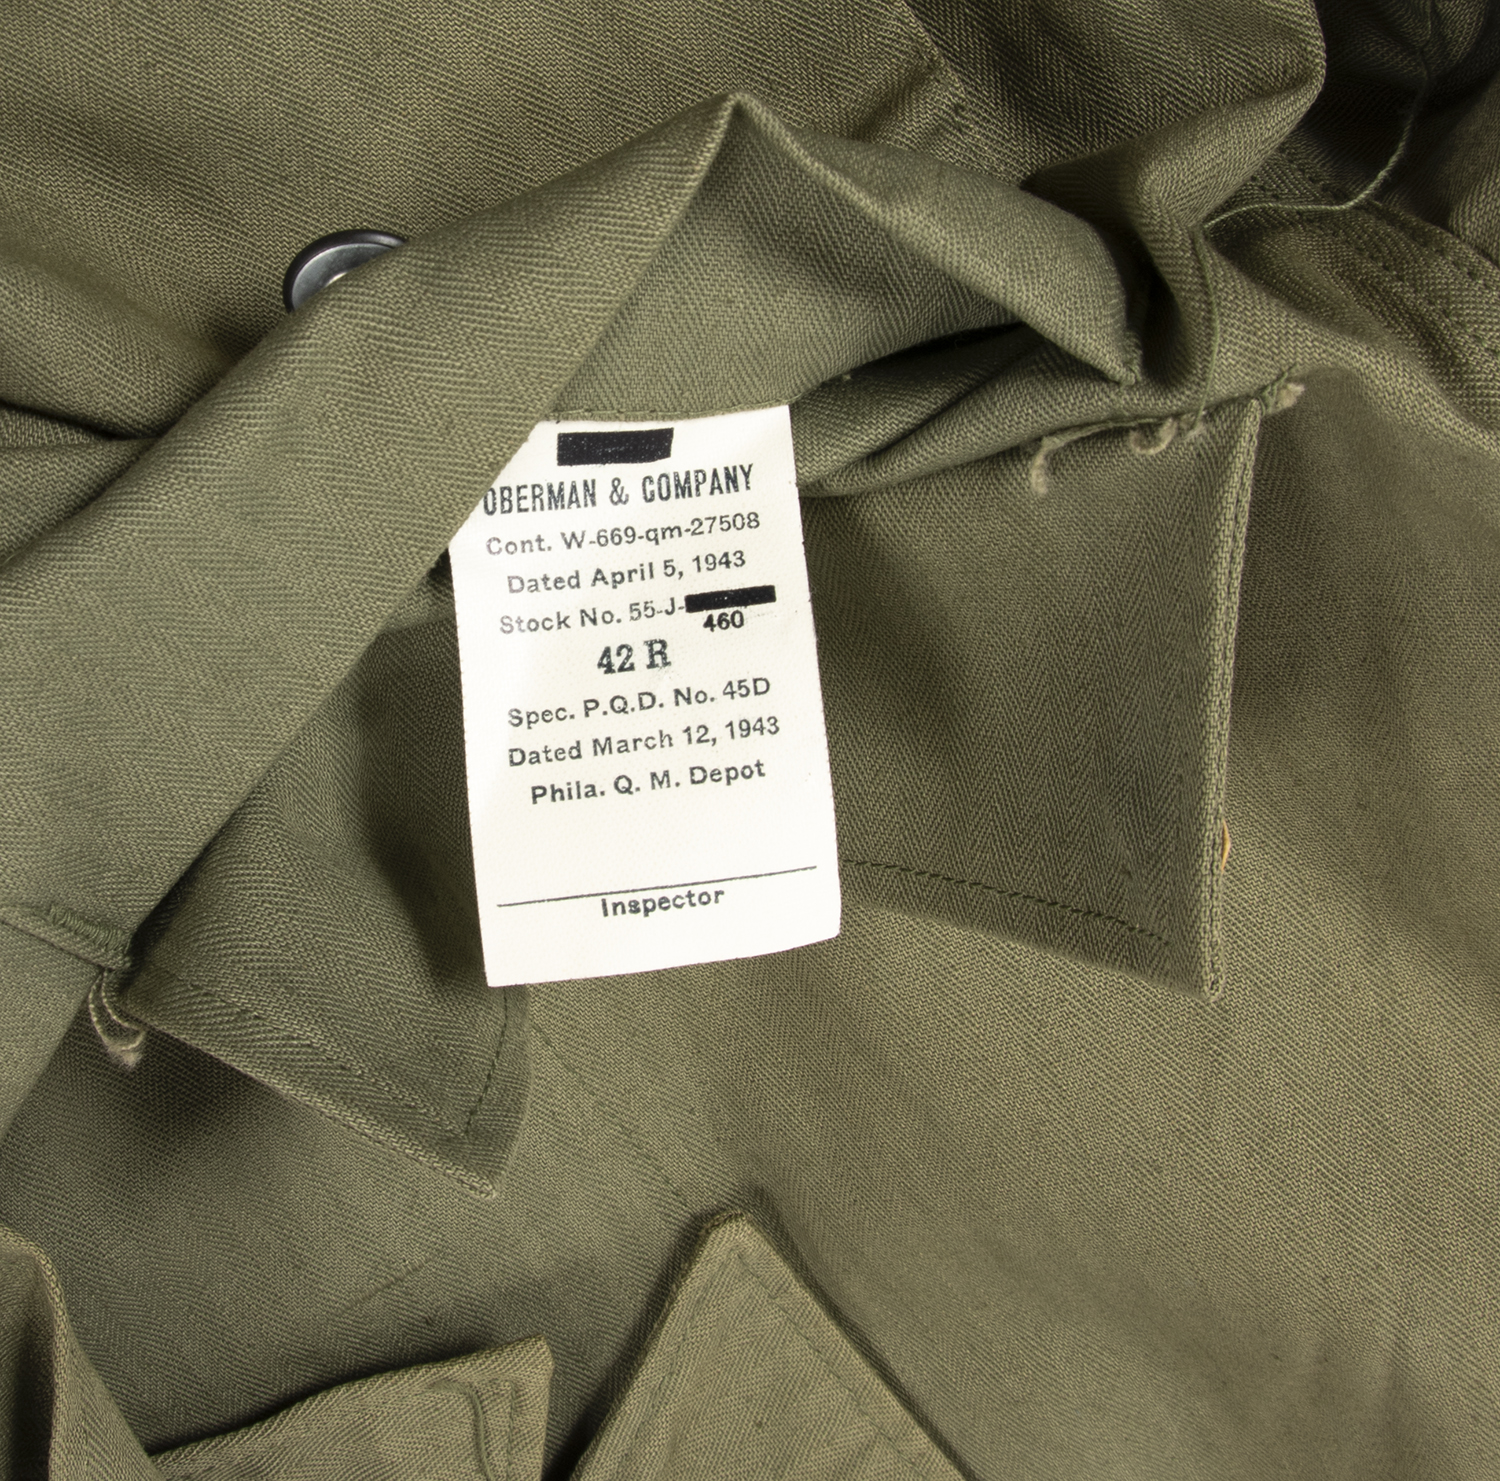
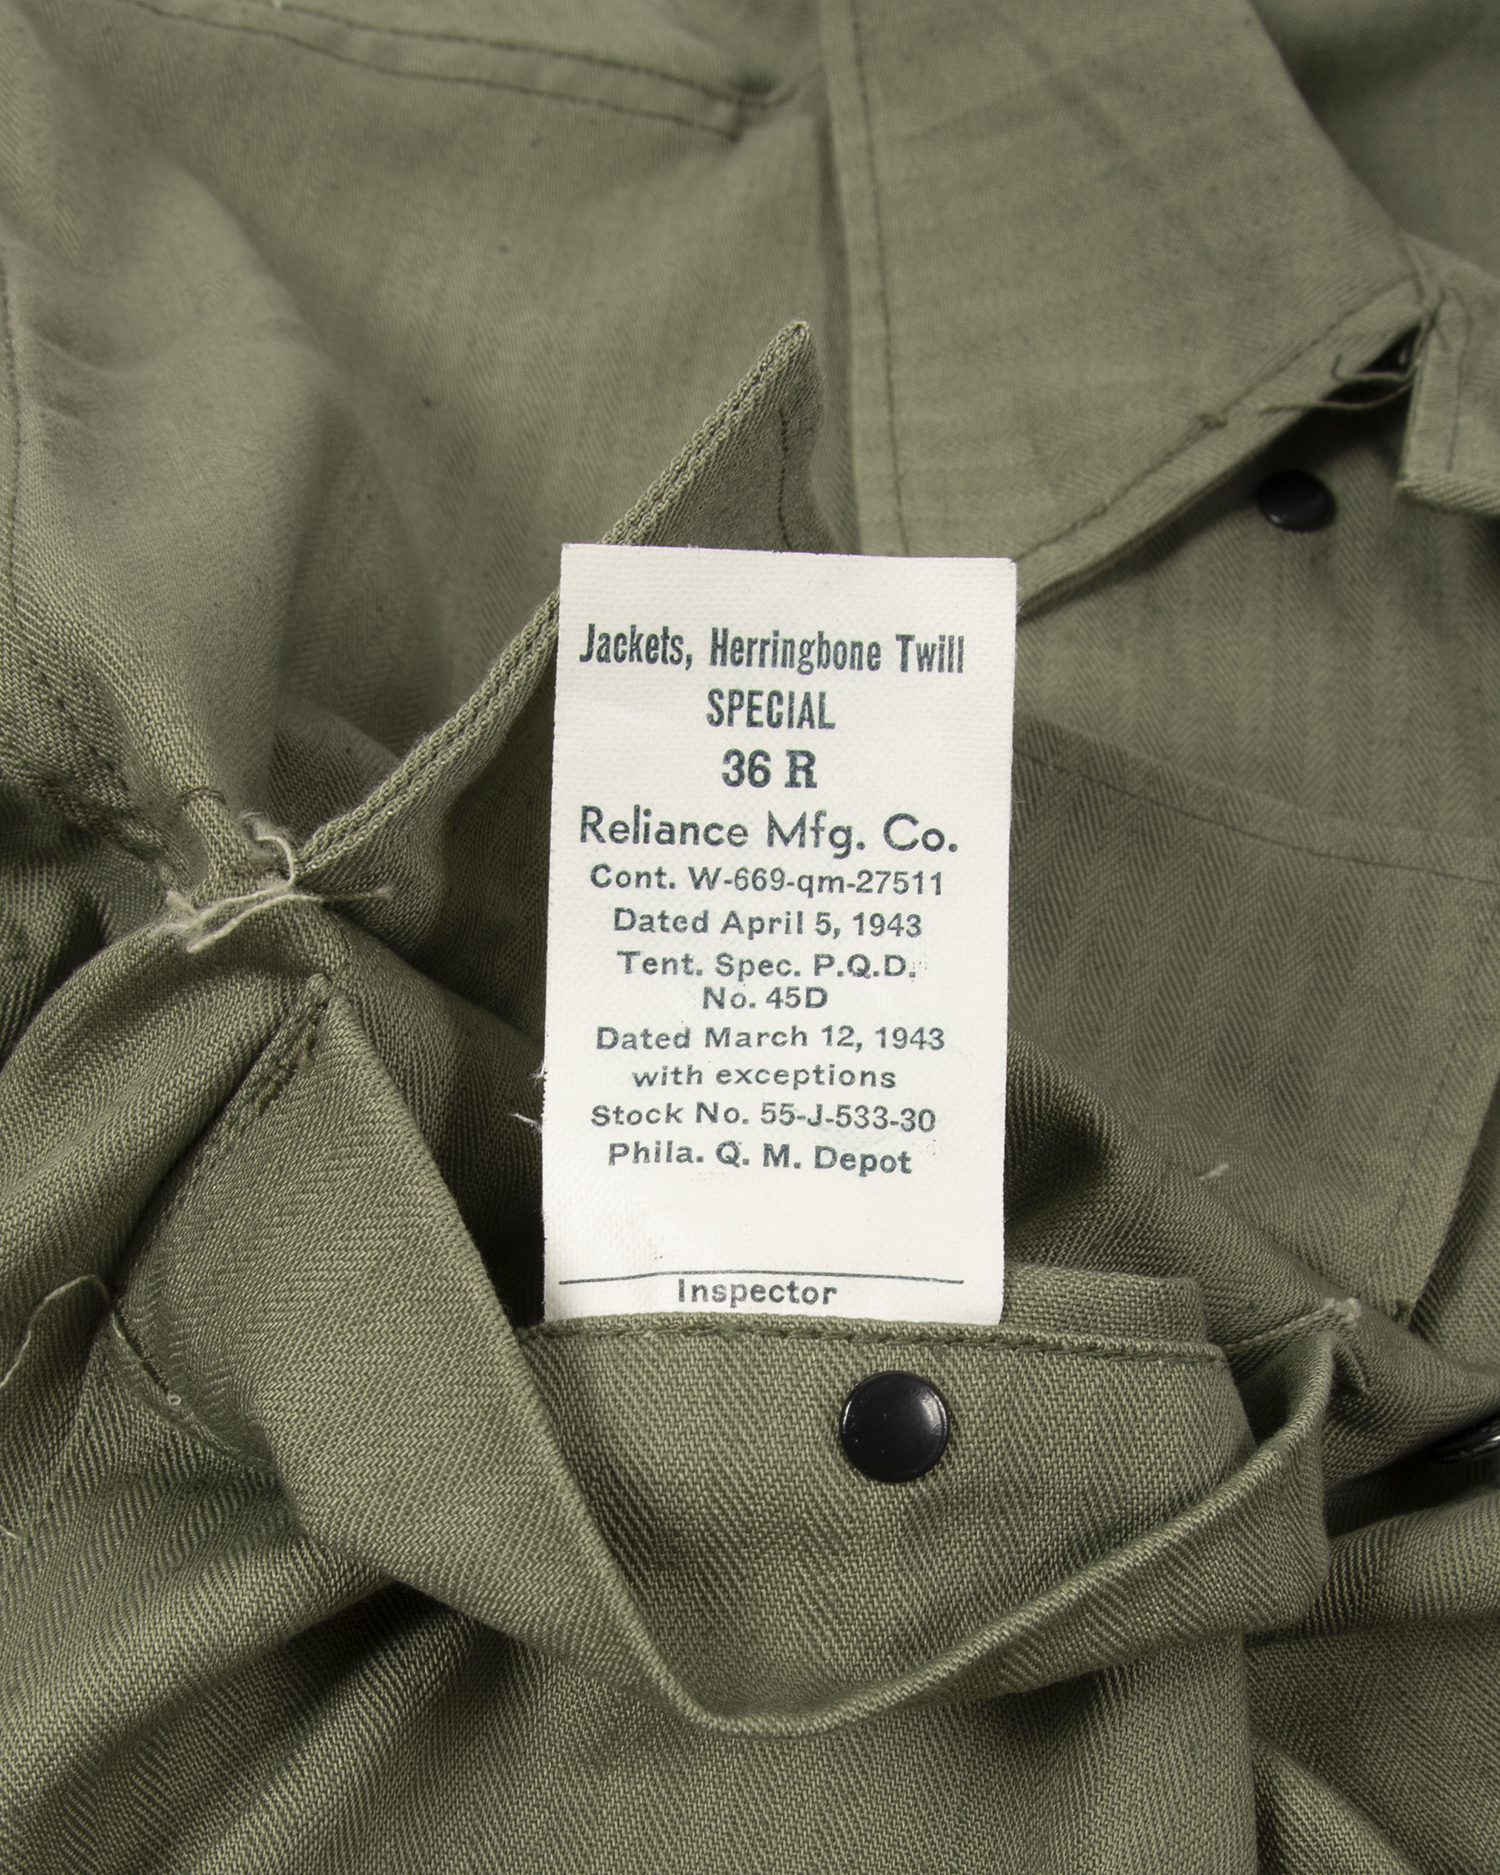
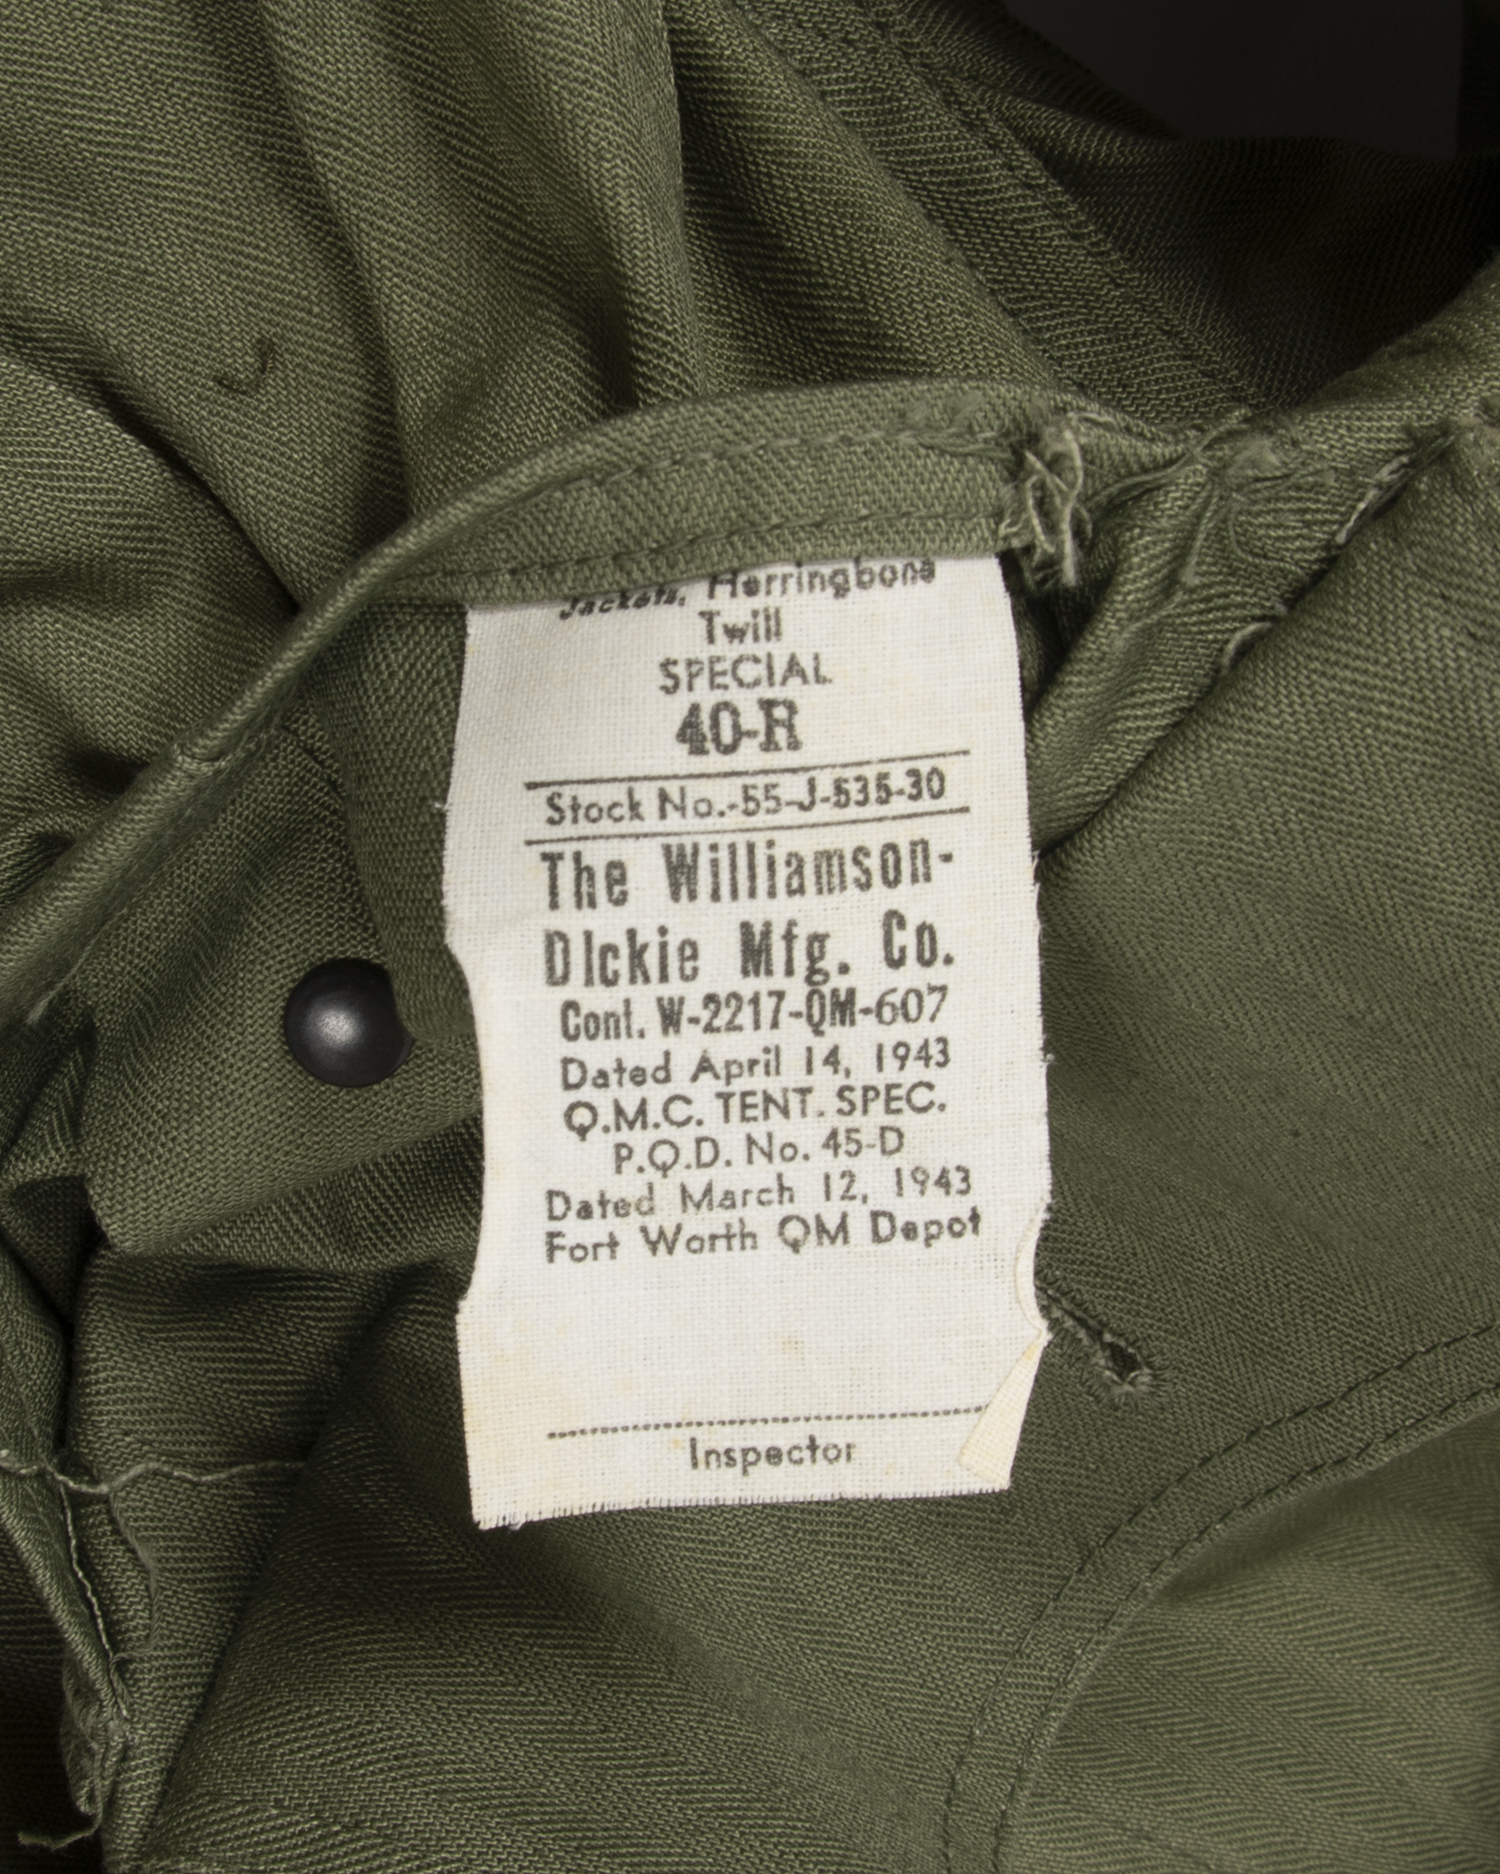
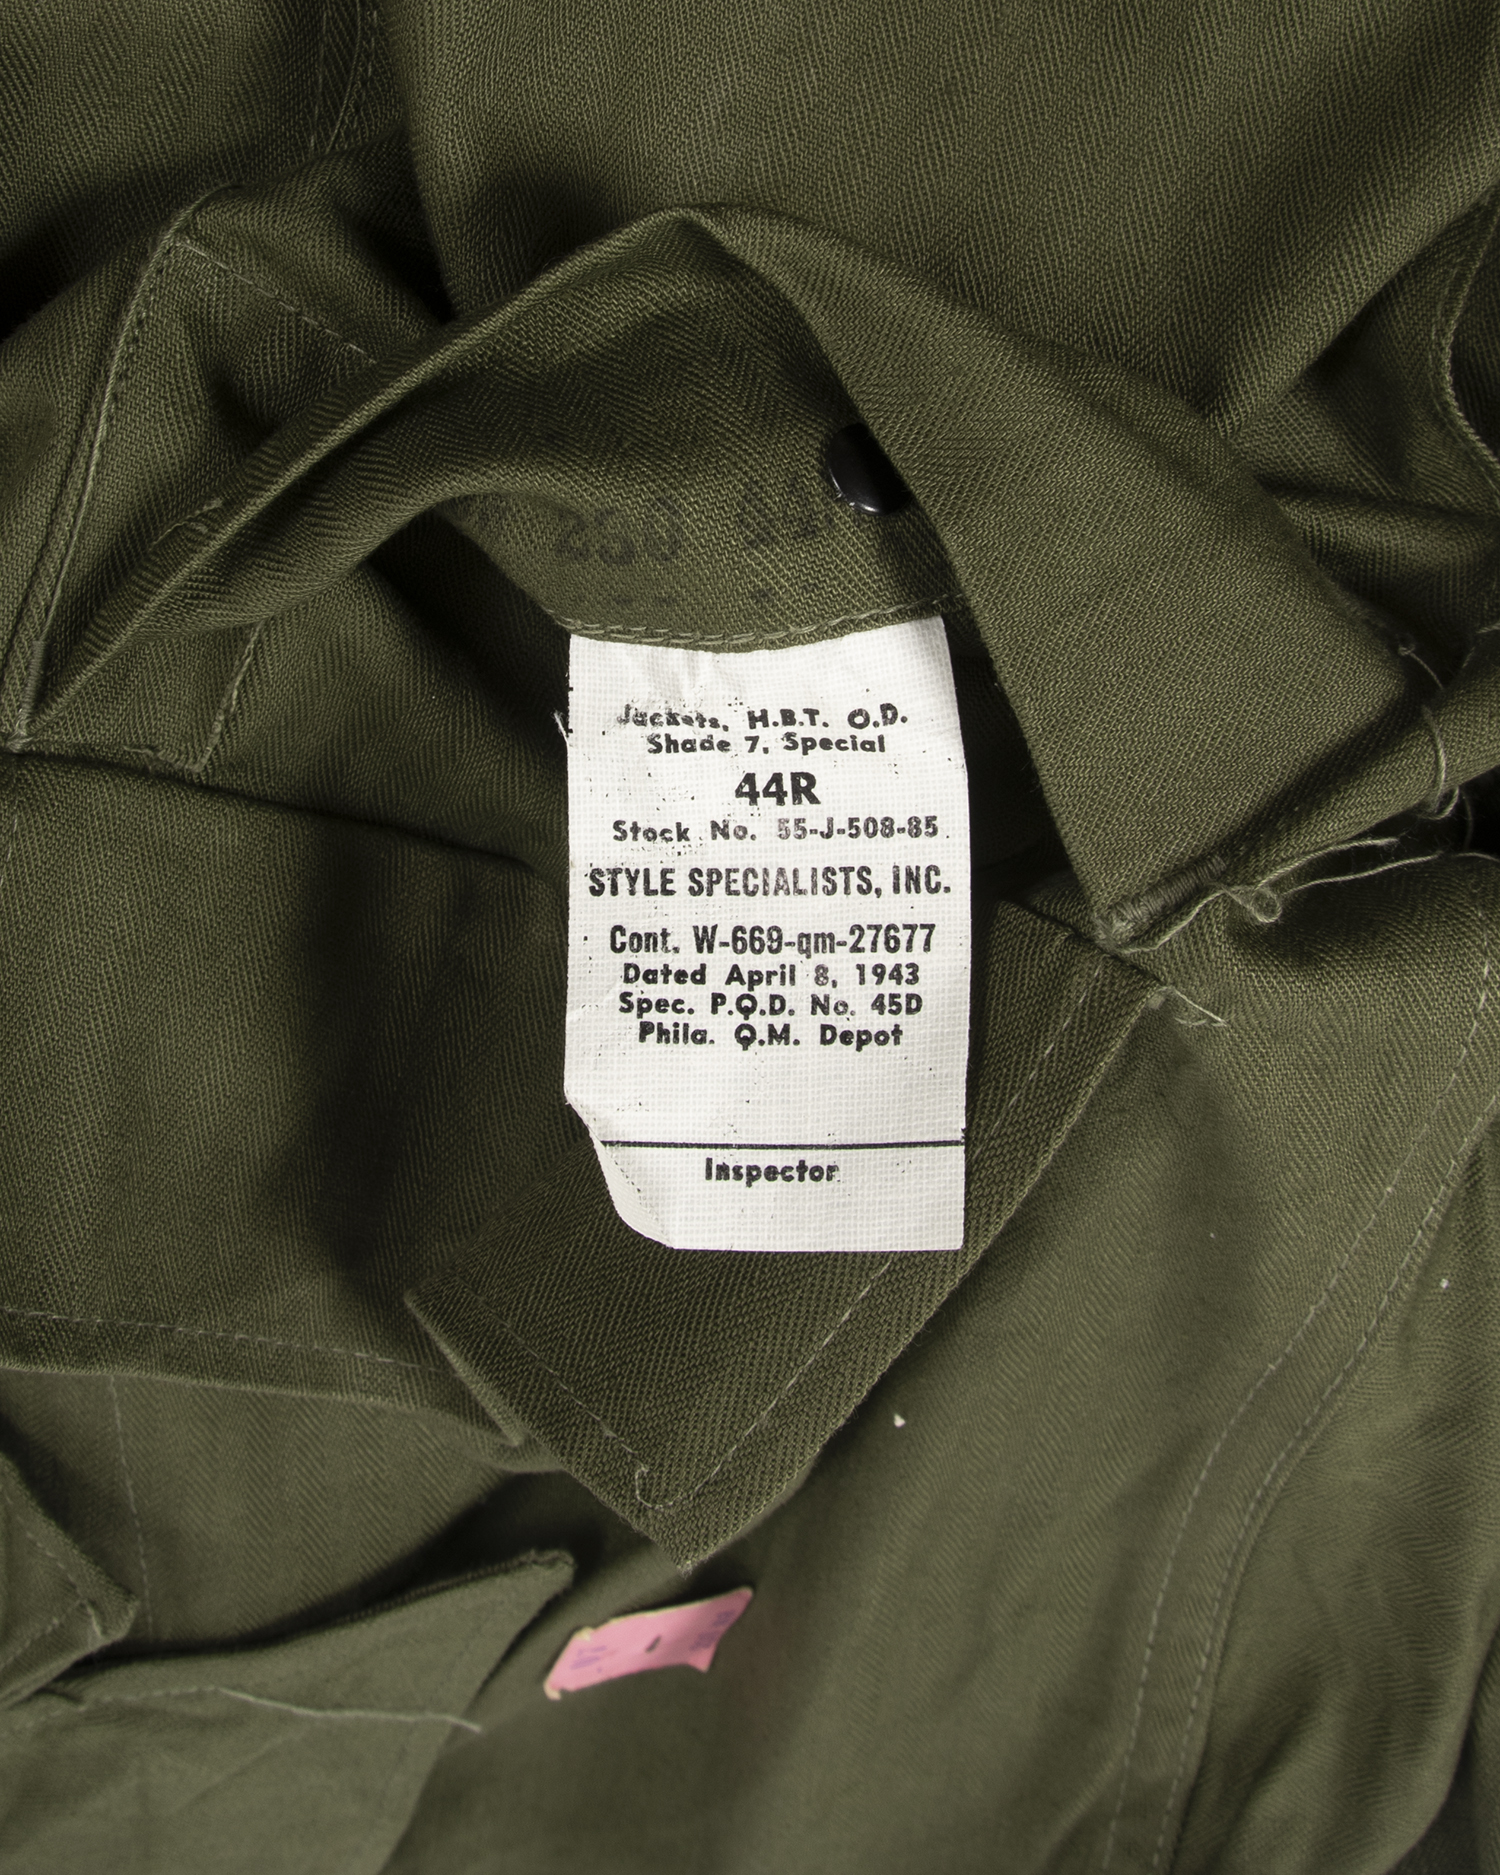
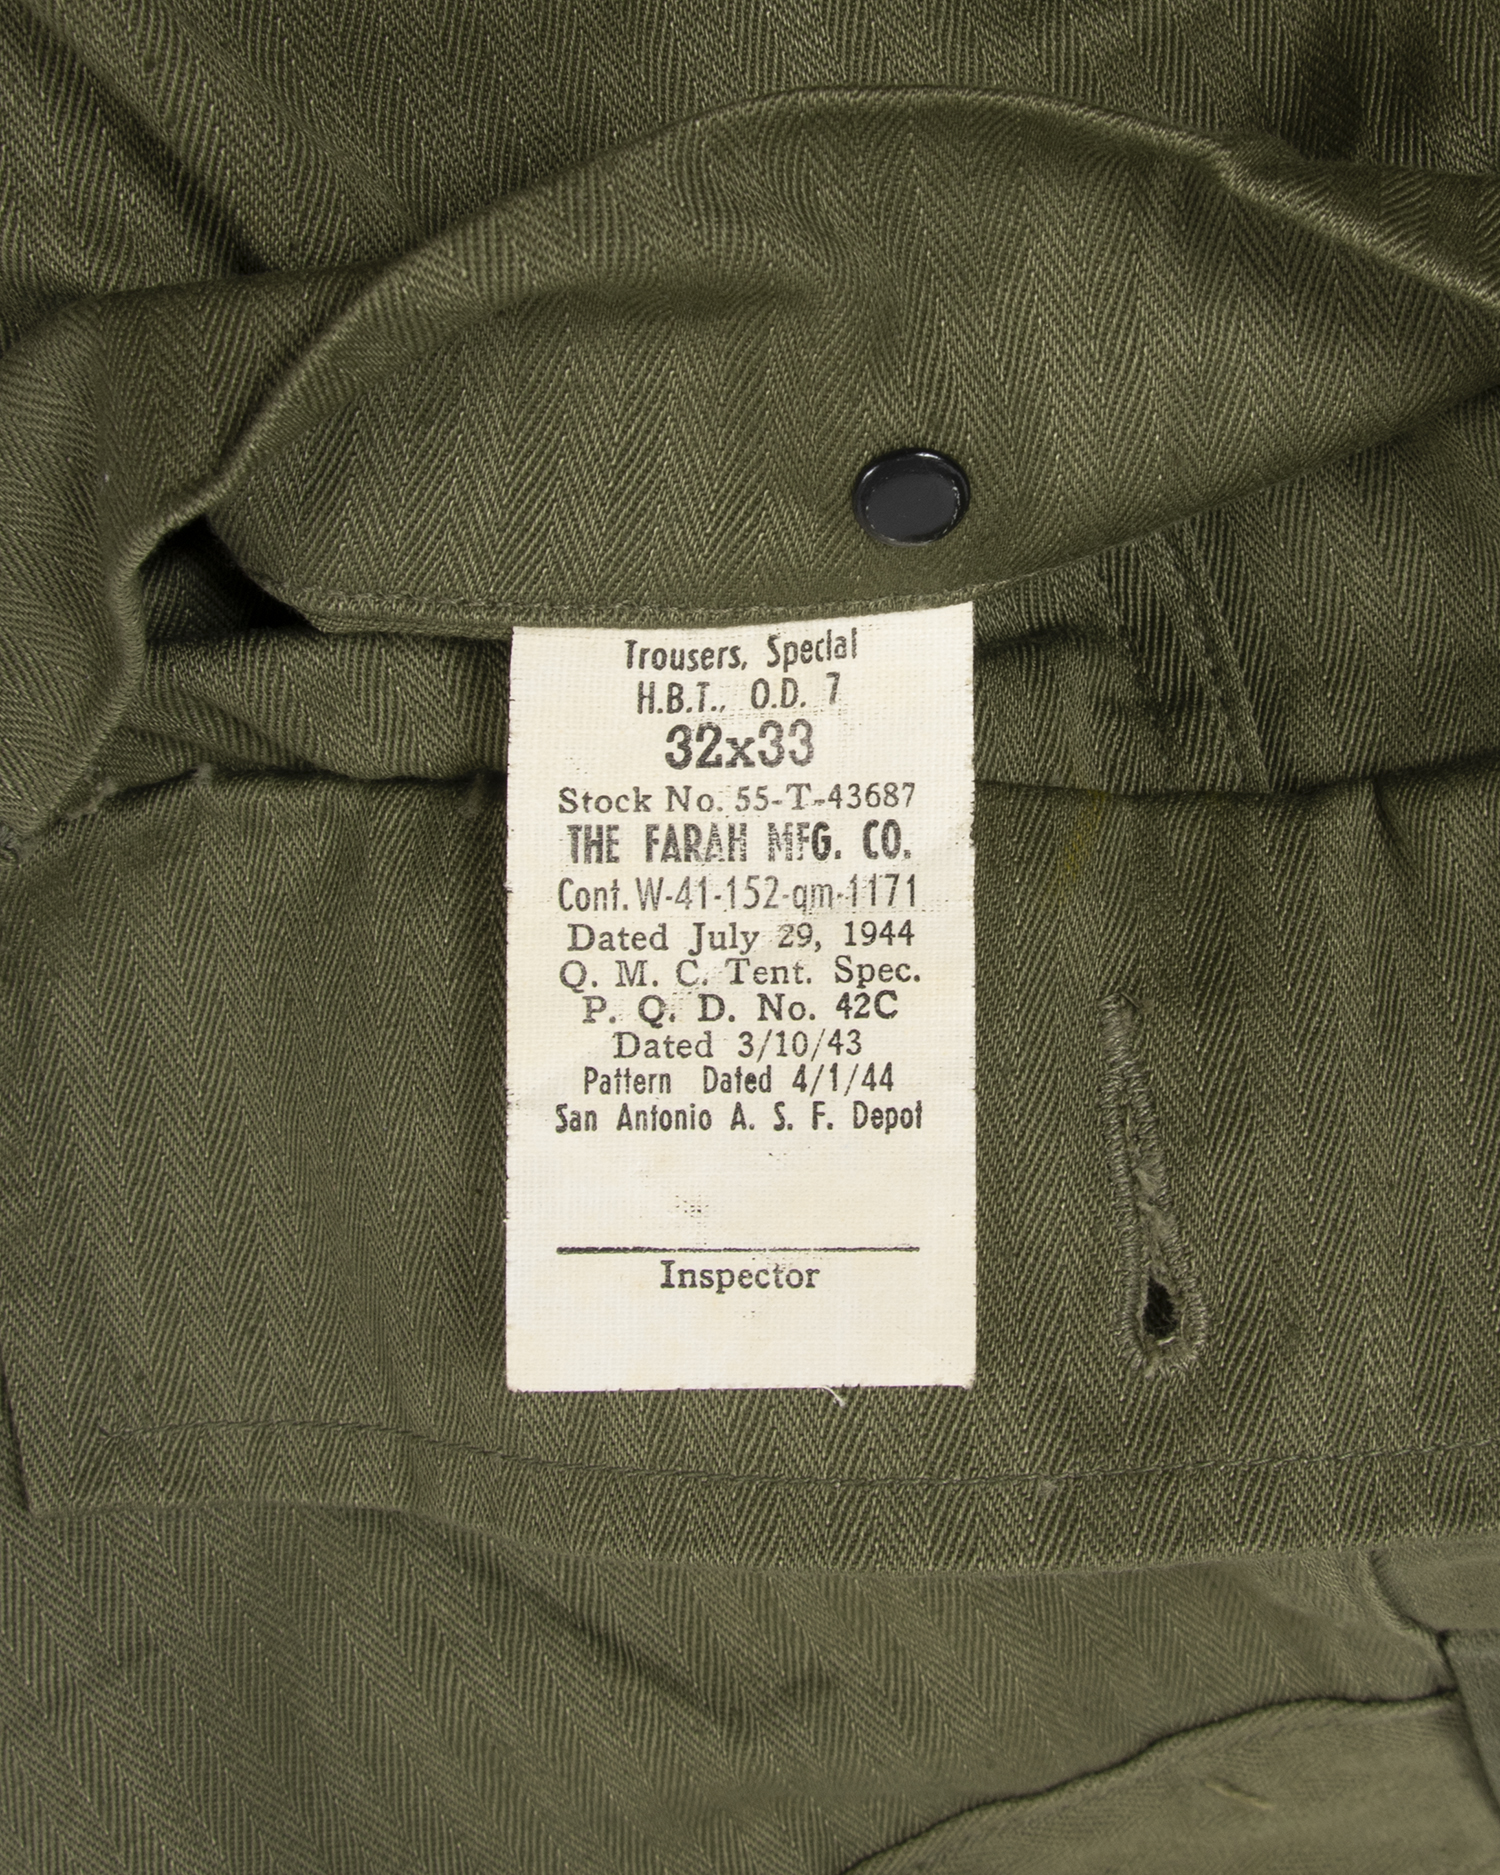
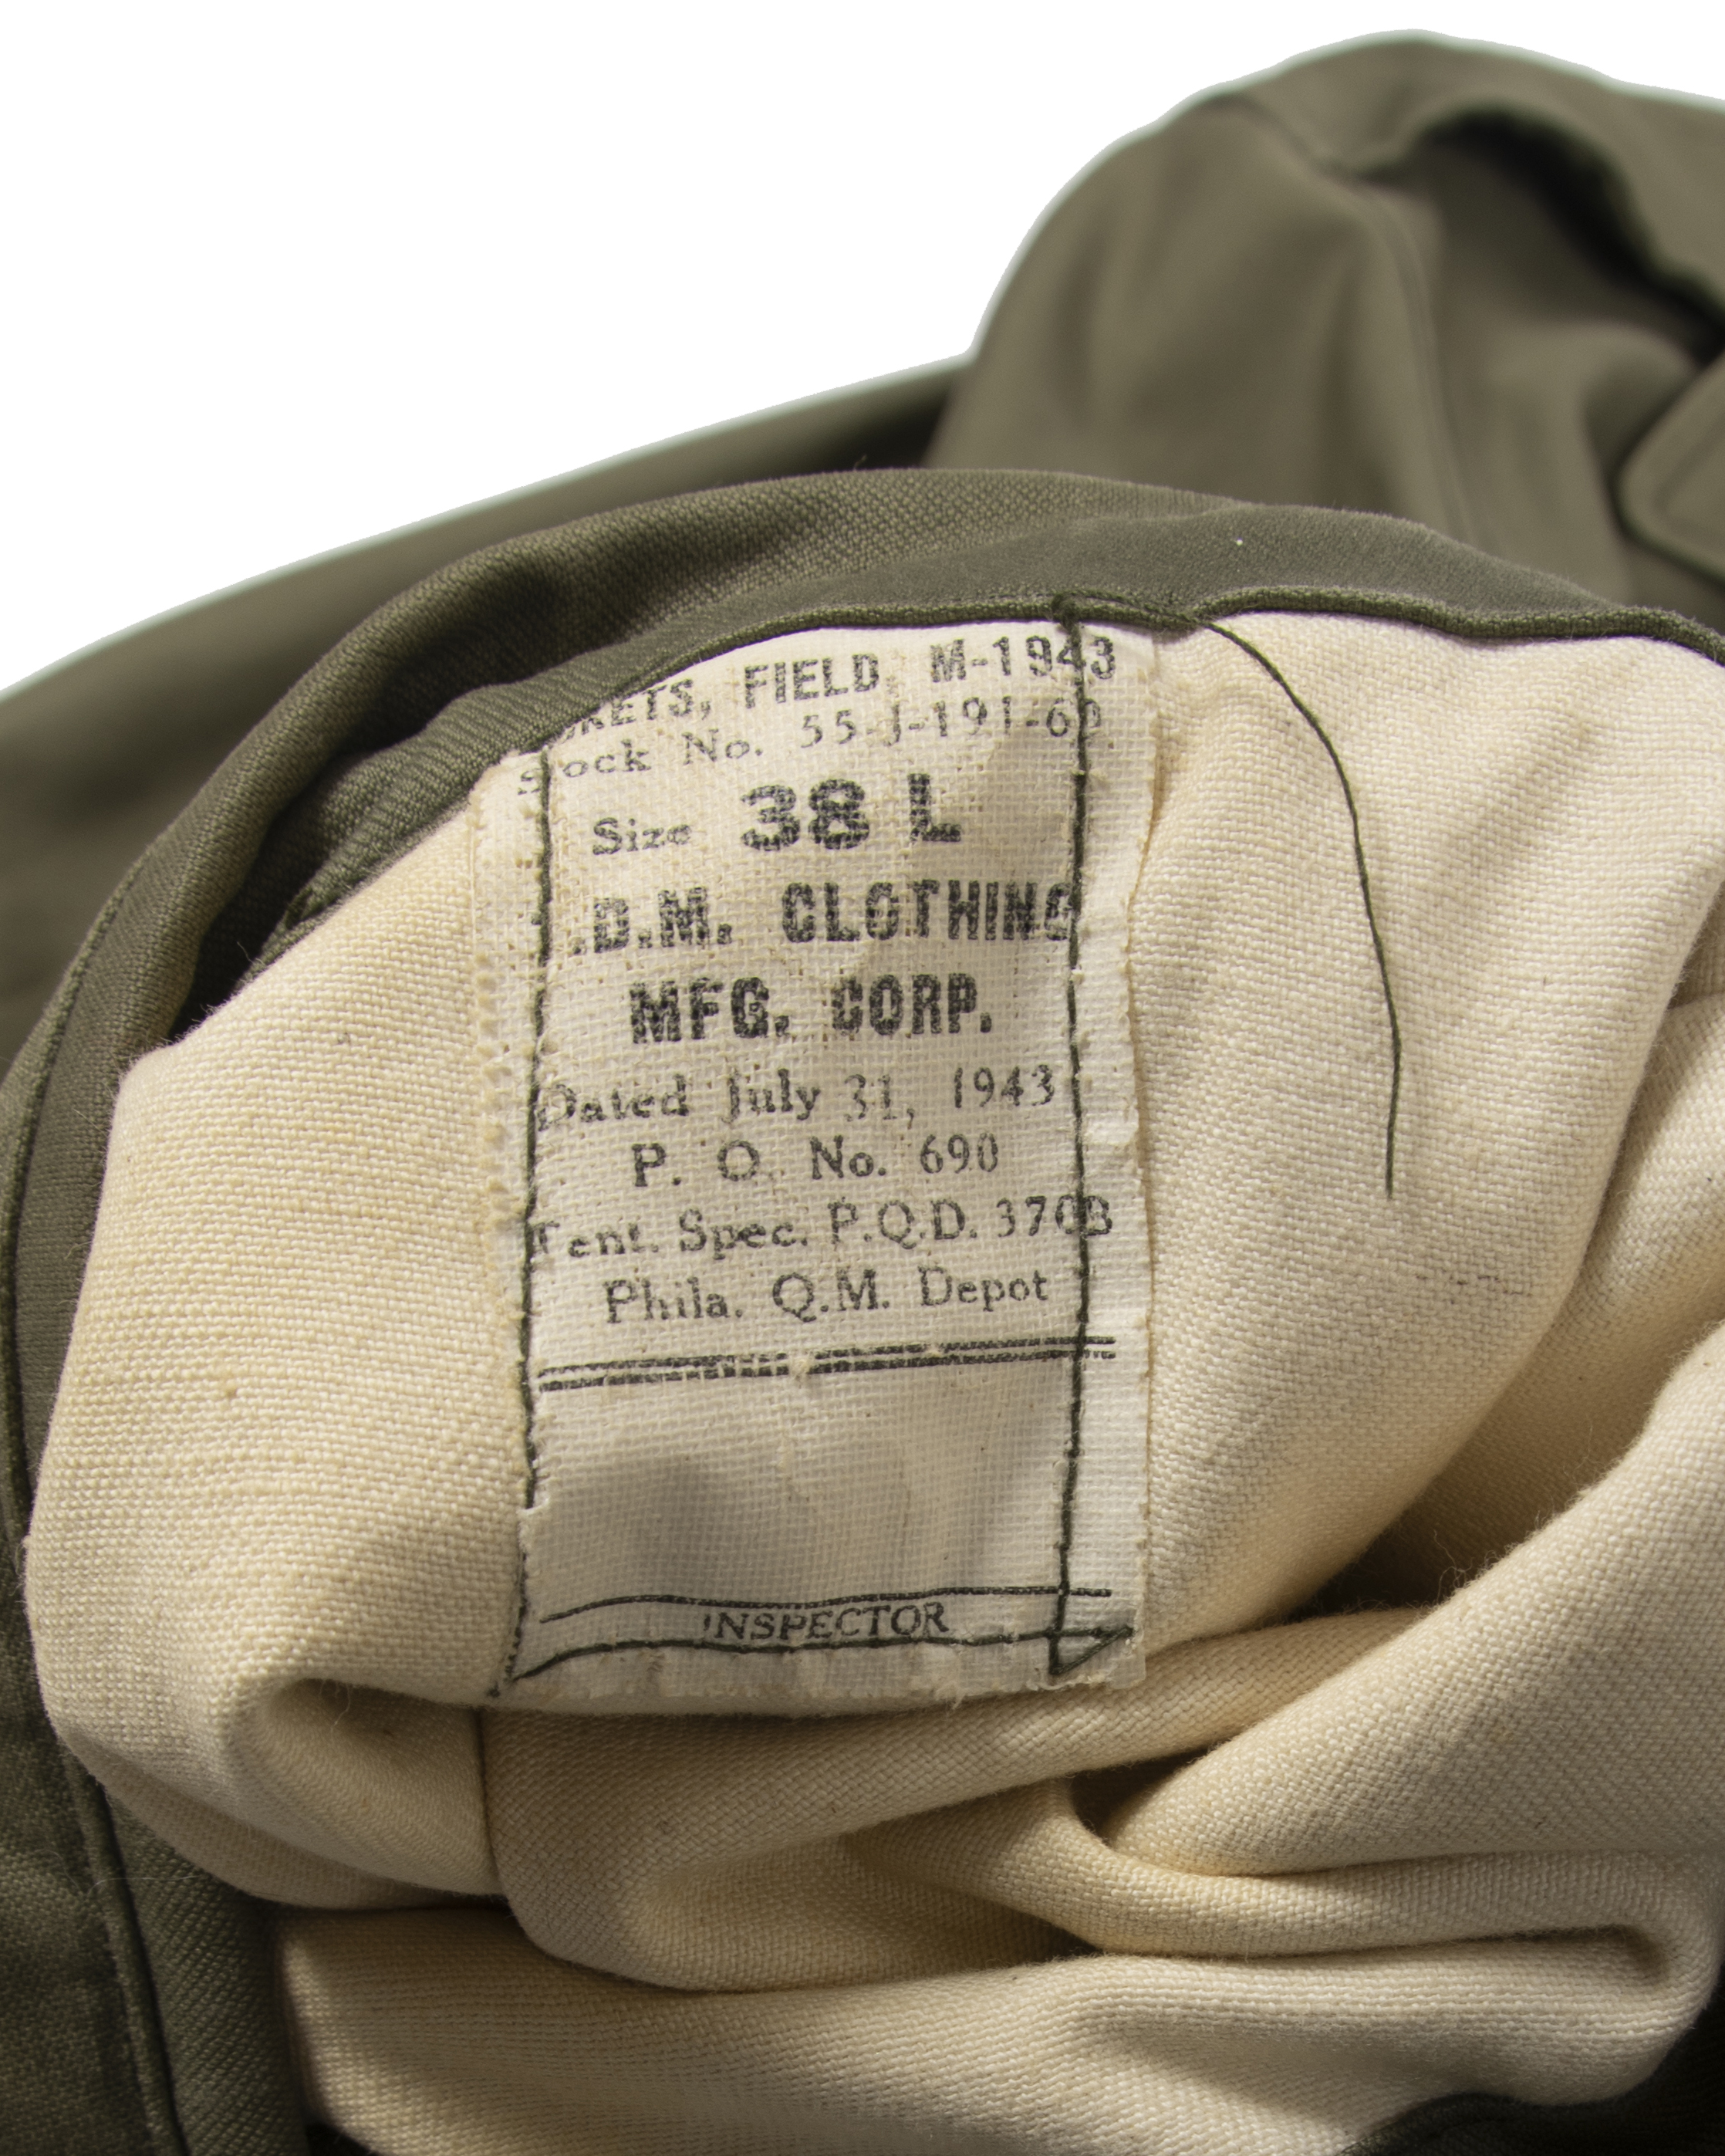
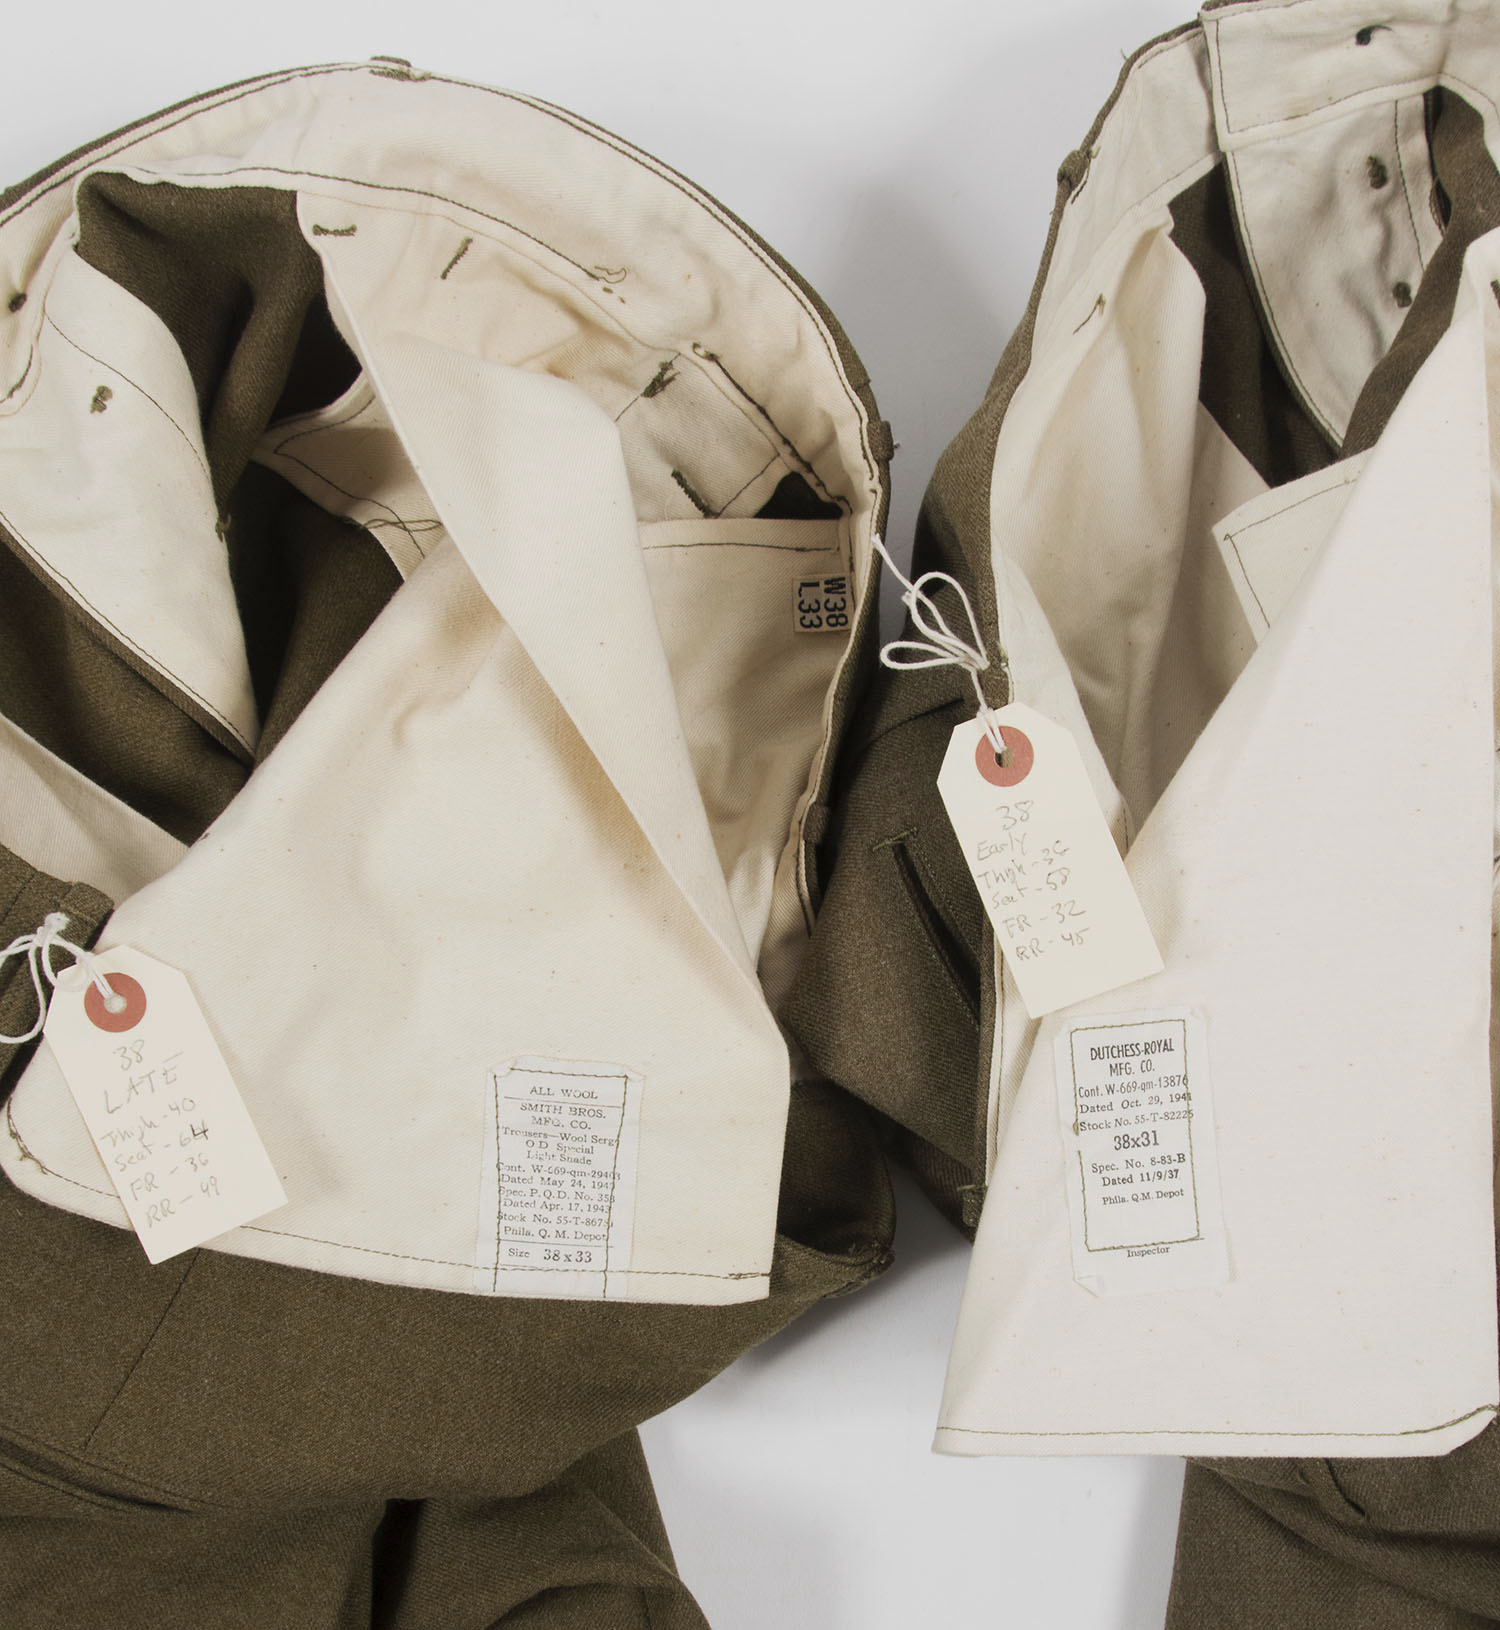
The QMC specification number for the field jacket was 370 (the field trousers being 371). This can be found printed on the spec labels in the right lower pocket. Periodically, improvements and pattern changes were made, which were indicated by a letter following the spec number. The date these specifications were issued into effect is also present.
Note on label dates: The pattern or spec date is when the design was completed and accepted. The contract date is the day the contract went into effect. Precisely when production of the garments began is unknown, although it would likely be within a few weeks of the contract date. The gray area is what happened if a manufacturer wasn’t finished with their run from the preceding contract when the new one was issued. I suspect every possible scenario occurred depending on the individual contractor, how anal the government inspectors were about enforcing such things, and which course of action was most profitable. It’s quite likely that 370C’s and 370B’s could both have been in progress on the same production line for some days or weeks. It’s also doubtful that every jacket made after 31 December, 1943 was a Pattern B. What was cut out would have been finished up before cutting the new garments. Lastly, remember there was no internet or email in 1943, meaning updates and contracts had to be mailed which could take days or weeks to arrive.

A 370C label
WWII Jackets: Realistically, there were three patterns worn in WWII. 370B, 370C, and 370D. The two earliest ones (370 & 370A) were prototypes, with actual numbers completed unknown, so a few may well have gone into combat. To date, I have never heard of any originals still in existence. 370E would not have begun production until 1945- meaning perhaps a few arrived by VE Day, but none were in the Ardennes or at Nijmegen.
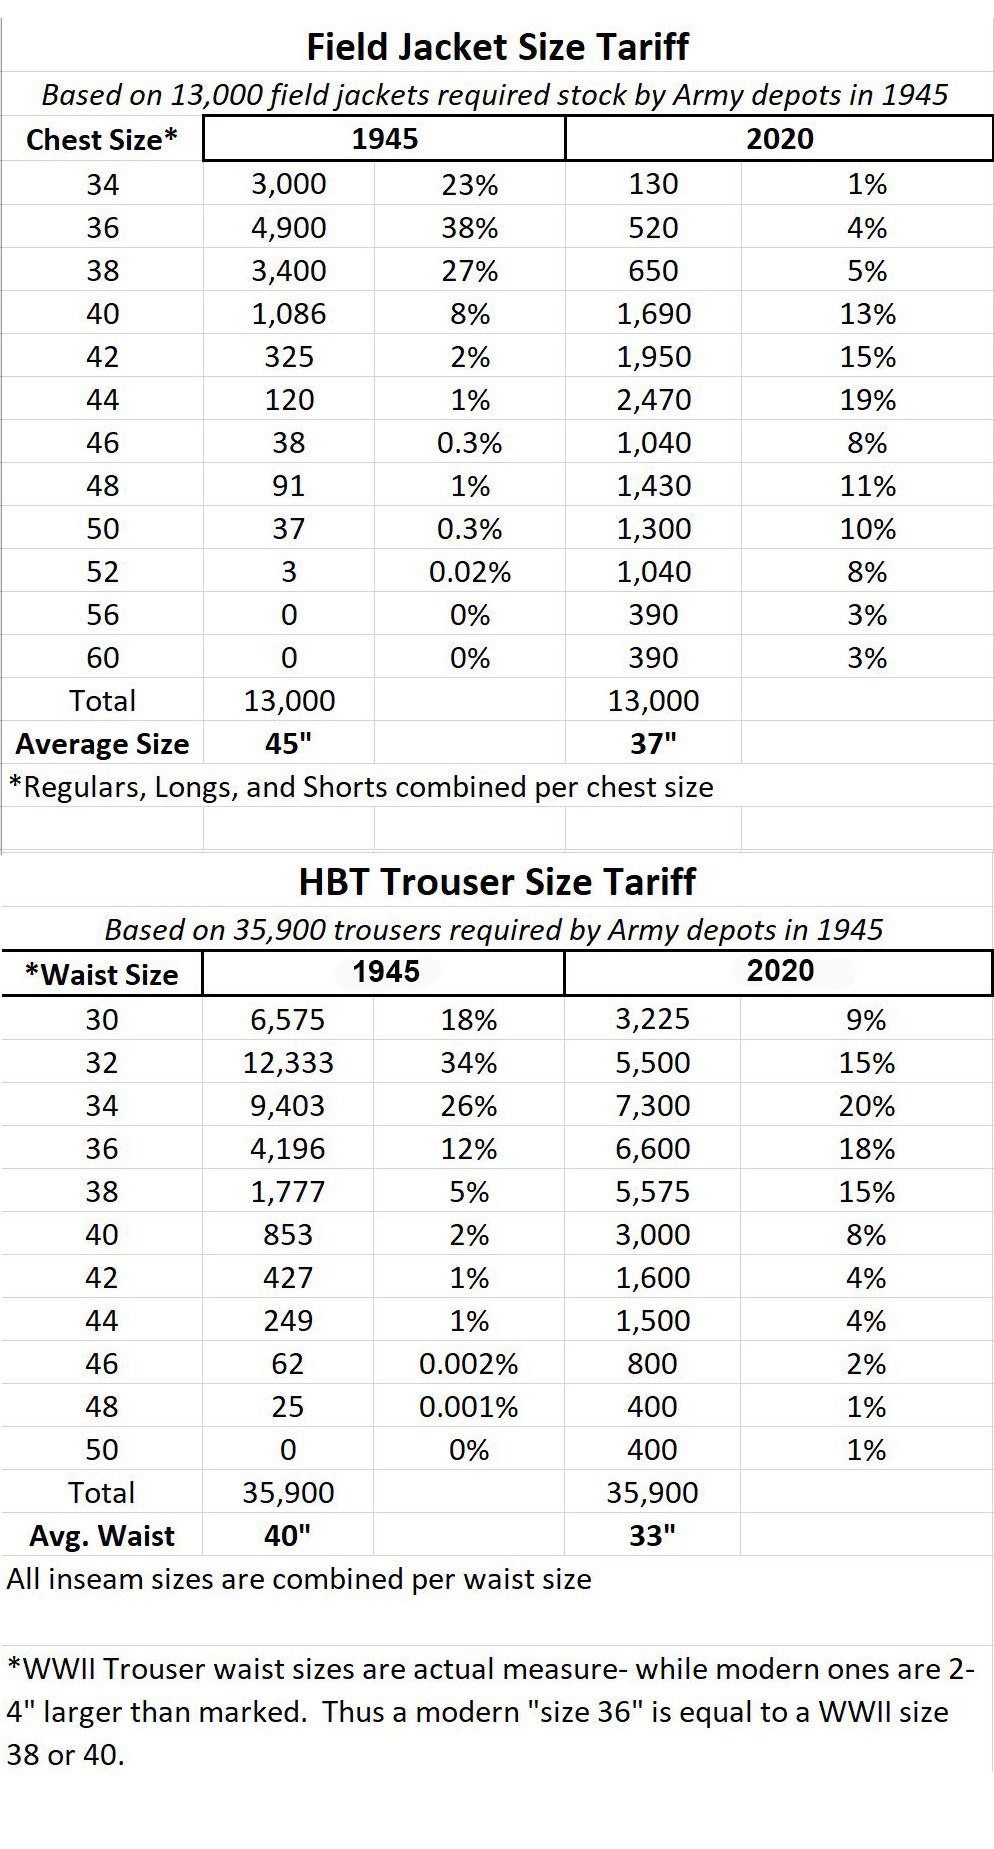
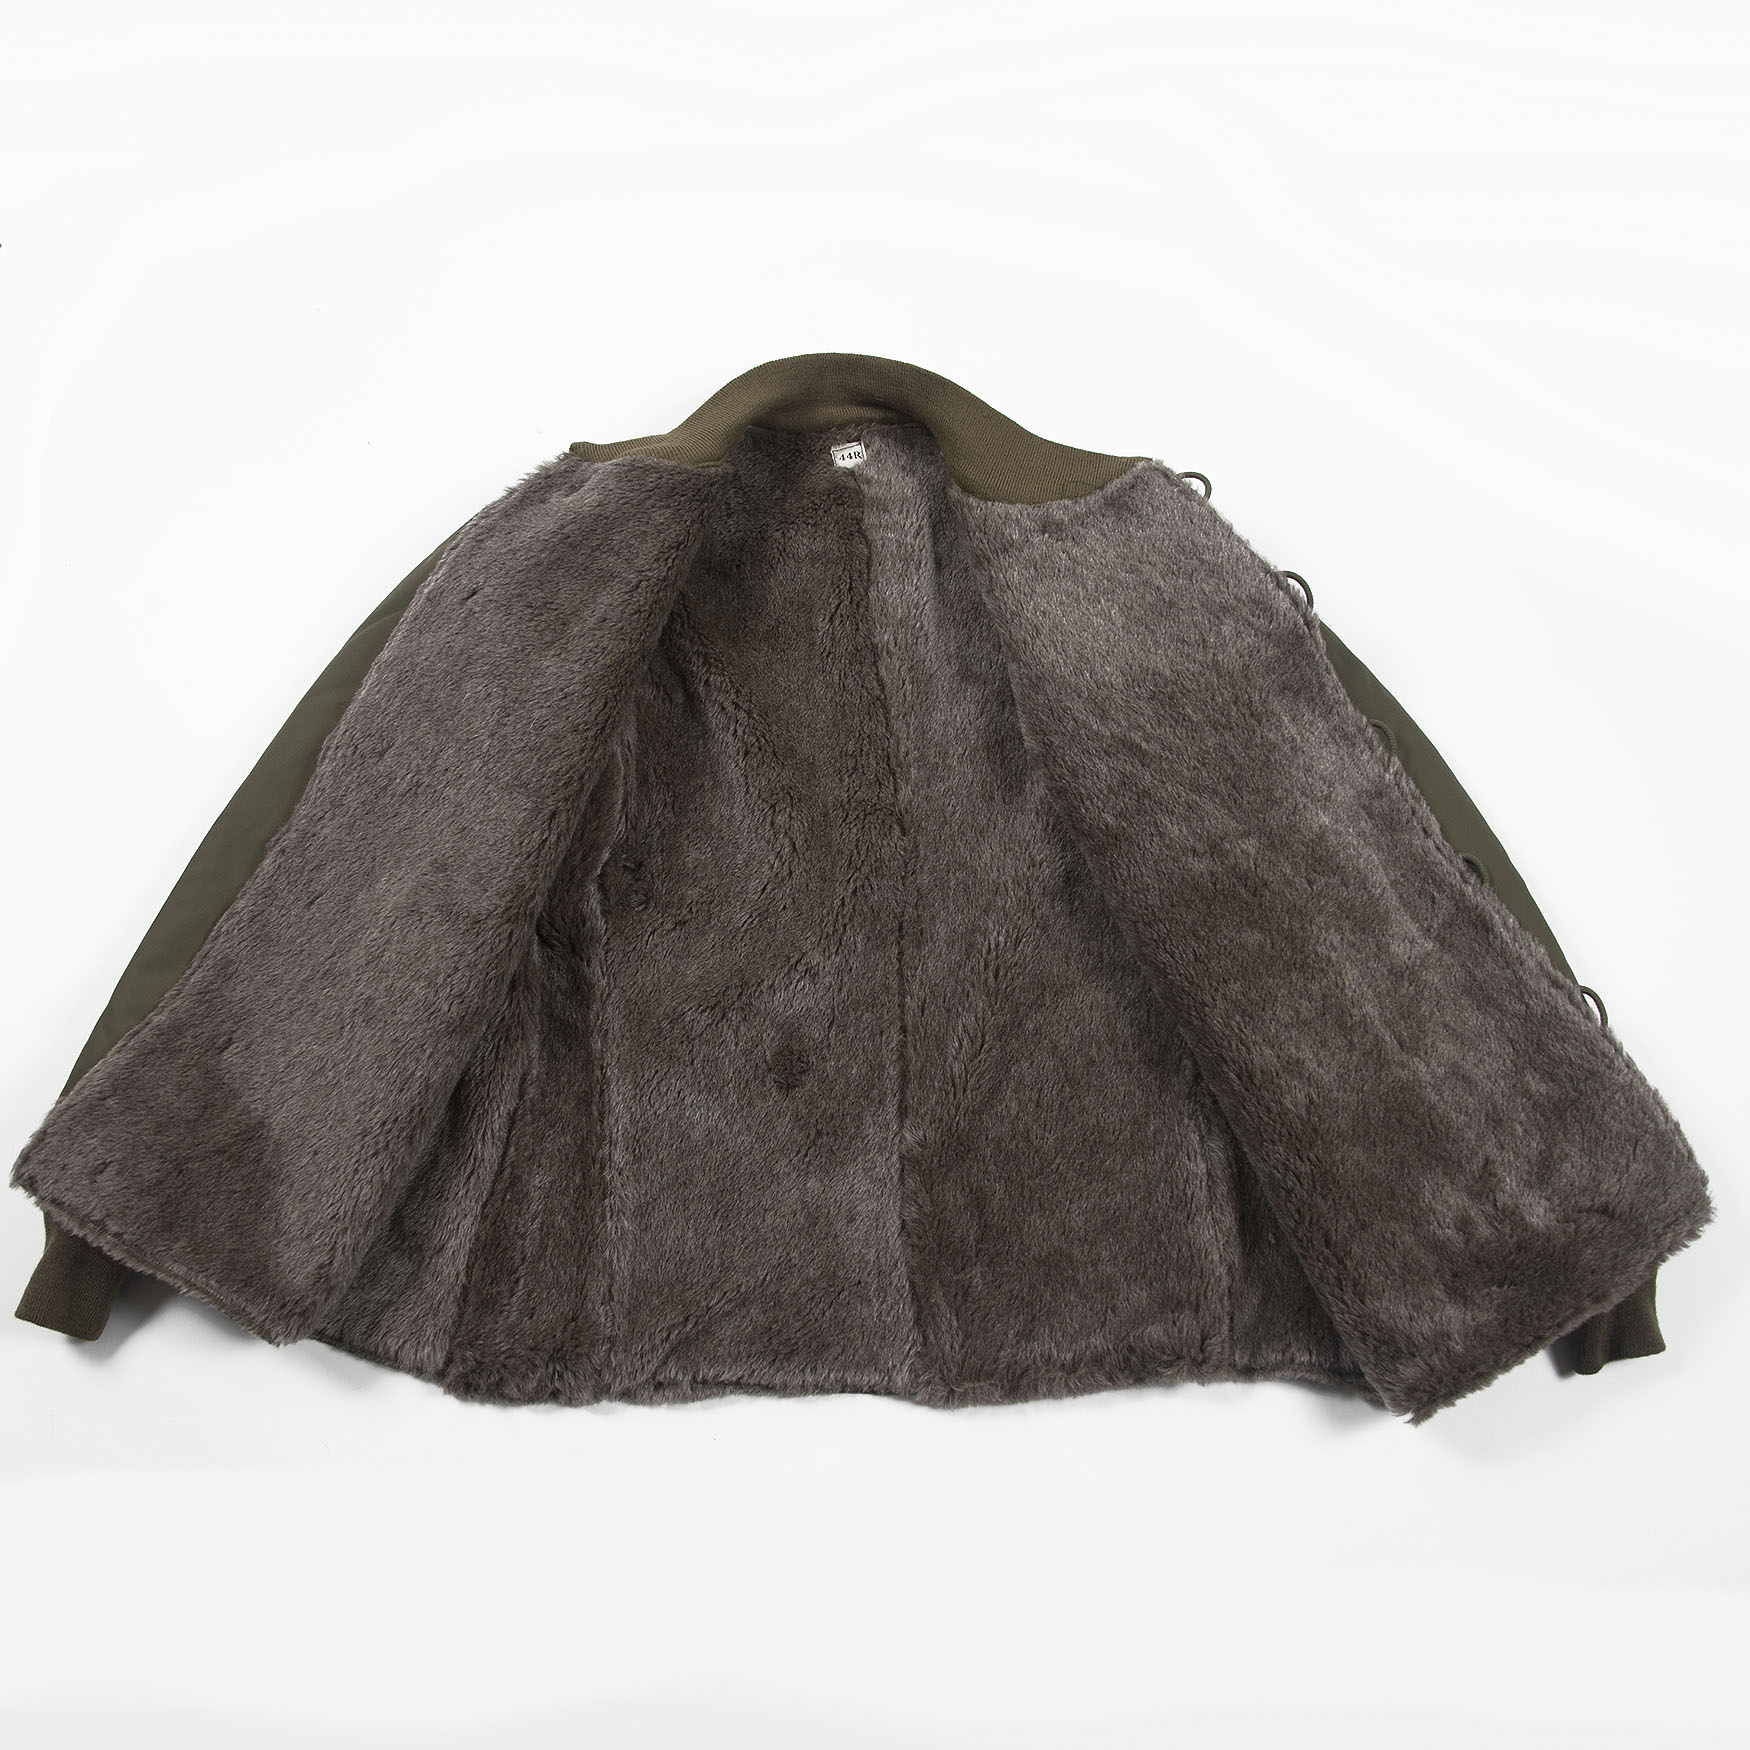
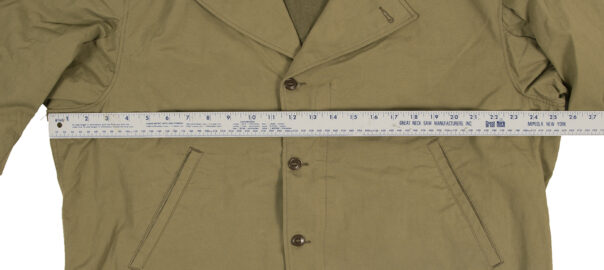
The BIG change: As soon as troops began receiving their jackets, complaints arose that they were too tight when the pile liner was worn underneath. As initially designed, the field jacket had 7″ of ease in the chest (ie: a size 40 measures 47″ around the breast) which is standard proportion for most coats and jackets. The pile liners are as thick as a tanker or flight jacket so more room was needed.
To correct this, the design was amended effective Dec 31, 1943. This was called “Pattern B”. From this point on, the patterns were altered with chest measure being increased 2″ and the upper arm circumference by 1″ to allow more room for the liners. The name “Pattern B” was used rather than a new spec number in order to allow supply personnel to more easily differentiate the two cuts of jackets when issuing them to troops.
All future patterns of field jackets used this sizing. Therefore, all 370B’s and about half the 370C’s (the first 6 months or so of all field jacket production) are cut like a typical men’s jacket. The latter batches of 370C’s, and all 370D, 370E, M50, M51, and M65 jackets are the Pattern B cut. (On Aug 1, 1944, Pattern B was itself amended slightly, but to date we have not determined what that change was.) Thus, most field jackets made have 9″ of ease in the chest, leading people to complain for decades that they’re far too large or mis-sized.
The 370 Series: Below are the main details of each pattern. There were some other very minor changes (such as a fractional change to the shape of the button tab under the pocket flaps) that we didn’t list. Keep in mind that millions were ultimately made, resulting in subtle variations and specific traits of one pattern sometimes appearing on the next or previous one likely due to overlapping production (or simply human error) in some factories.
This information came from an old Militaria Magazine article, which I expanded a bit using data from the QMC archives and examining and measuring my 30+ original M43 jackets.

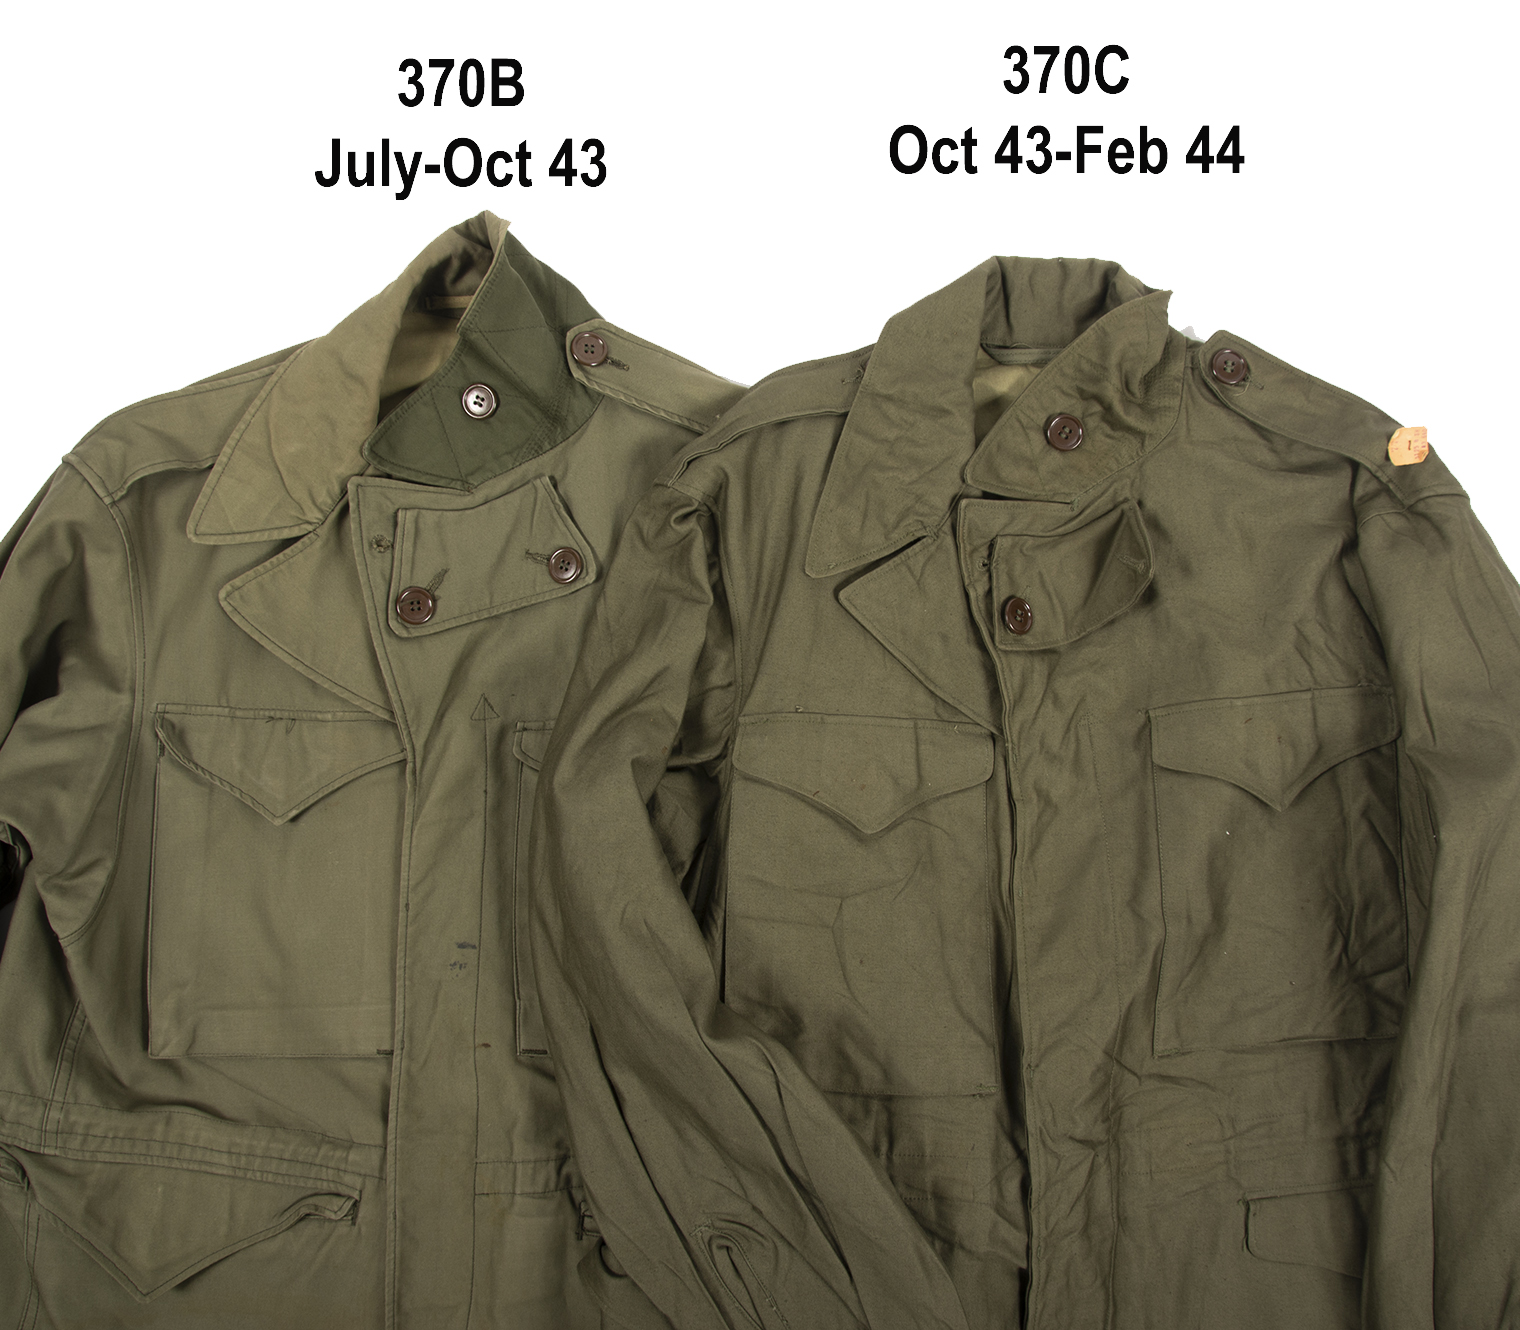
Quick I.D. guide: First, check the maker label in the lower right pocket. It will have the model number on it. If it’s missing or illegible, the main physical differences between the wartime issue jackets are:
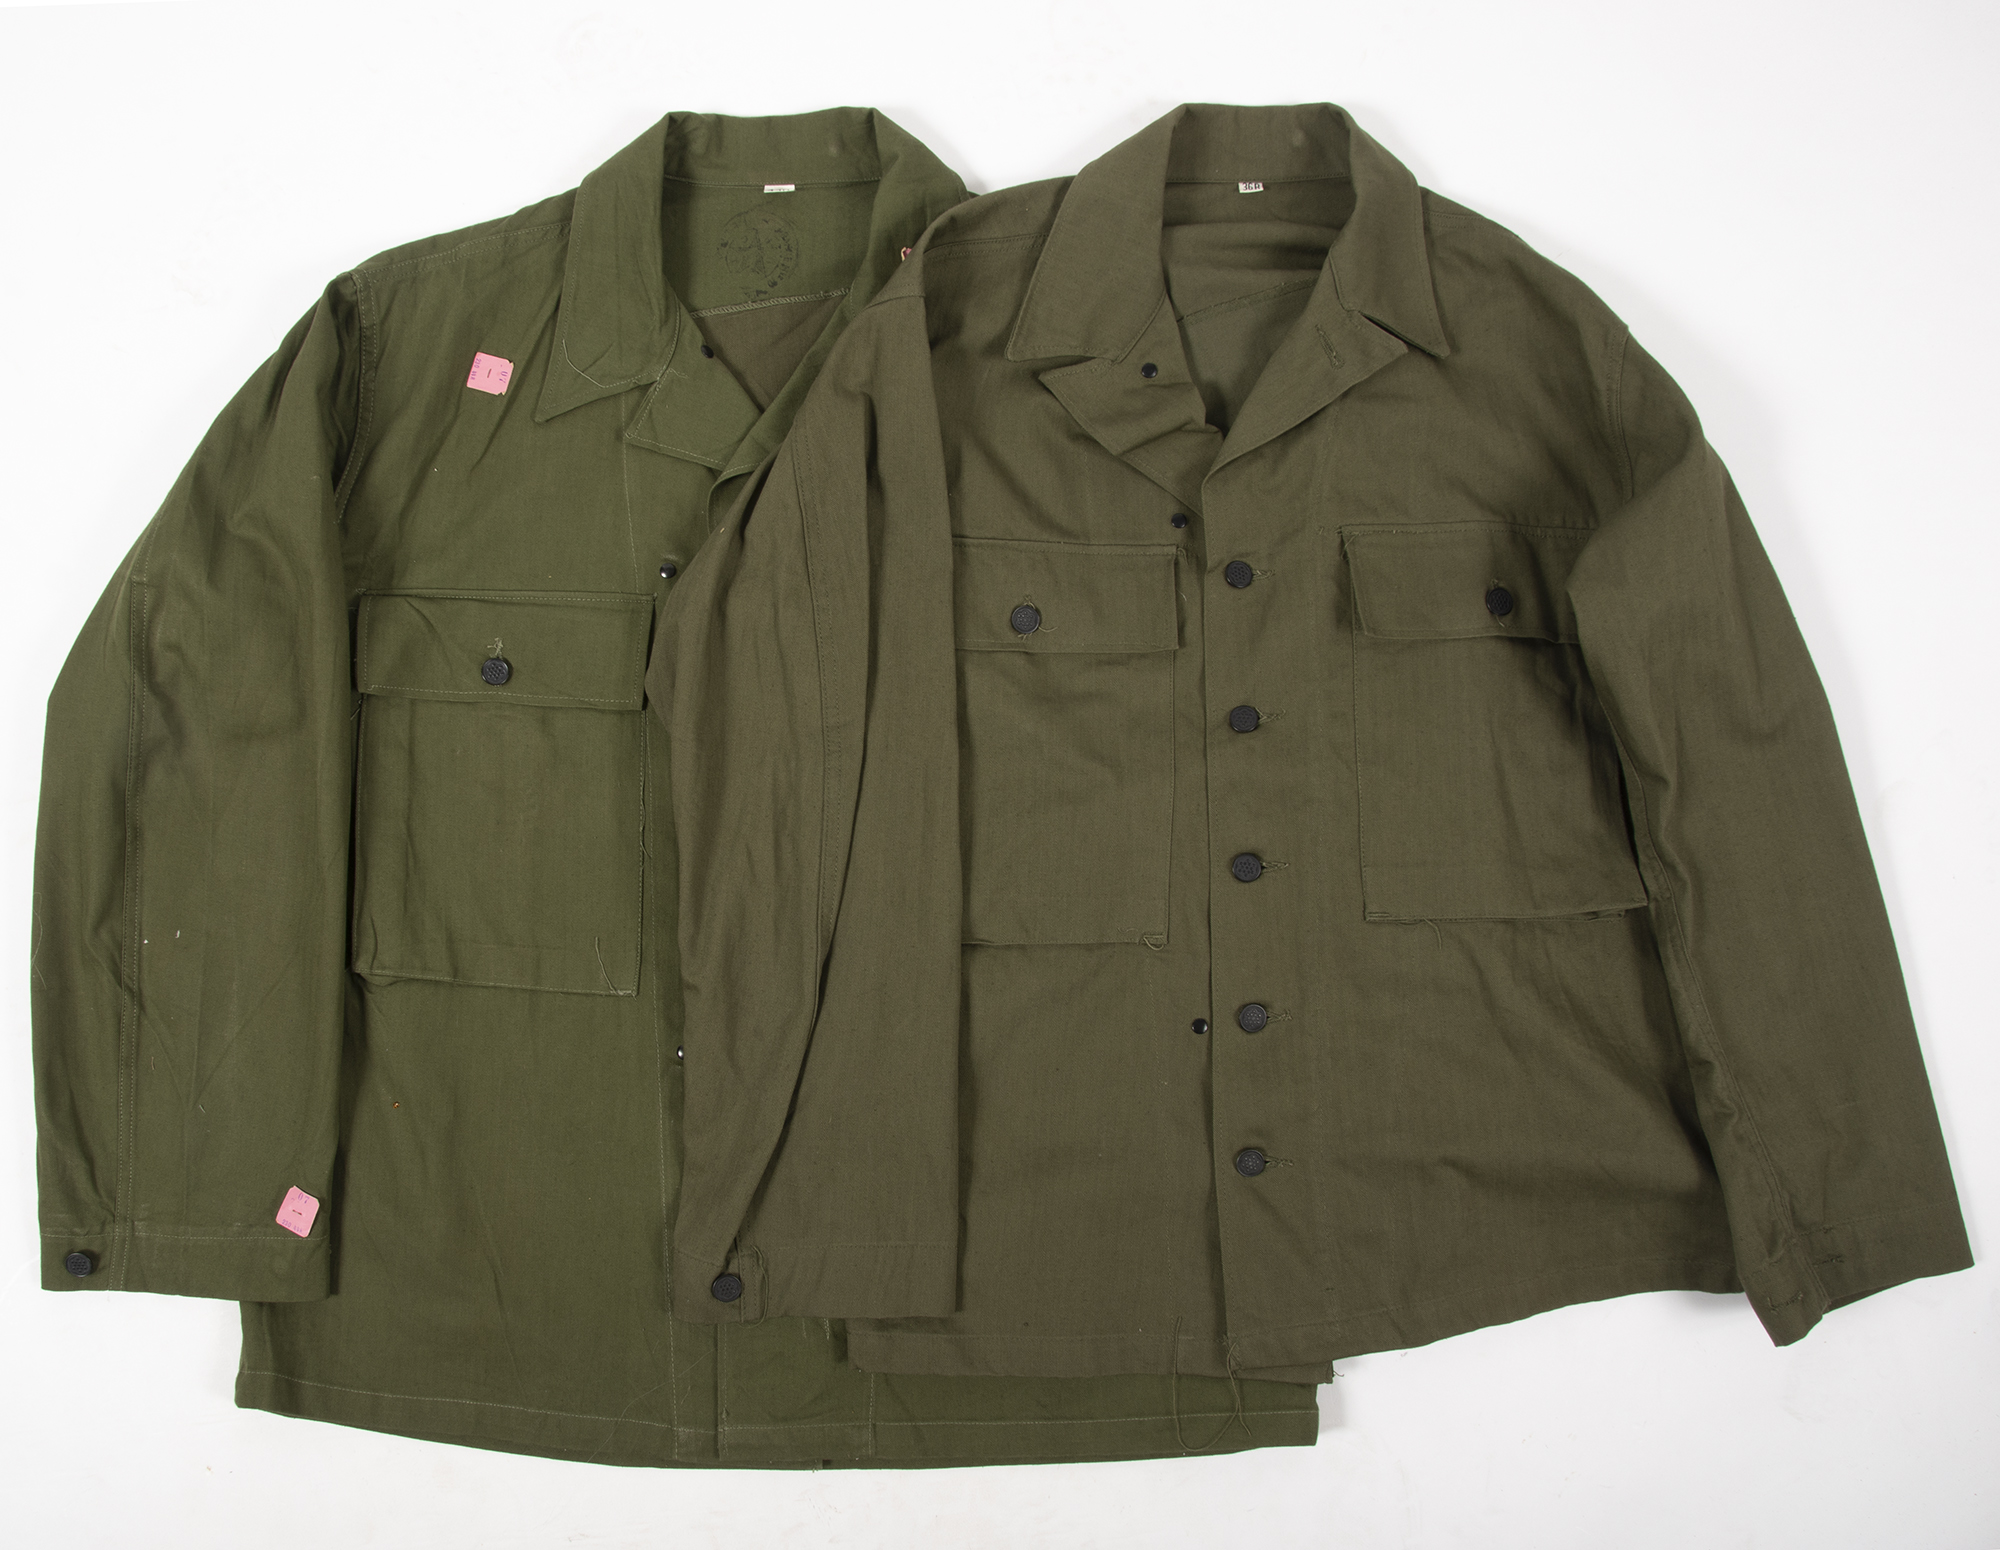
370B
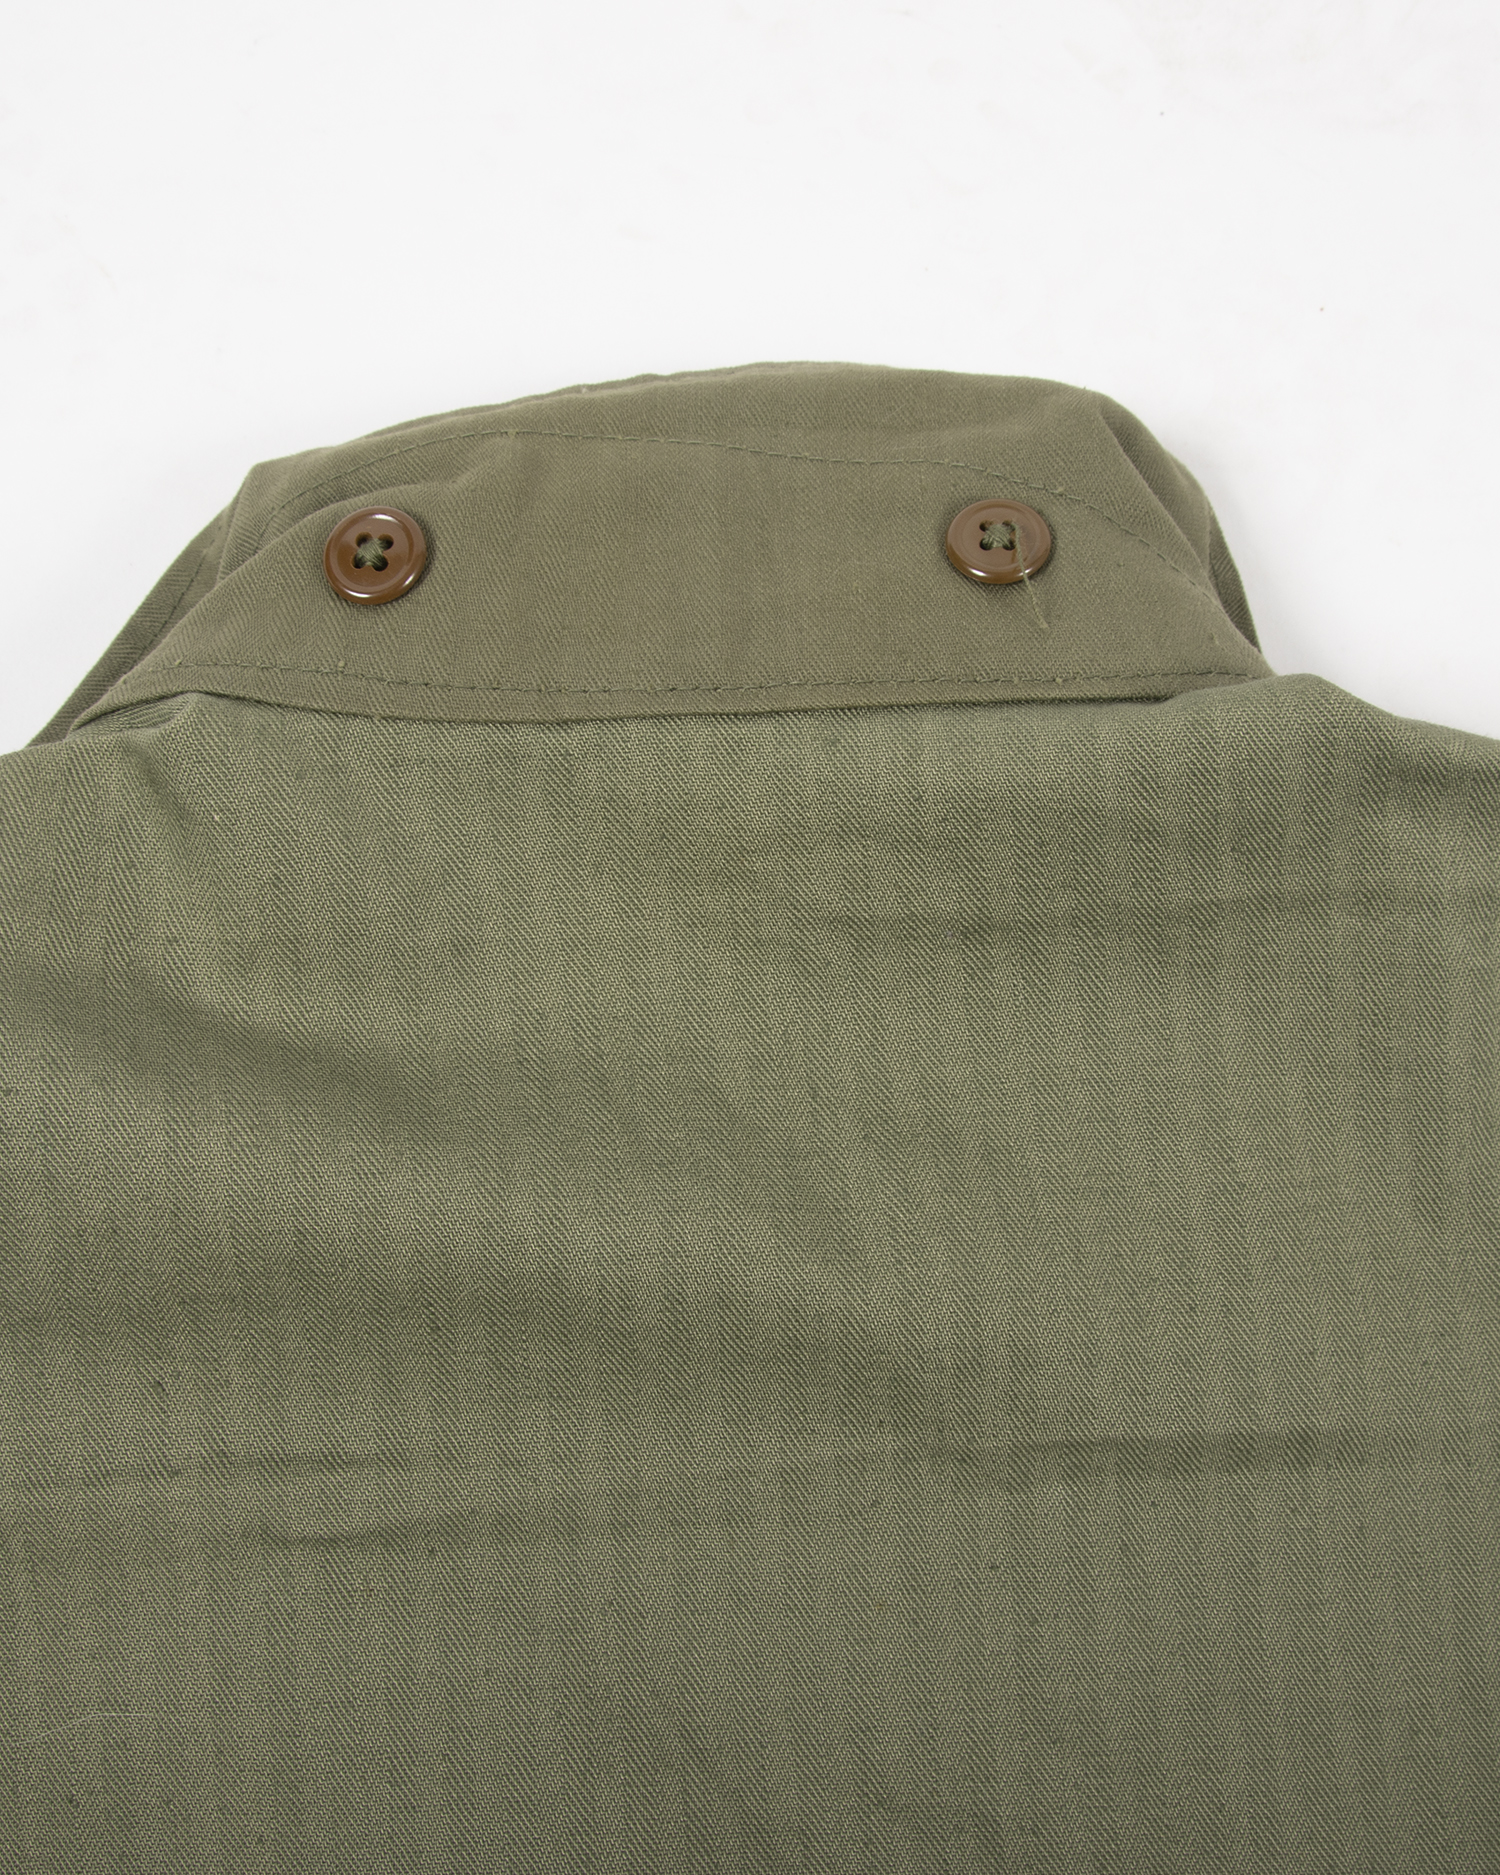
-Long epaulets, with the button actually placed on the neck
-Two buttons to hold the neck flap
370C
-Normal length epaulets, button on the shoulder
-One button to hold the flap
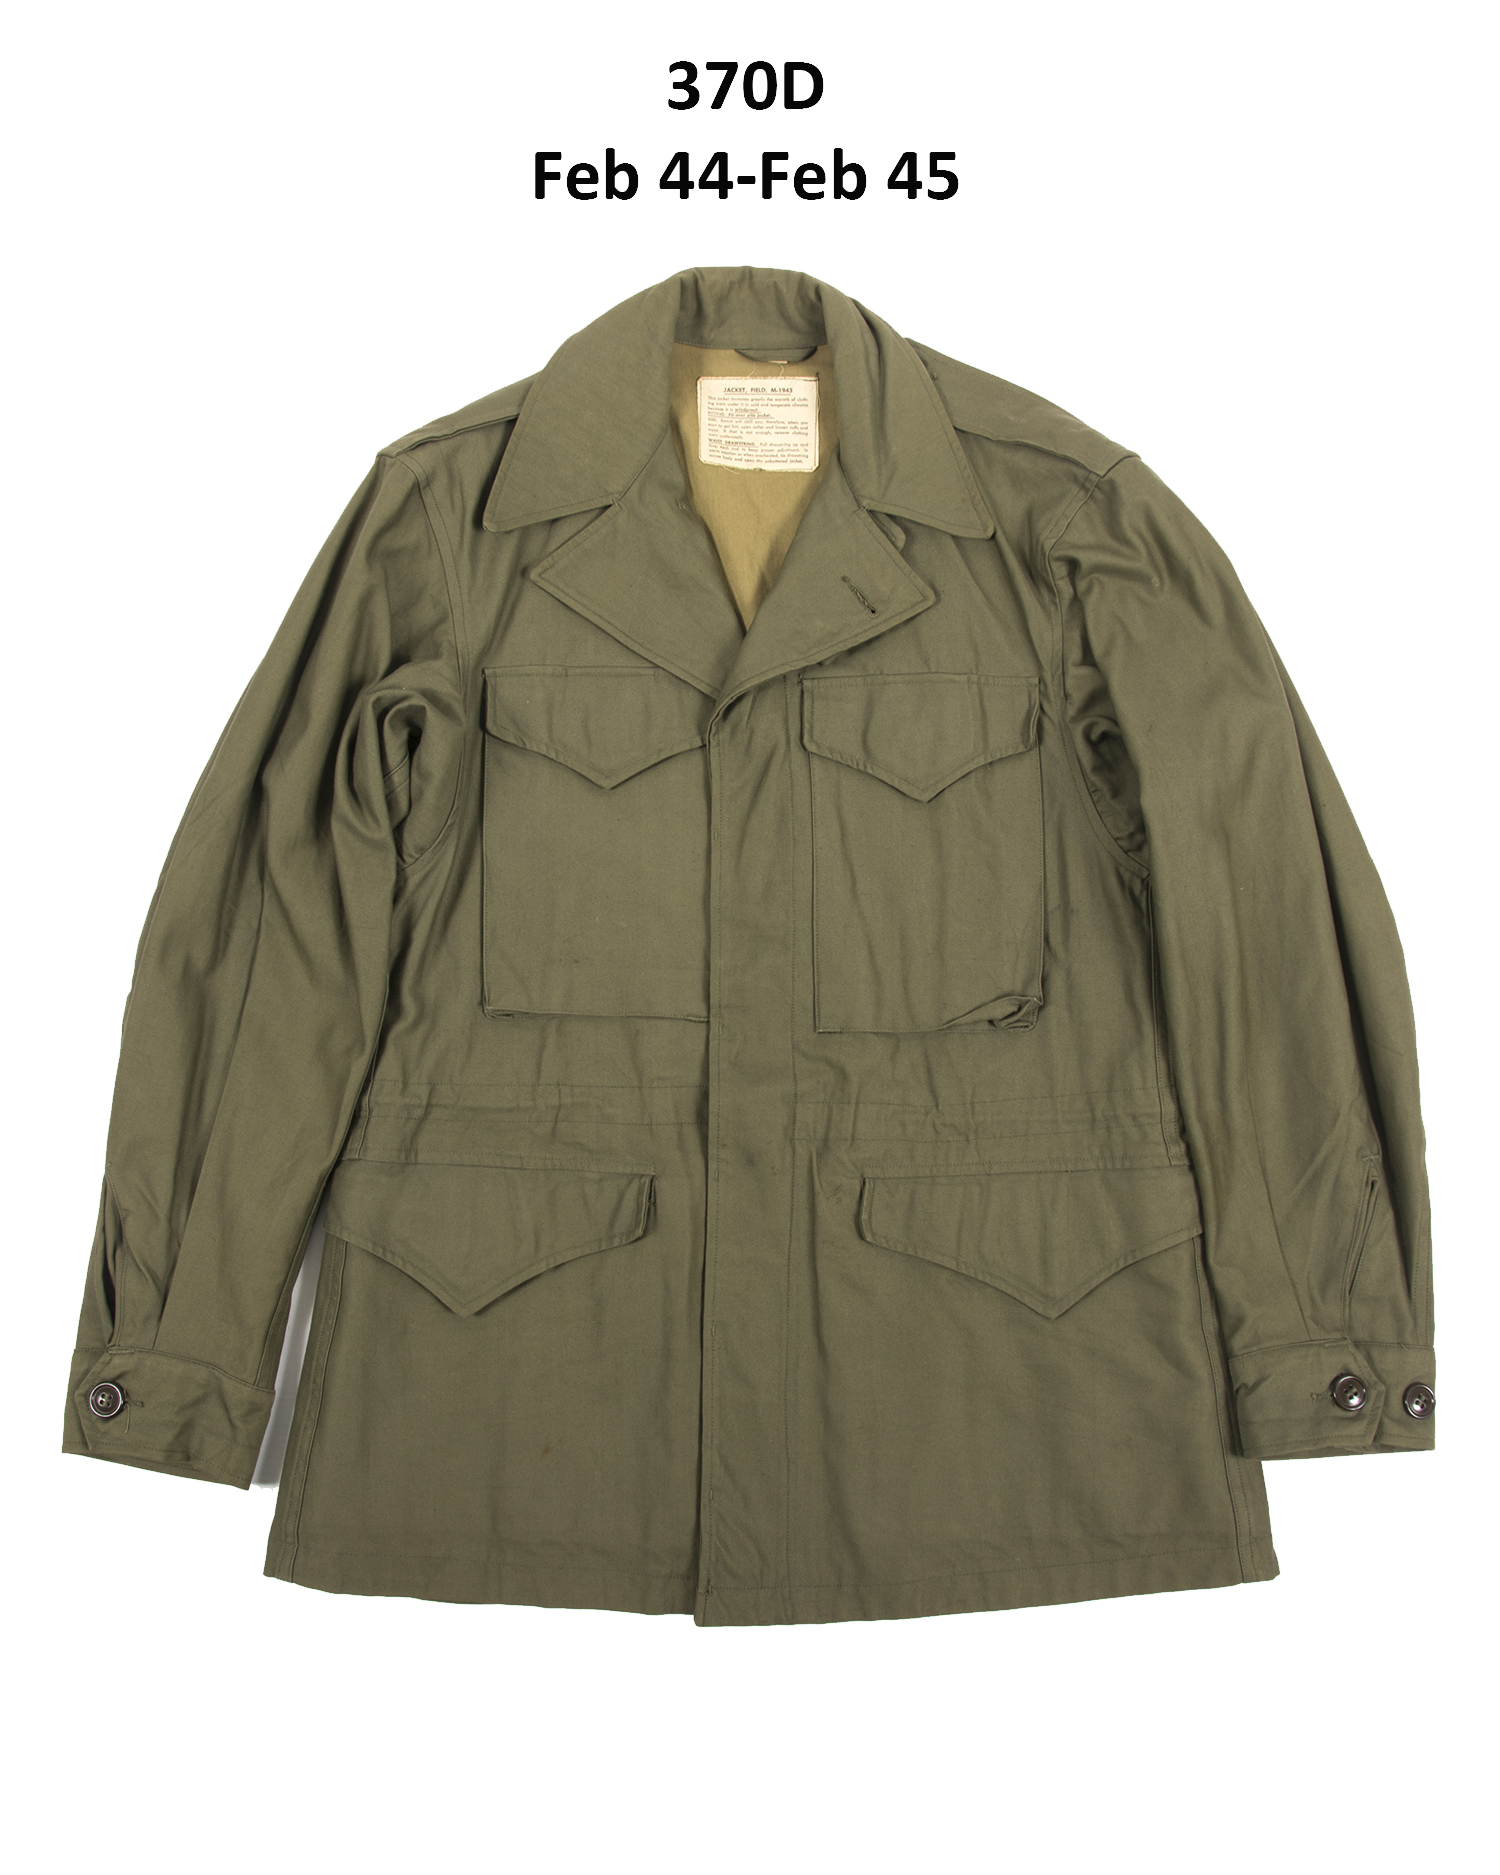
370D
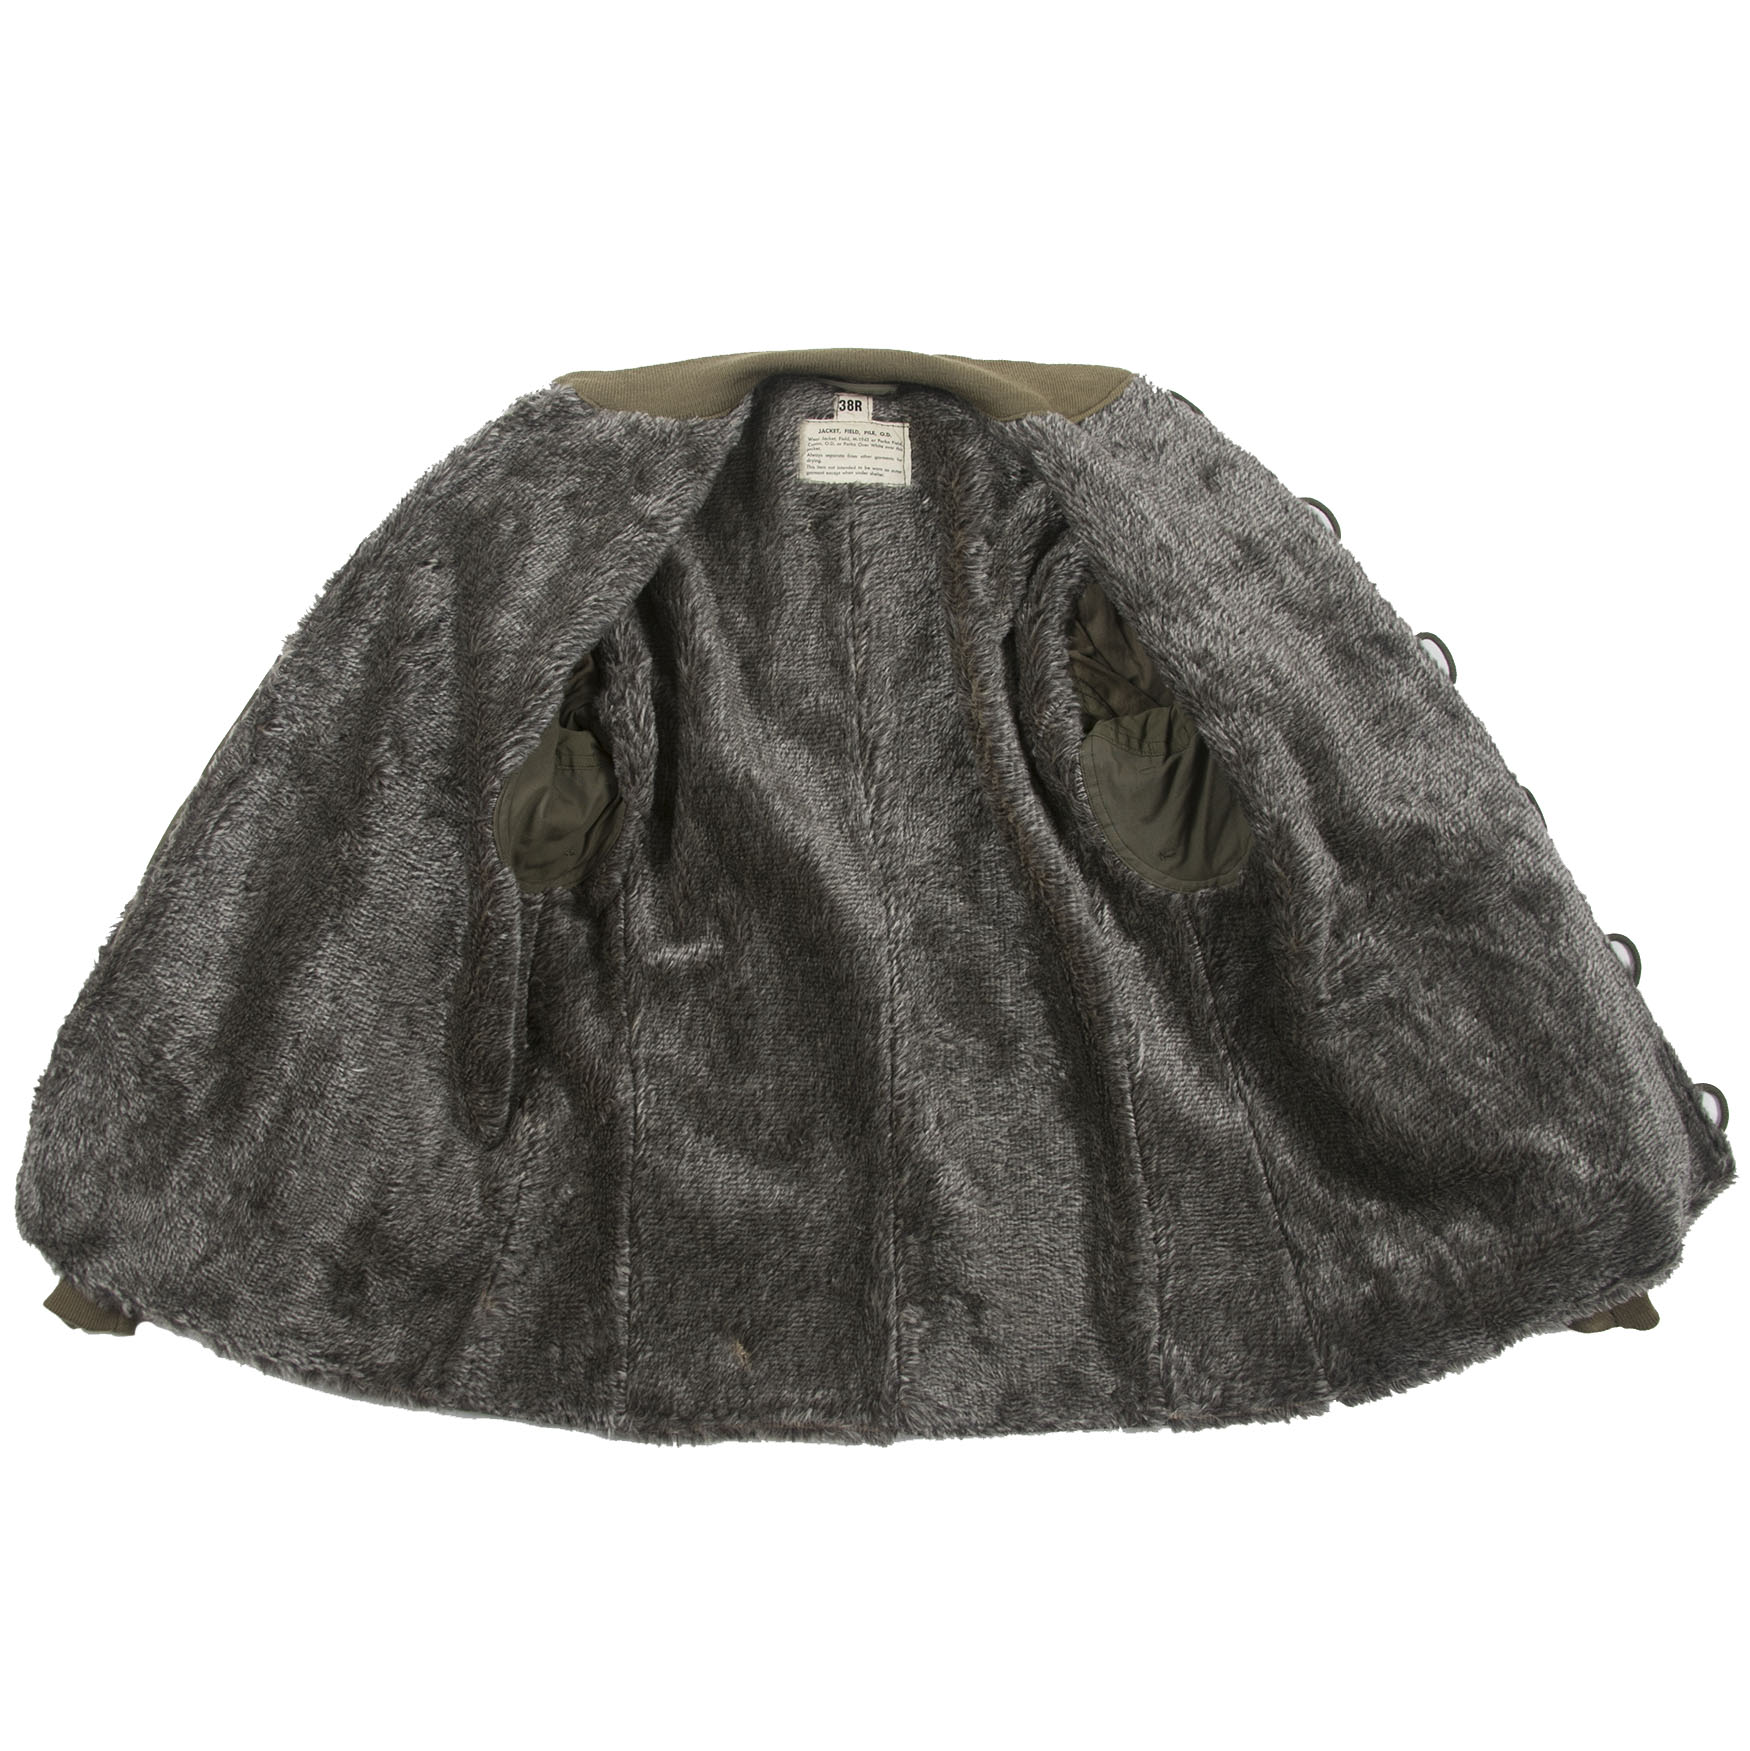
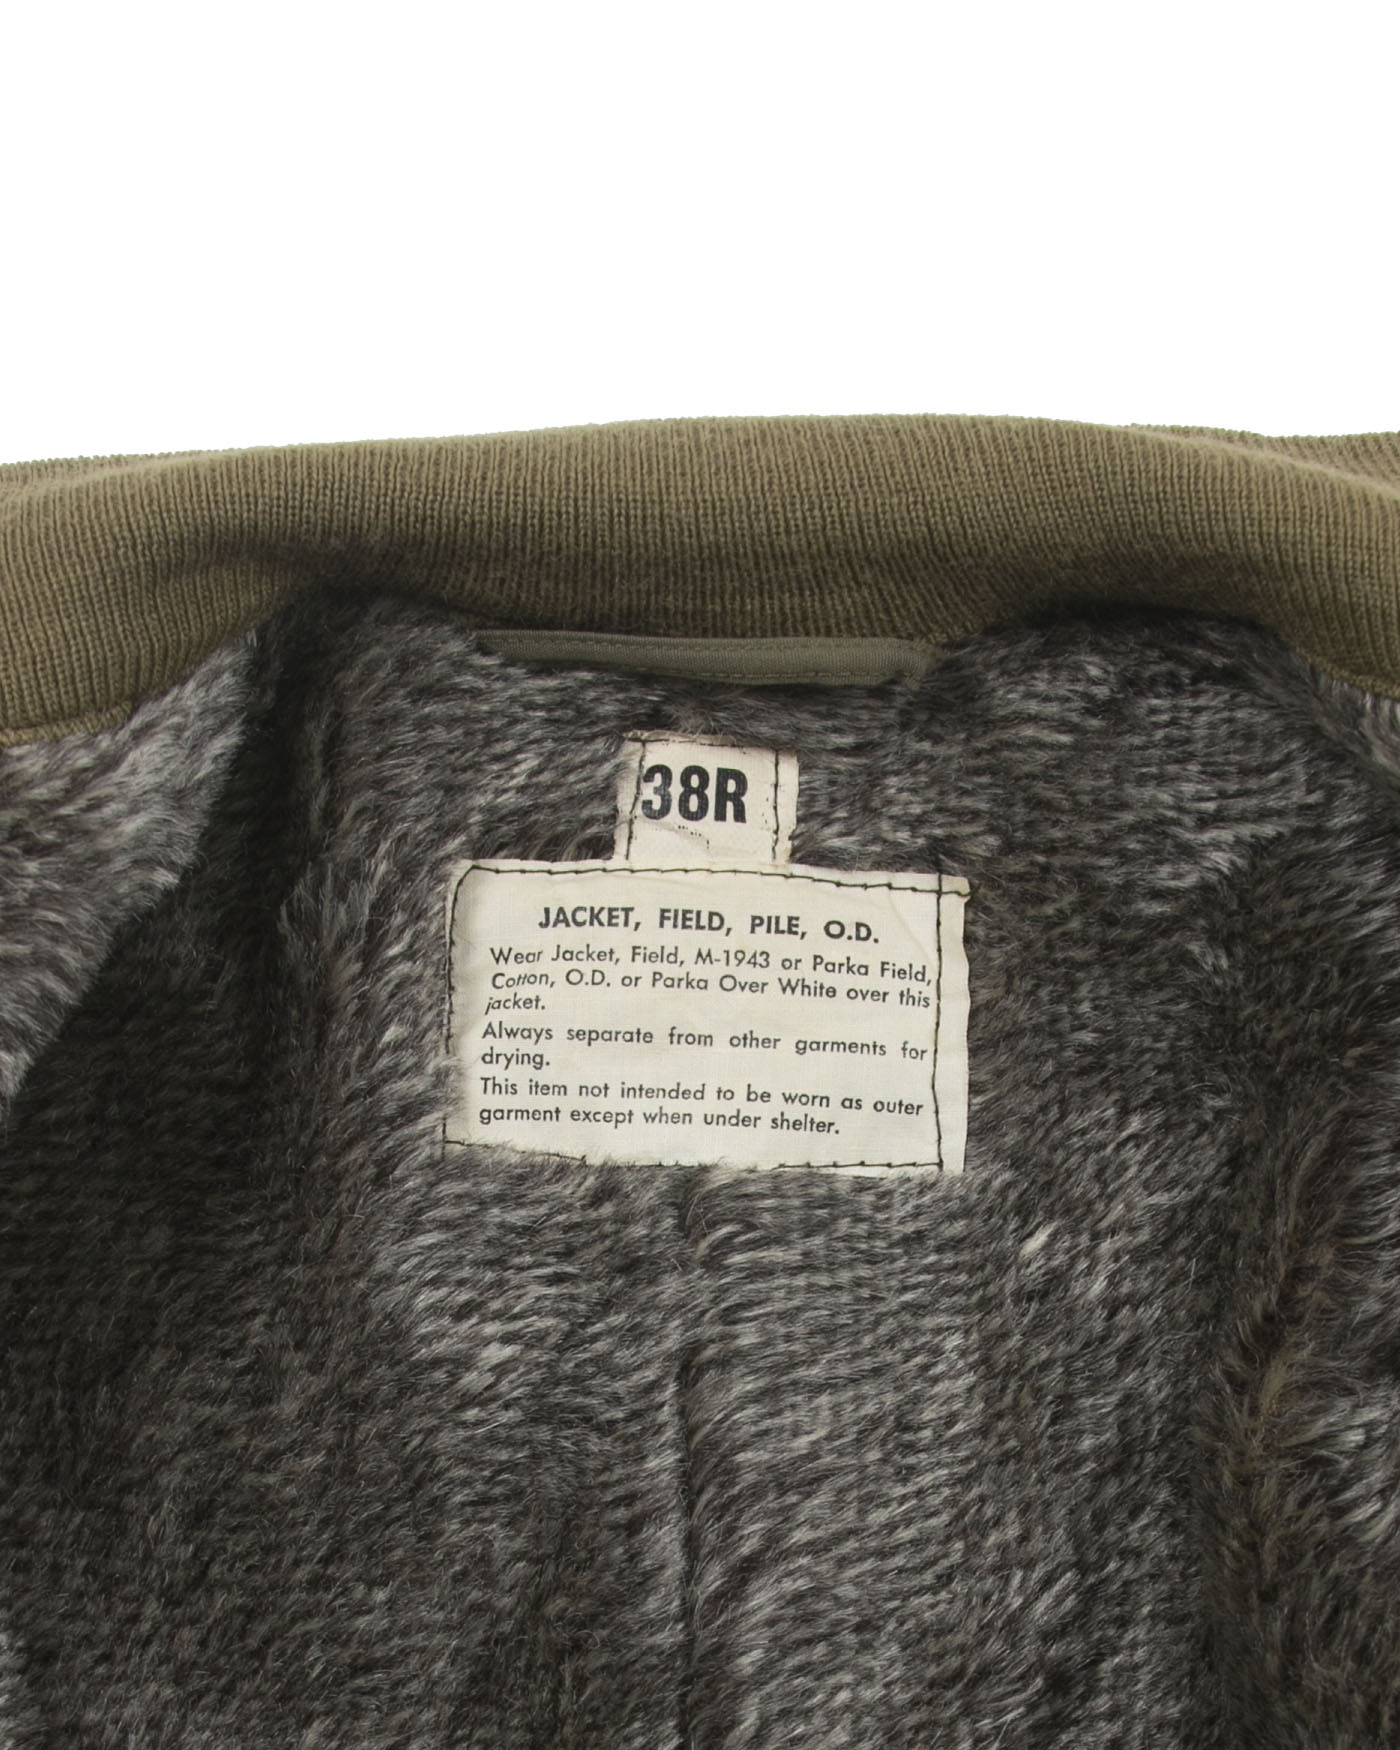
-Large white instruction label added to the neck
370E
-Usually they have a dark OD7 lining with the instructions printed on the fabric itself. A few still use OD3 lining and a white label, but it now has a small illustration on it.
1. Specification PDQ 370, dated May 29 1943. Prototype only.
-The collar can be buttoned in an upwards position by a piece of cloth under the collar, it can be buttoned in two positions, depending on what type of clothing is worn underneath.
-13 sizes are available, three lengths are available, Short, Regular and Long.
-Makers tag is in the right breast pocket, printed on cheese cloth.
-Size tag is sewn in the collar.
-There is a loop sewn in the collar to suspend the jacket when not worn.
-The bottom of the sleeves are closed like the wool shirt.
2. Specification PDQ 370A, dated June 30, 1943. Prototype only.
-The piece of cloth under the collar is placed lower.
-The bottom of the sleeves is hemmed by just one row of stitching.
-13 sizes available, 2 lengths , Regular and Long.
-Two lengths of cloth are sewn in at both extremities of the lower pockets to support the weight sometimes carried in them. One of these pieces of cloth goes all the way up to the collar.

370B Label
3. Specification PQD 370B, July 9, 1943. First pattern to be mass produced and issued in quantity.
-The bottom of the sleeves are more simplified. It appears the gusset was problematic and difficult to sew resulting in a wide variation (and sloppy stitching/ redos) on these jackets.
-The patch for closing the collar is replaced by a trapezoid patch sewn behind the left side of the collar and held in place by buttons. On some jackets these are a different color than the rest of the buttons.
-The second button for the collar is no longer there.
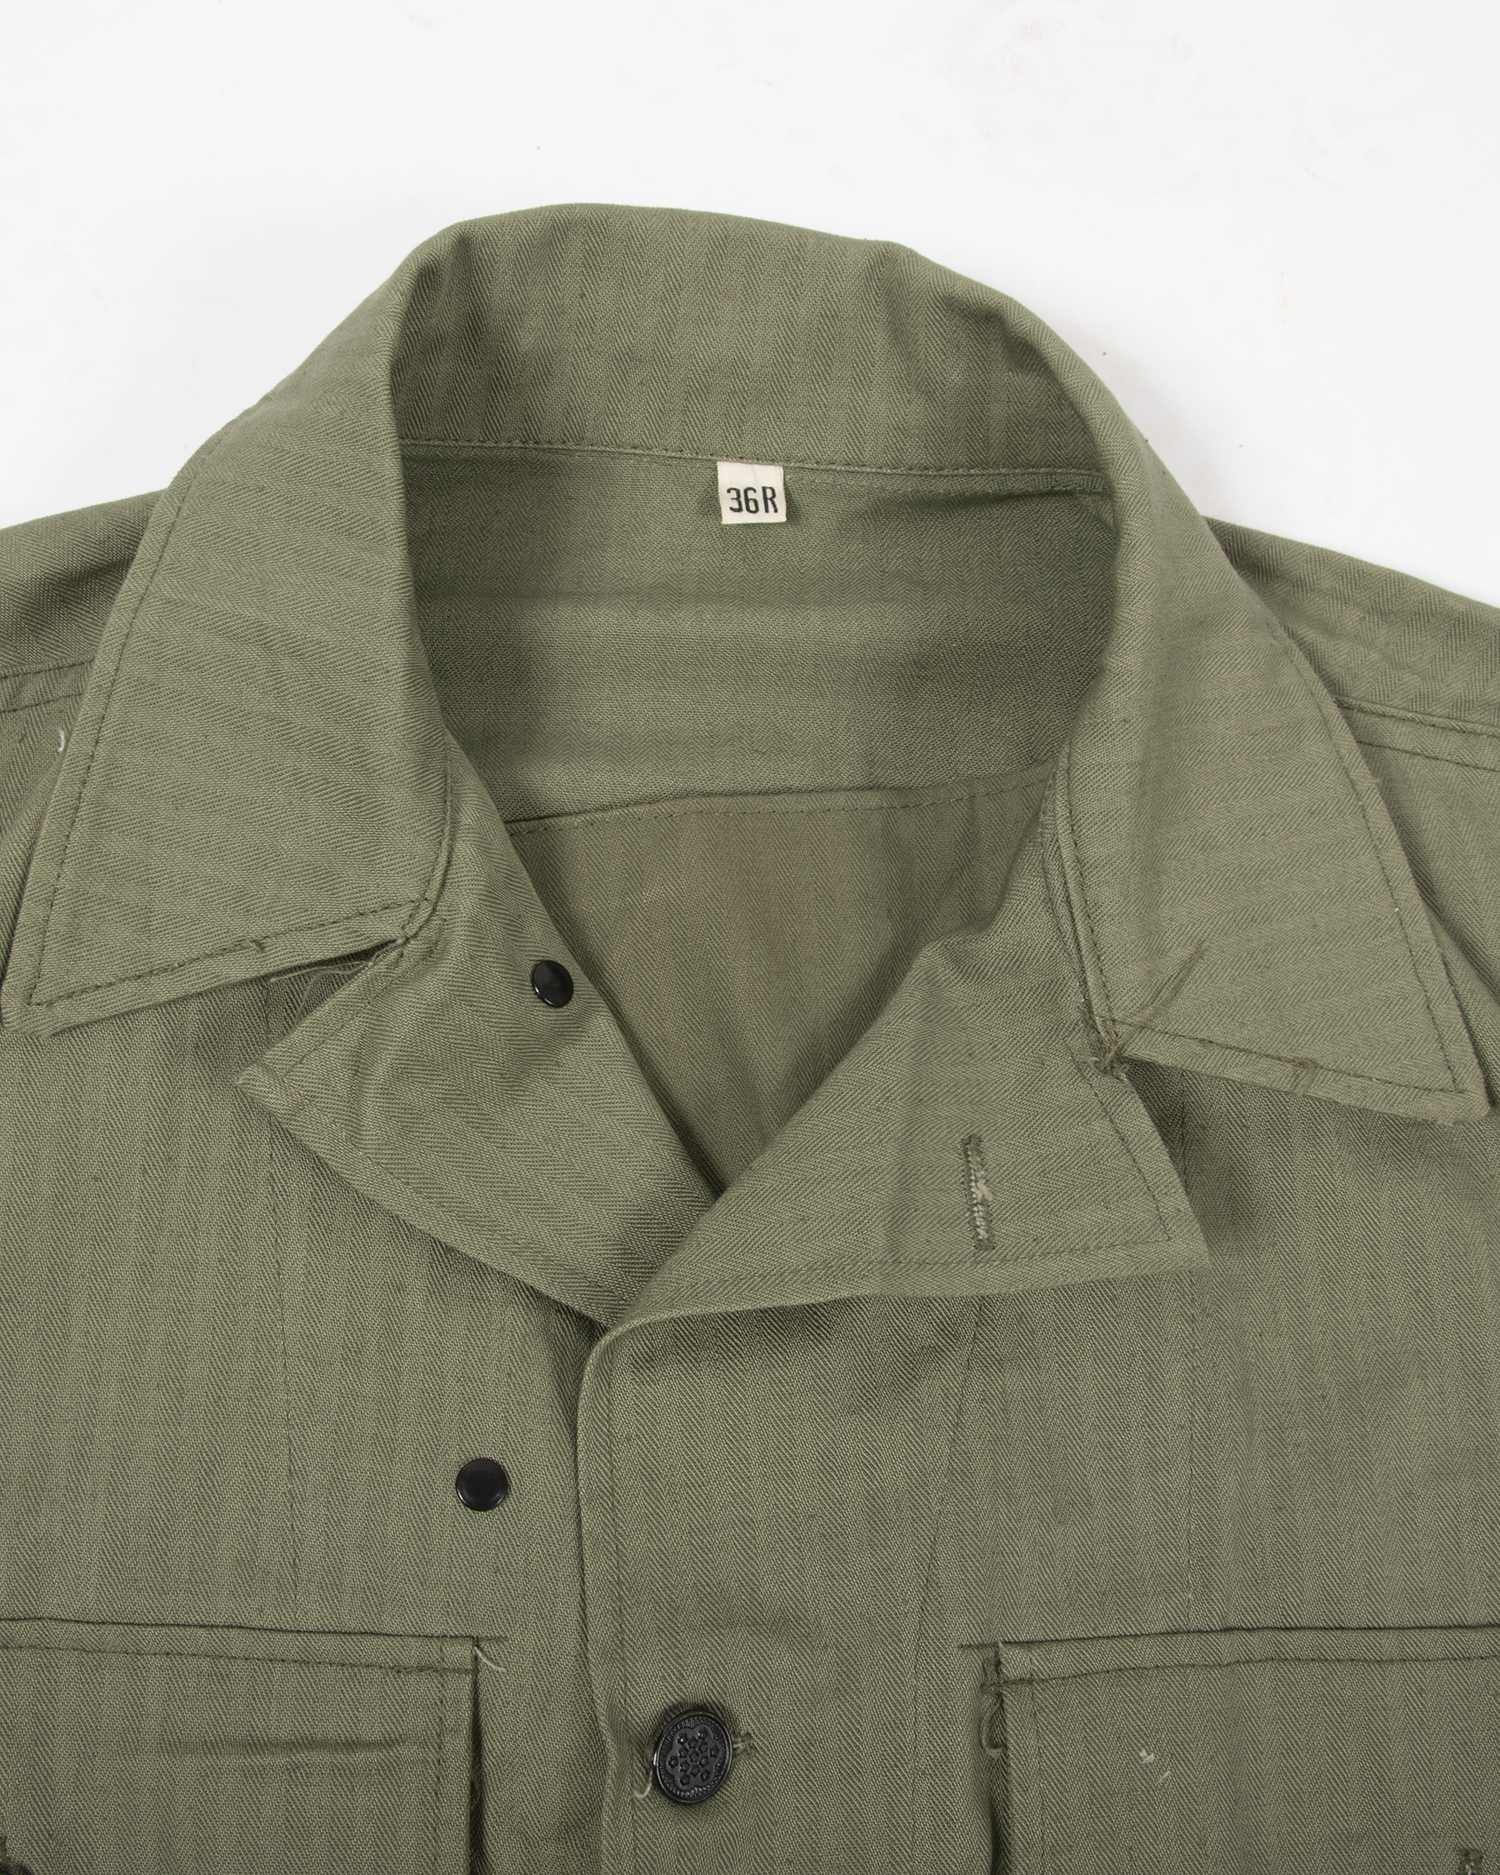
-The size is now printed in ink below the collar.
-Makers tag is in the right lower pocket.
-Epaulets are longer than subsequent models.
-Some have OD7 color lining, others use OD3.
-Suspension loop is sometimes sewn onto the back of the collar, others underneath as with later patterns.
-Pocket flaps tend to be narrower than on future patterns.

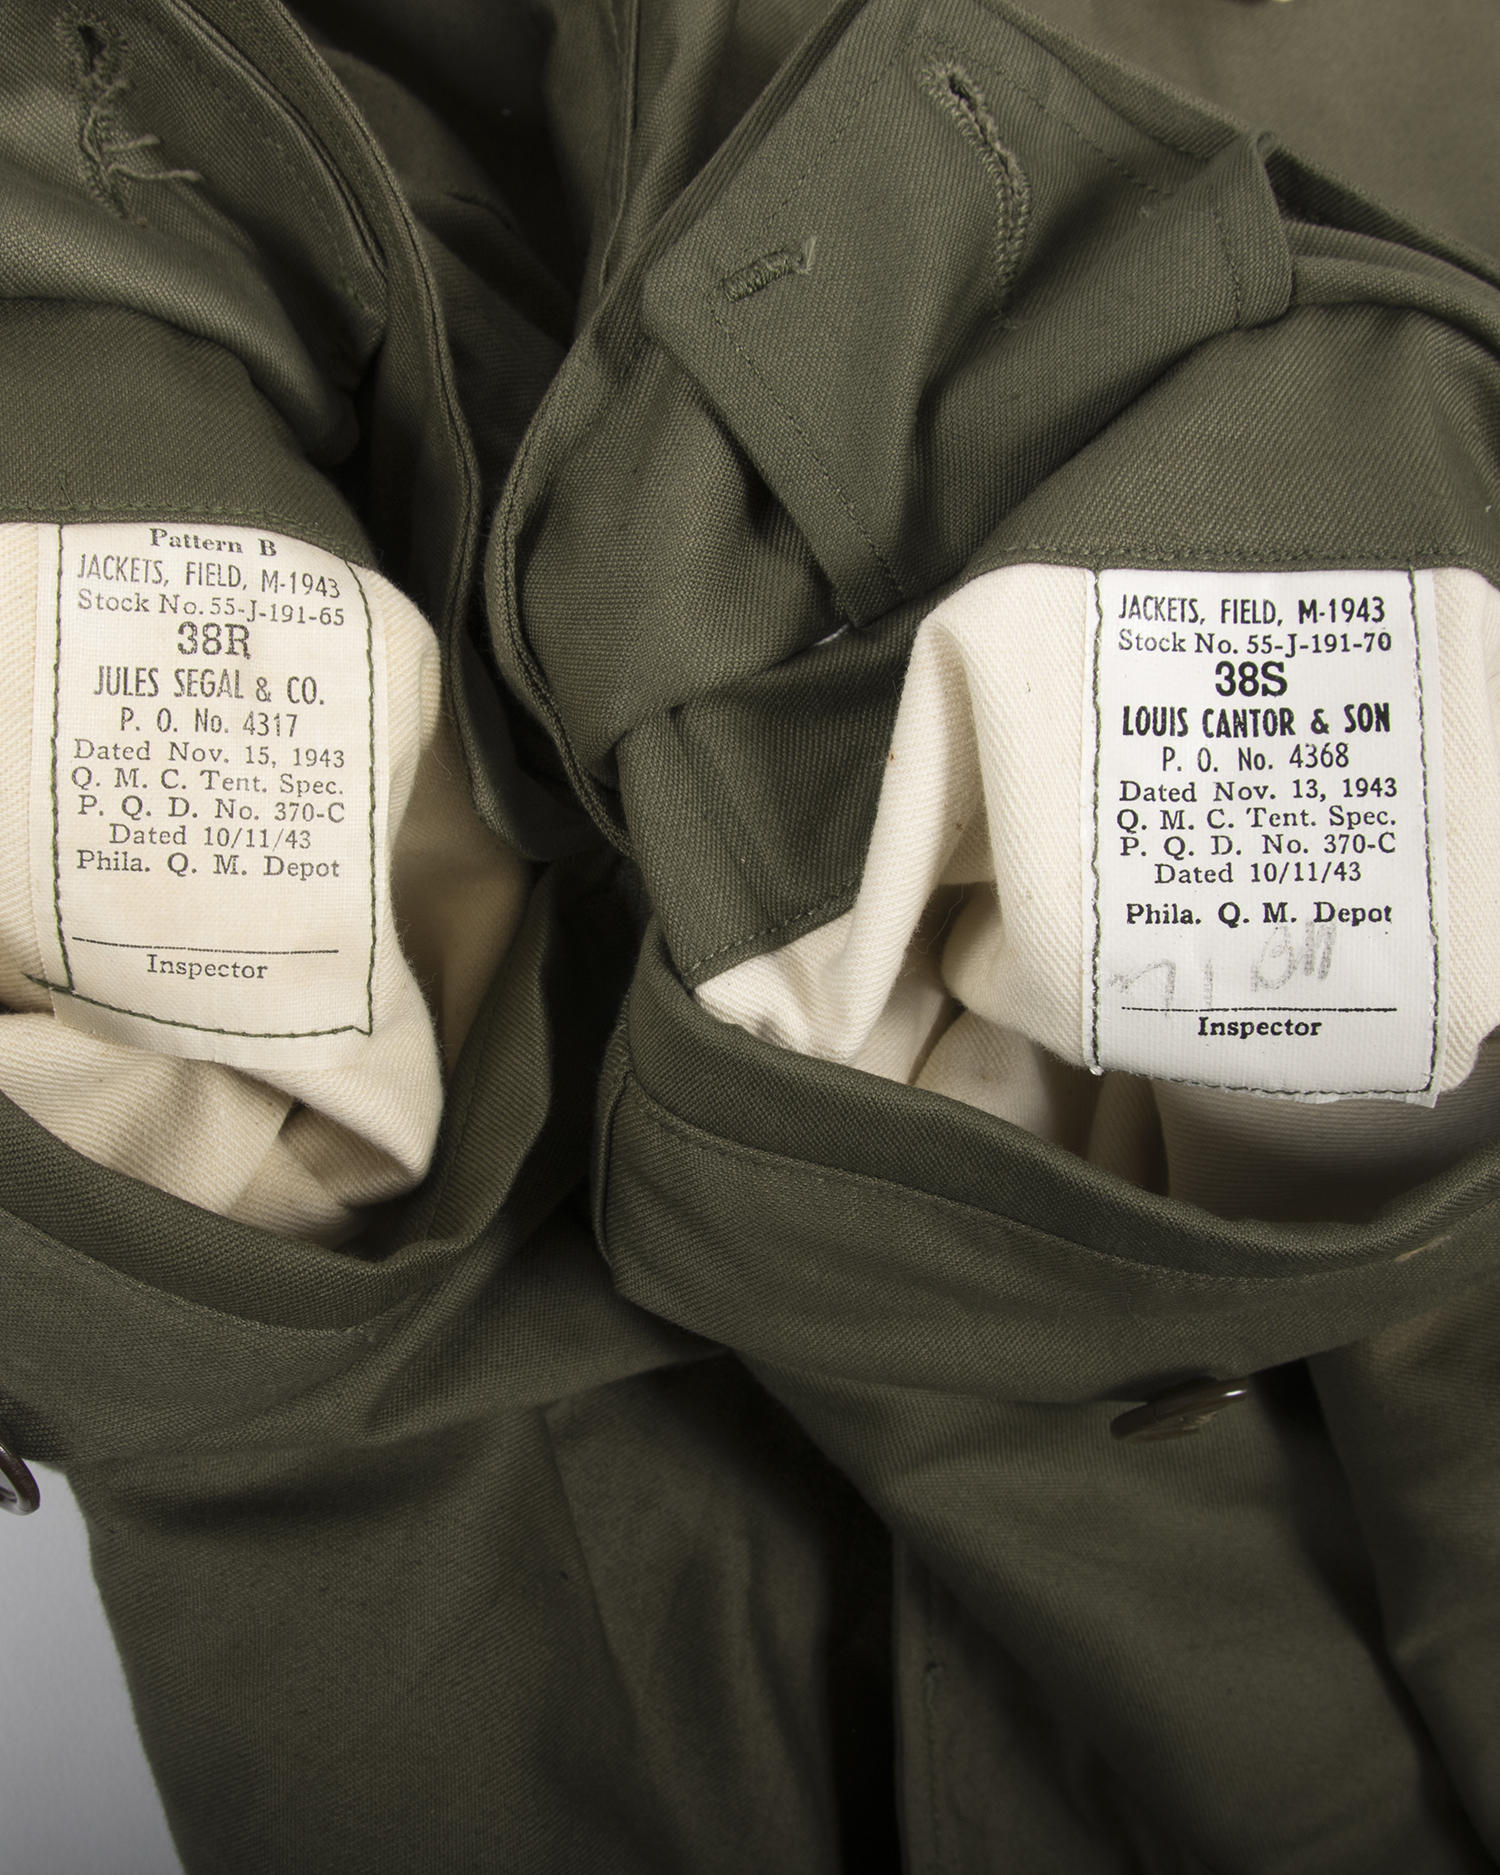
4. Specification PQD 370C, dated October 11, 1943.
-Thicker buttons.
-The cuff gusset is longer and simplified
-The 2nd button of the patch for the collar flap is dropped
-The loop for suspending the jacket is now actually sewn in a loop. This was not so before.
-18 sizes available, three lengths, Short, Regular and Long.
-OD3 poplin lining is normally used as permission was given to use up leftover stocks of M41 jacket fabric.

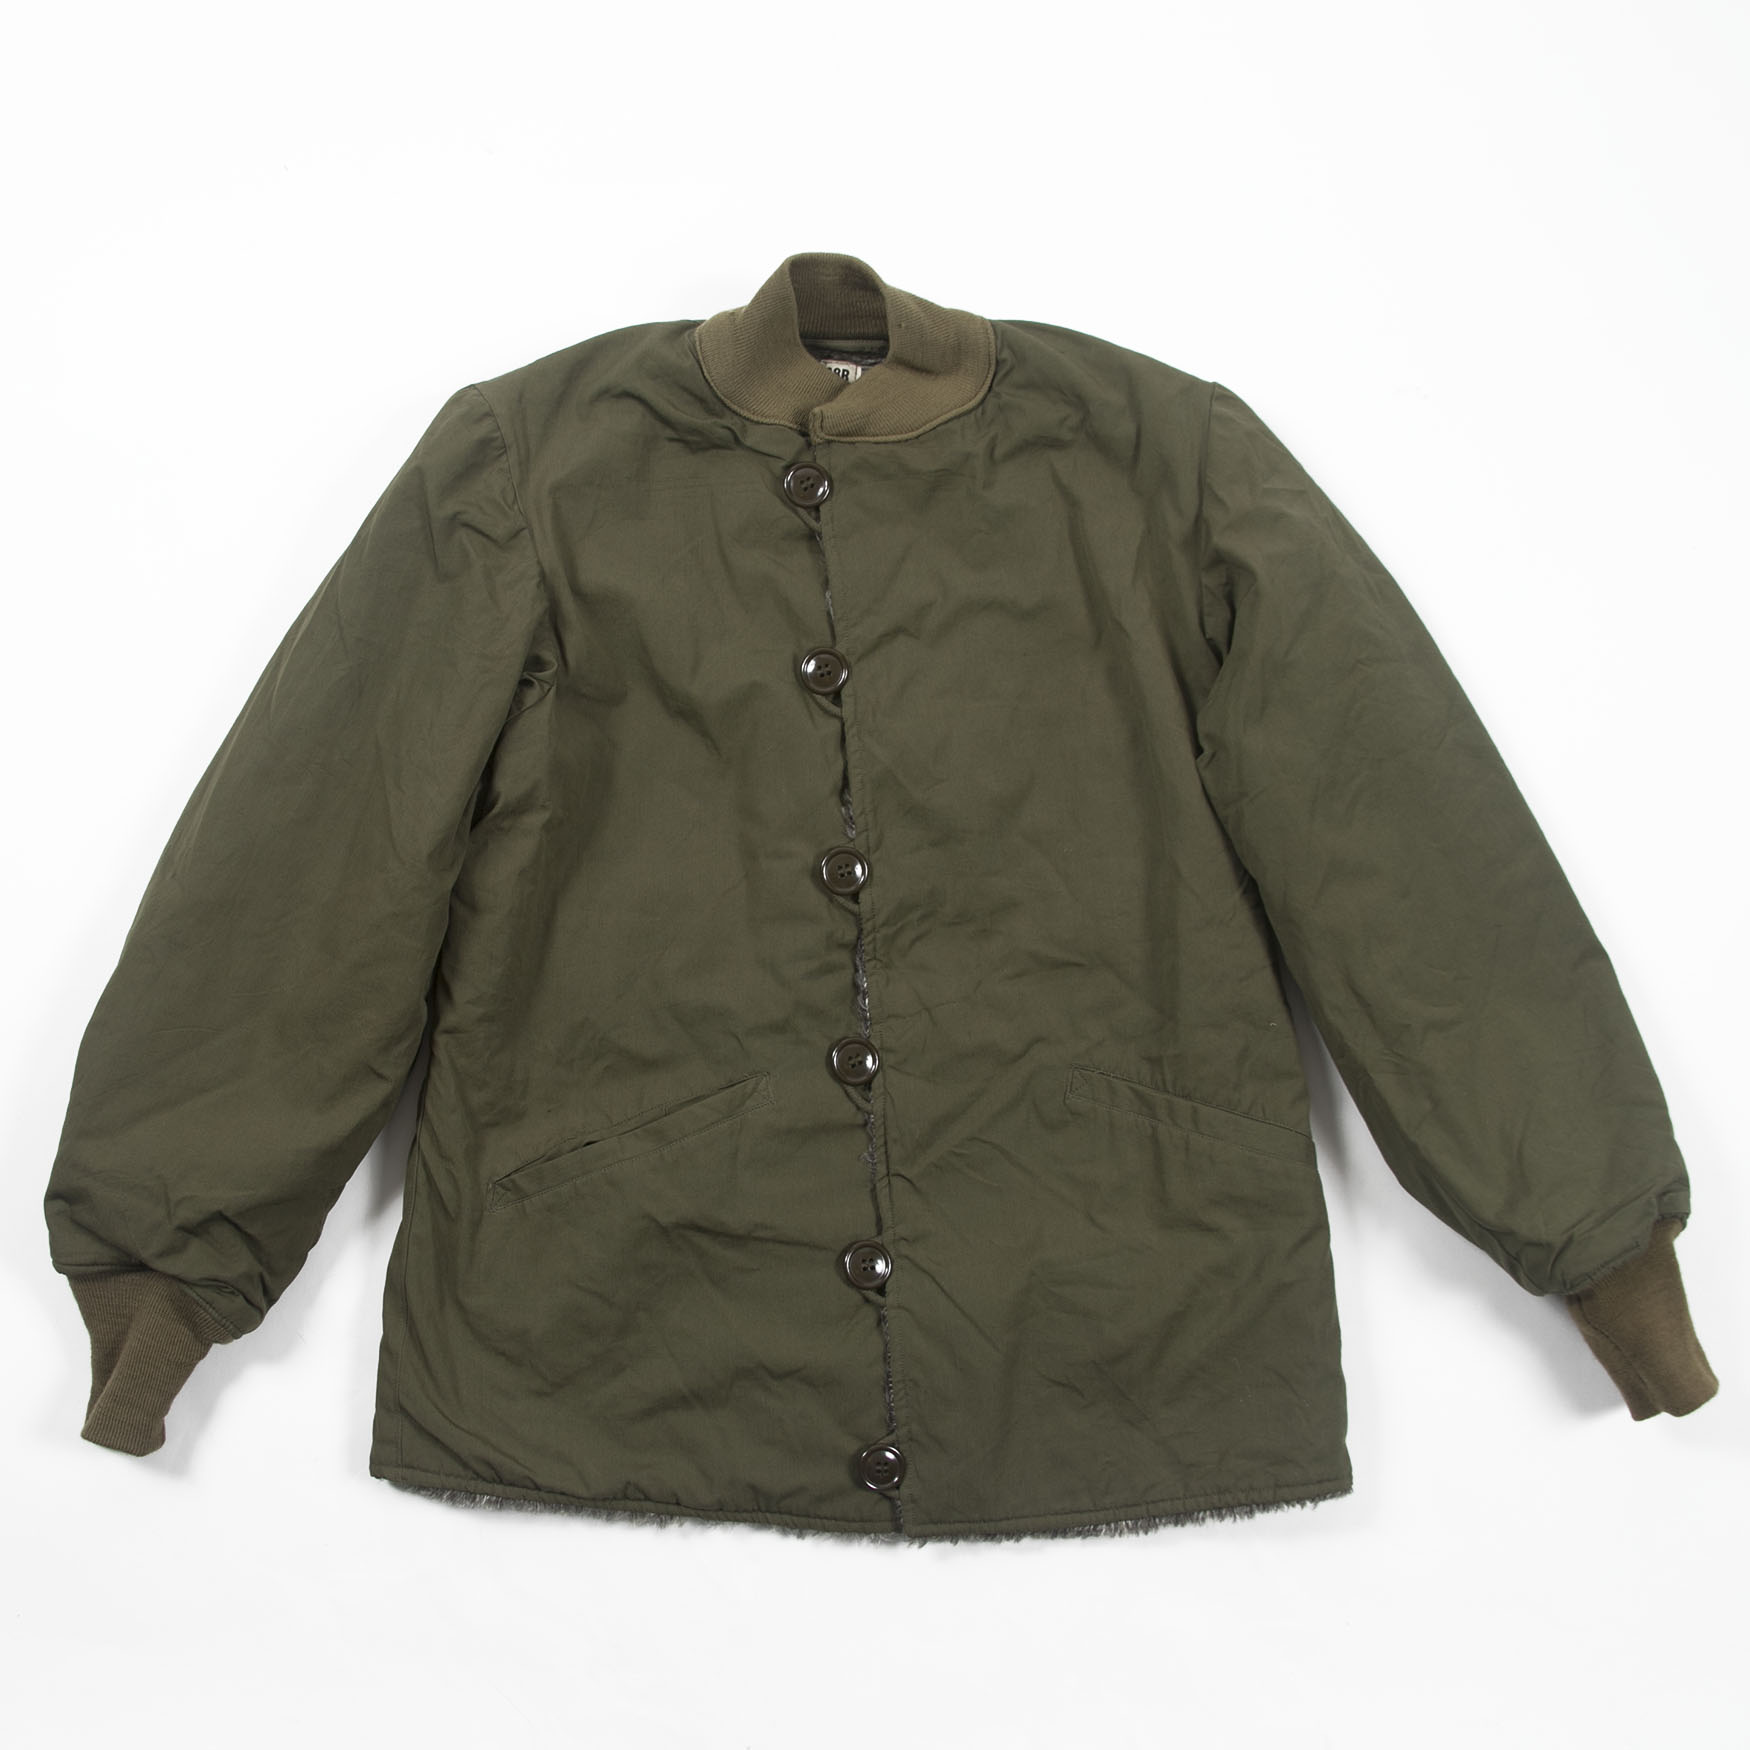
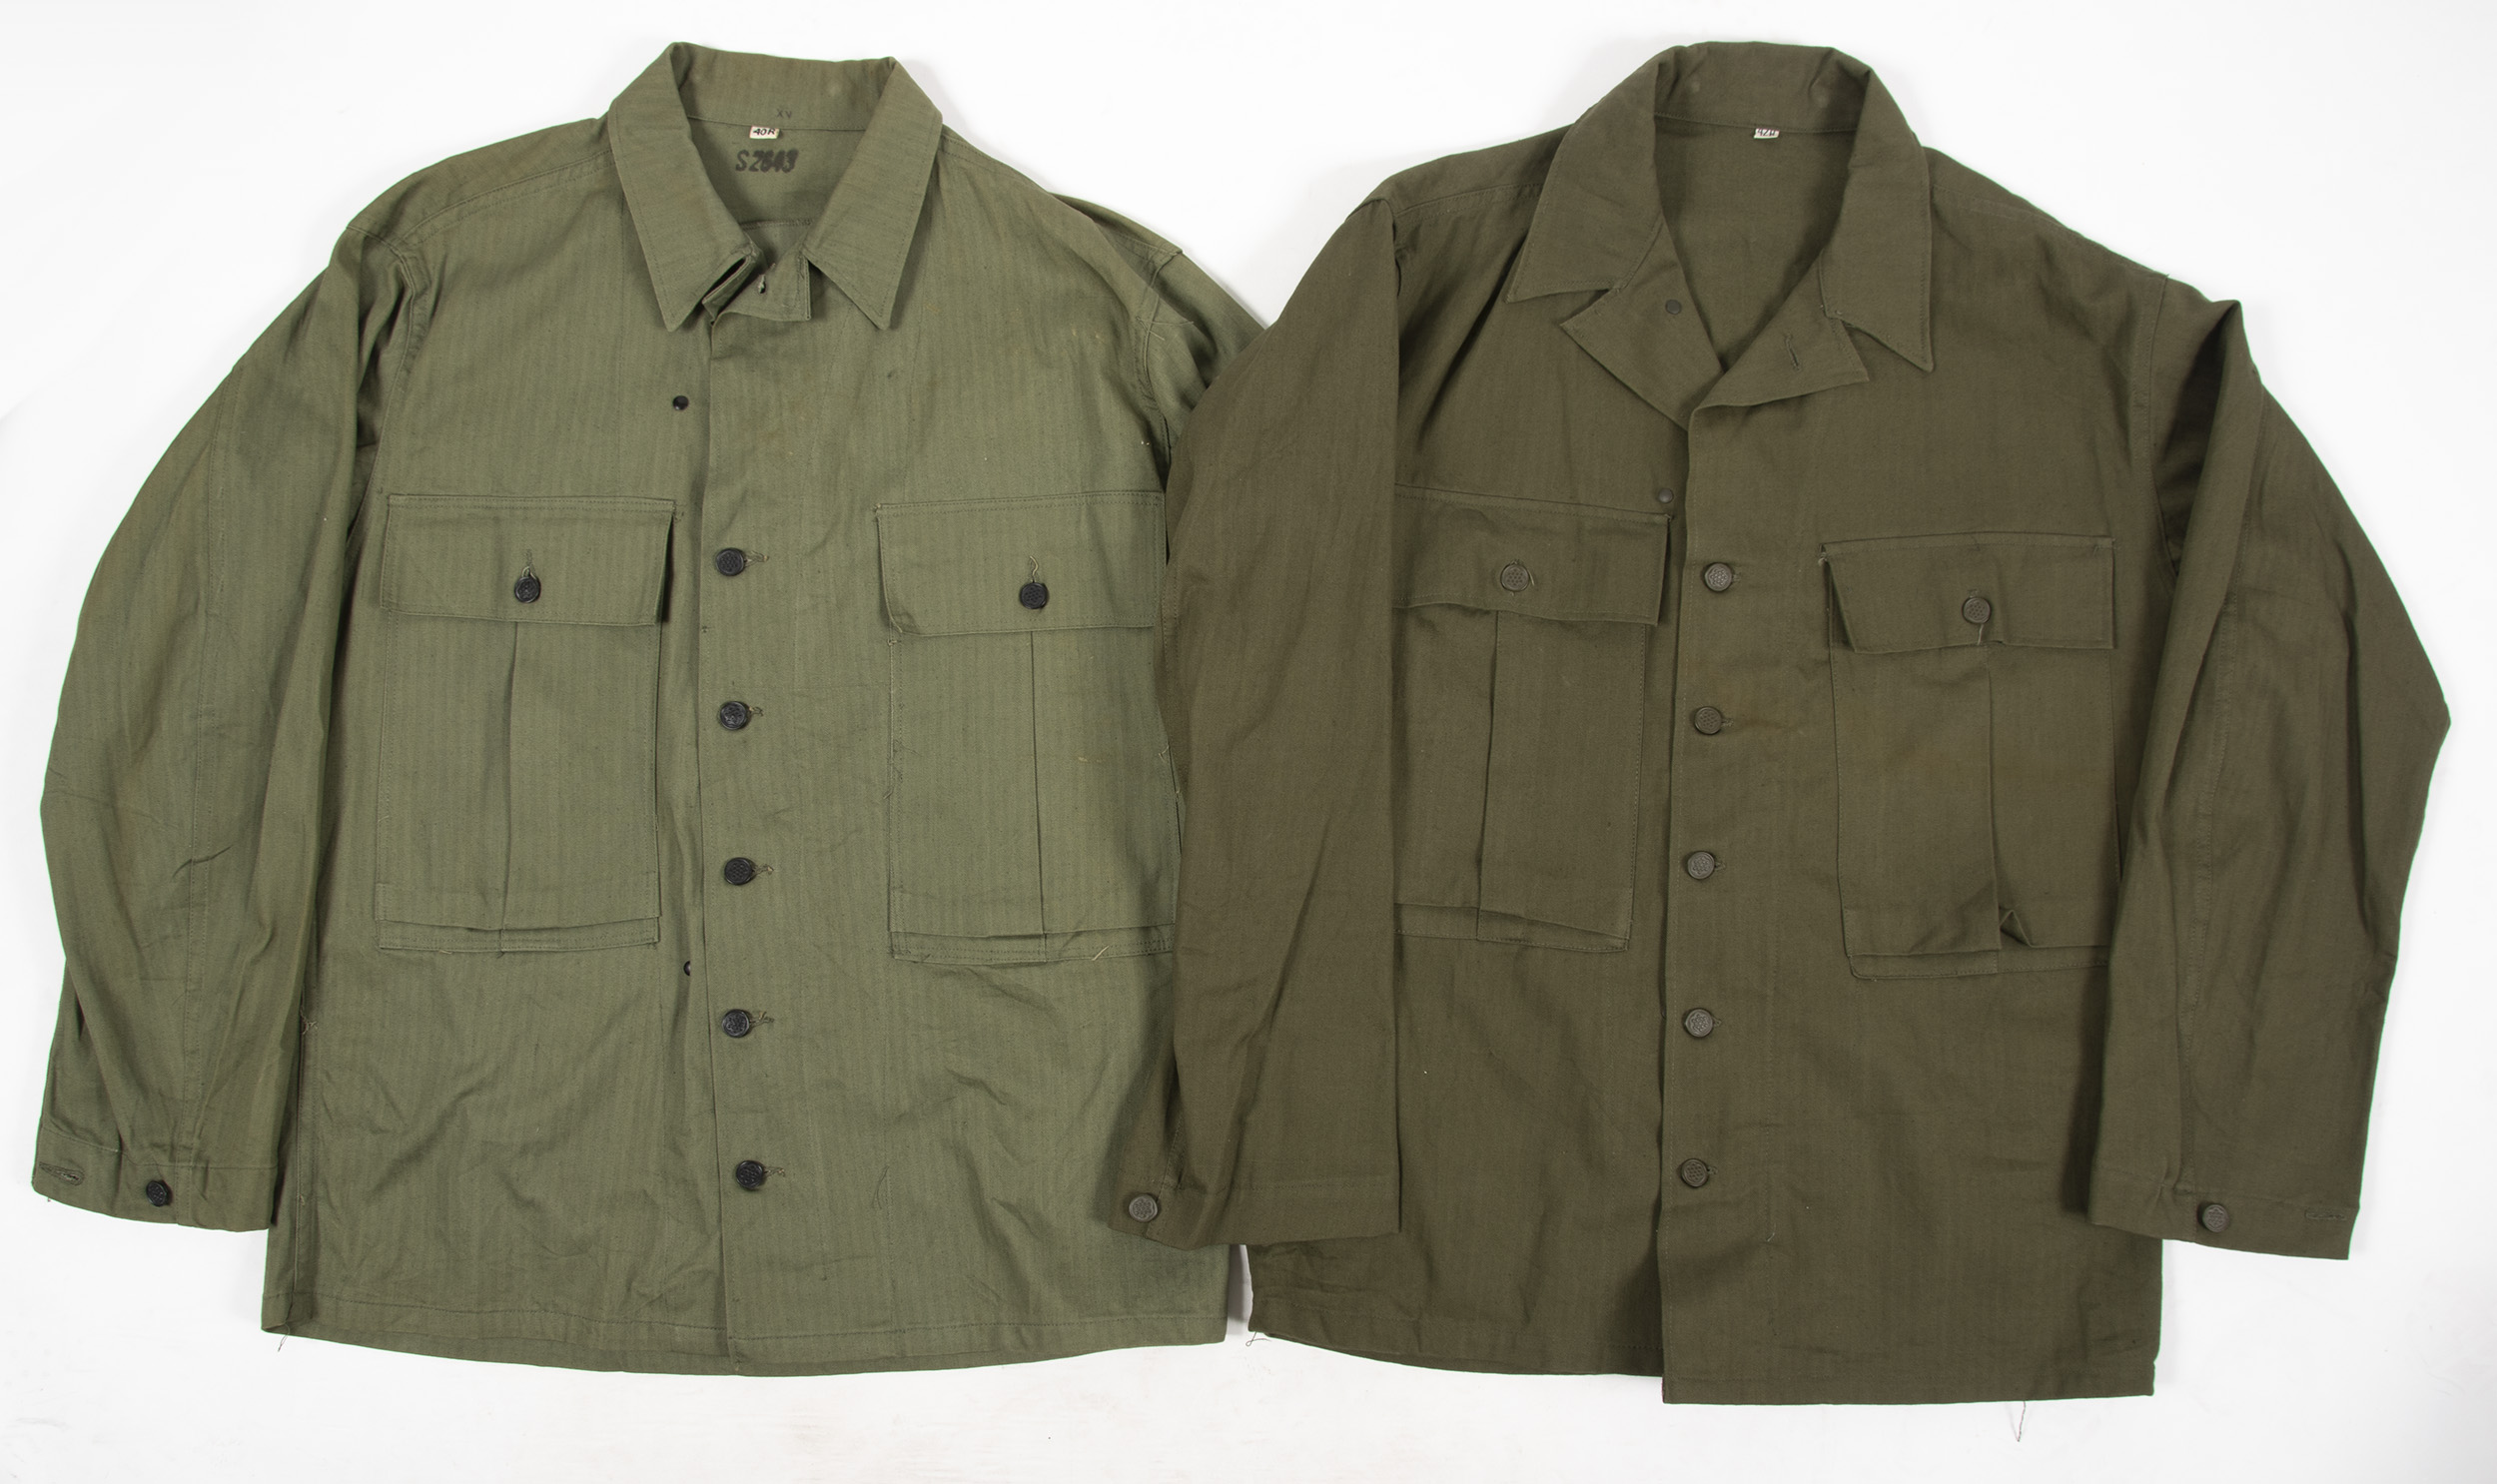
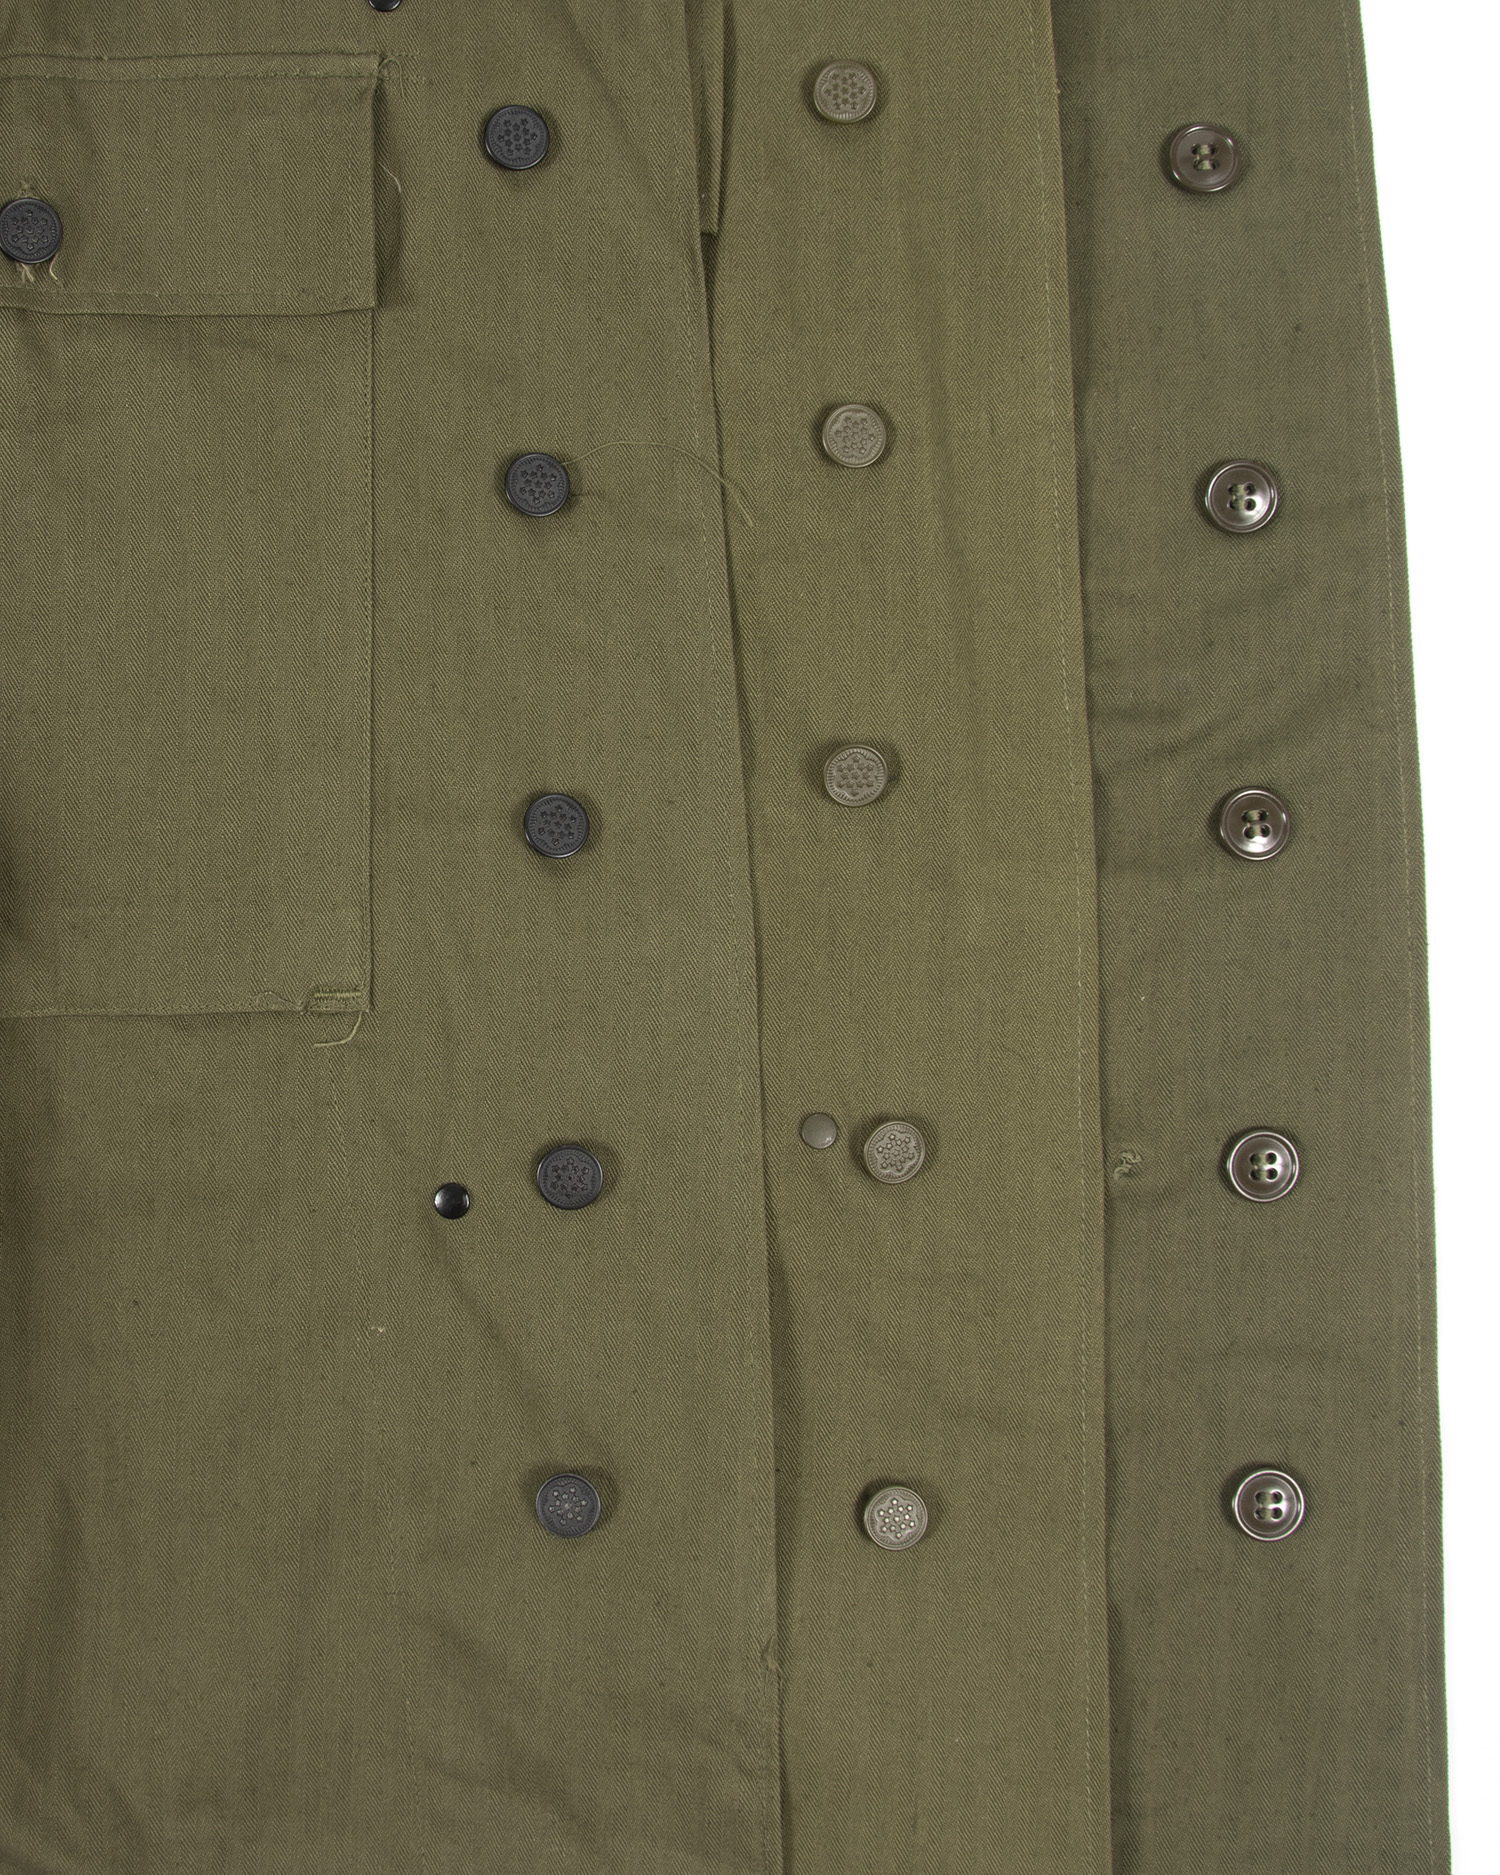
370C “Pattern B” vs. 370C
5. “Pattern B”, dated Dec 31, 1943.
This is not a separate pattern, but rather an amendment to the entire 370 class of field jackets. Henceforth, 2″ is added to the breast measure and 1″ to the upper arm circumference to allow more room for the pile liner. This the point where the field jackets became huge.
-This came into effect in the middle of the 370C production run, meaning some 370C’s are the less baggy cut, while others are the larger Pattern B.
-“Pattern B” or sometimes just “B” are printed (or ink stamped) on the maker label. Some jackets also had a “B” stamped below the collar next to the size mark.

There’s that sexy how-to-wear-me label!
6. Specification PQD 370D, dated, February 23 1944.
-‘How to use’ tag added below the collar, rectangular, in cheese cloth or on fabric. A few have the small illustration seen on 370E, most are just text.
-OD3 lining is normally used.
-Later 370D’s often use OD7 HBT cloth in the pockets.
7. Specification PQD 370E, February 13 1945.
-18 sizes, three lengths, Short, Regular and Long.
-The size tag is sewn in with the collar and the size is marked in red, blue or black.
-‘How to use’ tag now has a small drawing added. Some makers print this tag on the lining by a transfer that is ironed on.
-Some 370E’s still use OD3 lining while most now have OD7
-The breast pockets are made larger, supposedly to be able to carry K rations.
-OD7 HBT cloth is sometimes used as pocketing.
Some observations on originals
-The 370B is the most variable, likely as it was the first to be mass produced and there were near catastrophic production problems with the contractors documented in the NARA archives.
-Lining in 370B’s is sometimes OD7 (as was likely called for in the original design) and other times OD3- meaning the approval to use use leftover stocks of M41 jacket fabrics came down during production.
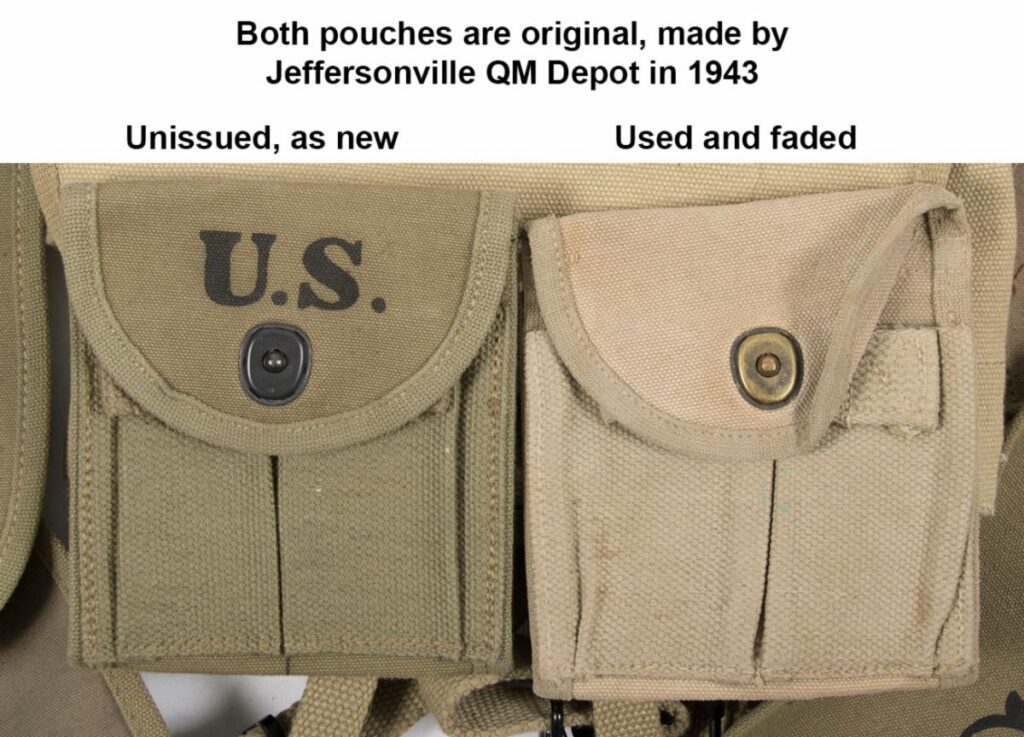
-When new, the cotton sateen fabric is dull on one side and rather shiny on the other. Original field uniforms were assembled with either side facing out. Whether or not one was supposed to be on the outside is unknown. After some wear and washings the shine dissipates. As the two sides are fairly different in appearance, this can lead some people to assume that some uniforms are made from some other cloth.
-The cuff gussets were a major source of headaches. Those in 370B’s are often poorly sewn, with two of my originals having been picked apart and re-sewn at the factory, I assume for having failed inspection. Some barely pass beyond the edge of the cuff, while others reach the buttonhole. On 370D-E they were extended all the way to the end of the cuff.
-The hang loop on the 370B’s neck is sometimes tacked directly to the collar (like a belt loop) and on others it’s sewn underneath as with subsequent patterns.
-The lower pocket position on all models ranges from actually on the drawcord channel to several inches below. I chose the lower position on our reproductions as it clears the pistol/ cartridge belt better.
-Pocket sizes are inconsistent. In the changes listed for 370E the pockets were to be enlarged somewhat, but it appears that the manufacturers took this as a suggestion rather than a rule. From 370B-370E the pocket dimensions are rather varied. Different length pockets for short and long sizes do not appear to have been graded out. Among all my jackets, the one with the largest breast pockets is a 370C, size 38 short. Go figure.

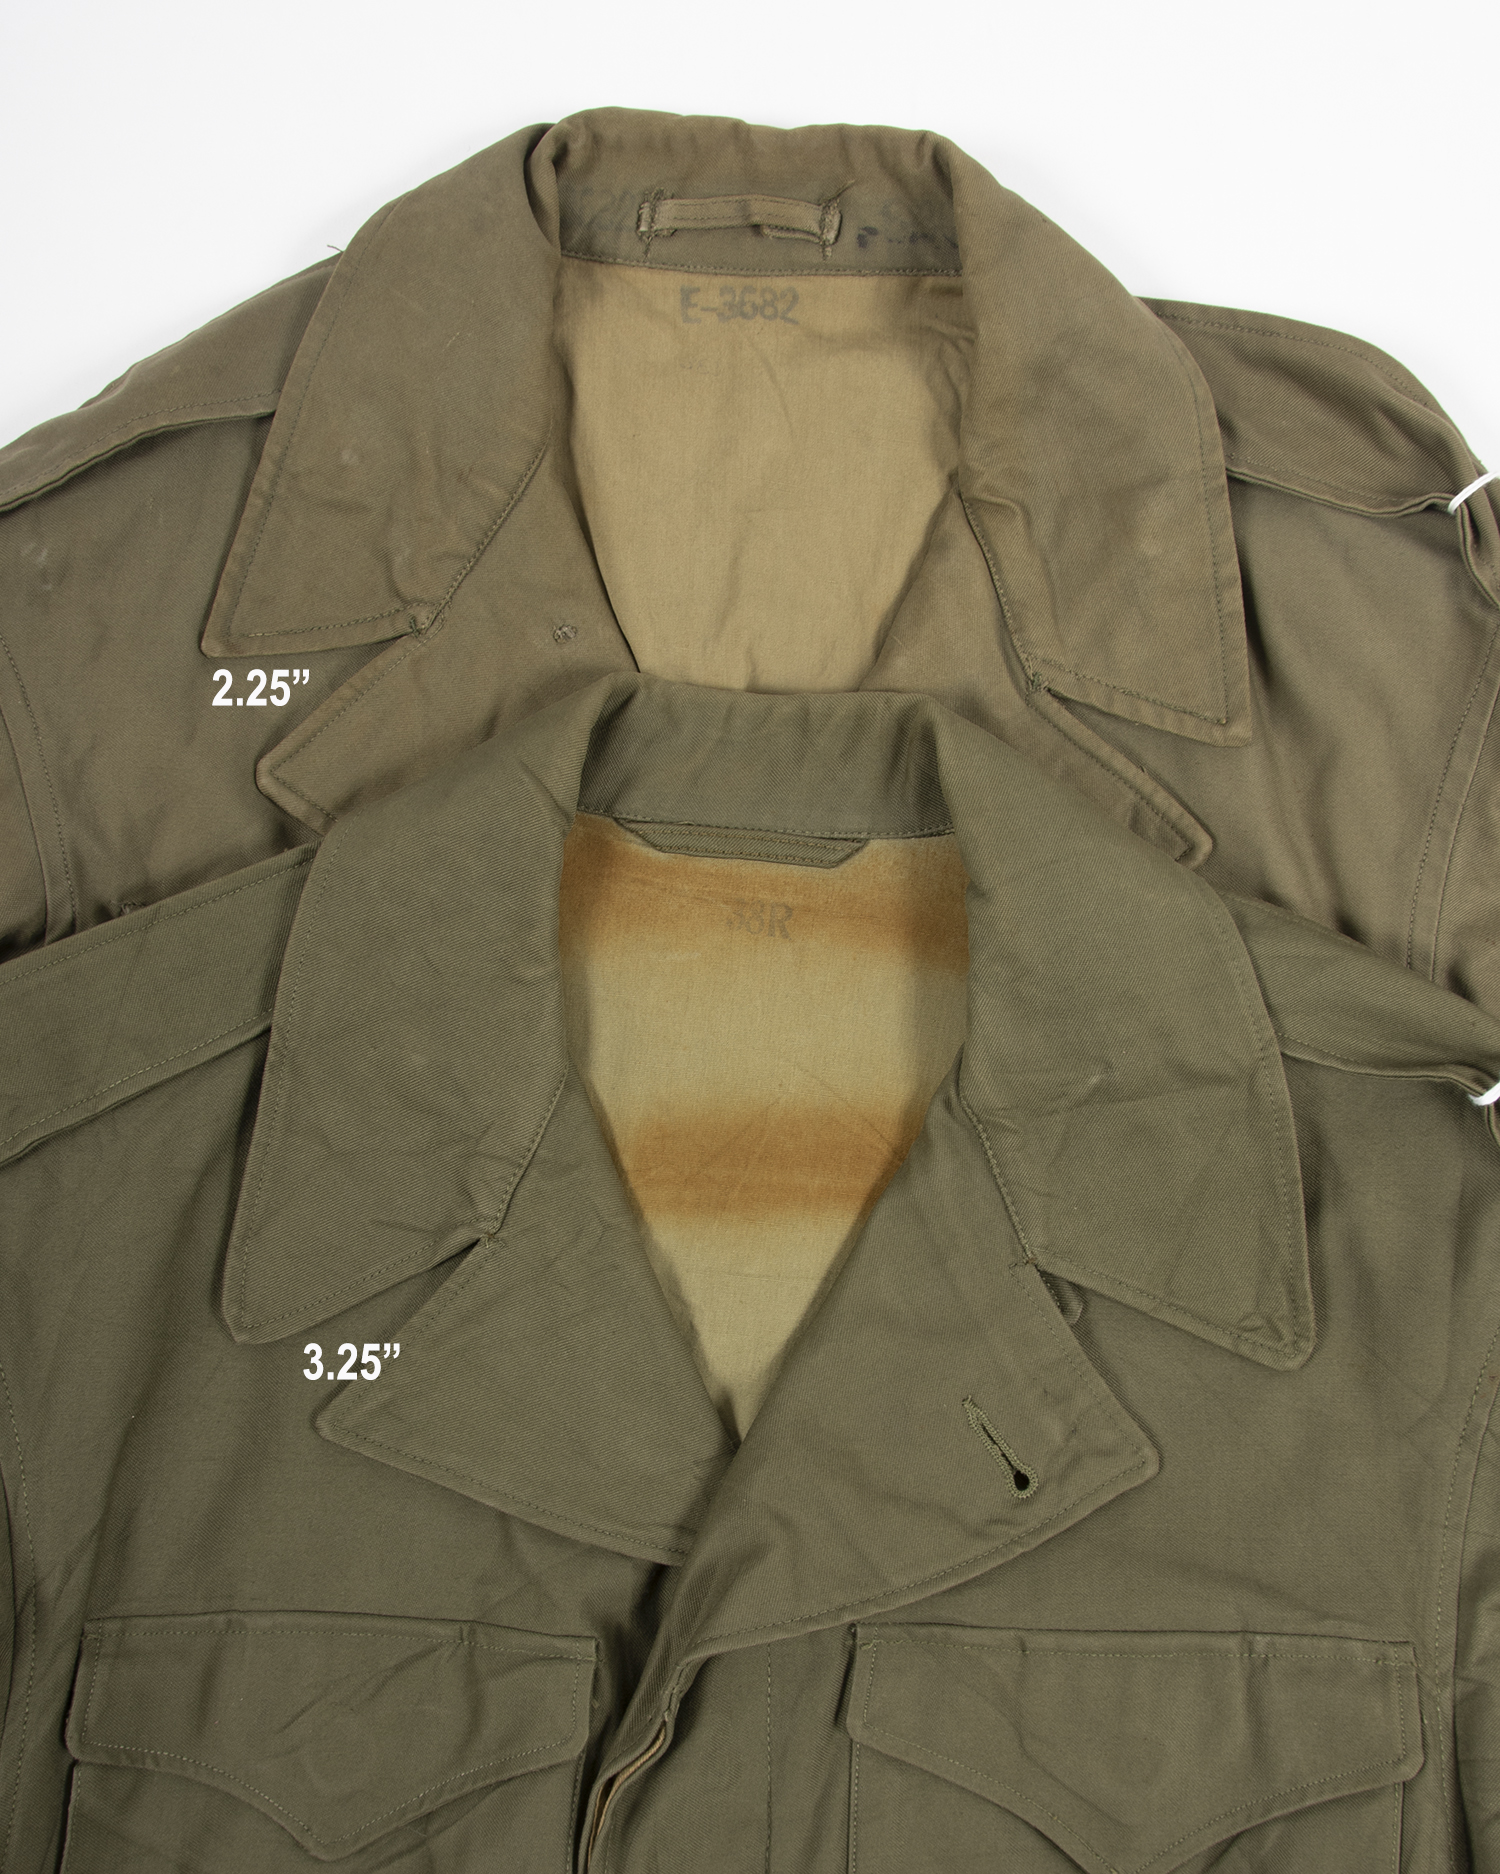
-Collar & lapel size varies widely- some are slender, with sharp corners, while others would make Batman proud. My originals range from 2.25″ to 3.25″ at the lapel.
-Buttons came in a wide color assortment, ranging from caramel to forest green. A dark brownish OD is most common. A few 370B’s used wool trouser type buttons (almost a butterscotch color) for the neck flap under the collar.
-The large white instruction label that excites so many living historians was not used until the 370D pattern in 1944.
-Most common pattern? At this point, we do not have the actual production numbers from 1943-45 of each pattern. (It might yet turn up.) From collecting them over the past 20 years, I encounter more 370C’s than any other Wartime pattern. In theory, the most plentiful should be 370D’s due to the much longer production run- but in early 1944 Eisenhower himself (who disliked the M43) had thrown a monkey wrench into the ordeal which resulted in manufacture being halted for awhile. It’s possible that the rush to get the troops equipped with them later that year led to a higher percentage of the total made getting sent to the ETO and being used up. The original order for 370B’s was several hundred thousand pieces, but production problems were rampant so how many were actually made is unknown. They are sometimes consider ultra rare, but I managed to acquire 9 or 10 in one year from trolling ebay. That does not jive with only a handful having been made.
-RC
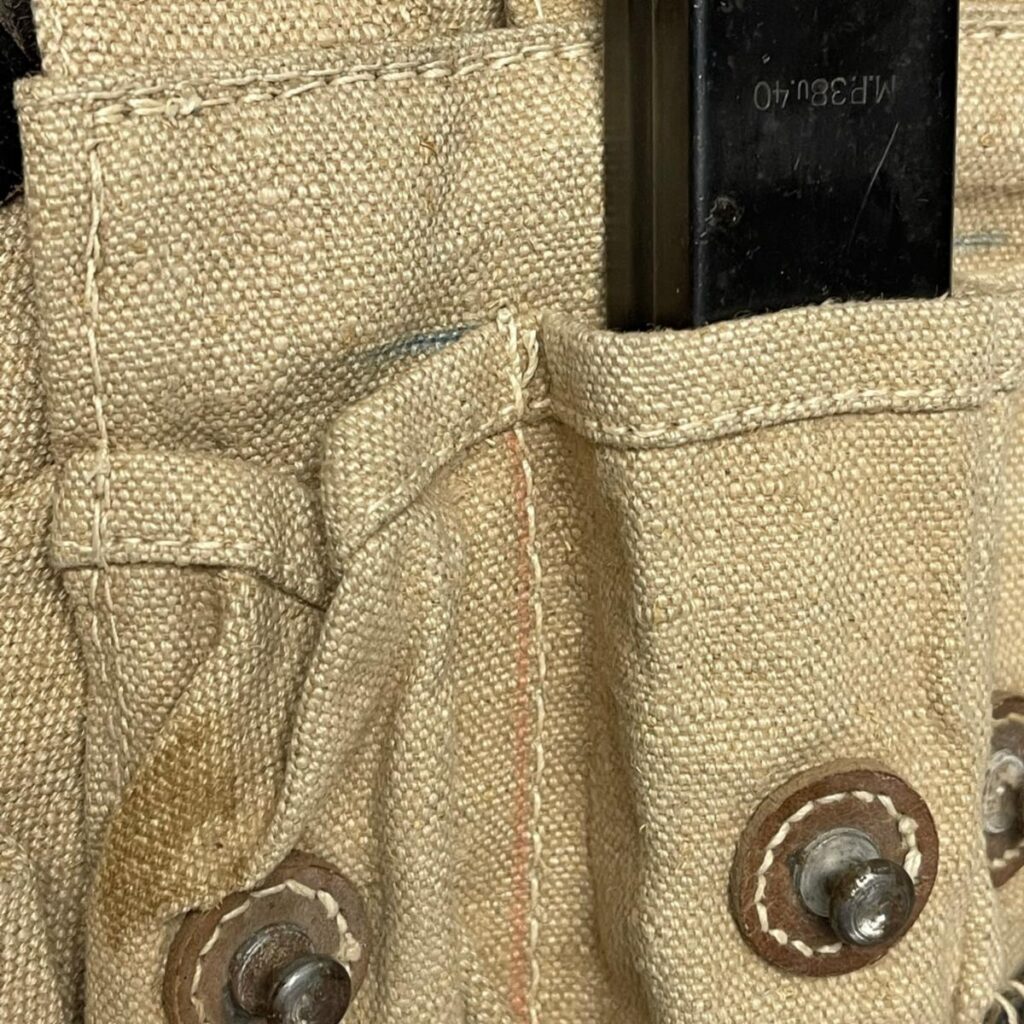 Blue and red pencil marks on original MP40 pouches.
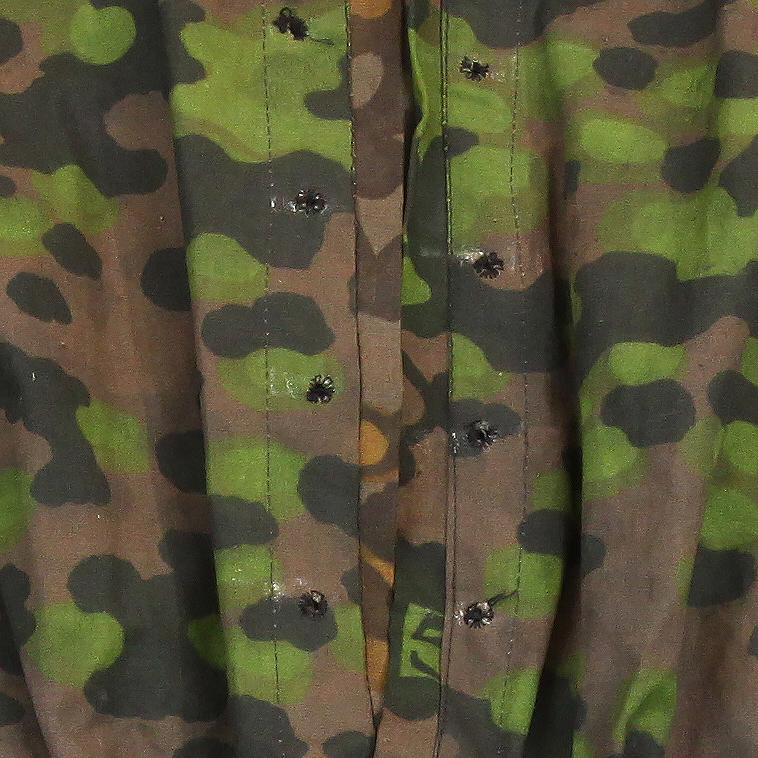 Original smock with chalk marks…how can they be wrong?
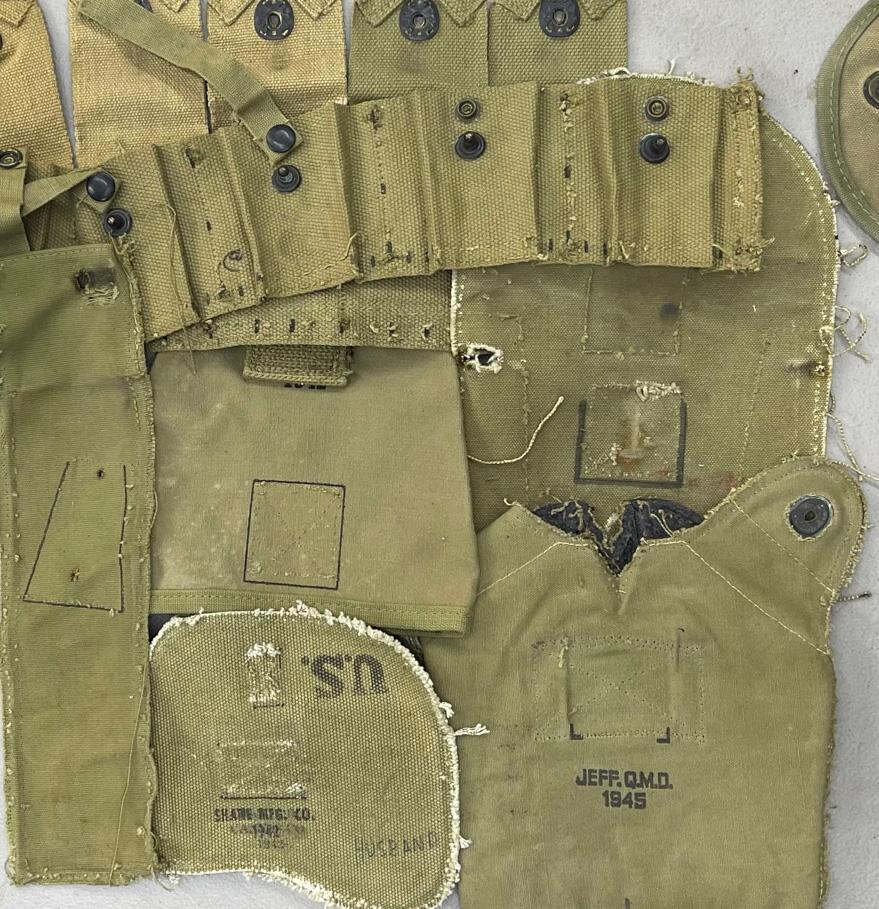 All those squares, U’s, tick marks, dots, dashes and other blemishes were applied at the factory in WWII to show the workers where to sew the parts- not offend the tender sensitivities of those keeping history alive 80 years later.
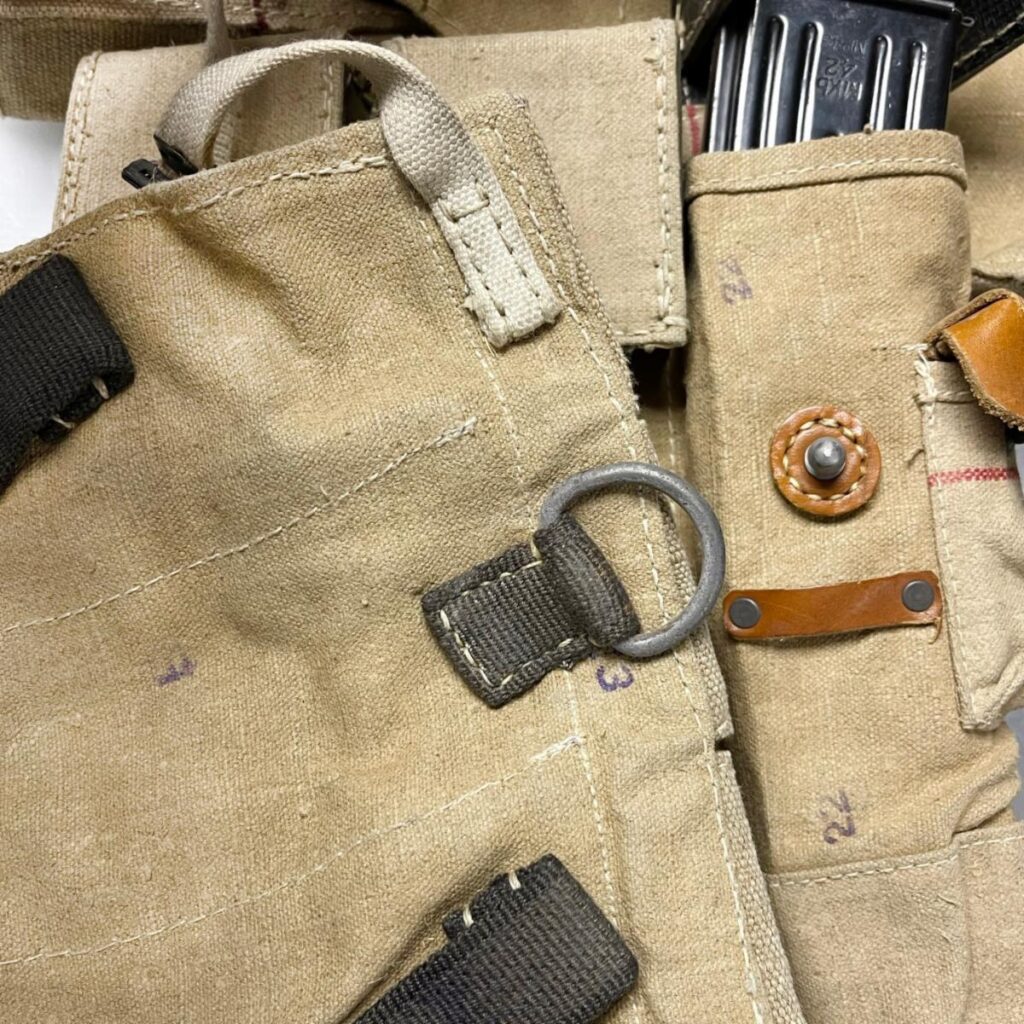 Various stamps on the parts of original MP44 pouches.
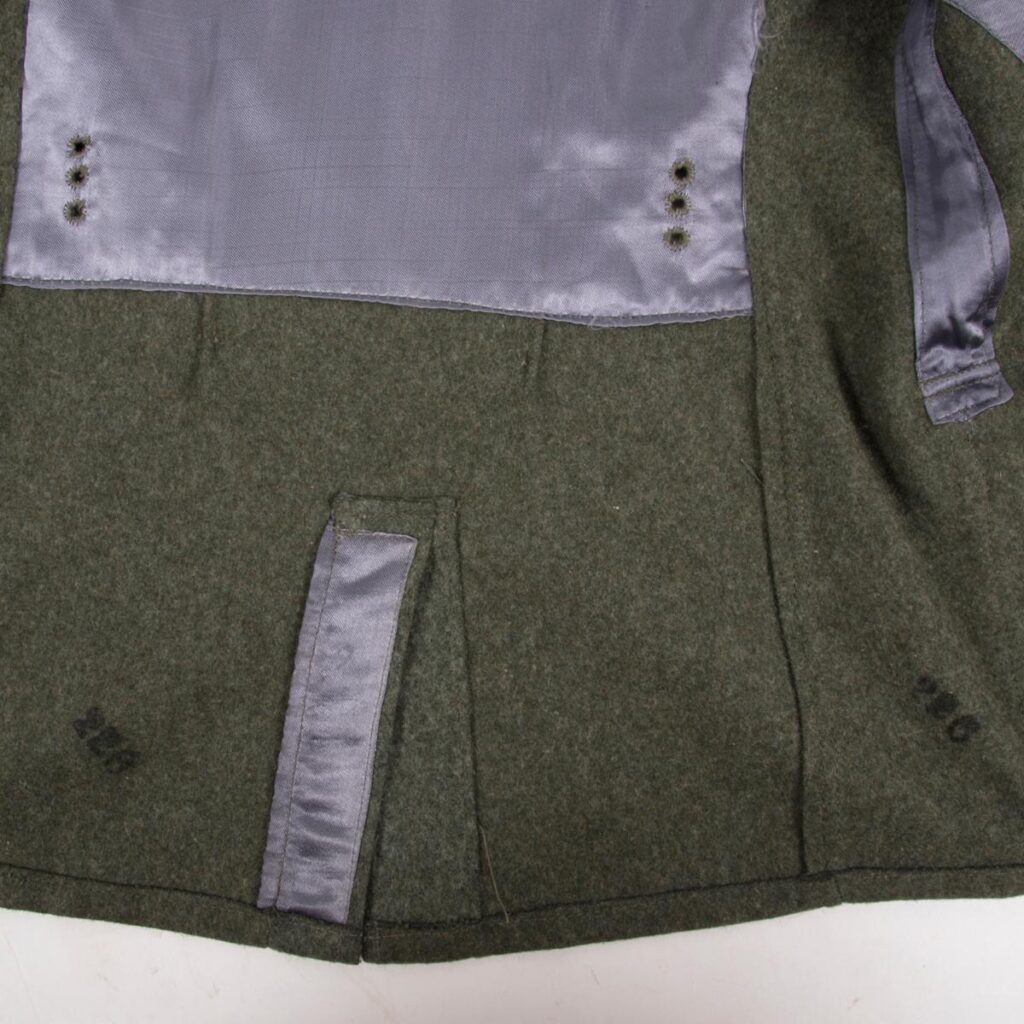 Shade marks (“226”) were stamped in black ink on all the wool parts of this original WSS M41 Feldbluse to indicate the layer of fabric they were cut from. The cloth wouldn’t have been stacked 200+ layers deep- but there were likely multiple cuts on the same table being done that day, so this might represent 2nd cut, layer 26 or something similar.
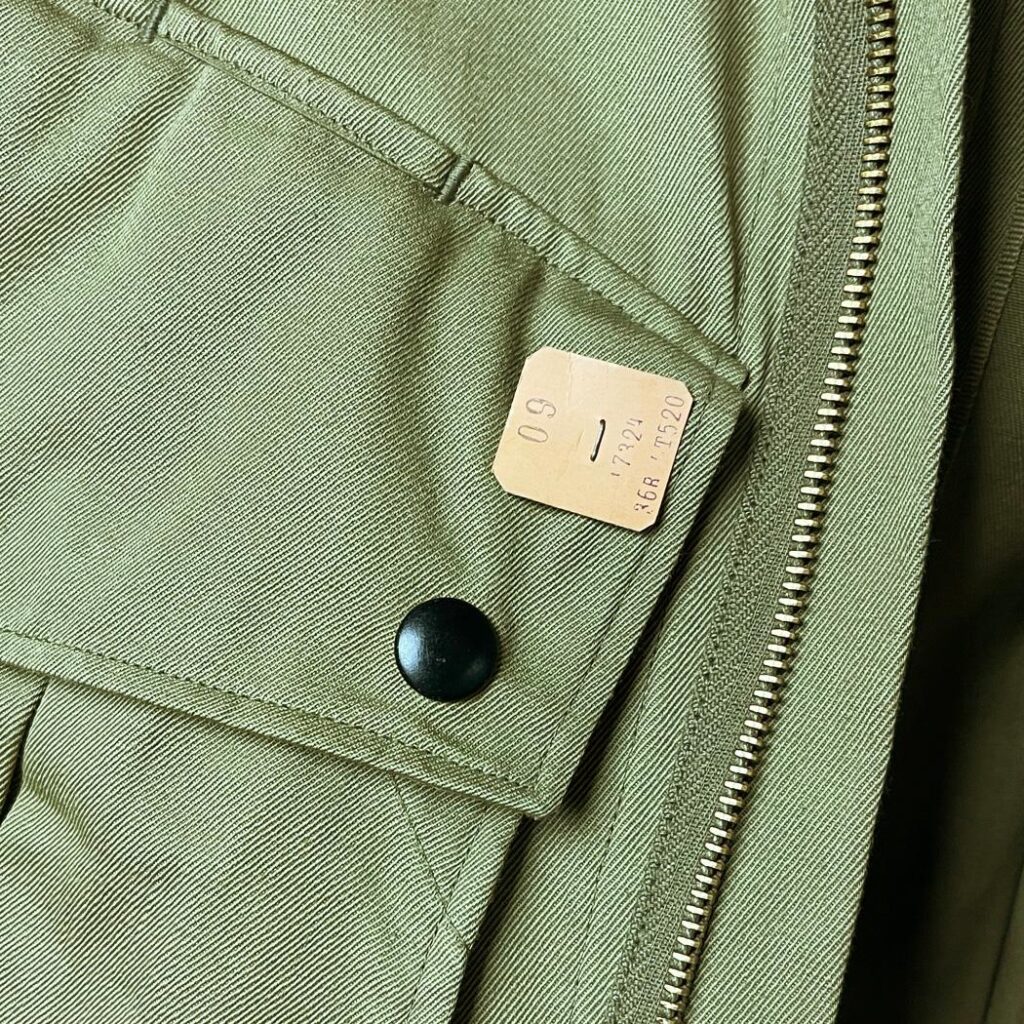 Shade tag on a original jump jacket. 09 is likely the layer, 36R the size, and the other two numbers could be any number of things. The info on the tags varies from factory to factory.
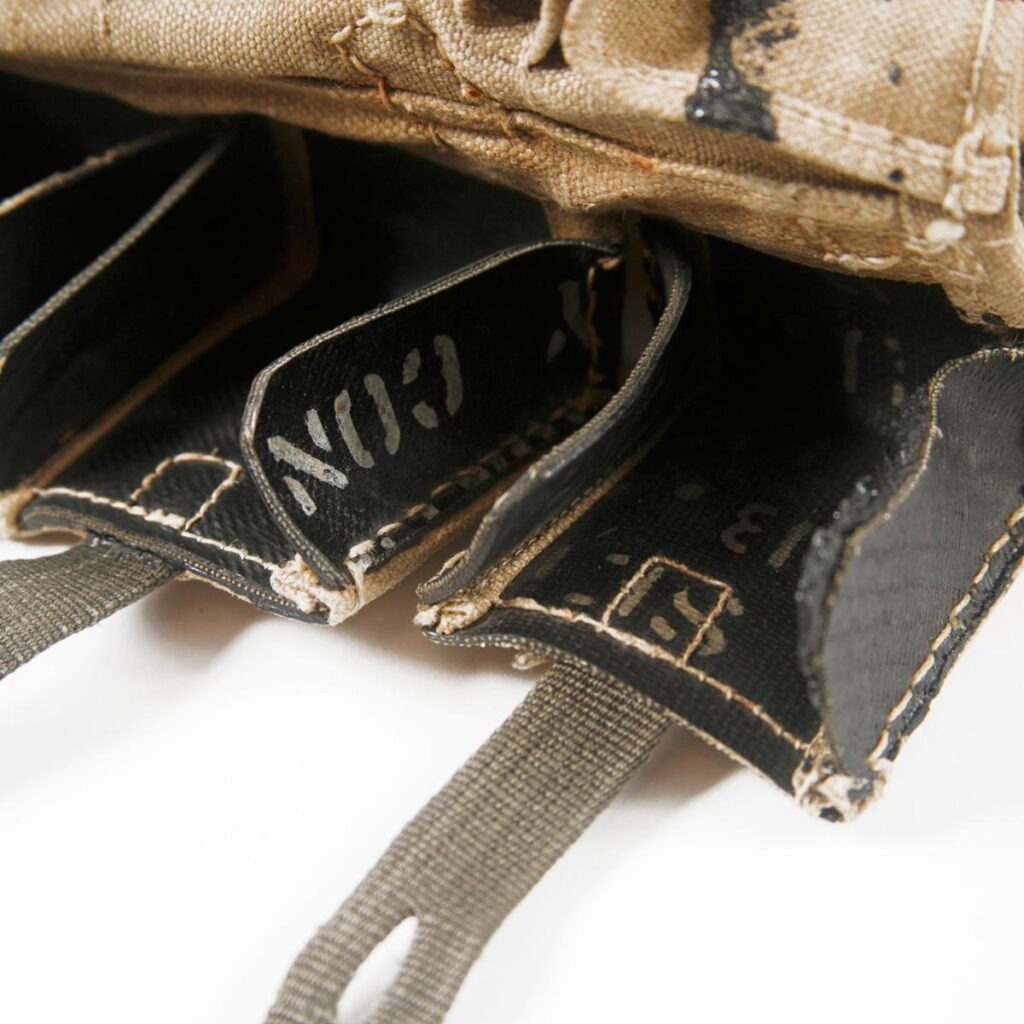 Inside flap of original MP44 pouches. We assume the “CON” is the first part of “Continental” (a major rubber and tire maker) as that’s what these flap sides are made from.
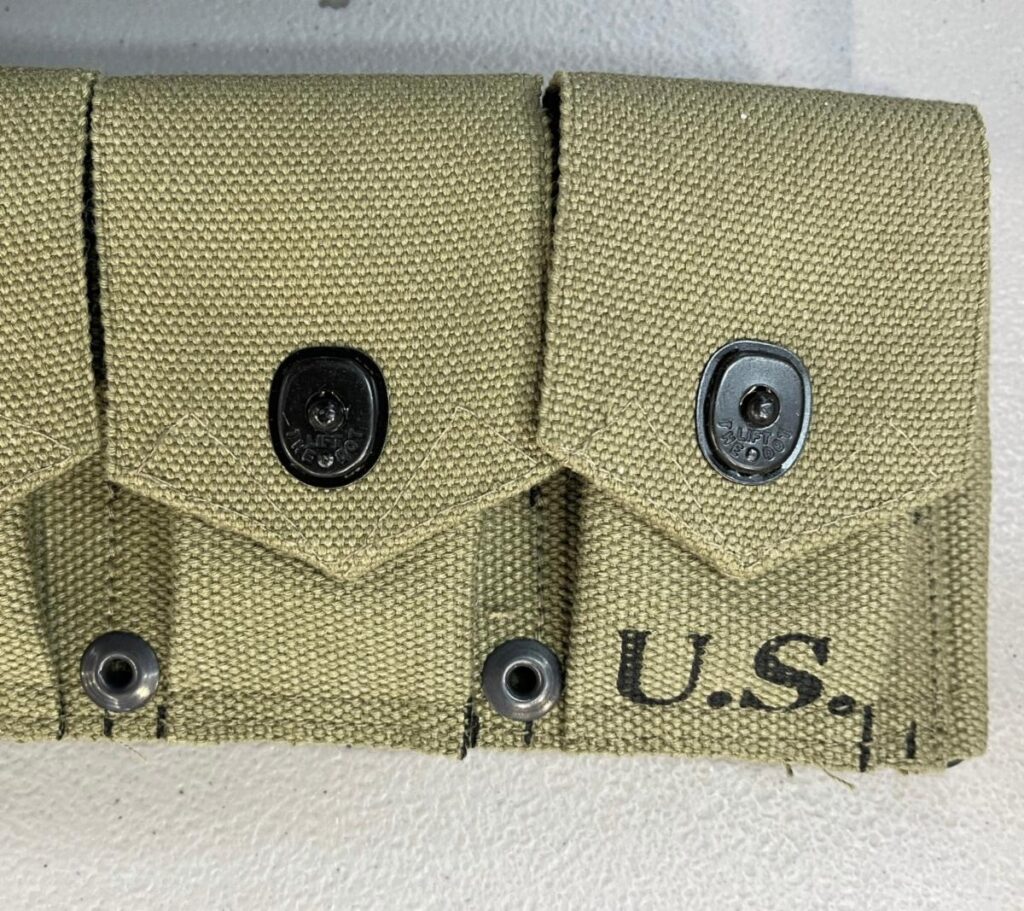 Guide marks on our cartridge belts.
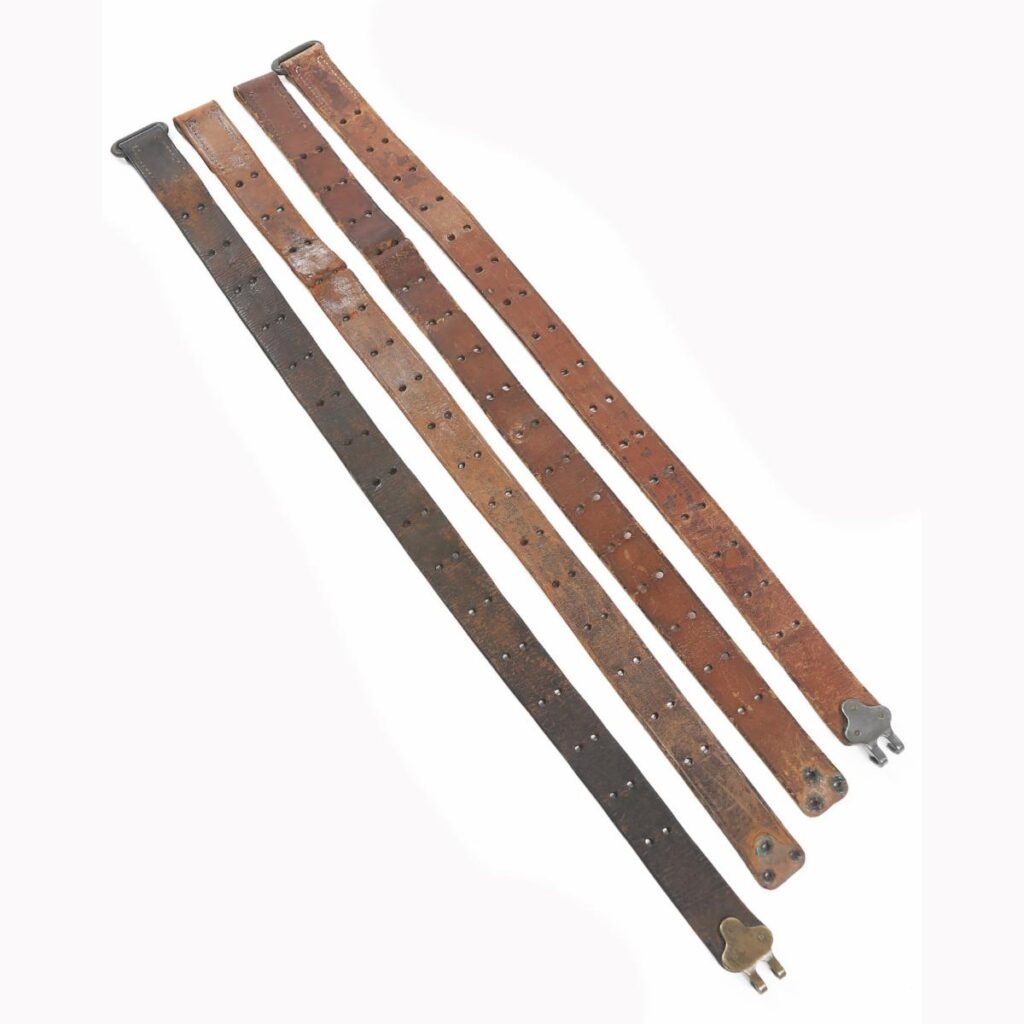 Variances in length of the short strap shown.
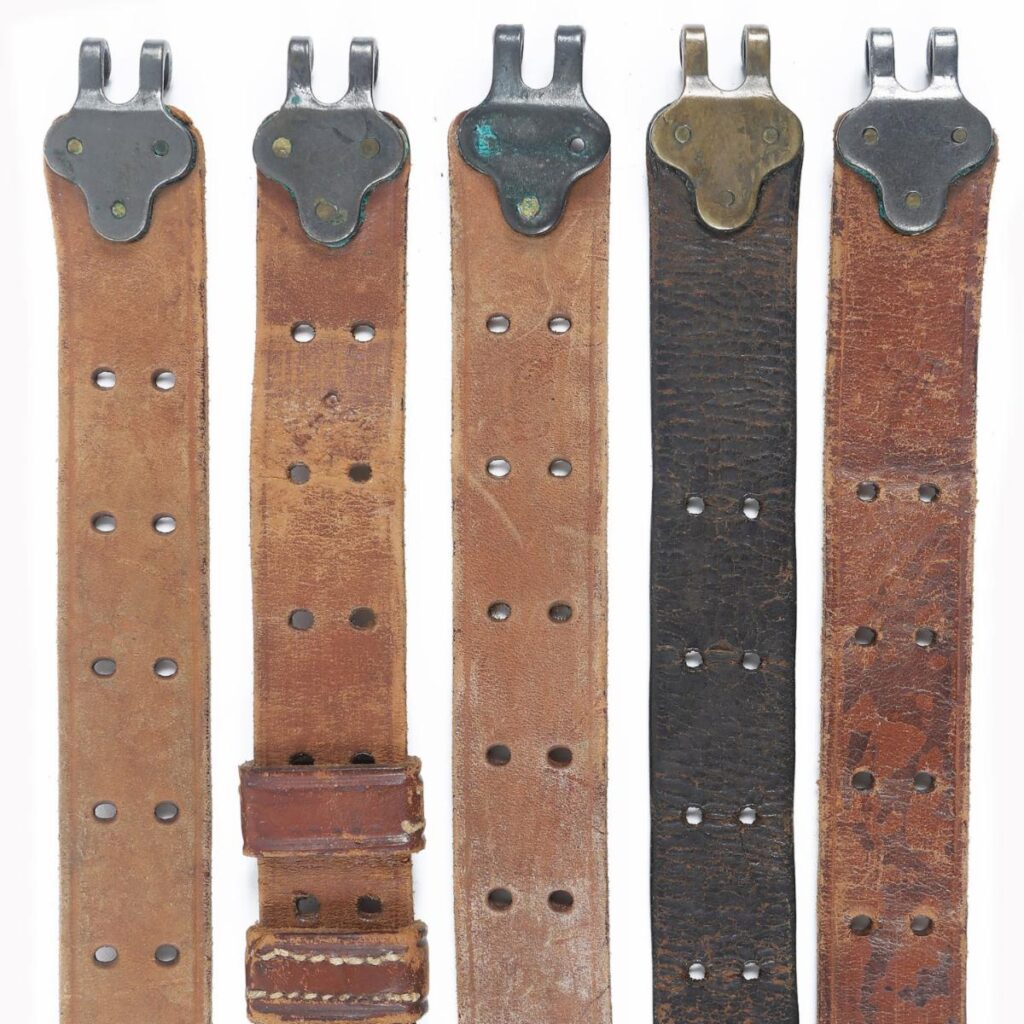 Note various shapes and locations of the adjustment holes.
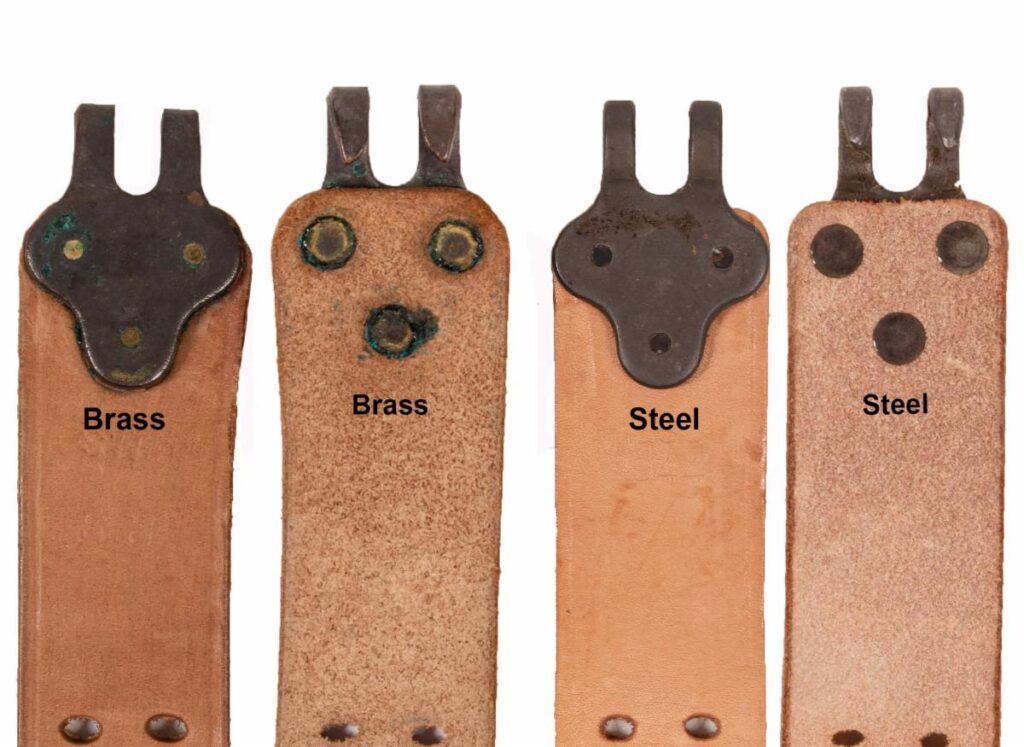 WWI and early WWII rifles used brass hardware (left)
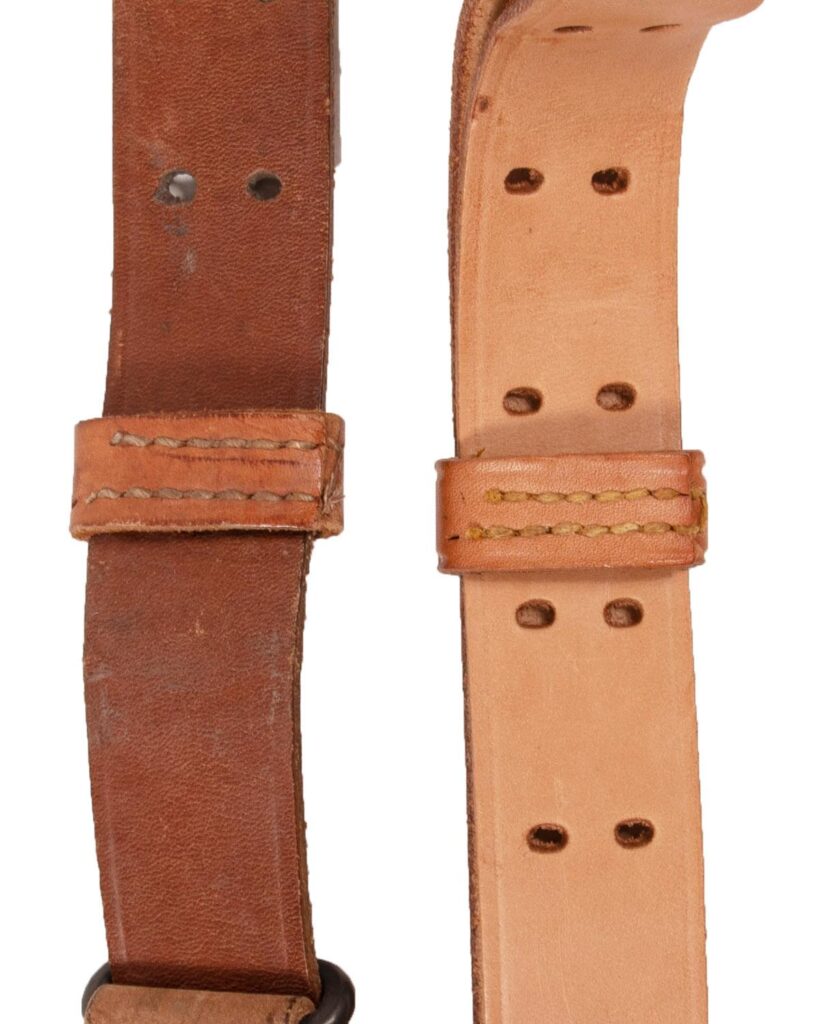 Keepers: Each sling comes with 2 “keepers”. These are typically 5/8″ wide and hand stitched. (No machine can stitch a closed loop.)
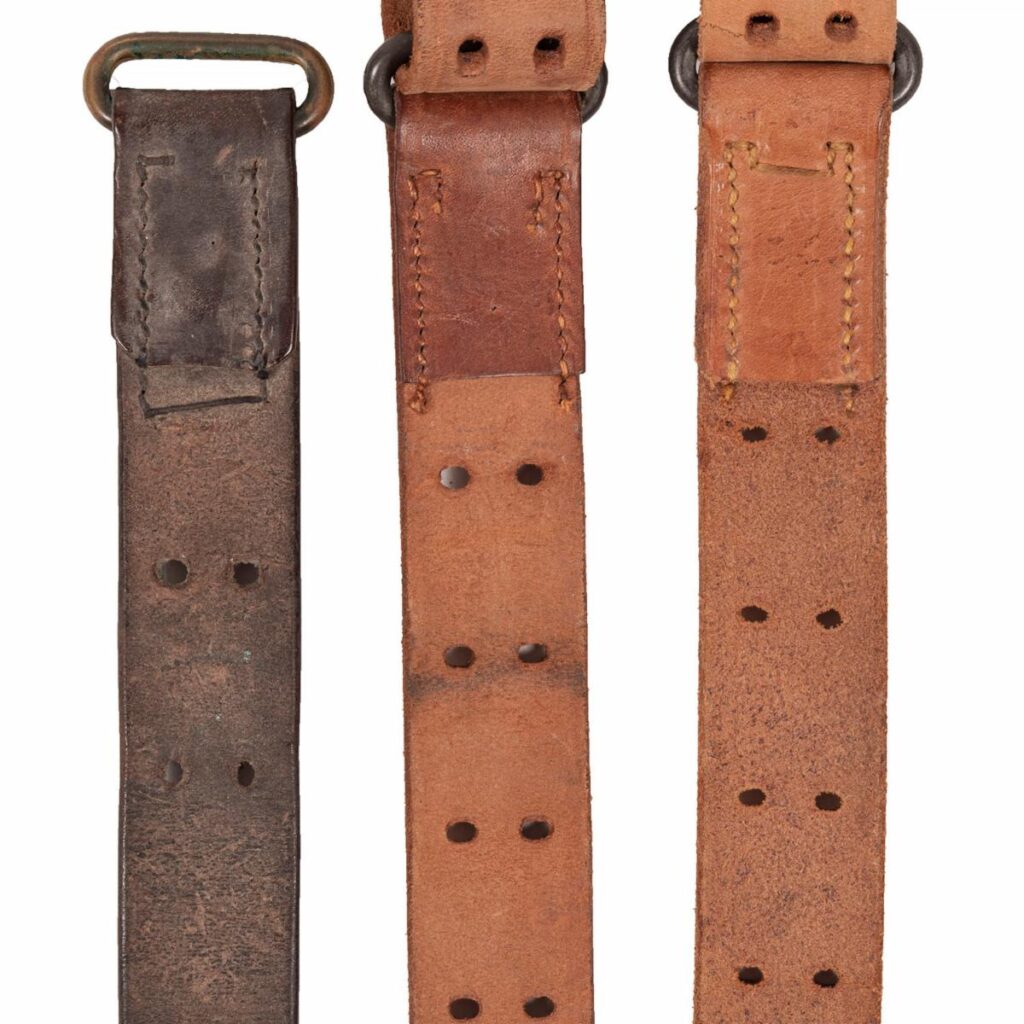
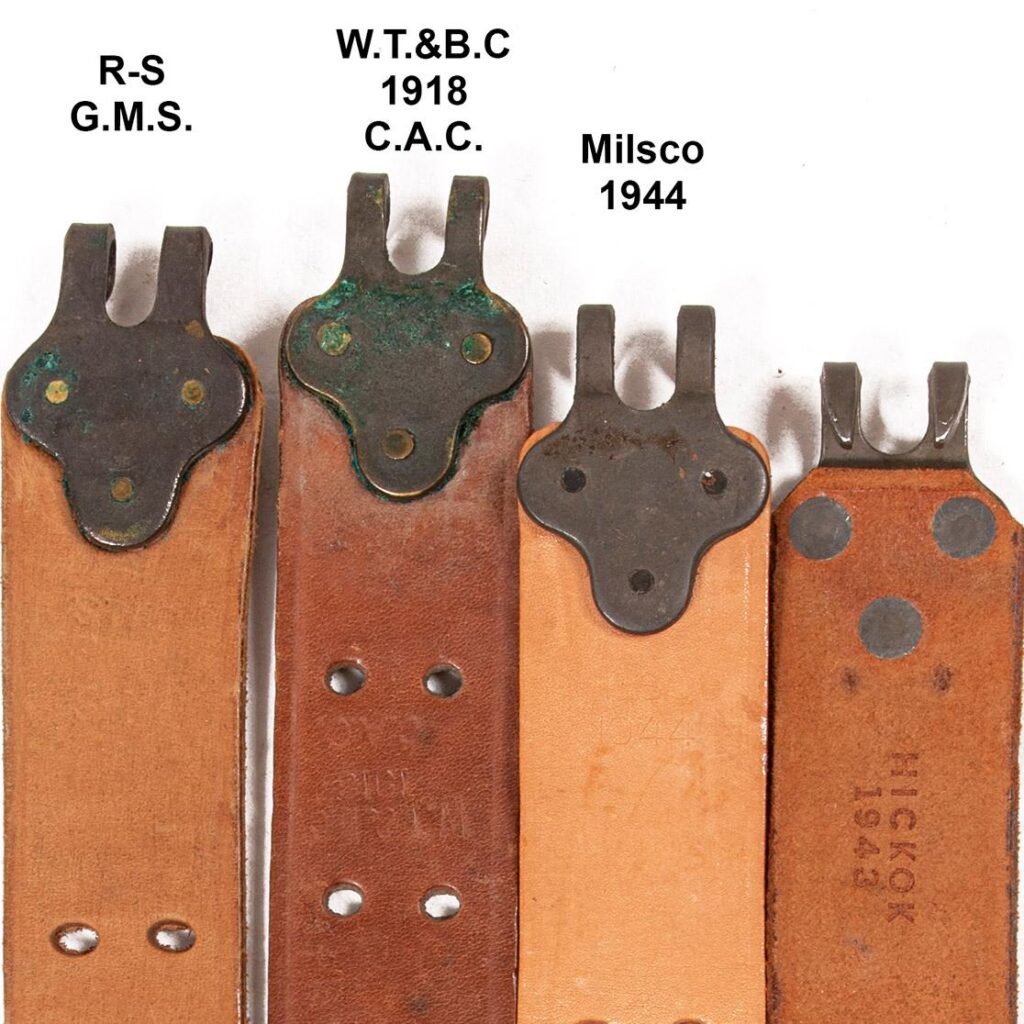 Not easy to see- note that the stamps on the two slings on the left are actually upside down.
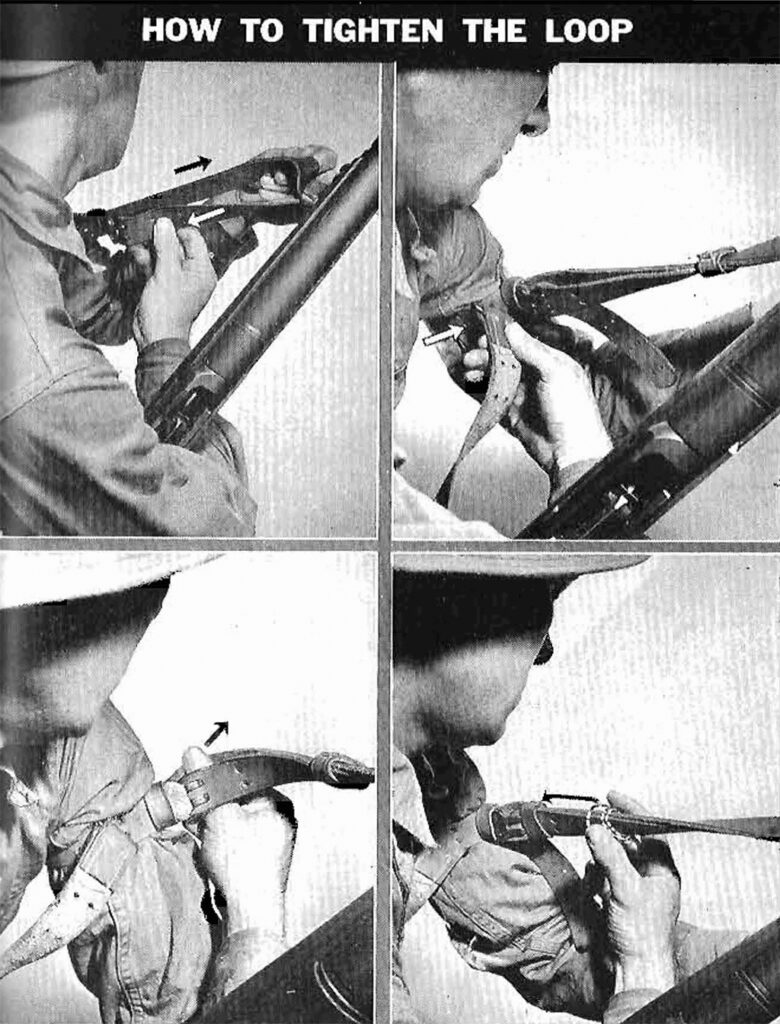
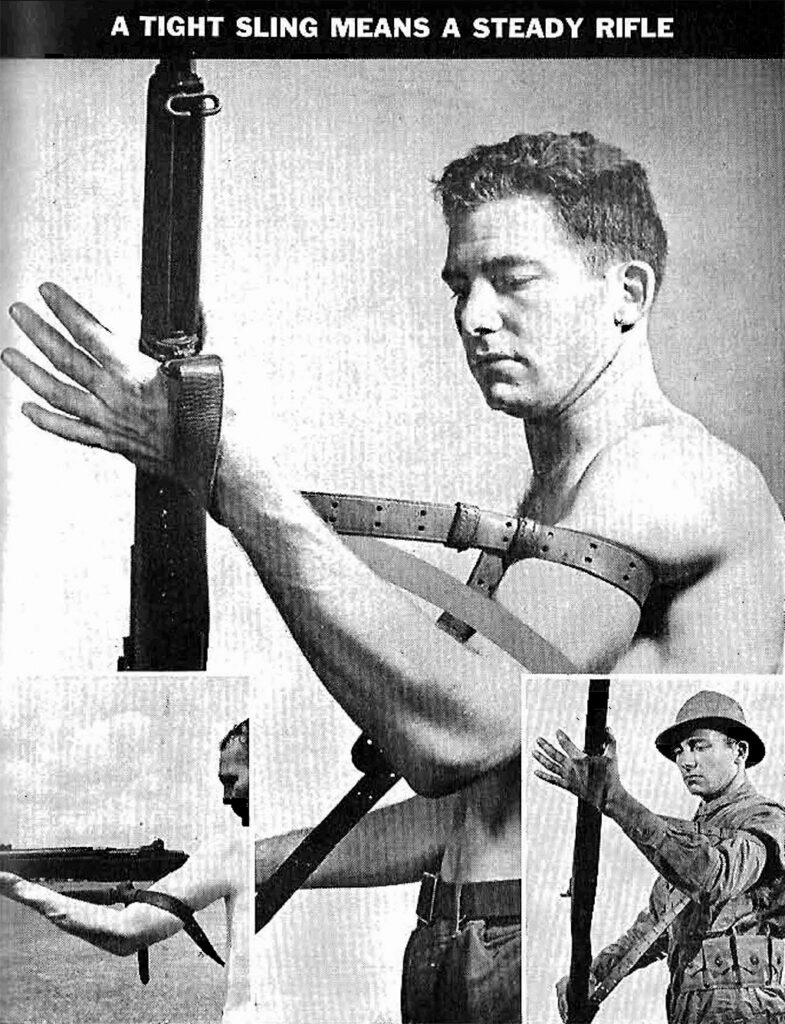
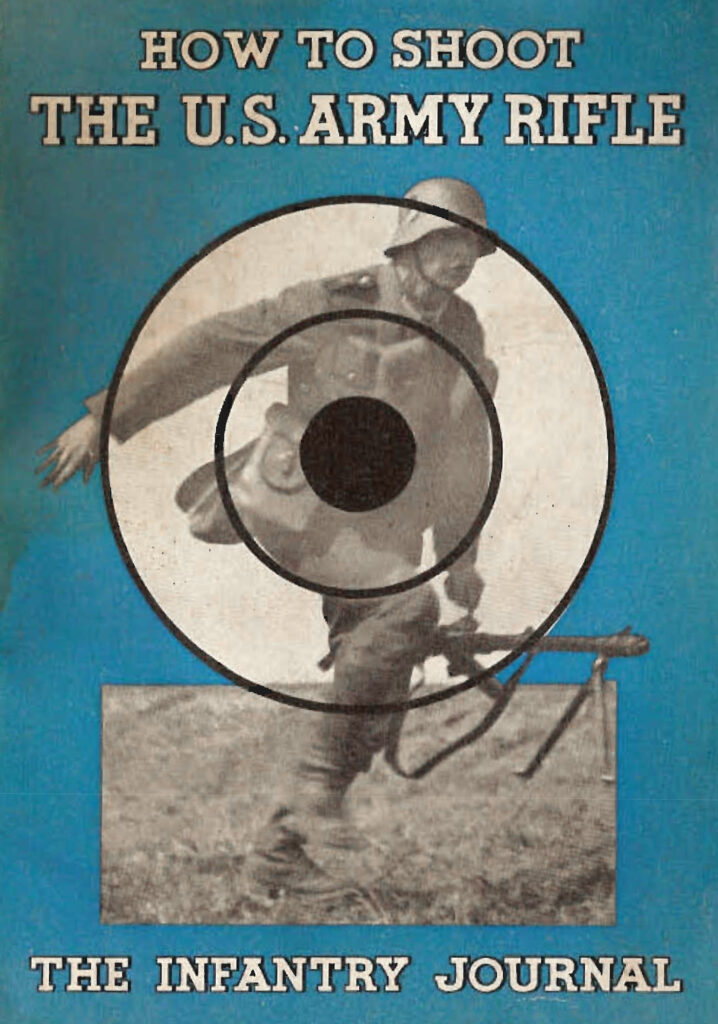 All information here is published in How to Shoot the U.S. Army Rifle; the Infantry Journal, pp 36-pp41 (Cover photo above) link
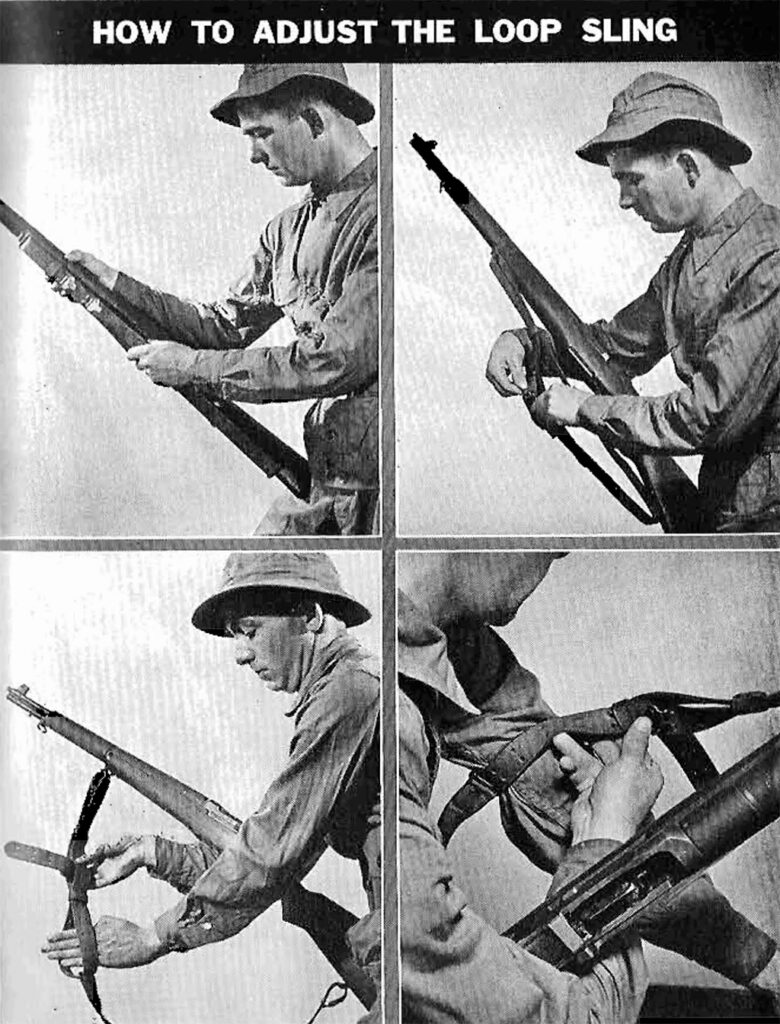
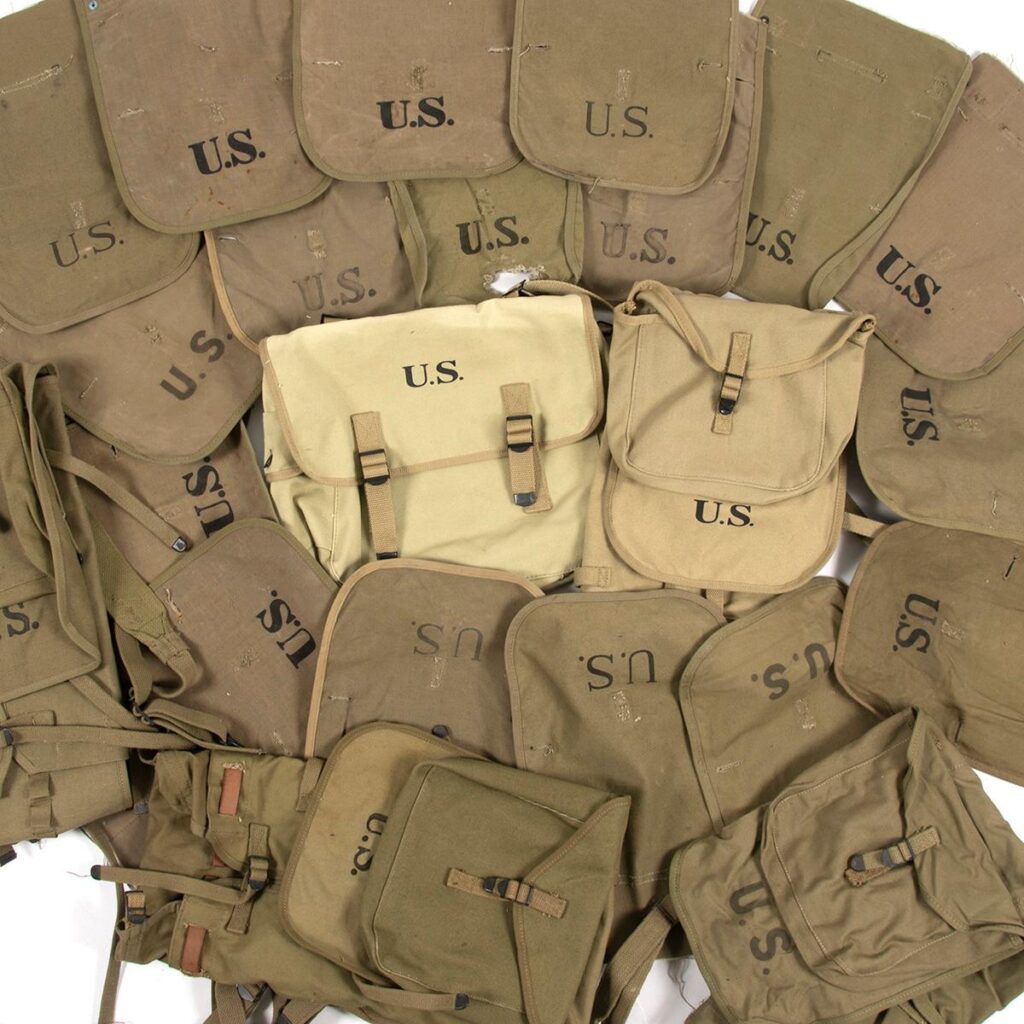
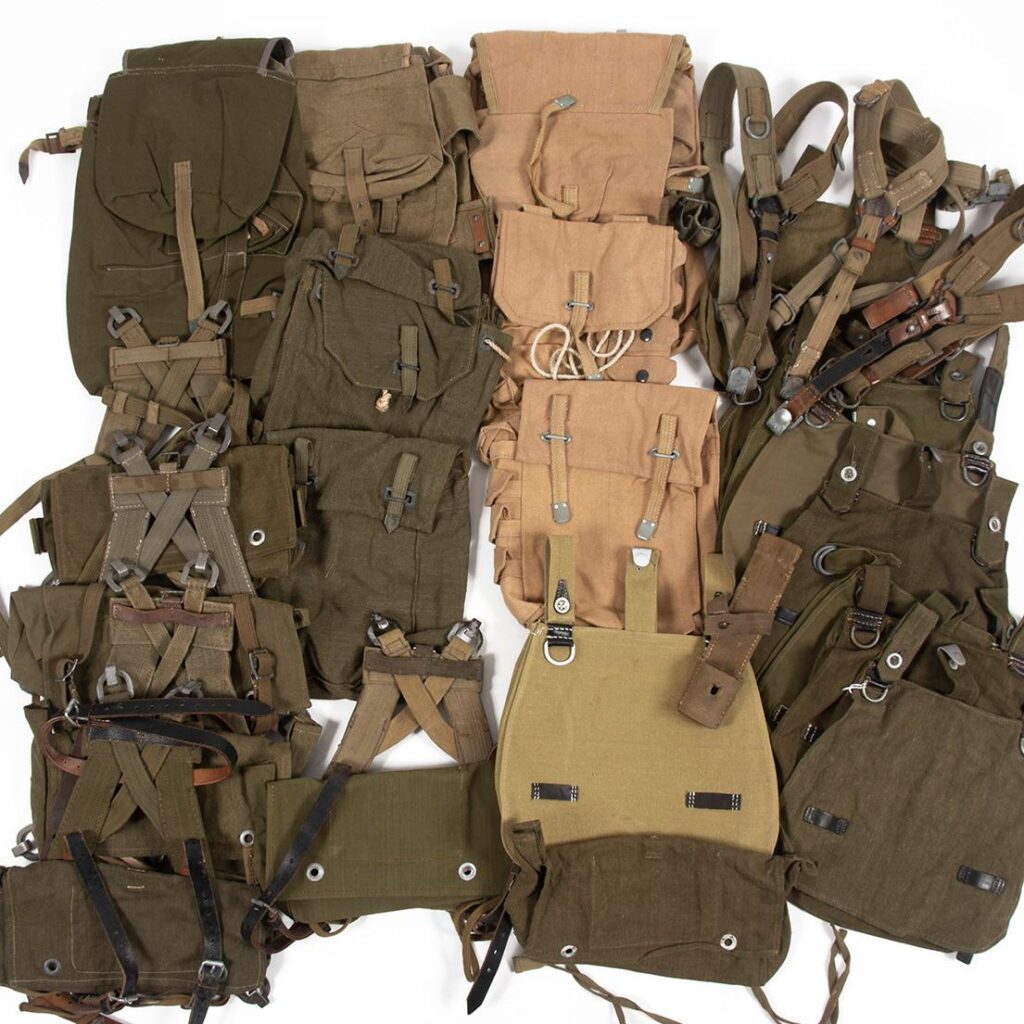
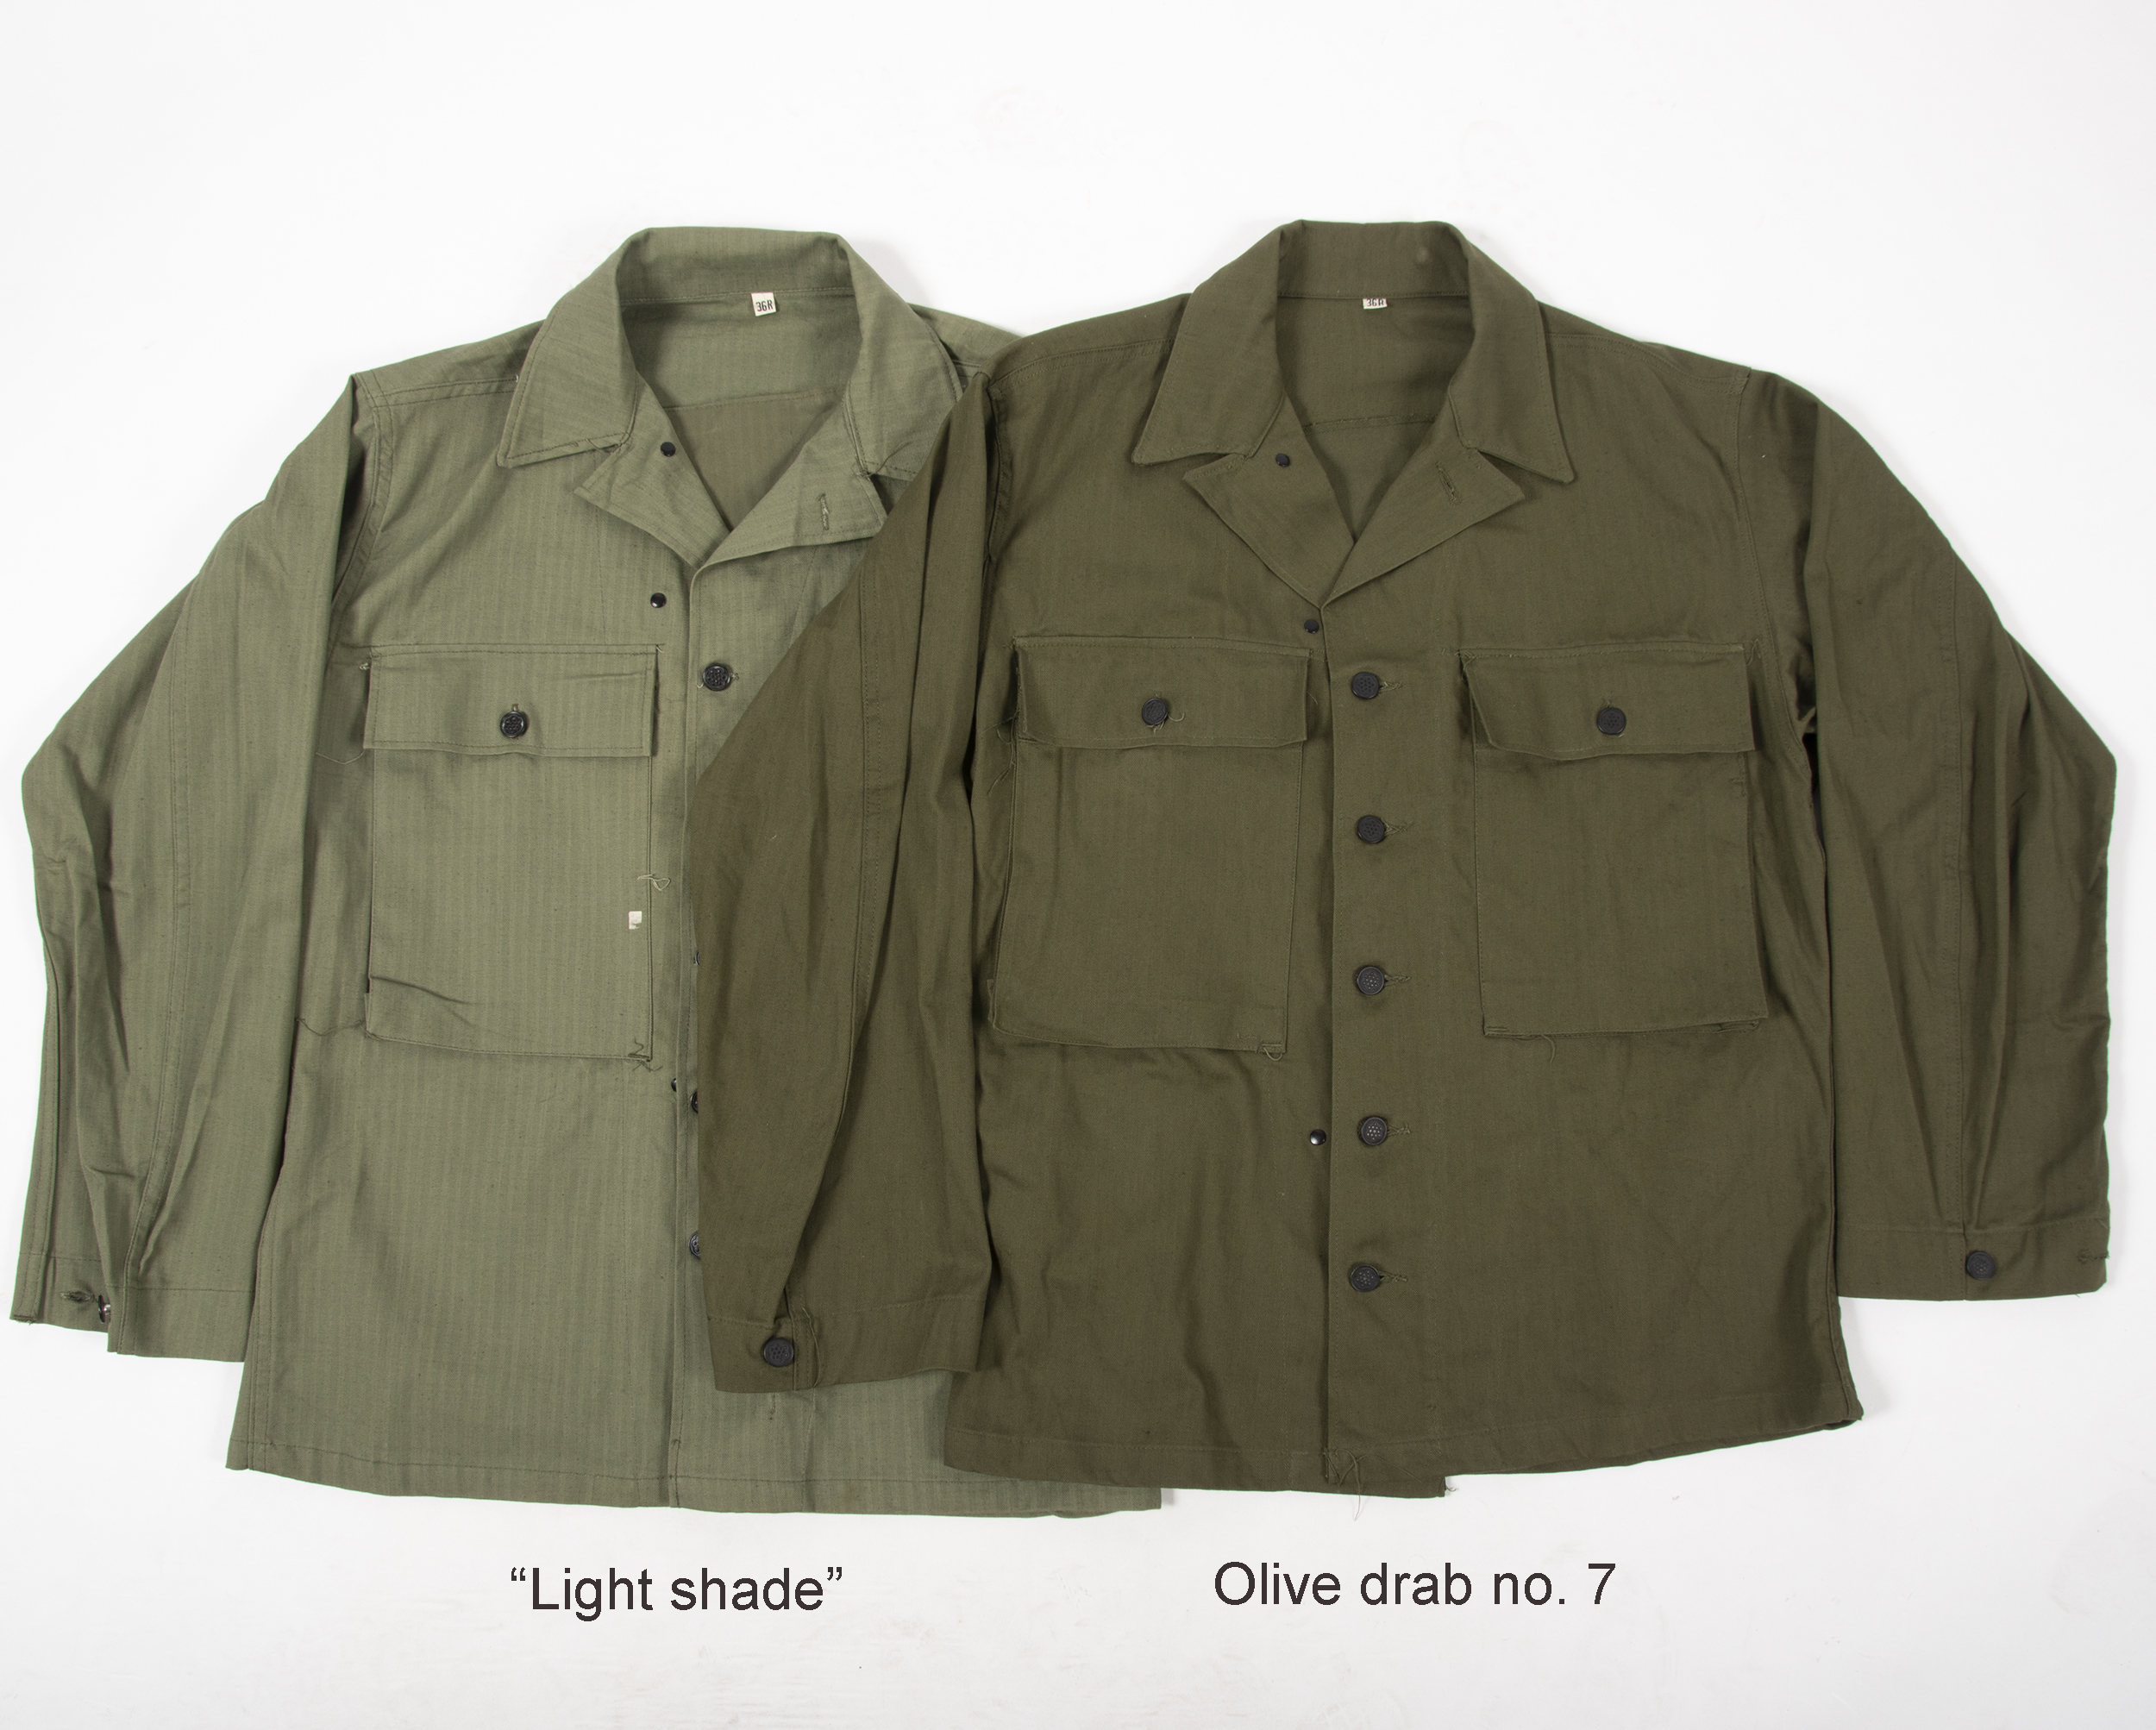
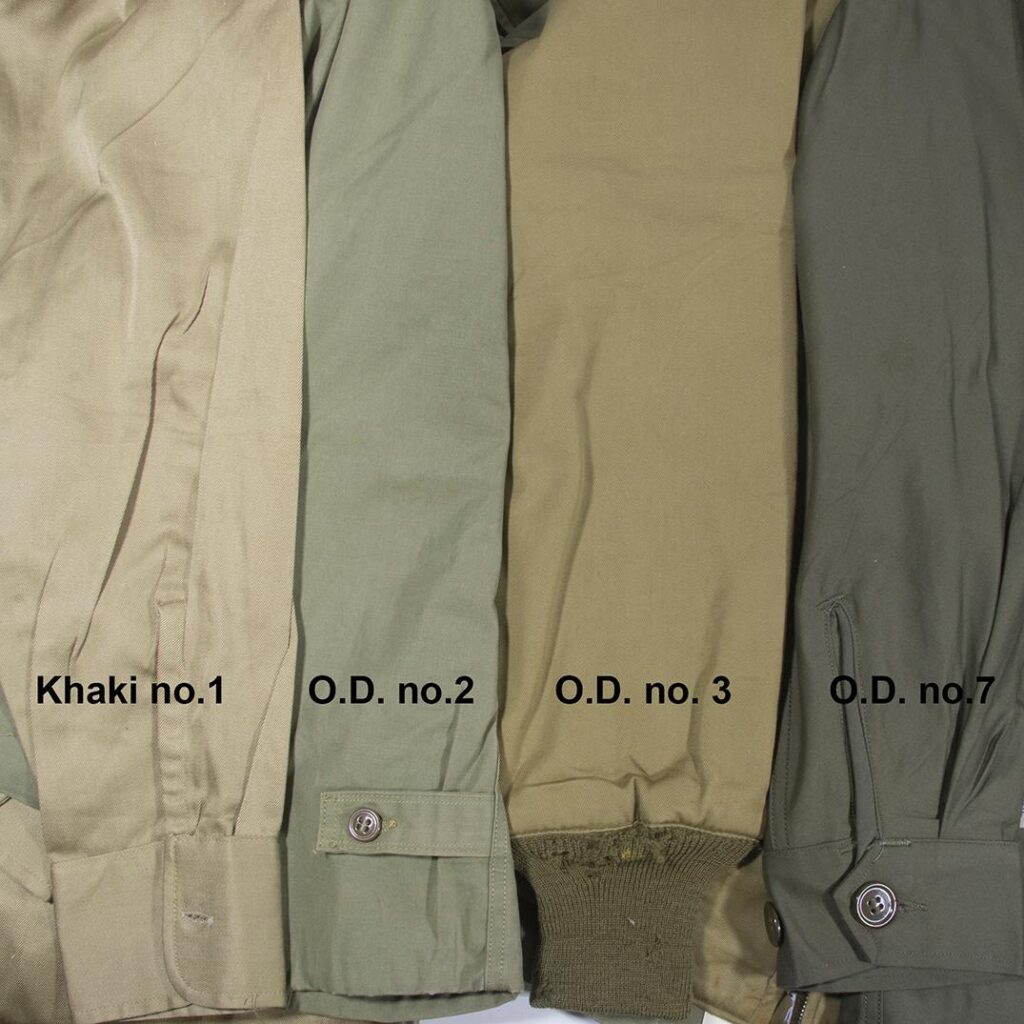 Original US uniforms in new or nearly new condition with the US Army’s terms for each color.
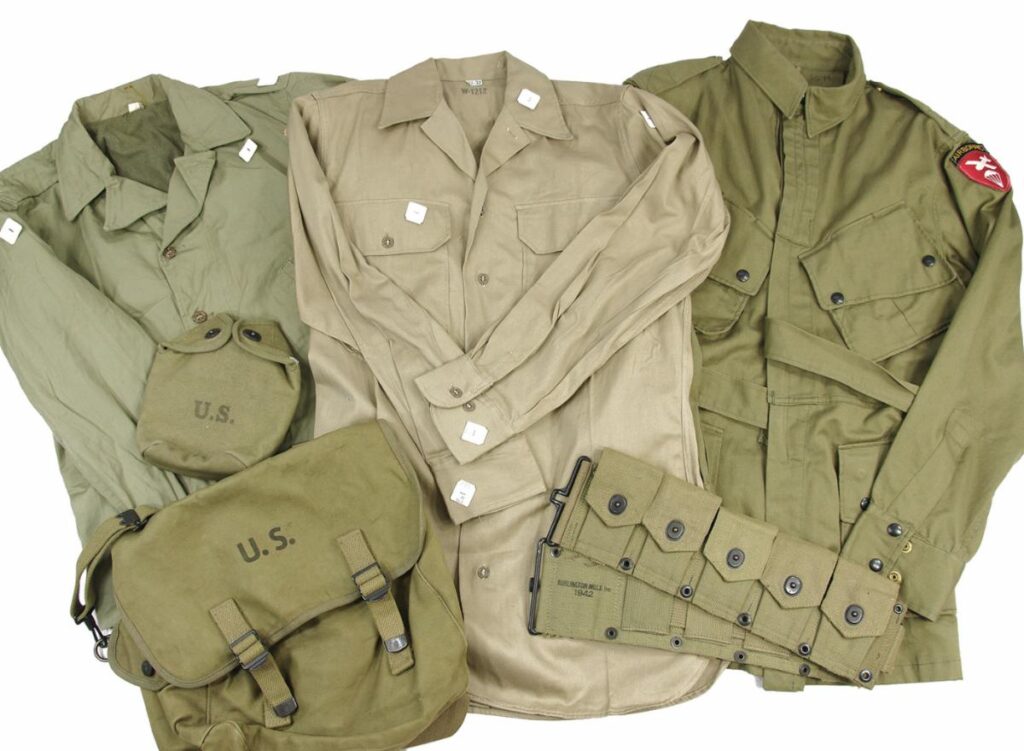 Originals- nothing is khaki except…Khakis!