How to Sew on
Heer EM Collar Litzen
Return to the Heer Litzen Product Page
There seems to be a conundrum involved in the sewing on of these little buggers... so here it is, step-by-step instructions on how to prepare them and apply them to a German wool tunic.
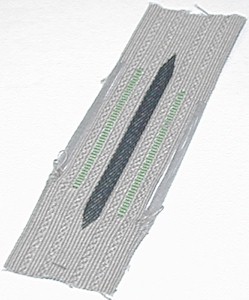 Step 1: Make sure the Litzen are flat (may require ironing; they sometimes come folded or curly). |
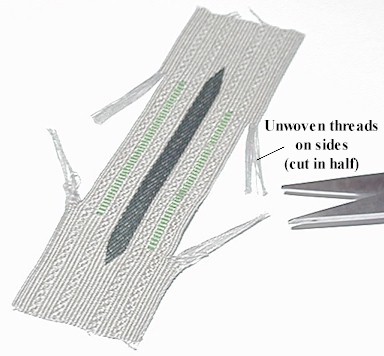 Step 2: Snip the unwoven threads in the middle of each (found on either side of the piece). Litzen are machine-woven in a continuous roll, which is why the threads are like this. |
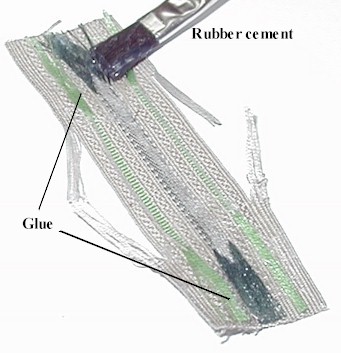 Step 3: Flip the Litzen over and apply rubber cement to each end (the last 2cm or so). |
 Step 4: Fold each of the threads over onto the cemented areas, at roughly a 45° angle so that they overlap each other. |
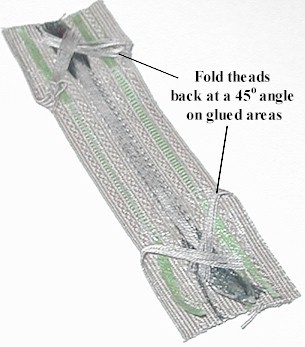
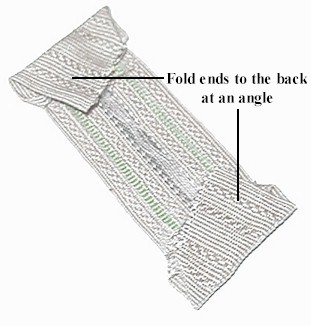 Step 5: Fold each end back at an angle, making sure that the angle matches the angle of the Waffenfarbe "lights" (which will also be the same angle as the collar on the tunic). The end result will be a rhomboid shape. 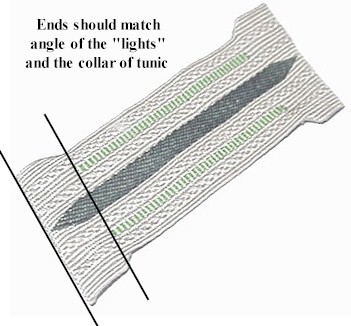
|
|
You are now ready to sew the Litzen onto the collar. They should be sewn just inside the stitching on the collar, roughly 1cm from the outside edge.
Early Litzen
Pre-war and early collar tabs were sewn onto a reinforced bottle-green backing
(much like the embroidered SS collar tabs). This was abandoned when field-gray
collars became commonplace (about 1940), and sewn directly to the collar instead.
A note about Waffenfarbe
There still seems to be some confusion on this issue; here are the facts:
During the early and mid-war period, the Litzen with specific branch Waffenfarbe
still seem to be prevailant, but by 1944 or so, the generic all-gray tabs
were used for all branches. The all-dark green Litzen were generally
used by Panzergreandiers for early or mid-war. Of course, with anything German,
you would see a mix of anything and everything at the end of the war, so early
Waffenfarbe could still be seen on collars alongside the late gray ones.